Although there are multiple ways to print objects in Access, the quickest way to print a table in Datasheet view is to click the Print button on the Database toolbar. This will print one complete copy of the table on the default printer. If you want to print anything other than one complete copy, for example, multiple copies or only selected pages, or to select a different printer, you must initiate the Print command from the File menu. Use the Print Preview command to determine if the table will print on one page, or if you need to adjust column widths, margins, or the direction the data displays on the page.
Although a printed table is not as professional or formal looking as a report, there are times when you may want to print your table in this manner as a quick reference or for proofreading.
1. | If necessary, open your 1B Pledges table in Datasheet view.
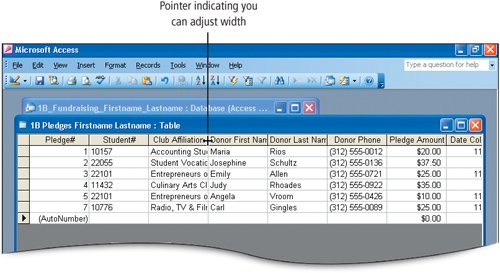
Notice that all of the columns are the same width regardless of the amount of data that is entered in the field or the field size that was set. If you print the table as currently displayed, the club names in the Club Affiliation column will not be fully displayed, nor will the Donor First Name and Donor Last Name column headings. Thus, it is recommended that you widen the columns.
|
|
[Page 921] |
2. | In the column heading row, point to the border between Club Affiliation and Donor First Name to display the  pointer, and then compare your screen with Figure 1.49. pointer, and then compare your screen with Figure 1.49.
Figure 1.49.
|
3. | With your pointer positioned as shown in Figure 1.49, double-click the boundary between these two field headings.
The column width on the leftClub Affiliationwidens to fully display the field name and the longest entry in this column. In this manner, the width of a column can be increased or decreased to fit its contents.
|
4. | Point to the border to the right of Pledge# and double-click.
The Pledge# column decreases in widthit is as wide as the field name, which is the widest entry in this column. You can also drag the border to the left or right to adjust the column width. Adjusting the size of columns does not change the data contained in the tables records. It changes only your view of the data.
|
5. | Using the technique you just practiced, adjust each of the column widths so they are just wide enough to display the data and field name. If necessary, use the horizontal scroll bar to scroll to the right to see all of the columns.
Another Way: To Change Column Widths
Change All of the Column Widths At Once
In the column headings area, you can drag to select all of the columns, and then double-click on any one of the borders to adjust all of the columns to the maximum width necessary.
|
|
[Page 922] |
6. | On the Table Datasheet toolbar, click the Print Preview button  , and then compare your screen with Figure 1.50. , and then compare your screen with Figure 1.50.
Figure 1.50.
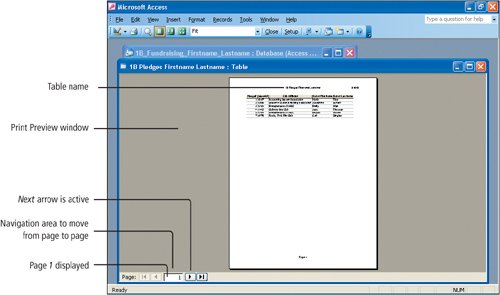
The table displays in a Print Preview window so you can see how it will look when it is printed. The name of the table displays at the top of the page. The navigation area at the bottom of the window displays a 1 in the Pages box, and the right-pointing arrowthe Next arrowis active. When you are in the Print Preview window, the navigation arrows are used to navigate from one page to the next, rather than from one record to the next.
NoteHeaders and Footers in Access Objects
The headers and footers in Access tables and queries are controlled by default settings; you cannot add additional information or edit the information. The object name displays in the center of the header area with the date on the rightthat is why adding your own name to the object name is helpful to identify your paper or electronic results. The page number displays in the center of the footer area. The headers and footers in Access forms and reports, however, are more flexible; you can add to and edit the information.
|
|
[Page 923] |
7. | In the navigation area, click the Next Page arrow  , click on the displayed data at the top of the page to zoom in, and then compare your screen with Figure 1.51. , click on the displayed data at the top of the page to zoom in, and then compare your screen with Figure 1.51.
Figure 1.51.
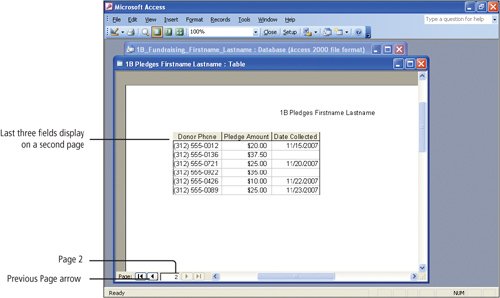
The second page of the table displays the last three columns of fields. Whenever possible, try to print all of the fields horizontally on one page. Of course, if you have many records you may need more than one page to print all of the records.
|
| |
8. | On the Print Preview toolbar, click Setup  , and then compare your screen with Figure 1.52. , and then compare your screen with Figure 1.52.
Figure 1.52.
(This item is displayed on page 924 in the print version)
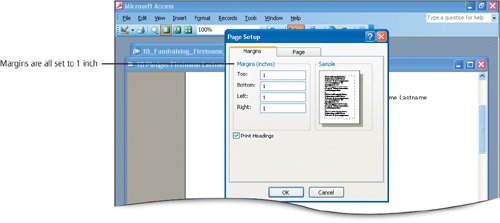
The Page Setup dialog box opens and the Margins tab displays. By default, all Access objects have a 1-inch margin for the top, bottom, left and right.
|
|
[Page 924] |
9. | Click the Page tab, and then under Orientation, click the Landscape option button. Click the Margins tab and change the Left margin to 0.75 and change the Right margin to 0.75
By default, Access prints in portrait orientationthe printed page is taller than it is wide. An alternate orientation is landscape orientationthe printed page is wider than it is tall. You must change the orientation before changing the margins to ensure that the correct margins are affected.
|
| |
10. | In the Page Setup dialog box, click OK. In the Print Preview window, click the page to zoom out and display all of the fields, and then compare your screen with Figure 1.53.
Figure 1.53.
(This item is displayed on page 925 in the print version)
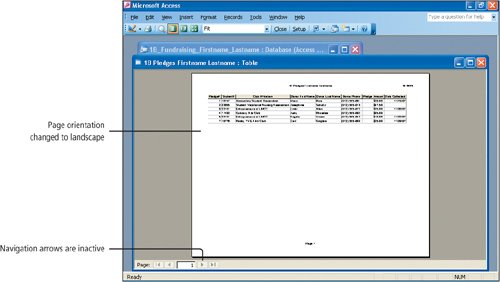
The orientation of the printout changes to landscape. Notice that the navigation arrows are inactive because all of the fields and all of the records display on one page.
The change in orientation from portrait to landscape is not saved with the table. Each time you want to print, you must check the margins, page orientation, and other print parameters to ensure that the data will print as you intend.
Alert!: Does Print Preview Still Show Two Pages?
If all of the fields in the table do not display on one page, open the Page Setup dialog box and reduce the size of the left and right margins as necessary until the table will print on one page.
|
|
[Page 925] |
11. | Check your Chapter Assignment Sheet or Course Syllabus, or consult your instructor, to determine whether you are to submit the printed pages that are the results of this project. If you are submitting your work on paper, on the Print Preview toolbar, click the Print
button  . .
|
12. | On the Print Preview toolbar, click Close  and then Close and then Close  the 1B Pledges table. Click Yes when prompted to save the changes to the layout. the 1B Pledges table. Click Yes when prompted to save the changes to the layout.
Because you adjusted the width of the columns in this table, Access prompts you to see if you want to save those changes. If you click No, the column widths will return to the standard, uniform width for each column.
|
13. | From the Database window, open your 1B Club Members table. Using the techniques you just practiced, adjust the column widths, preview the table to ensure that all the fields will display on one page, and then print the table if you are submitting your work on paper. Your name prints at the top of the page in the table name.
Save the changes you made to the table and Close the table.
|
