When you use the AutoContent Wizard to create a new presentation, PowerPoint suggests presentation text and applies background colors to the presentation. You can also create a new presentation based on a design template that does not include text. Microsoft Office PowerPoint 2003 includes a variety of design templates that you can apply to your presentation. A design template is a model on which a presentation is based, including graphic elements, animations, and a color schemea coordinated palette of eight colors that includes background, text, bullet, and accent colors. Additional templates are available on the Microsoft Office Online Web site.
In this activity, you will create a new presentation based on one of the PowerPoint design templates.
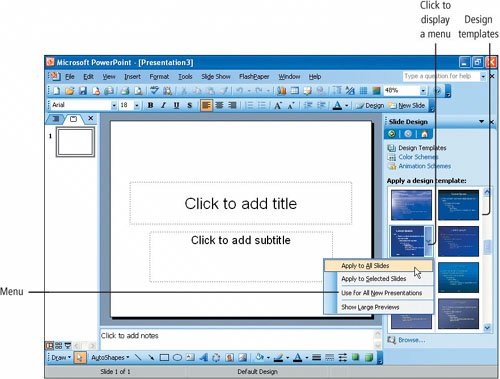
1. | If necessary, Start  PowerPoint. On the menu bar, click File, and then click New. In the displayed New Presentation task pane, click From design template. PowerPoint. On the menu bar, click File, and then click New. In the displayed New Presentation task pane, click From design template.
Thumbnail images of each design template display in the Slide Design task pane grouped into three categories: Used in This Presentation, Recently Used (displays only if any were recently used), and Available For Use.
Alert!: Does Your Screen Differ?
Depending on how this task pane was last displayed, the design templates may display in one column with each design template filling the width of the task pane, or the templates may be displayed as smaller images in two columns.
|
2. | Take a moment to view the various design templates by scrolling down using the scroll bar at the right edge of the Slide Design task pane. Point to, but do not click, several of the designs and notice that a ScreenTip displays the name of the template.
|
| |
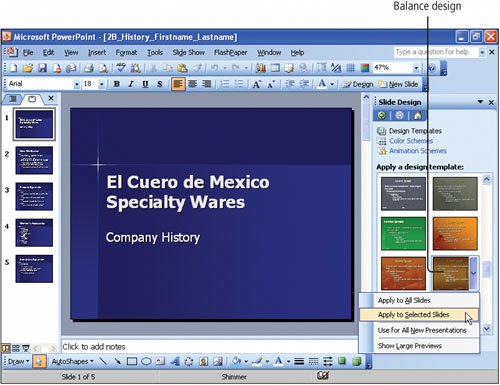
3. | Under Available For Use, locate the dark blue Shimmer template and point to it so that a bar with a downward-pointing arrow displays to the right of the design. Click the arrow to display a menu. Click Apply to All Slides as shown in Figure 2.12.
[Page 1225]
Figure 2.12.
The Shimmer template is applied to a new presentation, which currently contains only a title slide. This template consists of a blue color scheme with white text.
Alert!: Does Your Screen Differ?
If the Shimmer template does not display, the design templates may need to be installed. Click the Install Additional Templates icon at the lower end of the task pane to add the template.
|
4. | Close  the Slide Design task pane. the Slide Design task pane.
Another Way: To Locate Design Templates
If you know the name of a design template, you can quickly locate it by displaying an alphabetical listing of the template names. At the bottom of the Slide Design task pane, click Browse to open the Apply Design Template dialog box. Open the Presentation Designs folder to view the list, and then double-click the name of the template that you want to apply to your presentation.
|
|
[Page 1226] |
5. | Click in the Title placeholder, type El Cuero de Mexico Specialty Wares and then press and hold down  and press and press  . .
The insertion point moves to the subtitle placeholder. This keyboard shortcut is one of several that allow you to navigate quickly in a presentation.
|
6. | Type Company History and then press  . .
A new slide is created with the Title and Text layout. If your insertion point is positioned in the final placeholder on a slide, pressing is a quick method to create a new slide.
|
7. | In the Title placeholder, type How We Started and then press . Type the text in Figure 2.13.
Figure 2.13.

|
8. | On the menu bar, click Insert, and then click Slides from Files. Recall that in the Slide Finder dialog box, you can navigate to the file that contains the slides that you want to insert.
|
9. | If necessary, click the Find Presentation tab, and then click the Browse button. Navigate to your student files, and then double-click to open the file p02B_Company_History.
|
10. | At the bottom of the Slide Finder dialog box, click Insert All, and then click Close.
Three slides are inserted into your presentation. This brings the number of slides in your presentation to five.
|
| |
11. | On the menu bar, click File, and then click Save As. Navigate to the location where your presentations for this chapter are stored. In the File name box, type 2B_History_Firstname_Lastname and then click Save or press .
[Page 1227]
|
From the Slide Design task pane, you can change the design template for an entire presentation, for a single slide, or for a selection of slides. In this activity, you will change the design template for the first slide.
In this activity, you will change the design template for the entire presentation.
1. | If necessary, on the Formatting toolbar, click Design  to display the Slide Design task pane. to display the Slide Design task pane.
|
2. | Under Available For Use, locate the burgundy colored Curtain Call design template and point to it so that a bar with an arrow displays. Click the arrow to display a menu. Click Apply to All Slides. Scroll through the presentation and notice that all of the slides display in the Curtain Call design template.
|
3. | In the Slide Design task pane, under Recently Used, click Shimmer and notice that all of the slides in the presentation are formatted with the Shimmer design.
If you have not selected any slides, you can click the design template without displaying the menu to apply the template to the entire presentation.
|
4. | With the Shimmer design applied to all the slides, Save  the changes you have made to your presentation. the changes you have made to your presentation.
|
You can select multiple slides and apply a design to only the slides that you select. In this activity, you will change the design template for Slides 1, 4, and 5.
1. | In the Outline/Slides pane, click the Slides tab. Click Slide 1 so that a border surrounds it, indicating that the slide is selected. Press and hold down , and then click Slide 4. Press and hold down , and then click Slide 5.
Slides 1, 4, and 5 are each surrounded by a border, indicating that all three slides are selected.
|
2. | If necessary, on the Formatting toolbar, click Design to display the Slide Design task pane.
|
3. | Under Available For Use, click the dark blue Cascade design template. Notice that the Cascade design template, distinguished by its graphic in the upper left corner, is applied to Slides 1, 4, and 5.
|
4. | Save the presentation.
|
Be sure that if you choose to use multiple design templates in the same presentation, that the templates are similar to each other. A well-designed presentation includes some common elements on each slide. Too many different templates and backgrounds may result in a presentation that looks unprofessional and that distracts from the content.