Objective 4. Insert Clip Art

One type of image that you can insert into your presentations is clip art. A clip art is a single media file that contains an image that you can insert and use in a presentation. A collection of clip art images comes with your Microsoft Office software; additional images are available from the Microsoft Office Online Web site. Using the Clip Organizer, you can insert, view, and categorize the images that you want to use in your presentations.

Activity 3.14. Inserting Clip Art Using the Drawing Toolbar

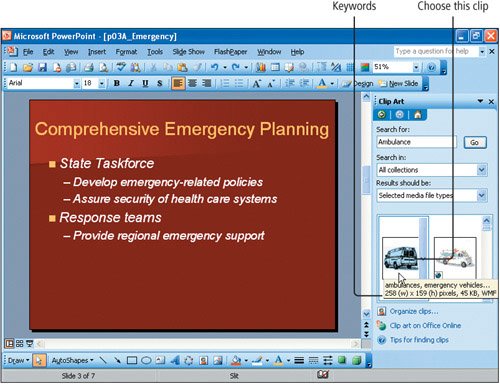
In this activity, you will add clip art to your presentation by using the Insert Clip Art button on the Drawing toolbar.

1.

If necessary, Open your file 3A_Emergency_ Firstname_Lastname.

2.

Display Slide 3. On the Drawing toolbar, click Insert Clip Art to display the Clip Art task pane.


[Page 1292]

3.

In the Search for box, type Ambulance to search for clips by keyword.

4.

Click the Search in arrow.

A hierarchy of folders displays, indicating the collectionsthe categories into which your clips are organized. My Collections are clips that you have stored on your system. Office Collections are clips that are available with Microsoft Office 2003. Web Collections include clips from Microsoft Office Online. You can expand each of these collections to view their contents by clicking the plus sign to the left of each collection name.

5.

If necessary, click to select the Everywhere box, as shown in Figure 3.18.

Figure 3.18.


The Search in box displays All collections.

6.

Click in an empty area of the task pane to close the Search in list. Then, click the Results should be arrow to display the types of mediaClip Art, Photographs, Movies, or Soundsfor which you can search. Click to clear the Photographs, Movies, and Sounds check boxes, and verify that the Clip Art check box is selected. The task pane indicates that you will search All collections for Clip Art that matches the keyword Ambulance.

7.

Click Go.


[Page 1293]

8.

Locate the black-and-white picture of an ambulance. Point to the clip and notice that information regarding the image displays, including keywords, size, and image type, as shown in Figure 3.19.

Figure 3.19.


9.

Click the image to insert it into the center of your slide, and then Close the task pane. The Picture toolbar may display somewhere in the PowerPoint window.

Alert!: Can Find the Ambulance Picture?

If you can find the ambulance picture when you search in the Clip Art task pane, you can insert the picture from your student files. On the menu bar, click Insert, point to Picture, and then click From File. Navigate to your student files and click to select the p03_Ambulance file. Click Insert.

10.

Save the file.

Another Way: To Insert Clip Art

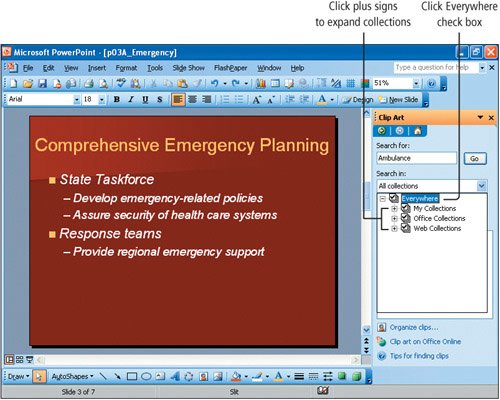
You can search for clips in collections without typing a keyword. For example, if you want to view all of the clips in the Animals collection, clear the Everywhere check box, click the Office Collections box, and then click the Animals check box. Click Go. Only the clips in the Animals collection will display.


[Page 1294]

Activity 3.15. Sizing and Moving a Picture

You can resize and move a clip art image using the same techniques that you used to size and move a placeholder. To maintain the original proportions of the image, use the corner sizing handles.

1.

Display Slide 3 and click the ambulance to select it. Point to the upper right sizing handle so that the diagonal resize pointer displays. Drag up and to the right until the picture is approximately twice its original size.

2.

To position the picture, point to the image to display the move pointer . Drag the picture down and to the right, noticing the dashed box that displays. Position the dashed box in the lower right corner of the slide, and then release the mouse button. Click anywhere on the slide to cancel the selection of the picture, and then compare your slide to Figure 3.20.

Figure 3.20.


3.

Create a header and footer for the notes and handouts that includes the date updated automatically and a footer with the text 3A_Emergency_Firstname_Lastname. Clear all other header and footer options, and then click Apply to All.


[Page 1295]

4.

Save the file. Check your Chapter Assignment Sheet or Course Syllabus, or consult your instructor, to determine if you are to submit your assignments on paper or electronically using your colleges course information management system. To submit electronically, go to Step 6, and then follow the instructions provided by your instructor.

5.

Print the presentation as handouts, four slides per page in horizontal order.

6.

Close the file.

End

You have completed Project 3A


[Page 1296]

Windows XP

Outlook 2003

Internet Explorer

Computer Concepts

Word 2003

Chapter One. Creating Documents with Microsoft Word 2003

Chapter Two. Formatting and Organizing Text

Chapter Three. Using Graphics and Tables

Chapter Four. Using Special Document Formats, Columns, and Mail Merge

Excel 2003

Chapter One. Creating a Worksheet and Charting Data

Chapter Two. Designing Effective Worksheets

Chapter Three. Using Functions and Data Tables

Access 2003

Chapter One. Getting Started with Access Databases and Tables

Chapter Two. Sort, Filter, and Query a Database

Chapter Three. Forms and Reports

Powerpoint 2003

Chapter One. Getting Started with PowerPoint 2003

Chapter Two. Creating a Presentation

Chapter Three. Formatting a Presentation

Integrated Projects

Chapter One. Using Access Data with Other Office Applications

Chapter Two. Using Tables in Word and Excel

Chapter Three. Using Excel as a Data Source in a Mail Merge

Chapter Four. Linking Data in Office Documents

Chapter Five. Creating Presentation Content from Office Documents


Go! With Microsoft Office 2003 Brief
GO! with Microsoft Office 2003 Brief (2nd Edition)
ISBN: 0131878646
EAN: 2147483647
Year: 2004
Pages: 448

Flylib.com © 2008-2020.
If you may any questions please contact us: flylib@qtcs.net