In this activity, you continue to work with the PowerPoint slides. You will add a chart as another slide and import data from an Excel file.
1. | On the Format menu, click Slide Design. The Slide Design task pane displays.
The slides created when you send the Word document have default formatting.
|
2. | In the Slide Design task pane, scroll down to find the Profile template (it is the first template in the list that does not have a solid color in the background), and then click it. If the Profile template does not appear in the list, choose another design. This adds background, graphics, and bullets to your slides appearance.
|
3. | On the Slides tab, click slide 1. On the Insert menu, click New Slide.
The Slide Layout task pane displays, and a new slide is inserted.
|
4. | In the Slide Layout task pane, under Other Layouts, click Title and Chart, and then on the slide, double-click the chart icon.
PowerPoint adds a default chart and datasheet to the new slide. While the chart is selected, the chart tools will display in the Standard toolbar. If you click outside the chart, it will be deselected, and PowerPoints Standard toolbar tools will display. To select the chart, double-click on the chart.
|
5. | With the chart selected, on the Standard toolbar, click Import File. The Import file window displays.
|
6. | In the Import File dialog box, from the Look in list, select the folder that contains your project files, and then double-click on the file Salary_Levels. The Import Data Options dialog box displays.
|
7. | In the Import Data Options dialog box, click on the sheet name Salary, and then click OK.
The chart and datasheet change to show the data from the selected file.
|
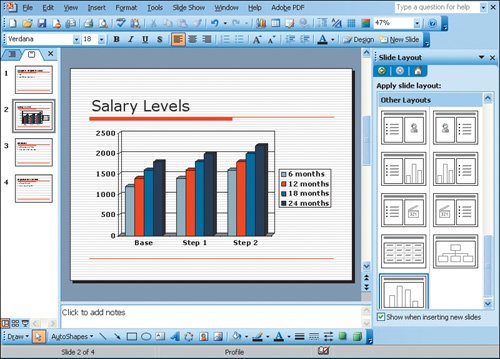
8. | Click outside the chart area on the slide. The datasheet and the chart toolbar close, and the finished chart displays on the slide.
|
|
[Page 1387] |
9. | On the slide, click in the Title text box. Type Salary Levels and then click outside the text box. Compare your screen with Figure 5.4.
Figure 5.4.
|
10. | Save your file, and leave it open for the next activity.
|
