3D Rendering with OpenGL and DirectX 9
D Rendering with OpenGL and DirectX 9
 Download CD Content
In this chapter, we look at the two major 3D APIs that we have access to on the Tablet PC: OpenGL® and DirectX®. In Chapter 30, Using Third-Party Engines, we explore a third-party engine that wraps up many of the DirectX functions, making the development process a much quicker and easier task.
| Note |
The source code for the projects are located on the CD-ROM in the PROJECTS folder. You can either type them in as you go or you can copy the projects from the CD-ROM to your hard drive for editing. |
OpenGL with the Tao Library
Before we develop with OpenGL, we are going to download an open source library that is a wrapper for OpenGL. To get started, download the library, currently at version 0.1.1, from http://www.randyridge.com/Tao/. Once downloaded, you need to unzip the compressed file. Inside the extracted directory, you will find two files. These files should be placed in a location that you will remember because we need to add a reference to the DLL from our project.
Because we are using Windows, and Glut is not installed by default, you will now need to download and install it. You can download the Windows binary from http://www.xmission.com/~nate/glut.html. Inside the compressed file, you will find Glut32.dll among others. The DLL file needs to be copied to C:WindowsSystem32.
Create a new empty application project in VB .NET and a reference to the Tao DLL that we downloaded earlier. If you are familiar with OpenGL, you have undoubtedly heard about the Redbook (http://www.opengl.org/developers/code/examples/redbook/). If you look at the page, and browse approximately one fourth of the way down, you will see an application called light. We are going to develop an application similar to light so that you can compare the code for each of them. It also allows you to see how quick and easy Tao is to work with.
Add a new empty Class Library to the project, leaving the name as Class1.vb. Next, add the following Imports to the Class Library:
Imports Tao.OpenGl
The next step is to create Sub Main. This is the first Sub procedure that gets called in the application. We begin this Sub by initializing Glut. Next, we create a window of size 500 x 500, set its position, and give the window a name. The remaining lines of code for this procedure call various additional Sub procedures that we have yet to create.
Here is the code:
Public Shared Sub Main(ByVal args() As String)
 Glut.glutInit()
 Glut.glutInitDisplayMode(Glut.GLUT_SINGLE Or Glut.GLUT_RGB Or Glut.GLUT_DEPTH)
 Glut.glutInitWindowSize(500, 500)
 Glut.glutInitWindowPosition(100, 100)
 Glut.glutCreateWindow("Light")
 Init()
 Glut.glutDisplayFunc(New Glut.DisplayCallback(AddressOf Display))
 Glut.glutKeyboardFunc(New Glut.KeyboardCallback(AddressOf Keyboard))
 Glut.glutMainLoop()
End Sub
The first of the Sub procedures that is called from Sub Main is Init. This procedure sets the material, light position, shading mode, and, generally speaking, a variety of attributes related to the lights and the 3D sphere we'll create.
Here is the code:
Private Shared Sub Init()
 Dim materialSpecular() As Single = {1.0F, 1.0F, 1.0F, 1.0F}

 Dim materialShininess() As Single = {50.0F}

 Dim lightPosition() As Single = {1.0F, 1.0F, 1.0F, 0.0F}

 Gl.glClearColor(0.0F, 0.0F, 0.0F, 0.0F)
 Gl.glShadeModel(Gl.GL_SMOOTH)

 Gl.glMaterialfv(Gl.GL_FRONT, Gl.GL_SPECULAR, materialSpecular)
 Gl.glMaterialfv(Gl.GL_FRONT, Gl.GL_SHININESS, materialShininess)
 Gl.glLightfv(Gl.GL_LIGHT0, Gl.GL_POSITION, lightPosition)

 Gl.glEnable(Gl.GL_LIGHTING)
 Gl.glEnable(Gl.GL_LIGHT0)
 Gl.glEnable(Gl.GL_DEPTH_TEST)
End Sub
Because we mentioned it, it's now time to create the sphere in the Sub procedure called Display:
Private Shared Sub Display()
 Gl.glClear(Gl.GL_COLOR_BUFFER_BIT Or Gl.GL_DEPTH_BUFFER_BIT)
 Glut.glutSolidSphere(0.5, 20, 16)
 Gl.glFlush()
End Sub
The next procedure that is called is Keyboard. It is simply used to test for the press of the Esc key. If the key is pressed, the environment ends. Otherwise, code continues to function as normal.
Here is the code:
Private Shared Sub Keyboard(ByVal key As Byte, ByVal x As Integer, ByVal y As Integer)
 Select Case key
 Case 27
 Environment.Exit(0)
 Exit Sub
 End Select
End Sub
That's all there is to this application, which displays a sphere, as shown in Figure 29.1. This is a simple example, but you can quickly see how powerful Tao can be to you as you develop for the Tablet PC. In the next section of this chapter, we look at Direct X 9.
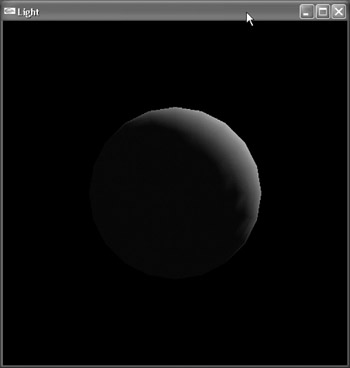
Figure 29.1: This sphere is visible on execution.
DirectX 9 Managed Code
We have looked at OpenGL, which is available on many platforms and is a very popular 3D API. Now, we take a look at DirectX, which is available only for Windows PCs. As we are working with the Tablet PC in this book, this does not have any issues for us. However, if you ever plan to run an application outside of Windows, DirectX will probably never be available. The idea behind managed code means that if the .NET Framework becomes available for another platform, your application will instantly run on it as long as it is using all managed code. It's true that this helps some applications, but probably will never affect DirectX programs because DirectX is tied to the Windows OS and most likely will never be ported. On the other hand, if you were to develop a Tao-based application, you should have much more portability.
Like OpenGL, we need to get the appropriate SDK before we can begin writing software. For DirectX, you can freely download it from www.microsoft.com. It is currently in release 9.0a.
The first step is to create a new Windows Forms application in VB. We'll use the form for rendering our 3D sphere, which looks very similar to the OpenGL version we have already developed. We can leave the properties of the default form alone and concentrate on the code.
First, add references to Microsoft.DirectX, Microsoft.DirectX.Direct3D, and Microsoft.Direct3DX, and add the following Imports:
Imports Microsoft.DirectX
Imports Microsoft.DirectX.Direct3D
The next step is setting up the variables for the application:
Private DX9 As Microsoft.DirectX.Direct3D.Device
Private Present As Direct3D.PresentParameters
Private Mesh As Direct3D.Mesh
Private Material As Direct3D.Material
Private Timer1 As Timer
In the Form_Load event, we check for an available adapter, create a device to render to, and initialize Direct3D. At the end of the procedure, we make calls to two additional procedures, which are completed next. Here is the code for this procedure:
 Private Sub Form1_Load(ByVal sender As System.Object, ByVal e As System.EventArgs) Handles MyBase.Load
 Me.Text = "DirectX Light"
 Dim objAdapters As Direct3D.AdapterInformation

 objAdapters = Direct3D.Manager.Adapters(0)

 Present = New Direct3D.PresentParameters()
 With Present
 .Windowed = True
 .SwapEffect = Direct3D.SwapEffect.Discard
 .BackBufferFormat = objAdapters.CurrentDisplayMode.Format
 .EnableAutoDepthStencil = True
 .AutoDepthStencilFormat = Direct3D.DepthFormat.D16
 End With

 DX9 = New Direct3D.Device(objAdapters.Adapter, _
 Direct3D.DeviceType.Hardware, Me, _
 Direct3D.CreateFlags.HardwareVertexProcessing, Present)

 AddHandler DX9.DeviceReset, AddressOf Me.OnDeviceReset

 InitializeDirect3D()
 StartRefreshCycle()
 End Sub
The InitializeDirect3D procedure basically just makes calls to other procedures, including CreateMesh, CreateMaterial, CreateLights, and InitializeView. The names of the procedures reflect the actions that they perform. The StartRefreshCycle procedure also does what you would expect. Here is the code for the two procedures:
Private Sub InitializeDirect3D()
 CreateMesh()
 CreateMaterials()
 CreateLights()
 InitializeView()
End Sub

Private Sub StartRefreshCycle()
 Timer1 = New Timer()
 Timer1.Enabled = True
 Timer1.Interval = 20
 AddHandler Timer1.Tick, AddressOf Me.Render
 Timer1.Start()
End Sub
We now create each of the Sub procedures called by the InitializeDirect3D procedure, beginning with CreateMesh. The CreateMesh procedure creates a sphere, which is rendered in the scene much like the sphere we created in the OpenGL version. Here is the code:
Private Sub CreateMesh()
 Mesh = Direct3D.Mesh.Sphere(DX9, 15, 15, 15)
End Sub
The next step is to create the material for the mesh. We can use the CreateMaterials Sub procedure, which was called next by InitializeDirect3D. We are not going to use a texture for the mesh and will simply use the color white for the material. Along the same lines, the code for creating the light is located in the CreateLights Sub procedure. The code could have been combined, but for easier reading, they have been placed in their own procedures. Here is the code for each of them:
Private Sub CreateMaterials()
 Material = New Direct3D.Material()
 Material.Diffuse = Color.White
End Sub

Private Sub CreateLights()
 Dim Light0 As Direct3D.Light = DX9.Lights(0)
 Light0.Type = Direct3D.LightType.Directional
 Light0.Direction = New Vector3(0, -1, 1)
 Light0.Diffuse = Color.White
 Light0.Ambient = Color.Gray
 Light0.Enabled = True
 Light0.Commit()

 DX9.RenderState.Lighting = True
 DX9.RenderState.Ambient = Color.Gray
End Sub
The next procedure that gets called is InitializeView. Like the name suggests, the code basically sets up the view for our scene. Here is the code:
Private Sub InitializeView()
 Dim eyePosition As New Vector3(0, 0, -75)
 Dim direction As New Vector3(0, 0, 0)
 Dim upDirection As New Vector3(0, 1, 0)

 Dim view As Matrix = Matrix.LookAtLH(eyePosition, direction, upDirection)
 DX9.SetTransform(Direct3D.TransformType.View, view)

 Dim fieldOfView As Single = Math.PI / 4
 Dim aspectRatio As Single = 1.0
 Dim nearPlane As Single = 1.0
 Dim farPlane As Single = 500.0

 Dim projection As Matrix = _
 Matrix.PerspectiveFovLH(fieldOfView, aspectRatio, nearPlane, farPlane)

 DX9.SetTransform(Direct3D.TransformType.Projection, projection)
End Sub
The remaining two procedures are Render and OnDeviceReset. OnDeviceReset simply calls InitializeDirect3D, the procedure we looked at earlier. The Render procedure contains the code, which actually causes the mesh to be rendered to the screen. Here is the code for both of them:
Private Sub OnDeviceReset(ByVal Sender As Object, ByVal e As EventArgs)
 InitializeDirect3D()
End Sub

Private Sub Render(ByVal sender As Object, ByVal e As EventArgs)
 DX9.Clear(Direct3D.ClearFlags.Target Or Direct3D.ClearFlags.ZBuffer, _
 Color.Black.ToArgb(), 1.0, 0)

 DX9.BeginScene()
 DX9.Material = Material

 Mesh.DrawSubset(0)

 DX9.EndScene()
 DX9.Present()
End Sub
If you were to run the application at this time, you would see a scene rendered something like Figure 29.2.
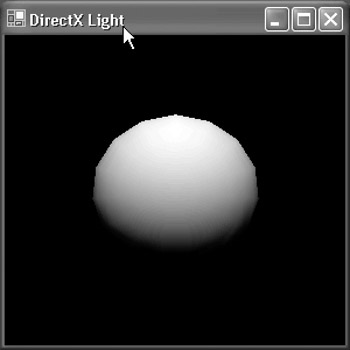
Figure 29.2: The scene rendered in DirectX is similar to its OpenGL counterpart.
Summary
In this chapter, we built two quick examples for 3D rendering using two different APIs, both of which are extremely popular and can be very productive. The decision on which to use is dictated by your own preferences. In Chapter 30, Using Third-Party Engines,we're going to use a 3D engine instead of creating one with OpenGL or DirectX.
- The Tablet PC
- Introduction to Visual Basic .NET
- Working with VB .NET
- Basics of the .NET Framework
- Introduction to the VB .NET Language
- Object-Oriented Programming with VB .NET
- Strings, GDI+, and Error Handling in VB .NET
- Math and Random Number Functions in VB .NET
- Your First Program
- Console Application Input/Output
- Your First Windows Forms Application
- Obtaining the Tablet PC SDK
- Introduction to Ink-Enabled Applications
- Tablet PC Full Screen Utility
- Tablet PC Screen Rotation and Special Buttons
- Creating an MP3 Player
- Form Effects
- Using Gestures to Control Tablet Media Player
- Getting Started with Microsoft Agent
- Advanced Microsoft Agent
- Speech Input with SAPI
- Custom Grammars for Speech Recognition
- WMI and Hardware
- Power Management for the Tablet PC
- Virtual Joystick
- Pong Game
- Not Quite a Magic Ball
- Storing Ink in a Database
- 3D Rendering with OpenGL and DirectX 9
- Using Third-Party Engines
- Tablet Fax
EAN: 2147483647
Pages: 191
- An Emerging Strategy for E-Business IT Governance
- Linking the IT Balanced Scorecard to the Business Objectives at a Major Canadian Financial Group
- A View on Knowledge Management: Utilizing a Balanced Scorecard Methodology for Analyzing Knowledge Metrics
- Managing IT Functions
- The Evolution of IT Governance at NB Power
