Your First Program
 Download CD Content
Now that we have walked through some of the changes in VB .NET, we're going to take some of what we have learned and put it into a simple 'Hello World!' application. We're going to create a Console application that simply opens and displays the 'Hello World!' text on the screen. This is by far the easiest application we create in the book, and although it is very simple, it is a good way to become acquainted with the IDE and how to build a VB .NET program.
| Note |
The source code for the projects are located on the CD-ROM in the PROJECTS folder. You can either type them in as you go or you can copy the projects from the CD-ROM to your hard drive for editing. |
Using the IDE
At this time, it is assumed that you have a version of Visual Basic .NET installed on your PC and that you have set the profile information as directed in Chapter 2, Introduction to Visual Basic .NET. Although it is not a requirement, the profile settings in the first chapter allow your display and the figures in this chapter to be very similar.
The first step is to open the Visual Studio .NET IDE, which can be seen in Figure 9.1.

Figure 9.1: The Visual Studio .NET IDE.
At this time, the IDE should be at the Start page, where you can select New Project. Alternately, you can choose File | New Project. Either way, the New Project window is displayed (see Figure 9.2).
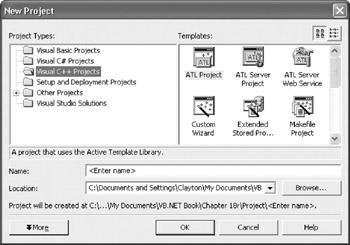
Figure 9.2: New Project window in the IDE.
You need to assign a location for the file to be stored along with a name for your project. These items can be set however you want, but something similar to the following works well:
Name: Chapter8
Location: C:VBNETProjects
You will notice a variety of application templates that can be used in VB .NET. At the left of the window, notice the Project Types list. Make sure that Visual Basic is selected from the list as it is in Figure 9.3.
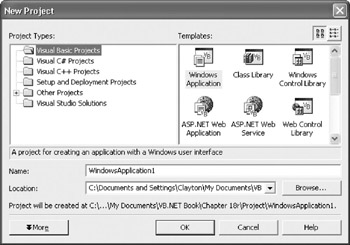
Figure 9.3: VB needs to be selected as the Project Type.
The following list describes the various templates:
Windows Application: A traditional standalone Windows application
Class Library: A windowless project that is a reusable class or component that can be shared with other projects
Windows Control Library: A custom control to use on Windows Forms
ASP.NET Web Application: The creation of an ASP.NET Web application
ASP.NET Web Service: The XML Web services authored with ASP.NET that can be published and called by an external application
Web Control Library: A custom control that can be used on Web Forms pages (similar to ActiveX control creation in VB6)
Console Application: A command-line application-we are using this in our program
Windows Service: The applications that do not have a user interface; formerly called 'NT services,' these applications are used to do things such as monitor files or check performance of the machine
Empty Project: An empty project with the necessary file structure to store application information, but all references, files, or components must be added manually
Empty Web Project: An empty environment for server-based applications
New Project in Existing Folder: A blank project within an existing application folder for using files from a preexisting project
For our application, we are going to choose Console Application. After setting the name and file location and clicking Console Application, click the OK button.
Your screen should now look similar to Figure 9.4.
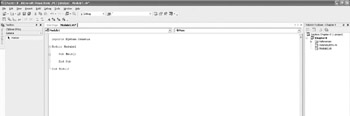
Figure 9.4: The application has been created.
We are now in Module1.vb. Notice the Toolbox on the left side of the IDE and Solution Explorer on the right. Because this is such a simple application, we don't have a need for either of these right now, but you can note where they are located as we'll use them in most of the later examples.
Writing Code
We are now in a good position to write some code for our application. This consists of a single line of output to the Console window that displays the words 'Hello World!' First, we'll perform this in a single line, then we'll accomplish it using a variable, and lastly, we'll achieve it by using the Imports keyword. All of them are equally effective for this application, but it is useful to compare how you can perform various actions in VB .NET.
Using a Single Line
Our first attempt at this application is to write a single line of code to output to the Console window. You will see that the current VB created code is similar to the following:
Module Module1

 Sub Main()

 End Sub

End Module
Sub Main() is the entry point for our application. We must write our output line between Sub Main () and End Sub. We are going to use the Systems.Console class to display information to the window. First, click in the Code Editor so that your cursor is positioned between the Sub Main() and End Sub code. Next, add the following text:
System.
Notice that as you type, Visual Studio helps you with the names of classes and functions (see Figure 9.5), because the .NET Framework publishes the type information. You can continue adding characters to the line as follows:
System.Cons
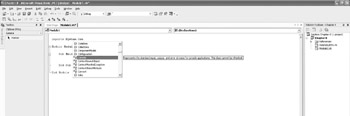
Figure 9.5: Visual Studio helps you with the names of available classes and functions.
At this time, you will see System.Console selected. You can continue typing the rest of the word 'Console,' or simply press the Tab key on your keyboard to move to the next item.
Continue adding the following code:
System.Console.WriteLine
Again, you can type out the entire line, or let Visual Studio fill it in for you and then press the Tab key. Either way, when you have finished typing the line, press the spacebar, which brings up the parameter list for the class (see Figure 9.6).
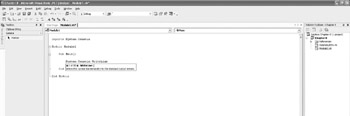
Figure 9.6: The parameter list for System.Console.WriteLine.
You can scroll through the list using the arrow keys; you can also see a few of the options in Figures 9.7, 9.8, and 9.9.
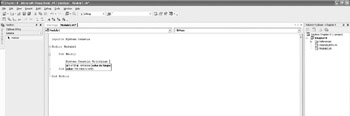
Figure 9.7: The first parameter list.
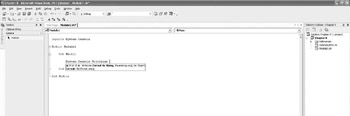
Figure 9.8: A second type of parameter.
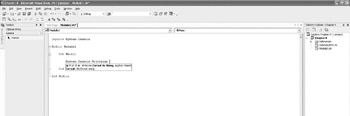
Figure 9.9: A third parameter.
The list continues on, and in this case, there are 18 of them. You don't have to scroll through each of the items unless you choose to do so. It is a great feature if you don't know or remember the various parameters for a class or function.
We simply need to complete the line as follows:
System.Console.WriteLine("Hello World!")
Our complete code listing should look like this:
Module Module1

 Sub Main()
 System.Console.WriteLine("Hello World!")
 End Sub

End Module
Executing the Program
We are now ready to execute the program in the IDE to see if it works. You can choose Debug | Start Without Debugging or press Ctrl+F5 as a keyboard shortcut. This starts the program and a window similar to Figure 9.10 is displayed on your screen.

Figure 9.10: The 'Hello World!' application.
That's all there is to this first application. If you press any key on your keyboard, you return to the IDE. Now, we're going to implement this in a slightly different way using a simple variable so that you can experience a few different features in VB .NET.
Using a Variable
We've discussed variables and declaring them in previous chapters, so we don't have to spend a great deal of time on the concepts in this chapter. We're going to create a variable of type String and then assign the variable a value. Then, we'll use the System.Console class to display this information as we did in the first example.
Begin by removing the System.Console.WriteLine("Hello World!") line from the Code Editor.
Module Module1

 Sub Main()

 End Sub

End Module
We're now back to our original code listing. If you prefer, you can start a new project instead of removing the code, but because it is only a single line, it's probably unnecessary.
We'll begin by adding the following variable declaration to the code:
Dim str as String
This code should be placed after Sub Main() so that the listing looks like this:
Module Module1

 Sub Main()
 Dim str As String

 End Sub

End Module
The next step is to assign a value to the str variable:
str = "Hello World!"
The code should now look like this:
Module Module1

 Sub Main()
 Dim str As String
 str = "Hello World!"

 End Sub

End Module
Lastly, we use the same WriteLine method of the System.Console class to output the variable information:
System.Console.WriteLine(str)
The final listing is as follows:
Module Module1

 Sub Main()
 Dim str As String
 str = "Hello World!"
 System.Console.WriteLine(str)
 End Sub

End Module
Testing the Program
Again, you can test the functionality of the program by choosing Debug | Start Without Debugging (Ctrl+F5 is the shortcut to this function).
Your output should look like Figure 9.10.
Using the Imports Keyword
Both of the previous options have worked; we are now going to look at a third option. This time, we use the Imports keyword to import the System.Console class into our application. This imports all of the members of the System.Console namespace into our application. Although we only have one line that uses it in this example, you can see how this will very effectively save us time when we are using much longer examples.
You can add the following Imports line above Module Module1 in the code:
Imports System.Console
The code then looks like the following:
Imports System.Console

Module Module1

 Sub Main()
 Dim str As String
 str = "Hello World!"
 System.Console.WriteLine(str)
 End Sub

End Module
We can then shorten the System.Console.WriteLine(str) line of code:
System.Console.WriteLine(str)
to:
WriteLine(str)
The final code should now read:
Imports System.Console

Module Module1

 Sub Main()
 Dim str As String
 str = "Hello World!"
 WriteLine(str)
 End Sub

End Module
If you run the application again, your output will look like Figure 9.10.
Final Code Listing
The following code listings are the final listings for the three examples in this chapter:
Listing 9.1 Single Line Example.
Module Module1

 Sub Main()
 System.Console.WriteLine("Hello World!")
 End Sub

End Module
Listing 9.2 Variable Example.
Module Module1

 Sub Main()
 Dim str As String
 str = "Hello World!"
 System.Console.WriteLine(str)
 End Sub

End Module
Listing 9.3 Imports Keyword Example.
Imports System.Console

Module Module1

 Sub Main()
 Dim str As String
 str = "Hello World!"
 WriteLine(str)
 End Sub

End Module
Summary
In this chapter, we built our first VB .NET application. Although it is a simple example, it is a good basis for our activity in Chapter 10, Console Application Input/Output, which is to design a Console application that takes user input and provides output. It will take the input of two numbers, calculate the third number, and then output it to the Console window.
- The Tablet PC
- Introduction to Visual Basic .NET
- Working with VB .NET
- Basics of the .NET Framework
- Introduction to the VB .NET Language
- Object-Oriented Programming with VB .NET
- Strings, GDI+, and Error Handling in VB .NET
- Math and Random Number Functions in VB .NET
- Your First Program
- Console Application Input/Output
- Your First Windows Forms Application
- Obtaining the Tablet PC SDK
- Introduction to Ink-Enabled Applications
- Tablet PC Full Screen Utility
- Tablet PC Screen Rotation and Special Buttons
- Creating an MP3 Player
- Form Effects
- Using Gestures to Control Tablet Media Player
- Getting Started with Microsoft Agent
- Advanced Microsoft Agent
- Speech Input with SAPI
- Custom Grammars for Speech Recognition
- WMI and Hardware
- Power Management for the Tablet PC
- Virtual Joystick
- Pong Game
- Not Quite a Magic Ball
- Storing Ink in a Database
- 3D Rendering with OpenGL and DirectX 9
- Using Third-Party Engines
- Tablet Fax
EAN: 2147483647
Pages: 191
