Getting Started with Microsoft Agent
 Download CD Content
In this chapter, we're again moving away from ink. This time, we look at some additional ways we can communicate with the Tablet PC using the Microsoft Agent ActiveX control that is available freely from Microsoft.
| Note |
The source code for the projects are located on the CD-ROM in the PROJECTS folder. You can either type them in as you go or you can copy the projects from the CD-ROM to your hard drive for editing. |
What Is Agent?
Microsoft Agent is a set of tools that can enrich your program. It offers us an easy way to add 'animated characters' that can talk by converting Text to Speech (TTS), play animation, and even allow some basic dictation. The 'characters' are graphics that are put together in the free Microsoft Agent Character Editor. There are a variety of characters with different capabilities.
When you load a character through Microsoft Agent, its character icon appears in the taskbar. If a mouse is placed over the icon, a ToolTip appears that tells the name of the character, and by single-clicking the icon, it displays the character. We also have the ability to show and hide the character programmatically. The character can be positioned anywhere on the screen by dragging it with the left mouse button. Again, we can also programmatically control this and can position it wherever we want.
When an Agent character talks, a word balloon opens that displays the text version of what the character is saying. When finished talking, the balloon hides automatically. You're probably used to this, but again, we can also control this through code, and we have the ability to hide the balloon during speech.
If a character's speech input is enabled, a user can press the character's push-to-talk button on the keyboard and a listening ToolTip is displayed notifying the user that the character is listening. If the character recognizes something that the user speaks through a microphone, the listening ToolTip displays what the character heard. The character can then react to the commands if we have written code for them. The character will not recognize anything the user speaks unless it was added as a command to the character in the code (more on this in Chapter 20, Advanced Microsoft Agent).
The standard character set includes four unique identities: Peedy the Parrot, the Genie, Merlin the Wizard, and Robby the Robot. In addition to the standard varieties, there are literally hundreds of characters that have been created by third parties. These characters can be simple or very intricate creations, with some of them freely available for download and others commercially available. We'll use Merlin (seen in Figure 19.1) in this chapter, although you'll soon find that it is very easy to switch characters.
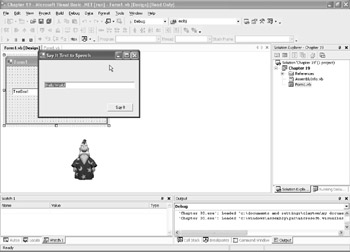
Figure 19.1: Merlin, displayed here in the IDE, is one of many characters available for Microsoft Agent.
Starting the Application
Before we begin this application, you should visit the Agent Web site at http://www.microsoft.com/products/msagent/downloads.htm to download the Agent control, characters, and Text to Speech engine. All of these are available for free from the Web site, although you may already have some or all of them on your machine.
| Note |
We have included Microsoft Agent version 2, which was current at the time of writing, on the CD-ROM that accompanies this book. You can either install it from the CD-ROM, or download it from the previous mentioned Microsoft Agent Web Site when you download the Agent characters and speech engine.. |
The Microsoft Agent API provides services that support the display and animation of animated characters. Microsoft Agent includes optional support for speech recognition so applications can respond to voice commands (we'll look at this in more detail in Chapter 20, Advanced Microsoft Agent). Characters can respond using synthesized speech, recorded audio, or text in a cartoon word balloon.
Before moving on, you need to download and install the following:
- The Microsoft Agent Core components
- Agent characters Genie, Merlin, Robby, and Peedy
- The Microsoft Speech API 4.0a runtime
- The Microsoft Speech Recognition Engine
- The Lernout and Hauspie Text-to-Speech engines for at least U.S. English
The installations shouldn't be too difficult to follow along with and you might have to go through a series of steps to teach the recognition engine. Make sure to follow the recognition training carefully so that the exercises in Chapter 20 work correctly. After downloading and installing the components and characters, you can open Visual Basic and select Windows Application. Next, right-click on the Standard toolbar and select Customize Toolbox from the pop-up menu (see Figure 19.2).
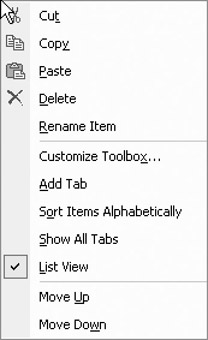
Figure 19.2: Using the pop-up menu.
The Customize Toolbox window is displayed (see Figure 19.3) and contains two tabs. Make sure that the COM Components tab is selected and then scroll the list of available controls until you find Microsoft Agent Control 2.0.
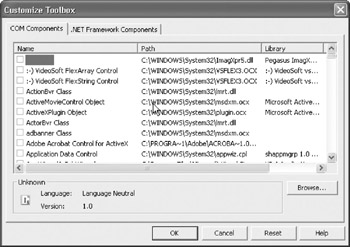
Figure 19.3: You can add controls to the Toolbox with the Customize Toolbox window.
After you find the Agent control, select it from the window and click the OK button. You will now find the Agent control available in the Toolbox among the other controls, although you will probably need to scroll to the bottom of the list. (See Figure 19.4.)
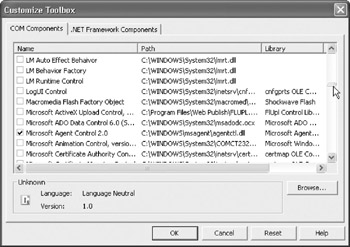
Figure 19.4: The control is now available in the Toolbox.
The next step is to add it to the window, just like any standard control. Although it is invisible to the end user, the control is seen at design time and is visible in Figure 19.5.
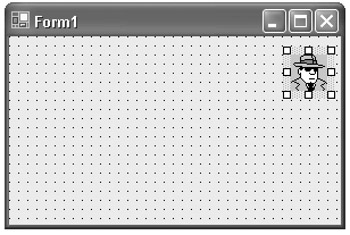
Figure 19.5: The control placed on the window.
Declaring the Character file
The next step is to open the Code Editor. We are going to declare Agent as type AgentObjects.IAgentCtlCharacterEx:
Dim Character As AgentObjects.IAgentCtlCharacter
We will now set up a variable named sChar that will store the location of the Agent character file named Merlin.acs:
Dim sChar As String = "C:Windowsmsagentcharsmerlin.acs"
| Note |
The previous line assumed that the Merlin.acs file was available at a specific location. You can search your local hard drive to locate the file if it is at a different location and change the previous line to reflect the location. |
Initializing the Character
We are now in a position where we need to initialize the character. We'll do this in the Form_Load event. Before the first step in dealing with the Agent character, we can set the Text property of the form to 'Say It Text To Speech'. Next, we'll load the Merlin character using the Load method of Agent1 (the control we added to the form). We'll then set an optional property of Character called the LanguageID, which sets the language used for Agent speech. In this case, we'll use English, which has an ID of &H409S.
Here is the code for these lines:
 On Error GoTo handler
 Me.Text = "Say It Text to Speech"
 Agent1.Characters.Load("Merlin", sChar)
 Character = Agent1.Characters("Merlin")
 Character.LanguageID = &H409S
handler:
 If Err.Number <> 0 Then MessageBox.Show("Description: " &
Err.Description, "Error!", MessageBoxButtons.OK, _
 MessageBoxIcon.Warning.Warning, MessageBoxDefaultButton.Button1)
 Err.Clear()
You may have noticed the simple error handler we include to handle any problems we may encounter with loading the character. We can now add a text box to the form (see Figure 19.6). The text box will be used to enter a string of characters.
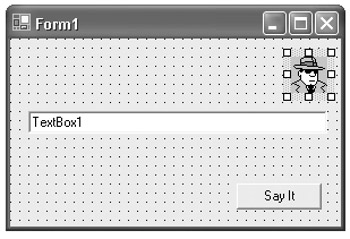
Figure 19.6: A text box is added to the form.
The character converts the text information to speech when the user instructs it to do so. In our application, we'll use a Button control for this. Add it to the form and change its Text property as seen in Figure 19.7.
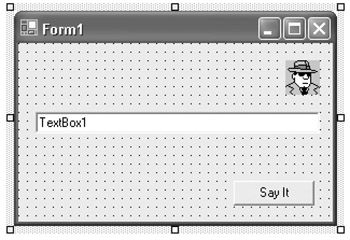
Figure 19.7: The Button control is added to the form.
There is a single line of code we need to add to the Form_Load event. This code sets the Text property of TextBox1 to 'Hello World!':
TextBox1.Text = "Hello World!"
The entire procedure is listed in the following code segment:
 Private Sub Form1_Load(ByVal eventSender As System.Object, ByVal
eventArgs As System.EventArgs) Handles MyBase.Load
 On Error GoTo handler
 Me.Text = "Say It Text to Speech"
 Agent1.Characters.Load("Merlin", sChar)
 Character = Agent1.Characters("Merlin")
 Character.LanguageID = &H409S
 TextBox1.Text = "Hello World!"
handler:
 If Err.Number <> 0 Then MessageBox.Show("Description: " &
Err.Description, "Error!", MessageBoxButtons.OK, _
 MessageBoxIcon.Warning.Warning, MessageBoxDefaultButton.Button1)
 Err.Clear()
 End Sub
We can now concentrate on the Button1_Click event, which will handle the Agent speech and hiding and showing the character. First, we'll use Character.Show to display the agent:
Character.Show()
Next, we can use the Speak method of the Agent control to get the character to speak. You can use any arrangement of characters, and in our case, we use the Text property of TextBox1. The text appears inside a bubble and is also heard:
Character.Speak(TextBox1.Text)
Once he has spoken, we'll hide the character again until the button is clicked:
Character.Hide()
The final procedure is as follows:
Private Sub Button1_Click(ByVal sender As System.Object, ByVal e As
System.EventArgs) Handles Button1.Click
 Character.Show()
 Character.Speak(TextBox1.Text)
 Character.Hide()
End Sub
Testing the Application
At this time, the application is finished and you can save it. To test the application, you can run it in the IDE. On opening, the window should look like Figure 19.8.
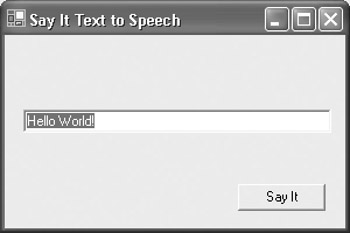
Figure 19.8: The screen on opening.
You can click the 'Say It' button, which should display the Agent as in Figure 19.9. Next, the Agent speaks the contents of the text box (see Figure 19.10). Lastly, the Agent is hidden and the original window is displayed.
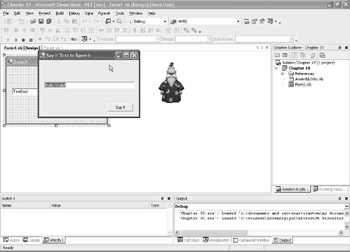
Figure 19.9: Displaying the Agent character Merlin.

Figure 19.10: The Agent is speaking.
You can change the contents of the text box and then click the 'Say It' button to test the application further.
Summary
In this chapter, we built our first Agent application. With only a few lines of code, we were able to create an application that converted text information into speech. In Chapter 20, Advanced Microsoft Agent, we learn much more about Agent programming and we also build a simple guess the number game.
- The Tablet PC
- Introduction to Visual Basic .NET
- Working with VB .NET
- Basics of the .NET Framework
- Introduction to the VB .NET Language
- Object-Oriented Programming with VB .NET
- Strings, GDI+, and Error Handling in VB .NET
- Math and Random Number Functions in VB .NET
- Your First Program
- Console Application Input/Output
- Your First Windows Forms Application
- Obtaining the Tablet PC SDK
- Introduction to Ink-Enabled Applications
- Tablet PC Full Screen Utility
- Tablet PC Screen Rotation and Special Buttons
- Creating an MP3 Player
- Form Effects
- Using Gestures to Control Tablet Media Player
- Getting Started with Microsoft Agent
- Advanced Microsoft Agent
- Speech Input with SAPI
- Custom Grammars for Speech Recognition
- WMI and Hardware
- Power Management for the Tablet PC
- Virtual Joystick
- Pong Game
- Not Quite a Magic Ball
- Storing Ink in a Database
- 3D Rendering with OpenGL and DirectX 9
- Using Third-Party Engines
- Tablet Fax
EAN: 2147483647
Pages: 191
