Tablet PC Full Screen Utility
 Download CD Content
In the previous chapter, we built Tablet PC applications that introduced some of the common features we'll use throughout the book. Now, in this chapter, we are going to build our first useful application, a Tablet PC utility that resides in the taskbar and uses a context menu.
| Note |
The source code for the projects are located on the CD-ROM in the PROJECTS folder. You can either type them in as you go or you can copy the projects from the CD-ROM to your hard drive for editing. |
Full Screen Utility Overview
The application we build in this chapter allows a user to write anywhere on the screen (see Figure 14.1). Because the application encompasses the entire screen, the user needs a way to minimize and close the application. To do this, we'll test for the right mouse button being pressed. If the right button is pressed, the application will pause for a period of 2000 milliseconds. It will then send the entered text to whatever application currently has focus.
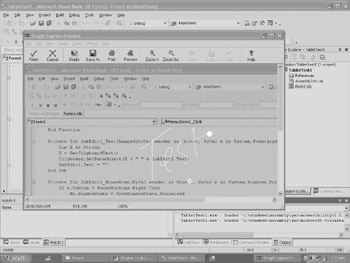
Figure 14.1: Writing on the screen.
Building the Application
We begin this utility by creating a new Windows Forms application. As a utility, we're going to create this application so that it will run in the taskbar. The taskbar menu will have three options to choose from:
Display: Fills the screen with our application
Paste: Copies the text to the clipboard as it's recognized
Exit: Closes the application
To create a taskbar menu in Visual Basic .NET, we can use a NotifyIcon control and a ContextMenu control. You can add these controls to our form. In the Properties window, you need to set the ContextMenu> property to Context Menu1. This displays the context menu automatically when the icon is right-clicked in the taskbar.
The next step is to add an InkEdit control to the form (see Figure 14.2). We'll use the InkEdit control because it automatically recognizes ink as we enter it. We could have used InkPicture and recognized the ink, or we could have used the API. Any of these work, but the InkEdit control is the easiest for this application. Because we are going to position and resize the control programmatically to fill the entire screen, you don't need to worry about its position or size.
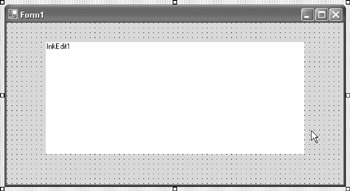
Figure 14.2: The control on the form.
Assigning Important Properties in Code
Let's write some code beginning with the Form_Load> event procedure. We'll set a few important properties for our application. For starters, our application is going to be transparent so that we can see which applications are running beneath it.
Here is the code for the Form_Load> event:
Private Sub Form1_Load(ByVal sender As System.Object, ByVal e As System.EventArgs) Handles MyBase.Load

 With Me
 .TopMost = True
 .Opacity = 0.3
 .Text = ""
 .ControlBox = False
 .FormBorderStyle = FormBorderStyle.None
 .MaximizeBox = False
 .MinimizeBox = False
 .ShowInTaskbar = True
 .BackColor = System.Drawing.Color.Gray
 End With

 NotifyIcon1.Visible = True

 NotifyIcon1.Icon = Me.Icon

 NotifyIcon1.Text = "Full Screen Tablet Utility"

 Me.WindowState = FormWindowState.Minimized
 Me.Hide()

End Sub
In the previous code, you can see that most of this procedure deals with setting properties for the form. This begins with setting the form to be located at the top of any running applications. This is obviously a very necessary feature for our application because we are planning to write on the entire screen and need to be above the other applications so we can capture the ink.
Next, we set the opacity form to 0.3. This allows us to 'see through' the form so that other running applications are visible as we are inking. Next, we change the text property to an empty string and the ControlBox> property to False> so that a control box is not displayed in the caption of the form. We can then set the border style, maximize box, and minimize box properties so that when the application is maximized, it takes up the entire screen. The last line of the With> statement changes the background color to gray.
After setting the properties for the form, we turn our attention to the NotifyIcon. First, we set the Visible> property to True> so that we can see it, we assign the icon to be the same as the icon in the application (if we had wanted to, we could have picked any icon for this property so that it would have been seen in the taskbar), and lastly we assign the Text> property to "Full Screen Tablet Utility"> so that when a mouse points to it, the text is seen by the user.
In order to wrap up the Form_Load> procedure, we set the form to minimize so that it isn't displayed on startup and then we decide to hide the application so that it won't be seen at all.
We now create the ContextMenu entries. Back in the Form Designer, we can click on the ContextMenu icon. This displays the context menu in the form. Next, click on the area within the form that shows the ContextMenu text. When you click the menu, a new menu option can be seen called 'Type Here.' This is the first entry that will be seen by the end user. We can add the text 'Display' to this. As you type this entry, new menus are available to its right and beneath it. We are going to add the following two items, in order, beneath the first one:
Paste
Exit
We now have three menu options (see Figure 14.3), but we need to create code for each of the menu events. You can create the click event for 'Display' by double-clicking its entry in the menu. In the Code Editor, add the following code:
Private Sub MenuItem3_Click(ByVal sender As System.Object, ByVal e As System.EventArgs) Handles MenuItem3.Click
 Me.WindowState = FormWindowState.Maximized
 Me.Show()
 Me.TopMost = True
 InkEdit1.Size = Me.Size
 InkEdit1.Text = ""
 InkEdit1.Left = 0
 InkEdit1.Top = 0
 InkEdit1.BackColor = System.Drawing.Color.Gray
 InkEdit1.DrawingAttributes.Color = System.Drawing.Color.White
End Sub
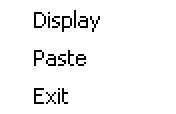
Figure 14.3: The menu options.
The first line of code sets the window to maximize so that the entire screen is filled with the application's window. Next, we need to show the application so that it can be seen. We then make sure that it is set to the top position among running applications before we move on to set InkEdit properties, the first of which is the Size> property. Next, we set InkEdit to an empty string and position it at the top left of the form so that it now takes up the entire screen. We finish up the procedure by setting the background color of InkEdit to gray, and then set the color of the pen to white.
Next, create the event procedure for the Paste menu item and add the following code:
Private Sub MenuItem1_Click(ByVal sender As System.Object, ByVal e As System.EventArgs) Handles MenuItem1.Click
 System.Threading.Thread.Sleep(2000)
 SendKeys.Send("^+V")
 Clipboard.SetDataObject("")
End Sub
The first line of code from the procedure delays the system 2 seconds. This gives us time to position our cursor before the text is pasted. To paste the text, we use the SendKeys> method. There are several variations of SendKeys> and numerous 'nondisplaying' commands we can use. We'll look at a few variations. First, we can use SendKeys>, which sends keystrokes to an active window of the foreground application. If you need further control, we can use SendKeys.SendWait>, which sends keystrokes and execution is suspended until the keystrokes have been processed.
To send normal alphanumeric characters, it's very easy. However, for our application, we need to send special keys that represent the Control key being pressed along with 'V' to simulate the Paste command's shortcut key combination.
The following characters represent special keys:
+: Shift
^: Ctrl
%: Alt
To use the special keys, you surround the character with braces. For example, to specify the Alt key, you can use {%}. Preceding a standard string with the special characters described in the previous list allows you to send a keystroke combination beginning with Shift, Ctrl, or Alt. For example, to specify Ctrl followed by 'J,' use ^J. If you need to specify that the Shift, Ctrl, or Alt key is held down while another key is pressed, you should enclose the key or keys in parentheses and precede the parentheses with the special character code. For example, to specify the J key being pressed while holding down the Alt key, you would use %(J).
The following list describes how to specify 'nondisplaying' characters:
Backspace: {BACKSPACE}, {BS}, or {BKSP}
Break: {BREAK}
Caps Lock: {CAPSLOCK}
Del or Delete: {DELETE} or {DEL}
Down arrow: {DOWN}
End: {END}
Enter: {ENTER}or ~
Esc: {ESC}
Help: {HELP}
Home: {HOME}
Ins or Insert: {INSERT} or {INS}
Left arrow: {LEFT}
Num Lock: {NUMLOCK}
Page Down: {PGDN}
Page Up: {PGUP}
Right arrow: {RIGHT}
Scroll Lock: {SCROLLLOCK}
Tab: {TAB}
Up arrow: {UP}
F1: {F1}
F2: {F2}
F3: {F3}
F4: {F4}
F5: {F5}
F6: {F6}
F7: {F7}
F8: {F8}
F9: {F9}
F10: {F10}
F11: {F11}
F12: {F12}
F13: {F13}
F14: {F14}
F15: {F15}
F16: {F16}
You can also use some formatting to simulate a key being pressed repeatedly. For example, {L 5} represents pressing the L key five times. With all of the information about SendKeys>, you can see that we are simulating Ctrl-V with the final line of code from the previous code listing.
We can now create the final menu event, which is the easiest of the three. If 'Exit' is clicked, we need to simply end the application. Here is the code:
Private Sub MenuItem2_Click(ByVal sender As System.Object, ByVal e As System.EventArgs) Handles MenuItem2.Click
 End
End Sub
Capturing Ink
Our application is nearly finished, but we have yet to deal with ink collection. As ink is entered into InkEdit1 and then recognized, it will raise the TextChanged> event. We can take advantage of this to add information to the clipboard. As you already know, pasting from the clipboard is one feature of the application. We're also going to use the clipboard to store the text as we recognize it.
Let's create the TextChanged> event for InkEdit1 (choose InkEdit> as the Class Name and TextChanged> as the Method), and then add the following code:
Private Sub InkEdit1_TextChanged(ByVal sender As Object, ByVal e As System.EventArgs) Handles InkEdit1.TextChanged
 Dim X As String
 X = GetClipboardText()
 Clipboard.SetDataObject(X & " " & InkEdit1.Text)
 InkEdit1.Text = ""
End Sub
The first line of code creates a variable that we can use to store the contents of the clipboard. If text content is on the clipboard, we need to store the text in the variable and then set the new clipboard data to be the original string followed by a space and then the newly recognized text. The following function is the GetClipboardText> function that we called in the previous procedure:
Public Function GetClipboardText() As String
 Dim objClipboard As IDataObject = Clipboard.GetDataObject()
 With objClipboard
 If .GetDataPresent(DataFormats.Text) Then Return _
 .GetData(DataFormats.Text)
 End With
End Function
You can see that the code for the function is very straightforward. We begin by retrieving data and checking if the information is a text string. If so, we return the string; otherwise, we make sure nothing is returned.
The final part of the application that we need to handle is a way to minimize the application once it has taken over the entire screen. Because the application limits the ability of the pen or mouse to click a button from the taskbar to close it, we need another way to minimize the form. One way is to add a button to the form, but we want to leave the entire screen available for ink. The remaining way we could minimize the application is to test the use of the right mouse button. If it is clicked, we can minimize the form and then hide the application. We can also add the ability to automatically paste the contents stored onto the clipboard. We've already created code to handle this, so we can simply call MenuItem1 (your name may be different depending on the order you used to create the menu options).
Here is the code for the procedure:
Private Sub InkEdit1_MouseDown(ByVal sender As Object, ByVal e As System.Windows.Forms.MouseEventArgs) Handles InkEdit1.MouseDown
 If e.Button = MouseButtons.Right Then
 Me.WindowState = FormWindowState.Minimized
 Me.Hide()
 MenuItem1.PerformClick()
 End If
End Sub
You can now test the application and then see how it works (see Figure 14.4).
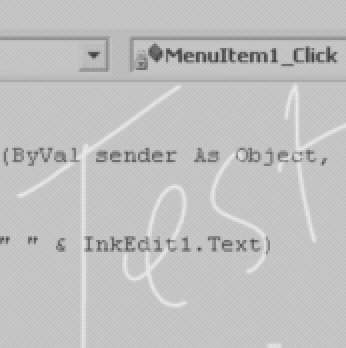
Figure 14.4: The application is being tested.
Summary
In this chapter, we created a utility that allows a user to write anywhere on the screen. The ink is converted into text and is placed on the clipboard so that it can be pasted into any application. The utility could use a few extra features, such as the ability to enable or disable the automatic pasting, but it is fully functional at this time. We create several additional utilities later in the book. The utilities are similar enough to this one that you can come back to add the missing features.
- The Tablet PC
- Introduction to Visual Basic .NET
- Working with VB .NET
- Basics of the .NET Framework
- Introduction to the VB .NET Language
- Object-Oriented Programming with VB .NET
- Strings, GDI+, and Error Handling in VB .NET
- Math and Random Number Functions in VB .NET
- Your First Program
- Console Application Input/Output
- Your First Windows Forms Application
- Obtaining the Tablet PC SDK
- Introduction to Ink-Enabled Applications
- Tablet PC Full Screen Utility
- Tablet PC Screen Rotation and Special Buttons
- Creating an MP3 Player
- Form Effects
- Using Gestures to Control Tablet Media Player
- Getting Started with Microsoft Agent
- Advanced Microsoft Agent
- Speech Input with SAPI
- Custom Grammars for Speech Recognition
- WMI and Hardware
- Power Management for the Tablet PC
- Virtual Joystick
- Pong Game
- Not Quite a Magic Ball
- Storing Ink in a Database
- 3D Rendering with OpenGL and DirectX 9
- Using Third-Party Engines
- Tablet Fax
EAN: 2147483647
Pages: 191
