WMI and Hardware
 Download CD Content
Overview
In this chapter, we develop a program that is based on the WMI class, or the Windows Management Instrumentation. WMI is an industry initiative to develop a standardized technology for accessing management information in enterprise environments. This information includes the state of system memory, inventories of currently installed client applications, and various other pieces of data (see Figure 23.1). Hardware information, especially when dealing with devices that are often on battery power like a Tablet PC, can be important to a developer. This chapter goes hand in hand with Chapter 24, Power Management for the Tablet PC, which details the power management capabilities that we can access.
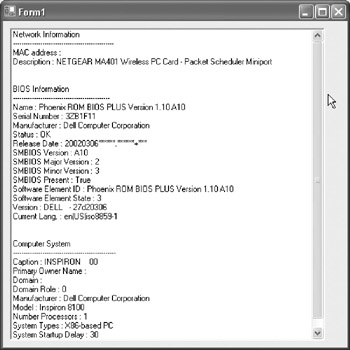
Figure 23.1: Our finished application with information displayed.
| Note |
The source code for the projects are located on the CD-ROM in the PROJECTS folder. You can either type them in as you go or you can copy the projects from the CD-ROM to your hard drive for editing. |
Project Overview
In this project, we take advantage of the WMI classes that are included in VB .NET to build an application that lists the various components and information about your PC. Our application will include the following information, but as you'll see, there is much more that can be included by making a few simple changes to this program.
Here is the information we're going to display:
- Network card
- MAC address of network card
- Network card description
- BIOS information
- Name
- Serial number
- Manufacturer
- Release date
- SMBIOS version
- SMBIOS major version
- SMBIOS minor version
- Software element ID
- Software element state
- Version
- Current language
- Computer system information
- Caption
- Primary owner name
- Domain
- Domain role
- Manufacturer
- Number of processors
- System type
- System startup display
- Total physical memory
- Processor information
- CPU name
- Voltage caps
- L2Cache
- Current clock speed
- CPU status
- Pointing device
- Device ID
- Pointing type
- Manufacturer
- Number of buttons
- Status
You can see that this program would be quite useful for troubleshooting information or simply to retrieve information from a system. This information could be used for copy protection code by retrieving a serial number and then writing a key generation program to generate a single valid key based on this number. You could also use this in an About Box to give the user details about their system. Additionally, you could use this to help determine if a keyboard or external mouse was connected to a Tablet PC. Suffice it to say, there are many ways in which you could put this information to good use.
Getting Started
This application will consist of a very simple user interface. We could just as easily have used a Console application template for this project, although we use a Windows Form template. This allows us much more flexibility if we want to add the ability to e-mail this information to someone or want to expand this program at a later date to include more information. Additionally, we could simply use this in another application as an About Box or a troubleshooting screen.
This first step is to create a Windows Forms application by starting VB .NET and then choosing the Windows Form template. This displays the default form like the one seen in Figure 23.2.
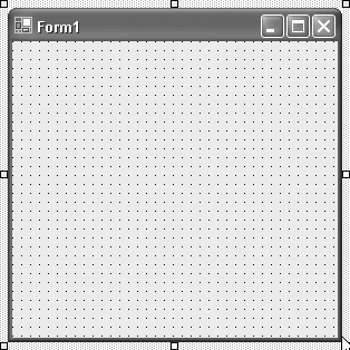
Figure 23.2: The default form in VB .NET.
Next, change the properties of the form as follows:
Size: 500,500
Text: System Information
You should see these changes instantly in the IDE (see Figure 23.3).
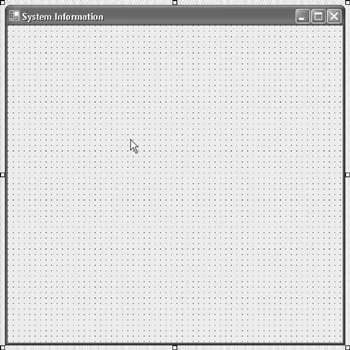
Figure 23.3: The form is changed instantly in the IDE.
Next, add a ListBox control to the form. This control will be utilized to store all of the information about the PC, including BIOS, Network, and System. You can add it to the form and then make these changes to it:
Size: 450,450
Location: 10,10
Your form should now look like Figure 23.4.
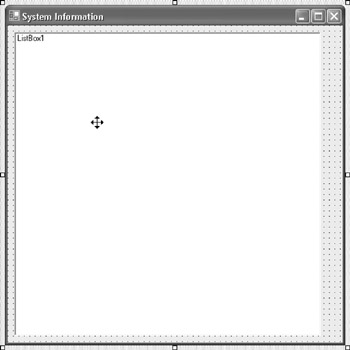
Figure 23.4: The form is now finished.
| Note |
You'll notice that we left the Form1 and ListBox1 names intact. If we had been creating an application that contained more items in its user interface, we probably would have changed these names to reflect their purpose. However, because this only contained a single form and a single control, it wasn't really necessary for our purposes. |
Writing Some Code
The next step is to begin writing some code for the application. You can double-click the form to display the Code Editor. Next, add a reference to System.Management and an Imports statement, which is the first line of code in the application and should appear before any other code. The line imports System.Management into the application. Here is the code:
Imports System.Management
You can add the Imports statement to the Code Editor, which should contain something similar to the following code after you have added it:
Imports System.Management

Public Class Form1
: Inherits System.Windows.Forms.Form

: Private Sub Form1_Load(ByVal sender As System.Object, ByVal e As System.EventArgs) Handles MyBase.Load

: End Sub

End Class
WMI References
Before we move on, let's take a look at some of the things we can accomplish with WMI and VB .NET. The following list of class names gives you an idea of the various classes that are exposed:
- Win32_X Management classes
- Win32_ComputerSystem
- Win32_DiskDrive
- Win32_LogicalDisk
- Win32_NetworkAdapter
- Win32_NetworkAdapterConfiguration
- Win32_NetworkLoginProfile
- Win32_OperatingSystem
- Win32_Printer
- Win32_Process
- Win32_Processor
- Win32_Service
- Win32_VideoController
A thorough list of the classes follows:
Win32_ComputerSystem class: Allows access to information about Windows PCs; has several domain roles:
0: Standalone workstation
1: Member workstation
2: Standalone server
3: Member server
4: Backup domain controller
5: Primary domain controller
- Properties
Caption: Name of the Windows PC
PrimaryOwnerName: Win2000 only owner of the PC
Domain: Name of the domain the PC is a part of
DomainRole: Role PC has in the domain, see above
Manufacturer: Manufacturer of the PC
Model: Model of the PC
NumberofProcessors: Number of processors in the PC
SystemType: Processor class of the PC
SystemStartupDelay: Amount of time in seconds for user to choose OS on startup
TotalPhysicalMemory: Amount of installed RAM in the system
Methods
Put_(): Saves changes made to the class
Win32_DiskDrive class: Allows access to disk drive information
- Properties
Caption: Description of the drive
Description: Brand name of the drive
InterfaceType: Type of the drive
Manufacturer: Manufacturer of the drive
Partitions: Number of partitions on the drive
Sectors: Sectors of the drive
ScsiBus: SCSI bus number
ScsiTargetID: SCSI ID
Size: Size of the drive in bytes
Win32_LogicalDisk class: Allows access to logical drives
- Properties
DriveType: Type of drive (1: removable, 2: floppy, 3: HD, 4: network, 5: CD-ROM)
FileSystem: File system of the drive
Freespace: Amount of free space on disk drive in bytes
Name: Disk drive letter
Size: Size of the drive in bytes
VolumeName: Volume name of the logical disk drive
VolumeSerialNumber: Serial number of the disk drive
Win32_NetworkAdapter class: Allows access to Windows network adapter properties
- Properties
Description: Name of the network adapter
MACAddress: MAC address of the network adapter
Win32_NetworkAdapterConfiguration class: Allows access to Windows network adapters (NIC) configuration
- Collections
DefaultIPGateway: Collection of all Default IP gateways
DNSServerSearchOrder: Collection of all DNS servers IPs
IPaddress: Collection of all IP addresses for the adapter
IPsubnet: Collection of all subnet masks
WinsPrimaryServer: Collection of all WINS servers IPs
- Properties
Description: Name of the network adapter
DHCPenabled: (-1: if DHCP is not enabled, 0: not enabled, 1: DHCP enabled)
DHCPLeaseObtained: Number representing date and time DHCP lease was obtained
DHCPLeaseExpires: Number representing date and time DHCP lease expires
DHCPServer: IP address of the DHCP server
DNSHostname: Name of the host
DNSDomain: Name of the DNS domain
IPenabled: Is true if the adapter has an enabled IPaddress
MACAddress: MAC address of the network adapter
Win32_NetworkLoginProfile class: Allows access to network login profile information
- Properties
LastLogin: Last login of the user
Name: Username of the user
Win32_OperatingSystem class: Allows access to Windows functions
- Properties
BootDevice: Drive that boots the OS
BuildNumber: Build verison of the OS
BuildType: Build type
Caption: Name of the operating system
CSName: Name of the system
CsdVersion: Service pack version
CurrentTimeZone: Time zone
FreePhysicalMemory: Amount of free memory in RAM in KB
FreeVirtualMemory: Amount of free virtual memory in KB
InstallDate: Date the OS was installed
LastBootUpTime: Number representing date and time since PC was last booted up
NumberofProcesses: Number of processes currently running
Organization: Organization that was set when installed
OsLanguage: Number representation of the language of the operating system
Primary: Is true if OS is in use
RegisteredUser: User of the OS
SerialNumber: Serial number of the operating system
SystemDevice: Drive that has the OS files
SystemDirectory: Path to the system directory
TotalVirtualMemorySize: Total size of virtual memory in KB
Version: Version of the operating system
WindowsDirectory: Path to the Windows directory
- Methods
Reboot(): Reboots the PC
Shutdown(): Shuts down the PC
Win32_Printer class: Allows access to Windows printers
- Properties
Description: Name of the printer
Win32_Process class: Allows access to Windows processes
- Properties
Caption: Name of the Windows process
CreationDate: String representing date and time process was started
Name: Name of the Windows process
Priority: Priority level of the process
ProcessID: ID of the Windows process
ThreadCount: Number of process threads
WorkingSetSize: Amount of memory dedicated to the process in Kb
- Methods
Create(strProcess): Creates a new process
Terminate(): Terminates the process
Win32_Processor class: Allows information about the processor
- CPU interfaces
1 Other
2 Unknown
3 Daughter board
4 ZIF socket
5 Replacement
6 None
7 LIF socket
8 Slot1
9 Slot2
10 370 Pin
11 SlotA
12 SlotM
- Properties
AddressWidth: Processor data width in bits
CurrentClockSpeed: Clock speed of the processor
Extclock: External clock speed of the processor
DeviceID: CPU ID of the processor
Description: CPU class, family, model, and stepping of the processor
L2CacheSize: Size of the L2cache on the processor in Kb
L2CacheSpeed: Speed of the L2 cache on the processor
Name: Brand name of the processor
UpgradeMethod: CPU interface, see above
Win32_Service class: Allows access to Windows services
- Properties
Description: Name of the service
DisplayName: Same as description
ServiceType: Type of service, 'ShareProcess' or 'Own Process'
State: Current state of the service, 'Running' or 'Stopped'
Status: Current status of the service, 'OK'
StartMode: Current Start mode of the service, 'Auto,' 'Manual,' or 'Disabled'
StartName: Start name of the service, 'LocalSystem'
- Methods
StopService(): Stops the service
ChangeStartMode(strMode): Changes the Start mode of the service
Mode: 'Automatic' or 'Manual'
Win32_VideoController class: Allows access to video properties
- Properties
Caption: Name of the video card
CurrentHorizontalResolution: Horizontal resolution of the screen
CurrentVerticalResolution: Vertical resolution of the screen
CurrentNumberOfColors: Color depth of the screen
Using the Classes
Now that you have an idea of the classes that we can utilize, we're going to put them to use in this application. Specifically, we're going to use NetworkAdapterConfiguration, BIOS, and ComputerSystem.
Let's begin with a simple property of the ListBox control. We are going to be placing a great deal of information in it, so we'll need to have scroll bars. Let's use the ScrollAlwaysVisible property:
ListBox1.ScrollAlwaysVisible = True
You can add this line to the Form_Load event, which should now look like the following code:
Private Sub Form1_Load(ByVal sender As System.Object, ByVal e As System.EventArgs) Handles MyBase.Load

 ListBox1.ScrollAlwaysVisible = True

End Sub
The next step is to create some variables for the ManagementClass and ManagementObject. These are both part of System.Management namespace that we imported earlier. Here is the code:
Dim mc As Management Class
Dim mo As ManagementObject
Next, we assign mc equal to a new ManagementClass. The ManagementClass in this case is the Network Adapter Configuration ("Win32_NetworkAdapterConfiguration"). We can also set moc equal to a ManagementObjectCollection. Here is the code for those lines:
mc = New ManagementClass("Win32_NetworkAdapterConfiguration")
Dim moc As ManagementObjectCollection = mc.GetInstances()
Now, it's time to begin sending information to the listbox. We begin with a couple of lines that will be used to send some basic text information to the listbox. We use its Add method as follows:
ListBox1.Items.Add("Network Information")
ListBox1.Items.Add("------------------------------------------------")
This information will be used so that the user can quickly look through the listbox to see the information they are looking for. The next step is to use a For Each loop, which is used to repeat a group of statements for each element in an array or, for our particular needs, a collection. We then check to see if IPEnabled is True. If so, we then output the MAC Address and Description properties of the network adapter.
Here is the code:
For Each mo In moc
 If mo.Item("IPEnabled") = True Then
 ListBox1.Items.Add("MAC address : " & mo.Item("MacAddress").ToString())
 ListBox1.Items.Add("Description : " & mo.Item("Description").ToString())
 End If
Next
At this point, we have the network card information, so we add a couple of blank lines to the listbox to help separate the areas. Here is the code for those lines:
ListBox1.Items.Add("")
ListBox1.Items.Add("")
Now, we turn our attention to the BIOS. This information is obtained through the "Win32_BIOS" management class. We set mc and moc similarly to the earlier step:
mc = New ManagementClass("Win32_BIOS")
moc = mc.GetInstances()
Again, we use a For Each loop to repeat the code necessary to add the information to the listbox. This time, we use a With statement so that we don't have to type ListBox1.Items for every line in this code. Instead, we can use a With statement to shorten this up. Here is the code:
For Each mo In moc
 With ListBox1.Items
 .Add("BIOS Information")
 .Add("----------------------------------------------")
 .Add("Name : " & mo.Item("Name").ToString())
 .Add("Serial Number : " & mo.Item("SerialNumber").ToString())
 .Add("Manufacturer : " & mo.Item("Manufacturer").ToString())
 .Add("Status : " & mo.Item("Status").ToString())
 .Add("Release Date : " & mo.Item("ReleaseDate").ToString())
 .Add("SMBIOS Version : " & mo.Item("SMBIOSBIOSVersion").ToString())
 .Add("SMBIOS Major Version : " & mo.Item("SMBIOSMajorVersion").ToString())
 .Add("SMBIOS Minor Version : " & mo.Item("SMBIOSMinorVersion").ToString())
 .Add("SMBIOS Present : " & mo.Item("SMBIOSPresent").ToString())
 .Add("Software Element ID : " & mo.Item("SoftwareElementID").ToString())
 .Add("Software Element State : " & mo.Item("SoftwareElementState").ToString())
 .Add("Version : " & mo.Item("Version").ToString())
 .Add("Current Lang. : " & mo.Item("CurrentLanguage").ToString())
 .Add("")
 .Add("")
 End With
Next
We now repeat the same process with the ComputerSystem, Processor, and Pointing Device management classes. Here is the code:
mc = New ManagementClass("Win32_ComputerSystem")
moc = mc.GetInstances()

For Each mo In moc

With ListBox1.Items
 .Add("Computer System")
 .Add("-------------------------------------------------")
 .Add("Caption : " & mo.Item("Caption").ToString())
 .Add("Primary Owner Name : " & mo.Item("PrimaryOwnerName").ToString())
 .Add("Domain : " & mo.Item("Domain").ToString())
 .Add("Domain Role : " & mo.Item("DomainRole").ToString())
 .Add("Manufacturer : " & mo.Item("Manufacturer").ToString())
 .Add("Model : " & mo.Item("Model").ToString())
 .Add("Number Processors : " & mo.Item("NumberofProcessors").ToString())
 .Add("System Types : " & mo.Item("SystemType").ToString())
 .Add("System Startup Delay : " & mo.Item("SystemStartupDelay").ToString())
 .Add("Physical Memory : " & mo.Item("TotalPhysicalMemory").ToString())
End With

Next
'Processor Info
 mc = New ManagementClass("Win32_Processor")
 moc = mc.GetInstances()
 For Each mo In moc

 With ListBox1.Items
 .Add("Processor")
 .Add("-----------------------------------------------")
 .Add("CPU Name: " & mo.Item("Name").ToString())
 .Add("CPU Voltage Caps : " & mo.Item("VoltageCaps").ToString())
 .Add("L2 Cache : " & mo.Item("L2CacheSize").ToString())
 .Add("Current Clock Speed : " & mo.Item("CurrentClockSpeed").ToString())
 .Add("CPU Status : " & mo.Item("CpuStatus").ToString())
 .Add("")
 .Add("")
 End With
 Next

 'Pointing Device
 mc = New ManagementClass("Win32_PointingDevice")
 moc = mc.GetInstances()
 For Each mo In moc

 With ListBox1.Items
 .Add("Pointing Device")
 .Add("-----------------------------------------------")
 .Add("Device ID: " & mo.Item("DeviceID").ToString())
 .Add("Type : " & mo.Item("PointingType").ToString())
.Add("Manufacturer: " & mo.Item("Manufacturer").ToString())
 .Add("Number of Buttons: " & mo.Item("NumberOfButtons").ToString())
 .Add("Status: " & mo.Item("Status").ToString())
 .Add("Caption : " & mo.Item("Caption").ToString())
 .Add("")
 .Add("")

 End With
 Next
Testing the Application
At this time, you can test the application by pressing F5, choosing Start from the Debug menu, or clicking the Start button in the IDE. Regardless of your choice, your application opens and should look similar to Figure 23.5.

Figure 23.5: The application with information displayed about the PC.
Final Code Listing
This is the final code listing for the application:
Imports System.Management


Public Class Form1
 Inherits System.Windows.Forms.Form

 Private Sub Form1_Load(ByVal sender As System.Object, ByVal e As System.EventArgs) Handles MyBase.Load

 ListBox1.ScrollAlwaysVisible = True

 'System.Management
 Dim mc As ManagementClass

 Dim mo As ManagementObject

 'Network Info
 mc = New ManagementClass("Win32_NetworkAdapterConfiguration")
 Dim moc As ManagementObjectCollection = mc.GetInstances()

 ListBox1.Items.Add("Network Information")
 ListBox1.Items.Add("------------------------------------------------")

 For Each mo In moc
 If mo.Item("IPEnabled") = True Then
 ListBox1.Items.Add("MAC address : " & mo.Item("MacAddress").ToString())
 ListBox1.Items.Add("Description : " & mo.Item("Description").ToString())
 End If
 Next

 ListBox1.Items.Add("")
 ListBox1.Items.Add("")

 'BIOS Info
 mc = New ManagementClass("Win32_BIOS")
 moc = mc.GetInstances()

 For Each mo In moc

 With ListBox1.Items
 .Add("BIOS Information")
 .Add("----------------------------------------------")
 .Add("Name : " & mo.Item("Name").ToString())
 .Add("Serial Number : " & mo.Item("SerialNumber").ToString())
 .Add("Manufacturer : " & mo.Item("Manufacturer").ToString())
 .Add("Status : " & mo.Item("Status").ToString())
 .Add("Release Date : " & mo.Item("ReleaseDate").ToString())
 .Add("SMBIOS Version : " & mo.Item("SMBIOSBIOSVersion").ToString())
 .Add("SMBIOS Major Version : " & mo.Item("SMBIOSMajorVersion").ToString())
 .Add("SMBIOS Minor Version : " & mo.Item("SMBIOSMinorVersion").ToString())
 .Add("SMBIOS Present : " & mo.Item("SMBIOSPresent").ToString())
 .Add("Software Element ID : " & mo.Item("SoftwareElementID").ToString())
 .Add("Software Element State : " & mo.Item("SoftwareElementState").ToString())
 .Add("Version : " & mo.Item("Version").ToString())
 .Add("Current Lang. : " & mo.Item("CurrentLanguage").ToString())
 .Add("")
 .Add("")
 End With
 Next


 'Computer Info
 mc = New ManagementClass("Win32_ComputerSystem")
 moc = mc.GetInstances()

 For Each mo In moc

 With ListBox1.Items
 .Add("Computer System")
 .Add("-------------------------------------------------")
 .Add("Caption : " & mo.Item("Caption").ToString())
 .Add("Primary Owner Name : " & mo.Item("PrimaryOwnerName").ToString())
 .Add("Domain : " & mo.Item("Domain").ToString())
 .Add("Domain Role : " & mo.Item("DomainRole").ToString())
 .Add("Manufacturer : " & mo.Item("Manufacturer").ToString())
 .Add("Model : " & mo.Item("Model").ToString())
 .Add("Number Processors : " & mo.Item("NumberofProcessors").ToString())
 .Add("System Types : " & mo.Item("SystemType").ToString())
 .Add("System Startup Delay : " & mo.Item("SystemStartupDelay").ToString())
 .Add("Physical Memory : " & mo.Item("TotalPhysicalMemory").ToString())
 End With
 Next

 End Sub
End Class
Summary
In this chapter, we built a very useful application that can be customized for your particular needs. It would be excellent to include with another project for an About Box or a Troubleshooting Guide. There were several new things we touched on in this example, including a ListBox control, the With statement, a For Each loop, and obviously the WMI. In Chapter 24, Power Management for the Tablet PC, we build a directory browser using the TreeView control.
- The Tablet PC
- Introduction to Visual Basic .NET
- Working with VB .NET
- Basics of the .NET Framework
- Introduction to the VB .NET Language
- Object-Oriented Programming with VB .NET
- Strings, GDI+, and Error Handling in VB .NET
- Math and Random Number Functions in VB .NET
- Your First Program
- Console Application Input/Output
- Your First Windows Forms Application
- Obtaining the Tablet PC SDK
- Introduction to Ink-Enabled Applications
- Tablet PC Full Screen Utility
- Tablet PC Screen Rotation and Special Buttons
- Creating an MP3 Player
- Form Effects
- Using Gestures to Control Tablet Media Player
- Getting Started with Microsoft Agent
- Advanced Microsoft Agent
- Speech Input with SAPI
- Custom Grammars for Speech Recognition
- WMI and Hardware
- Power Management for the Tablet PC
- Virtual Joystick
- Pong Game
- Not Quite a Magic Ball
- Storing Ink in a Database
- 3D Rendering with OpenGL and DirectX 9
- Using Third-Party Engines
- Tablet Fax
EAN: 2147483647
Pages: 191
