Step 1.2 Install SSH Windows Clients to Access Remote Machines Securely
Overview
Problem: Many times administrators will find themselves on a Windows machine with no way to access a remote server securely since Microsoft does not yet package an SSH client.
There are a number of excellent tools available that provide SSH client connectivity from a Windows platform. A list of these tools is available at http://www.openSSH.com/windows.html.
| Note |
It is possible to use Cygwin, a UNIX environment for Windows, to compile OpenSSH and run an OpenSSH server daemon. However, installing and configuring Cygwin is beyond the scope of this book and will not be discussed. Cygwin can be found at http://sources.redhat.com/cygwin/. |
Action 1 2 1 Download and install PuTTY for Windows
PuTTY is an open source Windows SSH and telnet client, distributed under the MIT license and maintained by Simon Tatham. The package contains all of the necessary components required to connect to a machine running the OpenSSH server and runs on all versions of Windows, starting at Windows 95.
PuTTY contains a number of components that are described below.
- PuTTY “ This is an SSH and telnet client that can be run through the Windows graphical user interface (GUI) or from the command line. It supports SSHv1 and SSHv2.
- PSCP “ This is a command line scp client.
- PSFTP “ This is a command line sftp client. PSFTP will only work on SSH servers that support SSHv2 since the SFTP protocol is supported only there.
- PuTTYtel “ This is a telnet only client.
- Plink “ This is a command line interface to PuTTY that can be used within scripts to create secure connections to SSH servers.
- Pageant “ This is an SSH authentication agent that will keep your private keys unencrypted in memory so you do not have to enter your passphrase every time you authenticate to a server.
- PuTTYgen “ This is a key generation utility that will create RSA1, RSA and DSA public/private key pairs.
Each of these components can function separately, although the purpose of some is to complement what the others do. For example, Pageant is used to provide automatic authentication for PuTTY, PSCP and PSFTP.
To install PuTTY onto your Windows machine, the following steps need to be taken:
- Point your web browser to http://www.chiark.greenend.org.uk/~sgtatham/putty/download.html
- The easiest way to download and install PuTTY is to scroll down to the section entitled A Windows-style installer (x86) for everything except PuTTYtel and click on the link provided. This will allow you to download all of the PuTTY components except the telnet-only client.
- The first box to pop up is the File Download dialog box asking if you want to Open, Save or Cancel this operation. A good practice when downloading software is to save it to your hard drive. If you have a virus scanner installed, this will allow you to easily determine if the software is infected with a virus, and has the benefit of preserving the software locally if a reinstall should become necessary. In general, it is not advisable to execute a program directly from the download site.
- Once the installer has downloaded, double-click on the file to start the installation.
- The first box will ask if you want to install PuTTY. Click Yes .
- The next box is the initial welcome screen asking you to close down any other applications. While it may not be necessary to close down every other program you have open at this time, it is probably a good idea to prevent any problems. Once you have closed down any open programs, click Next .
- The next box asks for the directory where you would like PuTTY installed. Choose the directory into which you would like it installed and click Next . This installation directory should be noted as it will be needed when setting the Windows path in an upcoming step.
- The next box asks you in what Start Menu folder to place PuTTY's shortcuts. Choose an existing folder or create your own and click Next .
- Next, you will be asked whether or not you would like to create:
- A Start Menu group ” this will create a folder within the Start Menu for easy access
- A desktop icon for PuTTY ” convenient desktop access
- Associate .PPK files with Pageant ” this associates files with the PPK extension with Pageant files. PPK files are where PuTTY stores your private keys.
Choose which items you want the installation to complete and click Next . If you are not sure which items should be created, leave them all checked and click Next .
- Finally, you are shown the choices you have made. If all are correct, click Install , else click Back and redo any choices.
- After the install is finished, you will see a window that confirms that the install was successful. Click the Finish button to complete the install. PuTTY is now installed and ready for use.
Since most of PuTTY's components are command line based, it may be helpful to have them in your Windows PATH so you can execute them while at the Windows command prompt. This is done differently in each version of Windows.
For Windows XP:
- Go to the Start Menu and right click on the My Computer icon. From there, select Properties .
- In the next box click on the Advanced tab and then click on the button marked Environment Variables .
- In the next box you will see a window marked System Variables . This box contains a number of environment variables Windows uses. Scroll through the list and look for the "Path" variable ” highlight it and then click Edit .
- The next box will show you a Variable name and a Variable value. Click once on the Variable value. DO NOT ERASE this value “ simply go to the far right and add the following:
;C:program filesputty
where c:program filesputty is the default directory in which the PuTTY programs are installed.
- Click OK until you are back at the desktop.
To check your PATH go back to the Start Menu and click on Run . Type in cmd and Click OK .
A Windows command prompt should appear. Type "PuTTY". If your path has been set correctly, the PuTTY configuration box should appear.
To change the PATH from a Windows command prompt: the path can be set as shown below:
C:> set PATH=%PATH%;c:program filesputty
where c:program filesputty is the default directory the PuTTY programs are installed. If typed on the Windows command prompt in this manner, the command must be repeated for each new command window opened; it will not be saved for future command windows.
Action 1 2 2 Download and install WinSCP a graphical SSH file transfer tool
The file transfer tools that come with PuTTY are command line based, which can make it difficult in a Windows environment to quickly and easily transfer files. However, there are a number of graphical SSH file transfer tools referenced at http://www.openSSH.com/ windows .html. One such tool is WinSCP.
WinSCP is a freeware scp-like client maintained by Martin Prikryl and is located at http://winscp.vse.cz/eng. It provides a Windows Explorer- or Norton Commander-type drag-and-drop interface for transferring files securely and easily from one computer to the next , using SSH.
- Point your web browser to http://winscp.vse.cz/eng/download.php.
- At the time of this writing, the latest version of WinSCP available for download is WinSCP 2.3.0. To download WinSCP 2.3.0, click on the link for WinSCP 2.3.0 installation package .
- The first box to pop up is a File Download dialog box asking if you want to Open , Save or Cancel this operation. A good practice when downloading software is to save it to your hard drive. If you have a virus scanner installed, this will allow you to easily determine if the software is infected with a virus, and has the benefit of preserving the software locally if a reinstall should become necessary. In general it is not advisable to execute a program directly from the download site.
- Once the WinSCP install program has completed downloading, double-click on it to start the installation.
- After double-clicking on the install program, the WinSCP Setup Wizard appears. The first box is the initial Welcome Screen asking you to close down any other applications. While it may not be necessary to close down every other program you have open at this time, it is probably a good idea to prevent any problems. Once you have closed down any open programs, click Next .
- The next box is the License Agreement . Read through the license agreement and if you agree to it, click the radio button next to "I accept the agreement" and click Next .
- The next box is the directory where you would like WinSCP installed. Choose the directory into which you would like WinSCP installed and click Next .
- The next window asks you to select the components to install. The components you are given the option to install are:
WinSCP application “ This is the main application. You want to install this.
PuTTYgen “ This is the key generator from PuTTY that WinSCP uses. Even if you already have PuTTYgen installed, you probably want to install this as it may be a different version than what you already have installed.
Pageant “ This is the SSH authentication agent from PuTTY that WinSCP uses. Like PuTTYgen, you probably want to install this as well.
Once you have selected the components to install, click Next .
- The next box asks you in what Start Menu folder to place WinSCP's shortcuts. Choose an existing folder or create your own and click Next .
- The next prompt will ask you to Select Additional Tasks . You are given a choice of the following tasks you would like the setup program to perform:
Create a desktop icon ” This will create an icon for WinSCP on the desktop.
Create a Quick Launch icon ” This will put an icon in your quick launch menu along your Taskbar.
Add upload shortcut to Explorer's ˜Send to context menu “ This will allow you to right click on a file within Windows Explorer and begin an upload.
Choose the tasks you prefer and then click Next .
- The next screen asks you to select your initial user settings.
User Interface style “ You are given the choice between a Norton Commander or Windows Explorer-style interface. The Norton Commander style will show the local and remote system in two windows side-by-side while the Window Explorer style will display the remote folder as a window by itself.
Show advanced login options ” This will show the advanced options you are able to set when the WinSCP initial login screen appears.
Choose the interface settings you prefer and click Next .
- Finally, you are shown the choices you have made. If these are correct, click Install , else click Back and redo any choices.
- After the install is finished, you will see a window that confirms the install was successful. Click the Finish button to complete the install. WinSCP is now installed and ready for use.
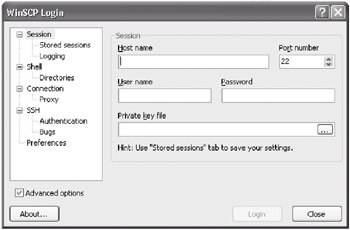
If WinSCP is installed correctly, the WinSCP login screen shown below should display.
SECTION I - Obtaining, Compiling and Installing OpenSSH
- Step 1.1 Install OpenSSH to Replace the Remote Access Protocols with Encrypted Versions
- Step 1.2 Install SSH Windows Clients to Access Remote Machines Securely
SECTION II - How to Use OpenSSH Clients for Unix-to-Unix Connectivity
SECTION III - How To Use PuTTY/WinSCP For PC-To-Unix Connectivity
- Step 3.1 Use PuTTY as a Graphical Replacement for telnet and rlogin
- Step 3.2 Use PuTTY / plink as a Command Line Replacement for telnet / rlogin
- Step 3.3 Use WinSCP as a Graphical Replacement for FTP and RCP
- Step 3.4 Use PuTTYs Tools to Transfer Files from the Windows Command Line
SECTION IV - Using Public Key Authentication
- Step 4.1 Authentication with Public Keys
- Step 4.2 Passphrase Considerations
- Step 4.3 How to Generate a Key Pair Using OpenSSH
- Step 4.4 How to Generate a Key Using PuTTY
- Step 4.5 How to use OpenSSH Passphrase Agents
- Step 4.6 How to use PuTTY Passphrase Agents
- Step 4.7 Using Public Key Authentication for Automated File Transfers
SECTION V - Troubleshooting SSH Connections
SECTION VI - Advanced SSH Topics
- Step 6.1 Port Forwarding
- Step 6.2 Using Port Forwarding Within PuTTY to Read Your E-mail Securely
- Step 6.3 X11 Forwarding
Conclusion
Appendix - Sample sshd_config File
EAN: 2147483647
Pages: 90
