Introduction to Visual Basic .NET
Overview
Although this book is based around developing projects for the Tablet PC, it is important to have at least a basic understanding of the Visual Basic .NET development environment and programming language. As a result, this chapter introduces you to Visual Basic and guides you through the creation of your first Visual Basic program. Topics that you'll be exposed to include the basics of the Visual Basic Integrated Development Environment (IDE), basic language, variables, and the built-in components.
| Note |
We also look at the difference between VB .NET and earlier versions, such as Visual Basic 6 in Chapter 3, Working with VB .NET. |
For those of you already well-versed in VB .NET or earlier versions of Visual Basic, you will find that some of this chapter deals with topics with which you are undoubtedly familiar. Although most of the concepts have remained the same, the IDE has been changed, and there are many new ideas we touch upon in this opening chapter. If you are a beginner or intermediate programmer and are new to VB .NET, you will find this chapter helps you build a solid foundation onto which you can base your future Visual Basic learning.
History of Visual Basic
Visual Basic has been in existence for over 10 years after debuting in the spring of 1992. It received a tremendous amount of press coverage, which propelled it into what is now the most widely used programming environment in the world. The first couple of versions were very simple and probably weren't useful for much more than prototyping an application you planned to write with something else. In subsequent releases, beginning with the database connectivity in VB3, Microsoft began to add features that transformed the tool that many considered a toy into a very usable product. In version 4, there was a limited ability to create objects and with versions 5 and 6, came additional object-oriented features. Now, with VB .NET, Visual Basic has been altered yet again and with these changes comes a shift in the way you'll develop applications. We'll look further at the language changes and how to upgrade VB6 projects to .NET in Chapter 3, Working with VB .NET, but for now, we'll introduce you to the VB IDE.
The Integrated Development Environment
We begin by looking at the VB IDE, which is one of the reasons why it is such a popular tool. It provides everything you need to develop applications in an easy-to-use and learn Graphical User Interface (GUI; pronounced Gooey).
Like many Windows applications, Visual Basic has several ways in which it can be opened. First, and probably the easiest, is accessing it through the Start menu-the exact path required to access this shortcut is dependent upon your installation and may differ on individual machines. Another option is to create a shortcut on your desktop, which executes Visual Basic when you double-click on it. There are several additional options such as double-clicking on files that are associated with the environment, so you should simply use the option that best suits your individual needs.
If you have experience with previous versions of Visual Basic, the first thing you'll notice is the lack of the familiar New Project window being displayed on startup. Instead, you are presented with a new Start page that appears very much like Figure 2.1.
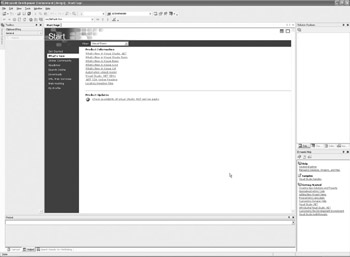
Figure 2.1: The Start page as displayed at startup.
The Start page is displayed at first startup showing the My Profile option, which allows you to set the environment so it reflects your personal settings. The customization is an important option because it can help reduce your learning curve and make your job much easier. You'll notice that there are three settings you can change in the Profile portion of the page: Keyboard Scheme, Window Layout, and Help Filter. Because we're using Visual Basic, you can set the Profile drop-down to read Visual Basic Developer. When you do so, it makes changes to the other options by automatically setting the options to Visual Basic preferences. You can see the changes reflected in Figure 2.2.
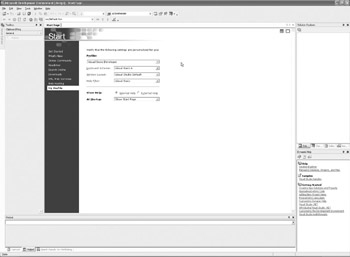
Figure 2.2: Visual Basic preferences are automatically selected when you set the profile.
There are several other interesting items on the Start page that are new to this version of Visual Basic. First, there is the Headlines option, which pulls information from the Internet for you and displays it inside the environment. You can see an example of the Headlines tab in Figure 2.3. The information in this tab consists of a variety of information, such as features of a new OS, technical articles and white papers that give specific details for topics, and a knowledge base that allows you to search through thousands of topics. Having this information available directly in the IDE is a tremendous time-saver.
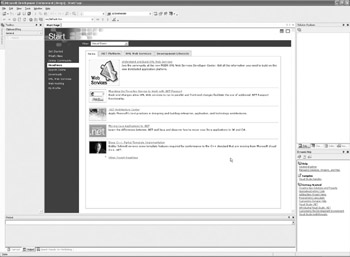
Figure 2.3: Headlines are retrieved from the Internet and displayed in the IDE.
The Get Started item, which can be seen in Figure 2.4, allows you to quickly view the projects you have been working on in a very convenient format. You can open any of the files listed in the Project tab by simply clicking on it. You can also start a new project by clicking the New Project button.
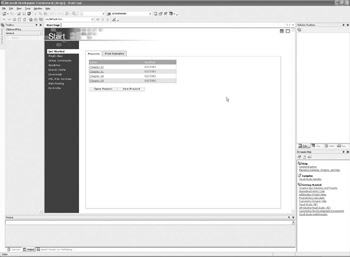
Figure 2.4: The Get Started item displays previous projects.
For most of the projects in this book, you will be developing Standard Windows executable files. In previous versions, you would have selected Standard EXE project from the Project window. The new VB .NET Project window, which can be seen in Figure 2.5, has several new options, including Windows Application, which is similar to the Standard EXE project in VB6. When you create the project, you are required to give it a name and a location in the dialog boxes that are listed beneath the project types. After you have set the appropriate options, you can click the OK button to create the project.
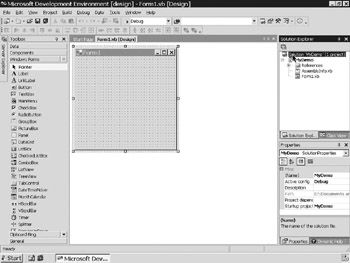
Figure 2.5: The VB .NET IDE looks similar to earlier versions.
After you click OK, the VB .NET IDE displays and looks similar to Figure 2.5. One thing you may notice immediately is the change in file extensions for VB forms, which were given names with an extension .FRM in previous versions of VB. In VB .NET, items that are used in a project are given the extension .VB. Also given a new extension is a class, which also uses the .VB extension.
As you can see in Figure 2.5, the Visual Basic IDE is fundamentally a collection of menus, toolbars, and windows that come together to form the GUI. There are several main windows that appear in the default Visual Basic IDE, along with several toolbars.
The Menus
As you can see in Figure 2.6, the Visual Basic IDE contains a menu bar and title bar that appears very similar to most Windows applications. The title bar serves as a quick reminder of what you are doing inside the IDE. For instance, unless you have changed something, the title bar should currently read something similar to 'WindowsApplication - Microsoft Visual Basic .NET [design] - Form2.vb[design].'

Figure 2.6: Menu and title bars provide information similar to most Windows programs.
The menu bar provides functions that you would expect from any standard Windows application. For instance, the File menu allows you to load and save projects, the Edit menu provides Cut, Copy, and Paste commands that are familiar to most Windows users, and the Window menu allows you to open and close windows inside the IDE. Each menu option works like any other Windows application, so they don't need any real introduction. You shouldn't be overly concerned with all of the options at this time, because we spend some time on them as we encounter them throughout the book.
The Toolbars
We'll now take a few moments to look at the toolbars in the Visual Studio IDE.
The Standard Toolbar
The Standard toolbar, which is displayed in Figure 2.7, is also comparable to the vast majority of Windows applications. It provides shortcuts to many of the commonly used functions provided by Visual Basic. Along with the Standard toolbar, Microsoft has provided several additional, built-in toolbars that can make your job a little easier. To add or remove any of the toolbars, you can right-click on the menu bar, or you can select Toolbars from the View menu.

Figure 2.7: Toolbars provide shortcuts to many of the common functions.
Individual Toolbars
The individual toolbars include the Debug, Edit, and Form toolbars. The Debug toolbar, which is visible in Figure 2.8, is utilized for resolving errors in your program and provides shortcuts to commands that are found in the Debug menu.

Figure 2.8: Shortcuts in the Debug toolbar are helpful when finding errors in your program.
The Layout Toolbar
The Layout toolbar (see Figure 2.9) includes many of the commands in the Format menu and is useful when you're arranging controls on a form's surface. For instance, you can quickly and easily align objects or center them horizontally or vertically on a form.

Figure 2.9: The Layout toolbar displays buttons specific to editing features.
Whether you decide to display these toolbars is purely a matter of personal taste as the functions they provide are generally available in menu options. Several factors, such as your screen size and resolution, may make their use impractical.
Custom Toolbars
You can create a custom toolbar or customize the appearance of the built-in toolbars by following a couple of steps. First, right-click on any toolbar, and then select the Customize option. From the Customize window that appears, which can be seen in Figure 2.10, click the New button and type a name for the new toolbar. The name appears in the toolbar list, and after making sure that its check box is selected, click the Commands tab, which displays a list of available menu commands. From the list of categories and commands, select the options you want to have on your toolbar. The changes are automatically saved, so continue placing options on the toolbar until you are finished, and then simply close the window. You can now use your toolbar like any other.
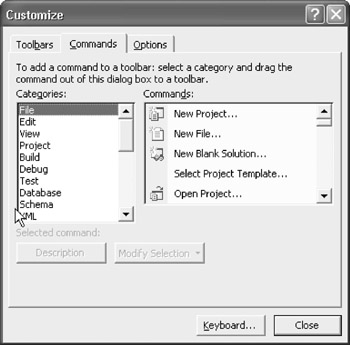
Figure 2.10: The Customize window allows you to create or customize a toolbar.
The Windows
In addition to the menus and toolbars, there are several windows that you need to become familiar with to get a basic grasp of the Visual Basic IDE. The Toolbox window displays some of the built-in Visual Basic controls. The Form Designer displays the basic building block of a typical Visual Basic application. The Code Editor is where you'll actually type the code for your application. Solution Explorer displays the objects that make up the project on which you are working, and you can position and view the forms with the Form Designer window. Lastly, you can set properties of the components and forms with the Properties window.
The Toolbox
The Toolbox, which can be seen in Figure 2.11, is probably the window that you will become familiar with the quickest because it provides access to all of the standard controls that reside within the Visual Basic runtime itself. These controls, known as intrinsic controls, can be sorted by right-clicking on the Toolbox and choosing Sort Items Alphabetically from the pop-up menu.

Figure 2.11: Standard controls as well as ActiveX controls are displayed in the Toolbox.
Pointer: Allows you to select controls that have already been placed on a form. The pointer is the only item on the Toolbox that isn't a control.
Button: Allows you to create standard buttons for input, such as OK or Cancel. Much like the TextBox, CommandButtons are used for input on almost every frame.
CheckBox: Allows the user to select True/False or Yes/No.
CheckedListBox: Displays a list of items that can display a check mark next to items in the list.
Color Dialog: Allows the user to choose colors.
ComboBox: Contains a list of items, but only provides support for a single user selection. This is similar to a ListBox control.
ContextMenu: Gives users access to frequently used menu commands.
CrystalReportViewer: Allows a Crystal Report to be viewed in an application.
DataGrid: Displays data in a tabular view.
DateTimePicker: Allows the user to choose a single item from date/time.
DomainUpDown: Displays and sets a text string from a list of choices.
ErrorProvider: Allows you to show the end user something is wrong.
FontDialog: Displays a dialog box for fonts.
GroupBox: Provides grouping for other controls.
HelpProvider: Allows you to associate an HTML help file.
HScrollBar: Lets you create scroll bars, but are used infrequently because many controls provide the ability to display their own scroll bars.
ImageList: Allows you to display images on other controls.
Label: Displays text information that does not have a need to be edited by an end user. It's often displayed next to additional controls to label their use.
LinkLabel: Provides Web-style links for your programs.
ListBox: Contains a list of items, allowing an end user to select one or more items.
ListView: Displays a list of items with icons.
MainMenu: Provides a menu for your programs.
MonthCalendar: Displays a calendar from which dates can be picked.
NumericUpDown: Displays and sets numeric values.
OpenFileDialog: Displays a dialog box for opening files.
PageSetupDialog: Displays a dialog box for setting up pages.
Panel: Provides a panel for your program.
PictureBox: Allows you to display images in several different graphics formats, such as BMP, GIF, and JPEG, among others.
PrintDialog: Displays a dialog box for printing.
PrintDocument: Provides the ability to print a document.
PrintPreviewControl: Provides the ability to preview before printing.
PrintPreviewDialog: Displays a dialog box for print preview.
ProgressBar: Indicates progress of an action.
RadioButton: Allows the user to select from a small set of exclusive choices.
RichTextBox: Displays RichText files on a form.
SaveFileDialog: Displays a dialog box for saving files.
Splitter: Allows you to resize docked controls at runtime.
StatusBar: Displays various types of information.
TabControl: Allows you to display tabs, such as those that appear in a notebook.
TextBox: Provides a field for input or displaying text.
Timer: Provides timed functions for certain events. The Timer control is an oddity when compared to other controls in that it isn't displayed at runtime.
ToolBar: Provides a toolbar for your application.
TrackBar: Allows the user to navigate large amounts of data; also known as a 'Slider' control.
TreeView: Displays a hierarchy of nodes.
VScrollBar: Lets you create scroll bars, but are used infrequently because many controls provide the ability to display their own scroll bars.
Some of the intrinsic controls are used more frequently and you are likely to become acquainted with them much faster. For example, the Button and Label control are used in almost all Visual Basic developed applications. Although some are very important, others may provide functionality that can be replaced by far superior controls.
Additional controls, known as ActiveX controls (sometimes referred to as OCX controls or OLE custom controls), provide extra functionality and can be added to the Toolbox for use in a project. These components are provided by many third-party companies or may have been provided by Visual Basic itself. Many times, these controls provide extended functionality that makes them much more powerful than the intrinsic controls. That being said, the built-in varieties offer a few advantages that cannot be overlooked. For instance, if you use a third-party control, you will need to distribute it with your application.
Form Designer
You need to have a place to assemble your controls, which is the function of forms. As you can see in Figure 2.12, the forms you work with are displayed inside the Form Designer window. When they are displayed in this way, you can place and manipulate controls.
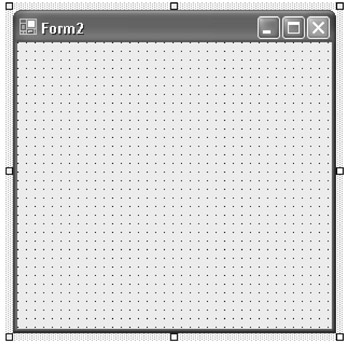
Figure 2.12: During development, the Form Designer displays the form you are working on.
Code Editor
Every form has a Code Editor, which is where you write the code for your program. The Code Editor can be opened in a variety of ways, such as double-clicking on a form or choosing Code from the View menu. Figure 2.13 displays a sample Code Editor.
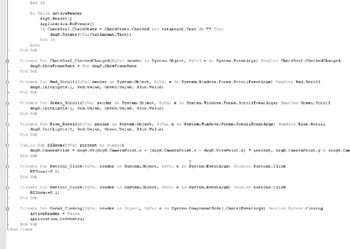
Figure 2.13: Visual Basic code is written in the Code Editor.
Solution Explorer
Solution Explorer can be seen in Figure 2.14 and is provided to help you manage projects. Solution Explorer is a hierarchical, tree-branch structure that displays projects at the top of the tree. The components that make up a project, such as forms, descend from the tree. This makes navigation quick and easy because you can simply double-click on the part of the project you want to work on. For instance, if you have a project with several forms, you can simply double-click the particular form you want to view. It provides a quick and easy means of navigation.
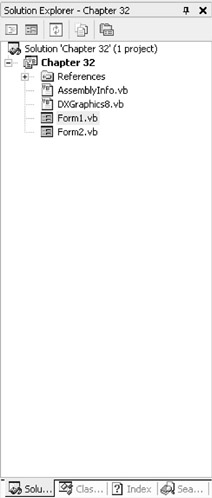
Figure 2.14: You'll quickly realize the usefulness of Solution Explorer.
Solution Explorer also provides additional functions, such as the ability to add new forms by right-clicking on an open area of the Solution Explorer window, and selecting Add Form from the pop-up menu, which can be seen in Figure 2.15.
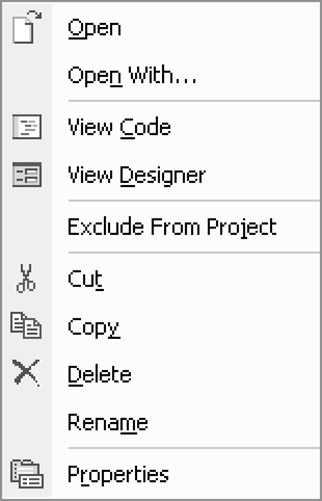
Figure 2.15: Pop-up menus make available countless valuable features in the IDE.
Properties Window
The Properties window is used for the configuration of the controls you place on a form as well as the form itself. All of the standard Visual Basic controls have properties, and the majority of ActiveX controls do as well. As you can see in Figure 2.16, the window displays the available properties for an individual control or the forms on which they are placed. These properties can be changed as you design an application, or you can alter them in code.
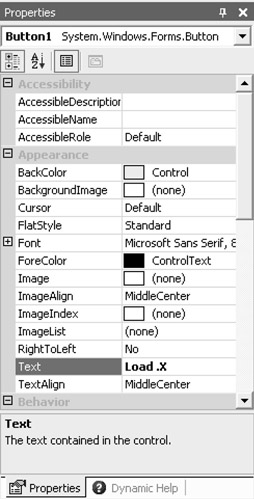
Figure 2.16: The Properties window allows you to adjust properties for many Visual Basic objects.
Summary
In this chapter, we looked at the history of Visual Basic, from its early days as a tool used mainly for prototyping, to its present standard that has made it the most popular development tool available today. We looked at the VB .NET development environment and went through some of the basic features of the IDE. In Chapter 3, Working with VB .NET, we continue our look at VB .NET by looking at its new features and we go over the basic features of the Upgrade Wizard, which walks you through the process of converting VB6 files to VB .NET. Finally, we put together the information from the first chapters to build our first project in VB .NET, the standard 'Hello World!' application.
- The Tablet PC
- Introduction to Visual Basic .NET
- Working with VB .NET
- Basics of the .NET Framework
- Introduction to the VB .NET Language
- Object-Oriented Programming with VB .NET
- Strings, GDI+, and Error Handling in VB .NET
- Math and Random Number Functions in VB .NET
- Your First Program
- Console Application Input/Output
- Your First Windows Forms Application
- Obtaining the Tablet PC SDK
- Introduction to Ink-Enabled Applications
- Tablet PC Full Screen Utility
- Tablet PC Screen Rotation and Special Buttons
- Creating an MP3 Player
- Form Effects
- Using Gestures to Control Tablet Media Player
- Getting Started with Microsoft Agent
- Advanced Microsoft Agent
- Speech Input with SAPI
- Custom Grammars for Speech Recognition
- WMI and Hardware
- Power Management for the Tablet PC
- Virtual Joystick
- Pong Game
- Not Quite a Magic Ball
- Storing Ink in a Database
- 3D Rendering with OpenGL and DirectX 9
- Using Third-Party Engines
- Tablet Fax
EAN: 2147483647
Pages: 191
