Programming with the Report Engine Object Model
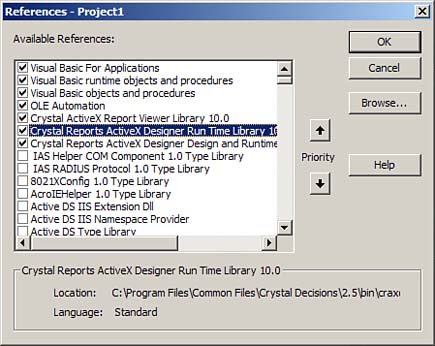
The object model is the main entry point to the Crystal Reports engine for desktop applications. As mentioned earlier, it is based on COM and can be used from any COM-compliant development environment. Although the main librarys filename is craxdrt.dll, the more important thing to know is that it shows up in the Project References dialog as Crystal Reports ActiveX Designer Runtime Library 10.0, as shown in Figure 30.3. After a reference is added to this library, a new set of objects will be available to you. These objects are contained in a library called CRAXDRT. To avoid name collisions, its probably a good idea to fully qualify all object declarations with the CRAXDRT name, for example, Dim Param As CRAXDRT.ParameterField.
Figure 30.3. Reference the Report Designer Components Object Model in the References dialog.
NOTE
When adding a Crystal Report to your project, a reference is automatically added to this library for you. You can use the CRAXDRT library right away.
In addition to many other features, the object model provides the capability to open, create, modify, save, print, and export reports. This section covers some of the more common scenarios a developer might encounter.
The main entry point to the object model is the Report object. This object is the programmatic representation of the report template and provides access to all the functions of the SDK. There are three ways to obtain a Report object:
- Load an existing RPT file from disk
- Create a new report from scratch
- Load an existing strongly typed report that is part of the Visual Basic project
The first two methods involve the Application object. Its two key methods are NewReport and OpenReport. As the name implies, the NewReport method is used to create a blank report and the OpenReport method is used to open an existing report. Creating a new report is useful if the application needs to make a lot of dynamic changes to the reports layout on the fly. This way all report objects can be added dynamically.
NOTE
Although many purist developers are tempted to not use any predefined report templates (RPT files) and create all reports on the fly, this tends to be overkill for most projects. There is a lot of work in having to programmatically make every single addition to a report. Its usually a better plan to have some RPT files as part of the application and then make some small modifications at runtime.
The other option is to use the OpenReport method, which takes a filename to an RPT file as a parameter. This opens an existing report. When using this method, the RPT files must be distributed along with the application. The advantage of having these externals files is that you can update the reports without updating the application.
The last method is to use a strongly typed report. A strongly typed report is one that is added to the Visual Basic project and turned into a DSR file. Whichever name you give that report, a corresponding programmatic object exists with the same name. For example, if you save a report as BudgetReport.DSR, you can create that report programmatically with the following code:
Dim Report As New BudgetReport
There are several advantages to using strongly typed reports. First, all report files are bound into the projects resulting executable so no external files are available for users to modify and mess up. Second, not only is the name of the report strongly typed (BudgetReport in the previous example), but also the section and report objects. For example, if you have a text object acting as a column header and you want to modify this at runtime, its very easy to access the object by name like this:
Report.ColumnHeader1.SetText "Some text"
The long-handed way of doing this would look something like this:
Dim field as CRAXDRT.FieldObject

Set field = Report.Sections("PH").ReportObjects(3)

Field.SetText "Some text"
Not only is this last method longer, youd also have to refer to the report object by index instead of name, which can become problematic. The following sections discuss some of the common tasks that are performed after a Report object is obtained.
Exporting Reports to Other File Formats
A very common requirement for application developers is to be able to export a report through their application. Not only do developers want a variety of formats, they want the export to happen in a variety of ways, for example, having the user select where to save the report, saving to a temp file and then opening it, e-mailing it to somebody else, and so on.
By being creative with exporting, you can create some very powerful applications. The Report Designer Component object model provides a very flexible API to meet these broad needs. This section covers the basics of exporting.
There are two components to exports: the format and the destination. The developer specifies both of these through the ExportOptions property of the Report object.
Setting the format options involves two steps. The first step is to choose which format you want to export to. Sometimes an application provides the user a list of export formats and lets him choose, other times the export type will be hardcoded. In any case, simply setting the FormatType property of the ExportOptions object specifies this. This property accepts a number. For example, to export to PDF, pass in 31. Remembering which number represents which format is tough so there are some enumerations with descriptive names that make this easier.
NOTE
For a full list of enumerations, consult the Crystal Reports Developers Help file and look at the CRExportFormatType enumeration in the Visual Basic object browser.
To help you get started, here are some of the more popular export format enumeration values:
- PDF: crEFTPortableDocFormat
- Word: crEFTWordForWindows
- Excel: crEFTExcel97
- HTML: crEFTHTML40
- XML: crEFTXML
Generally, all you need to do to set the format options is set the FormatType property. However, many of the format types have some additional options. For example, when exporting to Excel there is an option to indicate whether you want the grid lines shown. To handle these extra settings, there are some other properties off the ExportOptions object whose names begin with the format type. In the Excel grid lines example, the property is called ExcelShowGridLines. For PDF, there are PDFFirstPageNumber and PDFLastPageNumber properties that indicate which pages of the report you want exported to PDF. You can determine what options are available by checking out the Crystal Reports Developer Help file and looking at the ExportOptions object.
After the format is set up, you need to tell Crystal Reports where you want this report to be exported. This is called the export destination. The most common destination is simply a file on disk but there are destinations such as e-mail or Microsoft Exchange folders where reports can be automatically sent. The export destination is set via the DestinationType property of the ExportOptions object. Some example values are listed here:
- File: crEDTDiskFile
- E-mail: crEDTMailMAPI
- Exchange: crEDTMicrosoftExchange
Check out the CRExportDestinationType enumeration to see the other available options. Like the format, the destination has a set of additional options. The most obvious one is when setting the destination to a file (crEDTDiskFile), you would need to specify where you want this file and what its name should be. This is accomplished by setting the DiskFileName property. Other properties on the ExportOptions object are available such as the MailToList property, which is used to indicate who the report should be mailed to if the e-mail option is selected as the destination.
The final step in exporting is to call the Report objects Export method. It takes a single parameter: promptUser. If this is set to true, any options previously set on the ExportOptions object are ignored and a dialog appears asking the user to select the format and destination. This can be useful if you want the user to have the capability to use any export format and any destination. If you would like a more controlled environment, you can set promptUser to false. When this is done the previously selected values from the ExportOptions object are respected and the export is done without any user interaction besides a progress dialog popping up while the export is happening. This progress dialog can also be suppressed by setting the Report objects DisplayProgressDialog property to false. Listing 30.1 provides an example of a report being exported to a PDF file without any user interaction.
Listing 30.1. Exporting to PDF
Dim Report As New CrystalReport1


 Set export format

Report.ExportOptions.FormatType = crEFTPortableDocFormat


 Set any applicable options for that format

 In this case, set to only export pages 1-2

Report.ExportOptions.PDFFirstPageNumber = 1

Report.ExportOptions.PDFLastPageNumber = 2


 Set export destination

Report.ExportOptions.DestinationType = crEDTDiskFile


 Set any applicable options for the destination

 In this case, the filename to be exported to

Report.ExportOptions.DiskFileName = "C:MyReport.pdf"


 Turn all user interface dialogs off and perform the export

Report.DisplayProgressDialog = False

Report.Export False
Printing Reports to a Printer Device
Although its helpful to view reports onscreen and save some paper, many times reports still need to be printed. To accomplish this, there is a collection of methods for printing reports available from the Report object. The simplest way to print a report is to call the PrintOut method passing in true for the promptUser parameter as shown here:
Report.PrintOut True
This opens the standard Print dialog that enables the user to select the page range and then click OK to confirm the print. The limitation to this is that the pop-up dialog does not enable the user to change the destination printer. Because this is a common scenario, this method isn used very often. Instead, the PrinterSetup method is called. This method pops up a standard printer selection dialog that enables the user to change the paper orientation or printer.
Keep in mind that calling the PrinterSetup method does not actually initiate the print; it only collects the settings to be used for the print later on. Luckily it does indicate via a return value whether the user clicked the OK or Cancel button. Listing 30.2 shows an example of how to use the PrinterSetup method to set printer options.
Listing 30.2. Printing a Report Interactively
 Call PrinterSetup to set printer, paper orientation, and so on

If Report.PrinterSetupEx(Me.hWnd) = 0 Then

  If the return value is 0, the user did not click Cancel

  so go ahead with the print

 Report.PrintOut False

End If
To print a report without any user interaction, call the PrintOut method passing in false for the promptUser parameter. Options such as pages and collation can be set with the additional argument to the PrintOut method. To change the printer, call the SelectPrinter method. This accepts the printer driver, name, and port as parameters and performs the printer change without any user interaction. Listing 30.3 illustrates a silent print.
Listing 30.3. Printing a Report Silently
 Call PrinterSetup to set printer, paper orientation, and so on


 Set paper orientation

Report.PaperOrientation = crLandscape


 Set printer to print to

 pDriver -- for example: winspool

 pName -- for example: \PRINTSERVERPRINTER4

 pPort -- for example: Ne00:

Report.SelectPrinter pDriver, pName, pPort


 Initiate the print

Report.PrintOut False
Setting Report Parameters
Often reports delivered through an application need to be dynamically generated based on a parameter value. If a report with parameters is viewed, exported, or printed, a Crystal parameter prompting dialog pops up and asks the user to enter the parameter values before the report is processed. This parameter prompting dialog requires no code. The use of the object model comes into play when a developer wants to set parameters without user interaction. This is done via the ParameterFieldDefinitions collection accessed via the Report objects ParameterFields property. If all parameter values are provided before the report is processed, the parameter dialog is suppressed.
Parameters can be referenced by name or by number. To reference by name, call the ParameterFields objects GetItemByName method passing in the name of the parameter you want to access. This returns a ParameterField object. Alternatively, use the indexer on the ParameterFields object; for example, ParameterFields(1). When referencing by index, the parameters will be stored in the same order they appear in the Field Explorer window in the report designer. After a ParameterField object is obtained, simply call the AddCurrentValue method to set the parameters value as shown in Listing 30.4.
Listing 30.4. Setting Parameters
Dim Application As New CRAXDRT.Application

Dim Report As CRAXDRT.Report


 Open the report from a file

Set Report = Application.OpenReport("C:MyReport.rpt")


Dim p1 as ParameterField

Set p1 = Report.ParameterFields.GetItemByName("Geography")

p1.AddCurrentValue("Europe")


Dim p2 as ParameterField

Set p2 = Report.ParameterFields(2)

p2.AddCurrentValue(1234)
If the parameter accepts multiple values, simply call the AddCurrentValue method multiple times. For range parameters where there is a start and an end value, use the AddRangeValue method.
Sometimes a developer wants to prompt the user to enter some or all of the parameters but they want to control the user interface. Much information about the parameter can be obtained by reading its properties:
- ParameterFieldName: Name of the parameter
- ValueType: The data type of the parameter (string, number, and so on)
- Prompt: The text to use to prompt for this parameter
Also, by using the NumberOfDefaultValues property and GetNthDefaultValue method, a developer can construct her own pick-list of default parameter values that is stored in the report.
NOTE
For more information on the other properties and methods available on the ParameterField object, consult the Crystal Reports Developer Help file and look for the ParameterFieldDefinition object.
Setting Data Source Credentials
Although the sample reports that come with Crystal Reports 10 use an unsecured Microsoft Access database as their data source, most real-world reports are based on a data source that require credentials (username, password) to be passed. Also, its very common to want to change data source information such as the server name or database instance name via code. This section covers these scenarios.
Unlike parameters, there is no default-prompting dialog for data source credentials. They must be passed via code. The server name, location, database name, and username are all stored in the report. However, the password is never saved. A report will fail to run if a password is not provided.
Most reports only have a single data source but because it is possible for reports to have multiple data sources that in turn would require multiple sets of credentials, setting credentials isn something thats done on a global level. Credentials are set for each table in the report. Tables are represented by an object called a DatabaseTable inside the object model. The following code snippet illustrates the hierarchy required to get at the DatabaseTable object.
Report

 Database

 DatabaseTables

 DatabaseTable
Tables are accessed by their index, not their name. The indexes in the object model are all 1-based and are in the order you see them in the Field Explorer in the report designer. To access the first table in the report, you could do this:
Dim tbl as DatabaseTable

Set tbl = Report.Database.Tables(1)
After the correct DatabaseTable object is obtained, use the ConnectionInfo property bag to fill in valid credentials. If you do only have one data source in the report, but multiple tables from that data source, you need not set credentials for each one. The information is propagated across all tables. Listing 30.5 illustrates setting the server name, database name, username, and password for a report based off an OLEDB data source.
Listing 30.5. Setting Data Source Credentials
 Provide database logon credentials (in this case

 for an OLEDB connection to a SQL Server database)

Dim tbl as CRAXDRT.DatabaseTable

Set tbl = Report.Database.Tables(1)

tbl.ConnectionInfo("Data Source") = "MyServer"

tbl.ConnectionInfo("Initial Catalog") = "MyDB"

tbl.ConnectionInfo("User ID") = "User1"

tbl.ConnectionInfo("Password") = "abc"
Each type of data source has its own set of properties. OLEDB has a Data Source, which is the server name whereas the Microsoft Access driver has a Database Name, which is a filename to the MDB file. The ConnectionInfo property bag is introspective so you can loop through and determine what properties are available.
Mapping Unbound Fields at Runtime
Earlier in this chapter you saw that a new type of field called an unbound field can be added to the report with the Visual Basic report designer. Using the object model, these unbound fields can be mapped to database fields in the report at runtime. This is done two different ways: manually or automatically.
The manual method is to use the SetUnboundFieldSource method of the FieldObject. This method takes a single parameter, which is the name of the database field to be mapped in the Crystal field syntax, such as {Table.Field} . If a strongly typed report is being used, that is, a report added to the Visual Basic project, the UnboundField objects can be referenced as properties of the Report object. For example, an unbound field object given the default name of UnboundString1 can be referenced like this:
Report.UnboundString1.SetUnboundFieldSource "{Customer.Customer Name}"
If a report is loaded at runtime, there are no strongly typed properties so the FieldObject needs to be found under the Section and ReportObjects hierarchy. The following example gets a reference to the first unbound field in the details section:
 Dim fld As FieldObject

 Set fld = Report.Sections("D").ReportObjects(1)

 fld.SetUnboundFieldSource "{Customer.Customer ID}"
The automatic method is to simply call the Report objects AutoSetUnboundFieldSource method. This assumes that any unbound fields to be mapped are named to match a database field. Initially this might seem strange because the whole point of an unbound field is that the developer doesn know which database field it will be mapped to at design time. However, this automatic method is valuable when the database table doesn exist at design time, and instead is added at runtime based on some dynamic data.
Using the Code-Behind Events
One of the reasons that the report is saved as a DSR file instead of just an RPT file is that the DSR file contains some code that is attached to the report file. This code, often called code-behind, is event-handing code for several events that the report engine fires. The following list describes events that are fired and their corresponding uses:
- Initialize (Report): Fired when the report object is first created. This event can be useful for performing initialization-related tasks.
- BeforeFormatPage/AfterFormatPage (Report): Fired before and after a page is processed; can be useful for indicating progress.
- NoData (Report): Fired when a report is processed but no records were returned from the data source. Sometimes a report with no records is meaningless and thus should be skipped or the user should be warned; this event is a great way to handle that.
- FieldMapping (Report): Fired when the database is verified and there has been a schema change; this event enables you to remap fields without user interaction.
- Format (Section): Fired for the rendering of each section. This is useful for handling the detail sections event and performing conditional logic.
Part I. Crystal Reports Design
Creating and Designing Basic Reports
- Creating and Designing Basic Reports
- Introducing the Crystal Reports Designer
- Understanding Data and Data Sources
- Introduction to the Data Explorer
- Adding Database Objects to Your Report
- Joining Database Objects Together
- Understanding the Different Join Types
- Using the Report Creation Wizards
- Understanding the Crystal Reports Gallery
- Using the Standard Report Creation Wizard
- Creating a Report Without Wizards
- Troubleshooting
Selecting and Grouping Data
- Selecting and Grouping Data
- Introduction
- Understanding Field Objects
- Working with Groups
- Understanding Drill-down Reports
- Troubleshooting
Filtering, Sorting, and Summarizing Data
- Filtering, Sorting, and Summarizing Data
- Introduction
- Filtering the Data in Your Report
- Learning to Sort Records
- Working with the Sort Expert
- Creating Effective Summaries
- Troubleshooting
Understanding and Implementing Formulas
- Understanding and Implementing Formulas
- Introduction
- Using the Formula Workshop
- Using the Workshop Formula Editor
- Creating Formulas with the Formula Expert
- Using the Formula Extractor to Create Custom Functions
- The Multi-Pass Reporting Process of the Crystal Reports Engine
- Troubleshooting
Implementing Parameters for Dynamic Reporting
- Implementing Parameters for Dynamic Reporting
- Introduction
- Understanding the Value of Parameters
- Creating and Implementing Parameters Fields
- Using Parameters with Record Selections
Part II. Formatting Crystal Reports
Fundamentals of Report Formatting
- Fundamentals of Report Formatting
- Introduction
- Positioning and Sizing Report Objects
- Modifying Object Properties for Formatting Purposes
- Exploring the Format Editor Dialog Common Options
- Combining and Layering Report Objects
- Configuring Report Page and Margin Properties
Working with Report Sections
- Working with Report Sections
- Introduction
- Formatting Report Sections
- Modifying Report Section Properties
- Using Multiple Report Sections
- Troubleshooting
Visualizing Your Data with Charts and Maps
- Visualizing Your Data with Charts and Maps
- Introduction to Charts and Maps
- Using the Chart Expert
- Using the Map Expert
- Modifying Chart and Map Properties
- Troubleshooting
Custom Formatting Techniques
- Introduction
- Making Presentation-Quality Reports
- Common Formatting Features
- Conditional Formatting Using Data to Drive the Look of a Report
Part III. Advanced Crystal Reports Design
Using Cross-Tabs for Summarized Reporting
- Using Cross-Tabs for Summarized Reporting
- Introduction to Cross-Tabs
- Benefits of Cross-Tabs
- Using the Cross-Tab Wizard
- Using Top N with Cross-Tabs Reports
- Using Advanced Cross-Tab Features
Using Record Selections and Alerts for Interactive Reporting
- Using Record Selections and Alerts for Interactive Reporting
- Creating Advanced Record Selection Formulas
- Adding Alerting to Your Reports
- Performance Monitoring and Tuning
Using Subreports and Multi-Pass Reporting
- Using Subreports and Multi-Pass Reporting
- Understanding Subreports
- Understanding Linked Versus Unlinked Subreports
- Considering Subreport Execution Time and Performance
- Using Variables to Pass Data Between Reports
- Emulating Nested Subreports
- Troubleshooting
Using Formulas and Custom Functions
- Using Formulas and Custom Functions
- Becoming More Productive with Formulas
- Choosing a Formula Language: Crystal Versus Basic Syntax
- Using Brackets in Formulas
- Using Characters in Formulas
- Recent Improvements to Formulas
Designing Effective Report Templates
- Designing Effective Report Templates
- Understanding the Importance of Reuse in Reporting
- Understanding Report Templates
- Using Report Templates
- Using Existing Crystal Reports as Templates
- Understanding How Templates Work
- Creating Useful Report Templates
- Using Template Field Objects
- Using Report Templates to Reduce Report Creation Effort
- Applying Multiple Templates
Additional Data Sources for Crystal Reports
- Additional Data Sources for Crystal Reports
- Understanding the Additional Crystal Reports Data Sources
- Connecting to COM-based Data Sources
- Connecting to Java-based Data Sources
- Understanding Solution Kits for Crystal Enterprise
- Troubleshooting
Multidimensional Reporting Against OLAP Data with Crystal Reports
- Multidimensional Reporting Against OLAP Data with Crystal Reports
- Introduction to OLAP
- OLAP Concepts and OLAP Reporting
- Recently Added or Changed OLAP Features in Crystal Reports
- Using the OLAP Report Creation Wizard and OLAP Expert
- Advanced OLAP Reporting
- Introduction to Crystal Analysis
Part IV. Enterprise Report Design Analytic, Web-based, and Excel Report Design
Introduction to Crystal Repository
- Introduction to Crystal Repository
- What Is the Crystal Repository?
- Why Implement the Crystal Repository?
- Installing the Crystal Repository
- Adding Objects to and from the Repository
- Migration of the Crystal Enterprise Repository
- Troubleshooting
Crystal Reports Semantic Layer Business Views
- Crystal Reports Semantic Layer Business Views
- Introduction to Business Views
- Why Implement Business Views?
- Performance and Implementation Considerations
- Business Views Architecture and Implementation
- Troubleshooting
Creating Crystal Analysis Reports
- Creating Crystal Analysis Reports
- Introduction
- Introducing Crystal Analysis
- Accessing OLAP Data with Crystal Analysis
- Designing Crystal Analysis Reports and Applications
- Adding Crystal Analysis Objects to a Report
- Troubleshooting
Advanced Crystal Analysis Report Design
- Advanced Crystal Analysis Report Design
- Introduction
- Advanced Crystal Analysis Designer Tools
- Custom Calculations and Advanced Data Analysis
- Setting Report Options
- Troubleshooting
- Crystal Analysis in the Real World MDX
Ad-Hoc Application and Excel Plug-in for Ad-Hoc and Analytic Reporting
- Ad-Hoc Application and Excel Plug-in for Ad-Hoc and Analytic Reporting
- Introducing Ad-Hoc Reporting Conceptually
- Introducing the Crystal Enterprise Ad-Hoc Reporting Application
- Crystal Reports Excel Plug-in
- Crystal Analysis Excel Plug-in
Part V. Web Report Distribution Using Crystal Enterprise
Introduction to Crystal Enterprise
- Introduction to Crystal Enterprise
- What Is Crystal Enterprise?
- Why Implement a Crystal Enterprise Solution?
- Versions of Crystal Enterprise
- Understanding the Core Functions of Crystal Enterprise
Using Crystal Enterprise with Web Desktop
- Using Crystal Enterprise with Web Desktop
- Introduction
- Crystal Enterprise User Launchpad
- Crystal Enterprise Web Desktop
- Customizing the Web Desktop and Report Viewers
- Publishing to the Web Desktop
- Customizing the Web Desktop
- Troubleshooting
Crystal Enterprise Architecture
- Crystal Enterprise Architecture
- Introduction
- Crystal Enterprise Architecture Overview
- The Client Tier
- The Application Tier
- The Server Tier: Introduction to the Crystal Enterprise Framework
- The Server Tier: Overview of the Crystal Enterprise Services
- The Data Tier
- The Crystal Enterprise Architecture in Action
- Taking Advantage of the Crystal Enterprise Distributed Architecture
- Extending Crystal Enterprise
Planning Considerations When Deploying Crystal Enterprise
- Planning Considerations When Deploying Crystal Enterprise
- Ensuring a Successful Crystal Enterprise Implementation
- Approaching the Project
- Identifying Business Pain
- Establishing Project Requirements
- Understanding Organizational Reporting Requirements
- Troubleshooting
Deploying Crystal Enterprise in a Complex Network Environment
- Deploying Crystal Enterprise in a Complex Network Environment
- Introduction
- Understanding Network Protocols
- Understanding Firewall Types
- Configuring the Crystal Enterprise Architecture for Your Network Environment
- Interaction Between the WCS and the WC
- Deploying Crystal Enterprise with an IP Packet Filtering Firewall
- Using Crystal Enterprise with NAT
- Exploring the NAT and Crystal Enterprise Relationship
- Crystal Enterprise and Proxy Servers
Administering and Configuring Crystal Enterprise
- Introduction
- Using the Crystal Management Console
- Managing Accounts
- Managing Content
- Introducing Servers
- Managing Crystal Enterprise System Settings
- Using the Crystal Configuration Manager
Part VI. Customized Report Distribution Using Crystal Reports Components
Java Reporting Components
- Java Reporting Components
- Overview of the Crystal Reports Java Reporting Component
- Understanding the Java Reporting Components Architecture
- Differences with the Java Reporting Engine
- Configuring the Application Server
- Delivering Reports in Web Applications
- Using the Crystal Tag Libraries
- Exporting Reports to Other File Formats
- Printing Reports from the Browser
- Common Programming Tasks
- Troubleshooting
Crystal Reports .NET Components
- Crystal Reports .NET Components
- Understanding Microsofts .NET Platform
- Understanding the Different Crystal .NET Components
- An Overview of the Crystal Reports 10 .NET Components
- The Report Designer
- The Report Engine Object Model
- Delivering Reports with the Windows Forms Viewer
- Delivering Reports with the Web Forms Viewer
- Database Credentials
- Setting Parameters
- Troubleshooting
COM Reporting Components
- COM Reporting Components
- Understanding the Report Designer Component
- Building Reports with the Visual Basic Report Designer
- Programming with the Report Engine Object Model
- Delivering Reports Using the Report Viewer
- Troubleshooting
Part VII. Customized Report Distribution Using Crystal Enterprise Embedded Edition
Introduction to Crystal Enterprise Embedded Edition
- Introduction to Crystal Enterprise Embedded Edition
- Introduction to Crystal Enterprise Embedded Edition
- Understanding Crystal Enterprise Embedded Edition
- Crystal Enterprise Embedded Edition Samples
- DHTML Report Design Wizard
- Troubleshooting
Crystal Enterprise Viewing Reports
- Crystal Enterprise Viewing Reports
- Viewing Reports over the Web
- Introduction to the Crystal Report Viewers
- Understanding the Report Source
- Implementing the Page Viewer
- Implementing the Part Viewer
- Implementing the Interactive Viewer
- Implementing the Grid Viewer
- Troubleshooting
Crystal Enterprise Embedded Report Modification and Creation
- Introduction
- Deploying RAS Environments
- Loading Report Files
- Locating RAS Components in a Network Architecture
- Installing the RAS SDK
- Best Practices in RAS Exception Handling
- The RAS SDK in Action
Part VIII. Customized Report Distribution Using Crystal Enterprise Professional
Introduction to the Crystal Enterprise Professional Object Model
- Introduction to the Crystal Enterprise Professional Object Model
- Understanding the Crystal Enterprise Object Model
- Establishing a Crystal Enterprise Session
- Querying the Crystal Enterprise Repository
- Viewing Reports
- The Crystal Enterprise Java SDK
- Accessing the Java SDK
- Troubleshooting
Creating Enterprise Reports Applications with Crystal Enterprise Part I
- Creating Enterprise Reports Applications with Crystal Enterprise Part I
- Advanced Scenarios with the Crystal Enterprise Object Model
- Scheduling Reports
- Scheduling to a Destination
- Using Crystal Enterprise Notifications
- Scheduling to a Server Group
- Scheduling to a Specific Format
- Setting Database Credentials
- Troubleshooting
Creating Enterprise Reporting Applications with Crystal Enterprise Part II
- Creating Enterprise Reporting Applications with Crystal Enterprise Part II
- Querying the Crystal Enterprise InfoStore
- Creating and Responding to Crystal Enterprise Alerts
- Creating Schedulable Program Objects
- Troubleshooting
Appendix A. Using Sql Queries In Crystal Reports
Creating Enterprise Reporting Applications with Crystal Enterprise Part II
EAN: 2147483647
Pages: 341
