Objective 6. Create Headers and Footers

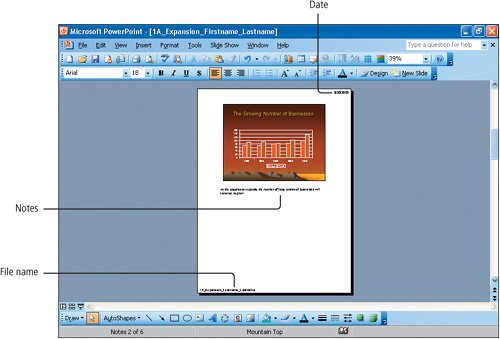
A header is text that displays at the top of every slide or that prints at the top of a sheet of slide handouts or notes pages. Slide handouts are printed images of more than one slide on a sheet of paper. Notes pages are printouts that contain the slide image in the top half of the page and notes that you have created in the Notes pane in the lower half of the page.


[Page 1170]

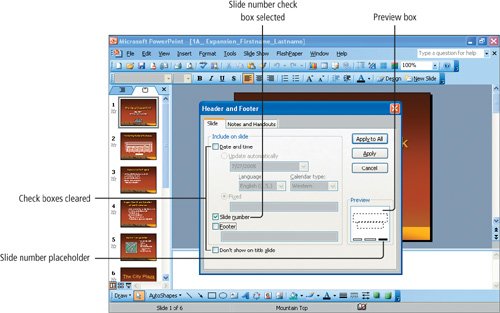
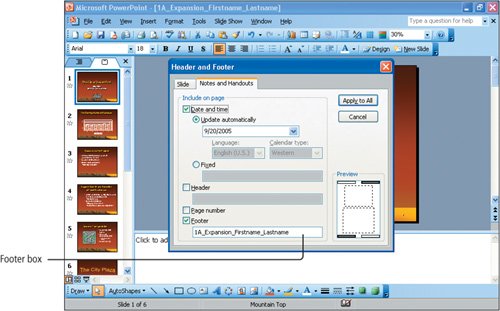
In addition to headers, you can also create footerstext that displays at the bottom of every slide or that prints at the bottom of a sheet of slide handouts or notes pages. In this activity, you will add the slide number to the footer on Slides 1 through 5. You will add to the handouts and notes pages a header that includes the current date and a footer that includes your name and the file name.

Activity 1.19. Creating Headers and Footers on Slides

1.

If necessary, Open your file 1A_Expansion_Firstname_Lastname and verify that Slide 1 is displayed in Normal View .

2.

On the menu bar, click View, and then click Header and Footer to display the Header and Footer dialog box.

At the top of this dialog box, two tabs displaySlide and Notes and Handouts.

3.

Click the Slide tab, which contains options to place the header or footer on the actual sliderather than on the printed handout. Then, locate the Preview box in the lower right corner of the dialog box and note the pattern of boxes. As you make changes in the dialog box, the Preview box will change accordingly.

4.

Under Include on slide, select (click to place a check mark in) the Slide number check box, and as you do so, watch the Preview box.

The Preview box in the lower right corner of the dialog box indicates the placeholders on a slide. Recall that a placeholder reserves a location on a slide for text or graphics. The three narrow rectangular boxes at the bottom of the Preview box indicate placeholders for footer text. When you clicked the Slide number check box, the placeholder in the far right corner is filled, indicating the location in which the slide number will display.

5.

If necessary, clear the Date and time check box so that a check mark does not display, and then clear the Footer check box. Notice that in the Preview box, the first two small rectangles are no longer solid black.


[Page 1171]

6.

Compare your dialog box to Figure 1.30, and then in the upper right corner of the dialog box, click the Apply to All button. This will display the slide number on all the slides in the presentationnot just the selected slides.

Figure 1.30.


7.

In the Slide pane, at the lower end of the vertical scroll bar, click the Next Slide button to display each slide and view the slide number in the lower right corner of each slidewith the exception of Slide 6.

8.

Display Slide 6.

The slide number does not display, and the background formatting is different from the other slides in the presentation. Special formatting on this slide suppresses (prevents from displaying) some elements such as headers and footers and the mountain range border that are present on the first five slides of the presentation. You will learn how to suppress these elements in a later chapter.

9.

Save the presentation.

Activity 1.20. Creating Headers and Footers on Handouts and Notes Pages

1.

Display the View menu, and then click Header and Footer to display the Header and Footer dialog box. Click the Notes and Handouts tab, which contains options to apply the header and footer that you create to the notes pages and handoutsand not to the actual slides.


[Page 1172]

2.

Under Include on page, make sure there is a check mark in the Date and time check box (click to add one if necessary), and then click to select the Update automatically option button.

The current date, Language, and Calendar type display in the appropriate boxes. The Update automatically option will insert the current date on your printed notes and handouts. The date is determined by your computers internal calendar and clock. Thus, every time the presentation is opened, the current date displays. Conversely, clicking the Fixed option button inserts a date that you type, and which does not update.

More Knowledge: Changing the Date Format

You can change the format of the date that displays by clicking the arrow to the right of the date box, and then choosing a date format. You can also change the Language that you wish to display.

3.

If necessary, clear the Header and Page number check boxes to omit these elements from the header and footer. Notice that in the Preview box, the corresponding placeholders are no longer selected.

4.

If necessary, select the Footer check box, and then click to position the insertion point in the Footer box. See Figure 1.31, and then using your own first and last name, type 1A_Expansion_Firstname_Lastname

Figure 1.31.


[Page 1173]

5.

In the upper right corner of the Header and Footer dialog box, click Apply to All so that each printed sheet displays the header and footer that you created.

6.

Display Slide 2. From the View menu, click Notes Pages to display the current slide in the Notes Page view. Notice the date in the upper right corner, and the file name in the lower left corner. See Figure 1.32.

Figure 1.32.


7.

To return to Normal View, in the lower left corner of the PowerPoint window click the Normal View button .

8.

Save the presentation.


[Page 1173 (continued)]

Windows XP

Outlook 2003

Internet Explorer

Computer Concepts

Word 2003

Chapter One. Creating Documents with Microsoft Word 2003

Chapter Two. Formatting and Organizing Text

Chapter Three. Using Graphics and Tables

Chapter Four. Using Special Document Formats, Columns, and Mail Merge

Excel 2003

Chapter One. Creating a Worksheet and Charting Data

Chapter Two. Designing Effective Worksheets

Chapter Three. Using Functions and Data Tables

Access 2003

Chapter One. Getting Started with Access Databases and Tables

Chapter Two. Sort, Filter, and Query a Database

Chapter Three. Forms and Reports

Powerpoint 2003

Chapter One. Getting Started with PowerPoint 2003

Chapter Two. Creating a Presentation

Chapter Three. Formatting a Presentation

Integrated Projects

Chapter One. Using Access Data with Other Office Applications

Chapter Two. Using Tables in Word and Excel

Chapter Three. Using Excel as a Data Source in a Mail Merge

Chapter Four. Linking Data in Office Documents

Chapter Five. Creating Presentation Content from Office Documents


Go! With Microsoft Office 2003 Brief
GO! with Microsoft Office 2003 Brief (2nd Edition)
ISBN: 0131878646
EAN: 2147483647
Year: 2004
Pages: 448

Flylib.com © 2008-2020.
If you may any questions please contact us: flylib@qtcs.net