Formatting is the process of changing the appearance of the text, layout, and design of a slide. Formatting text includes changing the style and size of the text, applying bold, italic, and underline, and enhancing text with effects such as shadows and embossing.
Activity 3.1. Changing Fonts and Font Sizes
A font is a set of characters with the same design and shape. Examples of fonts include Arial, Times New Roman, and Tahoma. Fonts are measured in points (abbreviated as pt.), with one point equal to 1/72 of an inch. A greater point size indicates a larger font size. Formatting changes are easier to view when the Slide pane is the only pane active in your PowerPoint window. Thus, in this activity you will change fonts and font sizes using the Slide pane.
1.
Start PowerPoint and from your student files, Open the file p03A_Emergency. If you want, create a Chapter 3 folder. From the File menu, click Save As. Save the file as 3A_Emergency_ Firstname_Lastname and be sure to use your name in place of the words Firstname Lastname. Close the Outline/Slides pane.
2.
Display Slide 2. In the title, double-click anywhere in the word Mission to select the entire word.
3.
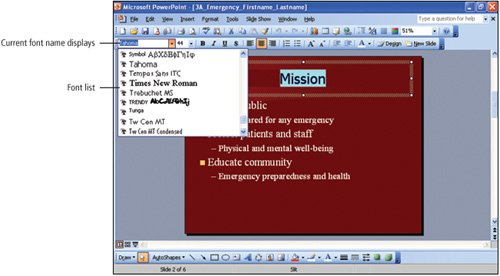
On the Formatting toolbar, click the Font arrow.
The current font is Tahoma. The font list displays the fonts available on your system. Figure 3.2 shows that each font name is displayed in its actual style so that you have an immediate picture of how the font will appear in your slide show and on your printed page.
[Page 1273]
Figure 3.2.
4.
Take a moment to view the various fonts available on your system by dragging the scroll box in the font list. The fonts are listed alphabetically. In the Font list, click Times New Roman to format the selection in the Times New Roman font.
5.
With the text in the title placeholder still selected, on the Formatting toolbar, click the Font Size arrow. Scroll down the Font Size list, and then click 48 to increase the font size by 4.
6.
Save the file.
NoteSizing the Font
The Font Size list displays default values for applying font sizes. You can click in the Font size box and type any font size directly into the box.
Activity 3.2. Replacing Fonts
In this presentation, much of the text is formatted in the Times New Roman font. Rather than selecting the text on each slide and changing it to the Arial font, you can use the Replace Fonts command to change all occurrences of a font to a different font.
1.
On the menu bar, click Format, and then click Replace Fonts.
2.
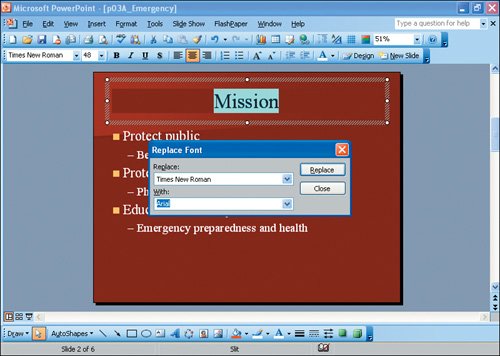
In the Replace Font dialog box, click the Replace arrow to display the fonts currently applied in the presentation. Click Times New Roman to indicate the font that you wish to replace.
[Page 1274]
3.
Click the With arrow, and then scroll the font list. Click Arial to indicate the new font to be used in the presentation, as shown in Figure 3.3. Click Replace, and then click Close. Scroll through your slides and notice the change in the fonts on each slide.
Figure 3.3.
4.
Save the file.
Activity 3.3. Changing Font Styles and Font Effects
Font styles and font effects are used to emphasize text using bold, italic, underline, and shadows. You can apply font formatting options by using the Font dialog box, keyboard shortcuts, or by using the Bold, Italic, Underline, or Shadow buttons on the Formatting toolbar. The Bold, Italic, Underline, and Shadow buttons are toggle buttons on the toolbar. A toggle button works similar to a light switch. The button is clicked once to turn the feature on, and the button is clicked again to turn the feature off. Other font effects such as embossing, superscript, and subscript can be accessed from the Font dialog box.
1.
Display Slide 2 and click anywhere in the bulleted list placeholder. Press and hold down and then click in the first bullet pointProtect public. Do not click the bullet in front of the text.
The first bulleted line is selected. Recall that pressing and holding down and then clicking in a line selects the entire line. This action does not include subordinate bullet points in the selection.
2.
On the Formatting toolbar, click Bold to apply bold to the selection. Click anywhere on the slide to cancel the selection and notice the formatting applied to the first line.
[Page 1275]
3.
Double-click the title to select it, and then on the Formatting toolbar, click Shadow. Click to cancel the selection and notice the slight shadowing effect applied to the title. In this presentation, the dark background does not provide sufficient contrast to view the text shadow effectively.
4.
Recall that the Shadow button is a toggle button. Double-click the title again to reselect it. On the Formatting toolbar, click Shadow to remove the shadow effect.
5.
You can apply more than one font style or effect to a selection. Select the first bullet pointProtect public. Do not select the subordinate bullet. On the Formatting toolbar, click Italic, and then click Underline. Click to cancel the selection and notice that the entire line is formatted in bold, italic, and underline.
6.
To use the keyboard shortcut to remove some of the font formatting that you have applied, select the first bullet pointProtect publicagain. Press and hold down and then press once to remove the underline from the selection. Click to cancel the selection.
7.
In the first bullet, select the word public but do not select the word Protect. Press and hold down and then press once to remove the bold formatting. With the text still selected, on the Formatting toolbar click Italic to remove the italic formatting. Click to cancel the selection and view the first bullet point.
The word Protect is the only text that contains the bold and italic formatting.
8.
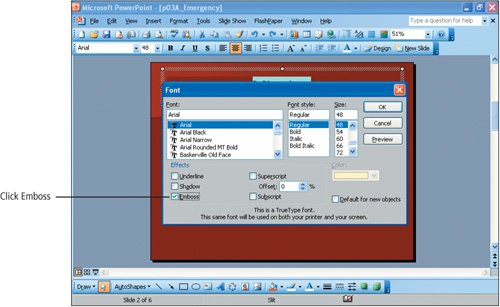
Double-click the word Mission to select it. On the menu bar, click the Format menu, and then click Font. Under Effects, click to place a check mark in the Emboss check box, as shown in Figure 3.4. Click OK to apply the formatting to the selection, and then click to cancel the selection, noticing the formatting that is applied to the selection.
[Page 1276]
Figure 3.4.
9.
The Emboss formatting is not effective on this background. On the Standard toolbar, click Undo to remove the format.
10.
Save the file.
Activity 3.4. Using the Repeat Key
You can use the function key to repeat the last command or series of keystrokes that you have performed. If you type a word and press , the word will be repeated. Similarly, you can apply bold to a selection of text, and then, using the repeat function, apply bold to a different selection of text.
1.
If necessary, display Slide 2, and then in the third bullet point, select the first wordProtect.
2.
On the menu bar, click Format, and then click Font. Under Font style, click Bold Italic, and then click OK.
3.
In the fifth bullet point, select the first wordEducateand then press .
The word Educate is formatted in bold and italic. Because the formatting was applied from the dialog box, both the bold and italic formats were repeatedthe two formats were treated as one action. The first words of each of the first-level bullet points are now formatted with bold and italic.
4.
Save your file.
[Page 1277]
Activity 3.5. Changing Font Colors
Recall that every design template consists of a color schemea palette of eight coordinated colors that includes background, text, fill, and accent colors. The color scheme for this template includes placeholder text in white. As you view Slide 2, notice that the first word of each bullet is emphasized with the bold and italic formatting that you applied. To further emphasize these words, you can change the font color.
1.
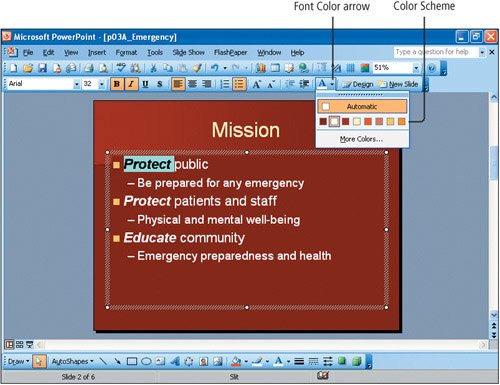
Display Slide 2 and then, in the first bullet point, select the first wordProtect. On the Formatting toolbar, click the Font Color arrow to display the eight colors in the design template color scheme, as shown in Figure 3.5.
Figure 3.5.
NoteDisplaying the Color Palette
Be sure to click the arrow, not the button itself. Clicking the Font Color button applies to your selected text the color that displays below the letter A on the button.
2.
Point to each of the colors in the color scheme and read the ScreenTip that displays, indicating the usage of each of the colors in the template.
You are not limited to using these colors, but if you use one of the colors in the color scheme, you can be sure that it will coordinate with all of the other colors in the presentation.
[Page 1278]
3.
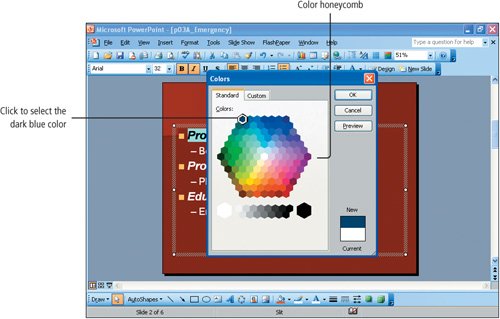
Below the color palette, click More Colors, and if necessary, click the Standard tab to display the Colors dialog box with a honeycomb of colors.
4.
In the first row of the honeycomb, click the first colordark blue, as shown in Figure 3.6. Click OK.
Figure 3.6.
Click to cancel the selection and view your color change. Notice that this color is very dark and does not draw focus to the selection.
5.
Select the word Protect again and on the Formatting toolbar, click the Font Color arrow.
Notice that the dark blue color that you applied displays below the original color palette indicating that this color was applied somewhere in the presentation. The ScreenTip Custom Color displays when you point to this color.
6.
In the original color scheme palette, click the last color squareorangeand then click elsewhere in the slide to cancel the selection.
Notice that this color emphasizes the word Protect and creates a focal element on the slide.
7.
In the third bullet point, select the word Protect and then press to repeat the font color selection. In the fifth bullet point, select the word Educate, and then press again to repeat the font color selection. Click elsewhere in the slide to cancel the selection, and then compare your slide to Figure 3.7.
[Page 1279]
Figure 3.7.
As you read this slide, notice the difference in tone that the orange, bold, and italic create when applied to the first word of each bullet. Using color and font styles, you can effectively create emphasis and focus, and you can change the tone of your presentation.
8.
Save the file.
Activity 3.6. Copying Formatting Using Format Painter
Format Painter copies formatting from one selection of text to another. This differs from copy and paste in that the text itself is not copied. Instead, only the formatting of the selected text is copied. In this activity, you will use Format Painter to copy formatting to a single selection of text and also to multiple selections of text.
1.
If necessary, Open your file 3A_Emergency_Firstname_Lastname.
2.
Display Slide 2, and in the first bullet point, double-click to select the first wordProtect. This word is formatted in bold and italic, and the font color is orange.
3.
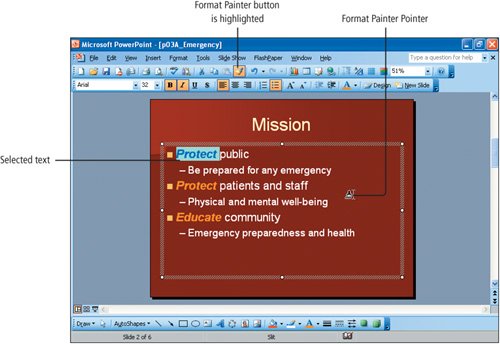
On the Standard toolbar, click the Format Painter button . Move the pointer away from the Format Painter button and notice that the Format Painter button is highlighted. Additionally, the mouse pointer appears as an I-beam with a small paintbrush attached to it, as shown in Figure 3.8.
[Page 1280]
Figure 3.8.
4.
Do not click anywhere in the slide. Instead, move the pointer to the vertical scroll bar and notice that the pointer displays as a left-pointing arrow. Drag the scroll box down so that Slide 5 displays. Move the pointer back into the Slide pane and notice that the Format Painter pointer displays again.
5.
In the first bullet point, drag to the right to select Mobile emergency trailers. Release the mouse button and click elsewhere on the slide to cancel the selection.
The Format Painter button is no longer highlighted and the words Mobile emergency trailers are formatted with the same formatting as the word Protect in Slide 2.
6.
On Slide 5, and in the first bullet point select the first wordMobile. On the Standard toolbar, double-click the Format Painter button .
Double-clicking the Format Painter button will cause it to remain active until it is clicked again to turn it off.
7.
In the second, first-level bullet point, drag the pointer over the words Rapid response and then release the mouse button.
The format is applied to the selection. Move your pointer anywhere away from the selection and verify that the paintbrush is still attached to the pointer. This indicates that Format Painter is still active.
[Page 1281]
Alert!: Has the Paintbrush Disappeared from Your Pointer?
If you do not see the paintbrush, it is likely that your hand moved slightly when you attempted your double-click of the Format Painter button, and it was interpreted as a single click. Double-click the Format Painter button again.
8.
Drag your pointer over the words Teams ready to deploy and then release the mouse button to apply the formatting.
9.
Click the Format Painter button once to turn it off, and then click elsewhere on your slide to cancel the selection and view the formatting changes.
10.
Save your file.
Alert!: Don Forget to Turn Off Format Painter!
When you use Format Painter for multiple selections, do not forget to click the Format Painter button or press to turn it off. Otherwise you will continue to paint your presentation text!
Activity 3.7. Changing Text Case
Text Case refers to text capitalization. Text can be changed to all lowercase, all uppercase, sentence case, or title case. You can change text case using the Change Case command on the Format menu, or you can use the keyboard shortcut. The table in Figure 3.9 describes each case option in PowerPoint.
Figure 3.9. Text Case Options
Case Option
Description
Sentence case
The first letter of the sentence is capitalized.
Lowercase
Text is not capitalized.
Uppercase
Text is in all capital letters.
Title case
The first letter of every word is capitalized.
Toggle case
Uppercase letters in the selection are changed to lowercase, and lowercase letters are changed to uppercase.
1.
If necessary, Open your file 3A_Emergency_ Firstname_Lastname.
2.
Display Slide 1 and select the text in the subtitle placeholderKeeping our community safe. On the menu bar, click the Format menu, and then click Change Case. Click Title Case to capitalize the first letter of each word. Click OK.
[Page 1282]
3.
Select the title text. Press and hold down and then press to display the title text in uppercase.
4.
Press again to display the title text in all lowercase.
5.
Press again.
The text displays in title case. The keyboard shortcut rotates through these three case options. Click to cancel the selection and then compare your slide to Figure 3.10.
Figure 3.10.
6.
Save your file.
Activity 3.8. Changing Text Alignment
Alignment refers to the horizontal position of the text between the left and right edges of a placeholder. There are four alignment options in PowerPointAlign Left, Center, Align Right, and Justify. You can change alignment by using an alignment button on the Formatting toolbar, by clicking the Format menu and then clicking Alignment, or by using a keyboard shortcut. In this activity, you will change the alignment of the title placeholder on the first and last slides.
1.
Display Slide 6, and then click in the title placeholder. Notice in the Formatting toolbar that the Center button is highlighted. This indicates that the line in which the insertion point is positioned is center aligned.
[Page 1283]
2.
On the Formatting toolbar, click Align Right.
Although the title displays on two lines, it is treated as one line because when it was typed, the key was not pressed after the word Response. Thus, the entire title is right aligned. Aligning the title at the right edge of the slide is a subtle change that makes the slide more interesting.
3.
Display Slide 1, and then click in the title placeholder. Press and hold down , and then press .