In Normal View, the PowerPoint window is divided into three areasthe Slide pane, the Outline/Slides pane, and the Notes pane. When you make changes to the presentation in the Outline/Slides pane, the changes are reflected immediately in the Slide pane. Likewise, when you make changes in the Slide pane, the changes are reflected in the Outline/Slides pane.
1. | Start PowerPoint. On the Standard toolbar, click the Open button  . .
|
2. | In the Open dialog box, click the Look in arrow, and then navigate to the location where you are storing your files. Click to select your file 1A_Expansion_Firstname_Lastname. Be sure that you click the file that contains your name.
|
3. | In the lower right corner of the Open dialog box, click the Open button. Alternatively, you can double-click the name of the file to open it.
|
4. | At the lower left corner of the window, locate the View buttons, and check to be sure that your presentation is displayed in Normal View. If necessary, click the Normal View button  . .
In Normal View, the left side of your window displays the Outline/Slides pane. When the Outline tab is active, you can enter and edit text in your presentation. When the Slides tab is active, thumbnails of your presentation display and you can copy, move, and delete entire slides.
|
|
[Page 1153] |
5. | In the Outline/Slides pane, click the Slides tab so that the thumbnail image of each slide is displayed.
Alert!: Does Your Screen Differ?
When you open a file, the presentation displays in the view in which it was last saved.
|
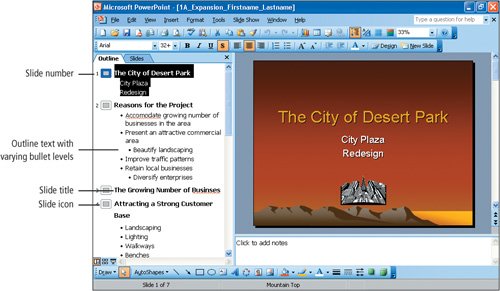
6. | Click the Outline tab to display the text of the presentation in outline format.
The slide numbers in the outline are followed by a small picture called the slide icon. See Figure 1.16. The slide number and slide icon indicate the start of a new slide in your presentation. Notice also that the text displays with indents and bullets similar to an outline that you would type in a word processor. PowerPoint uses these indents to determine the outline level in a slide. Misspelled words are flagged with a red wavy underline.
Figure 1.16.
|
7. | Move your mouse pointer into the text in the Outline tab, and notice that your pointer displays as an I-beam pointer  , indicating that you are pointing to a text area in the Outline/Slides pane or in the Slide pane. , indicating that you are pointing to a text area in the Outline/Slides pane or in the Slide pane.
|
| |
8. | In the Outline tab, position your I-beam pointer in the first slide after the word Redesign and then click the left mouse button to position the insertion pointthe blinking vertical bar that indicates where text will be inserted when you typeat this location. Press  and then type and Expansion and then type and Expansion
[Page 1154]
Notice that as you type, the changes are also made in the Slide pane.
|
9. | In the Outline tab, locate Slide 2, and then pause the mouse pointer over the second bullet symbol so that a four-headed arrow displays, as shown in Figure 1.17. Click the left mouse button.
Figure 1.17.
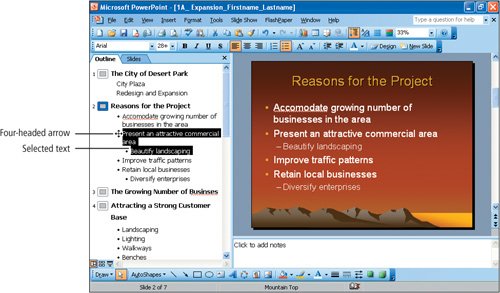
Notice that the bulleted item and the subordinate (lower-level) bullet below this item are both selected (highlighted in black). Clicking on a bullet selects the bulleted item and all subordinate text.
|
10. | On your keyboard, press  to delete the selected text. to delete the selected text.
|
11. | On the Standard toolbar, click the Save button  . .
The changes you have made to your presentation are saved. When you click the Save button, your file is stored to the same drive and folder, with the same file name.
|
Text in a PowerPoint presentation is organized according to outline levels, similar to the outline levels you might make for a book report. The highest level on an individual slide is the title. Bulleted levels (outline levels identified by a symbol) are identified in the slides by the indentation and the size of the text. Indented text in a smaller size indicates a lower outline level. It is easy to change the outline level of text to a higher or lower level. For example, you might create a presentation with four bullets on the same level. Then you might decide that one bulleted item relates to one of the other bullets, rather than to the slide title. In this case, a lower outline level should be applied. You can demote text to apply a lower outline level, or promote text and apply a higher outline level. Or, you can begin a new slide by promoting bulleted text to a slide title.
1. | On the right side of the Outline tab, point to the vertical scroll bar, press and hold down the left mouse button, and then drag down until you can view all of the text in Slide 6.
|
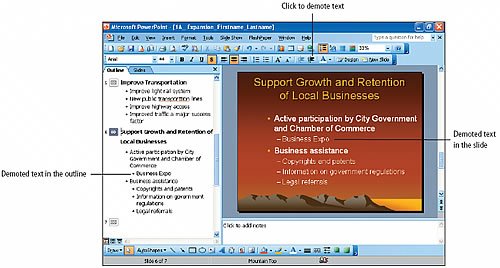
2. | In the Slide 6 text, click to position the insertion point anywhere in the second bulleted lineBusiness Expo. On the Formatting toolbar, click the Increase Indent button  . .
The bulleted item is demoted and displays as a lower outline level under the first bullet. See Figure 1.18.
Figure 1.18.
|
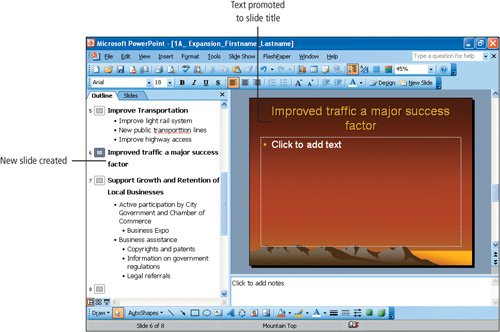
3. | In the Outline tab, locate Slide 5, and then click anywhere in the last bulleted itemImproved traffic a major success factor.
Slide 5 displays in the Slide pane. Notice that all of the bulleted items are at the highest bullet level, including the last itemImproved traffic a major success factor.
|
| |
4. | On the Formatting toolbar, click Decrease Indent to promote the item one outline level.
The bulleted item is deleted from the slide, and a new Slide 6 is created with the title Improved traffic a major success factor. When a bulleted item at the highest level is promoted, it is promoted to a title slide and a new slide is created. See Figure 1.19.
[Page 1156]
Figure 1.19.
|
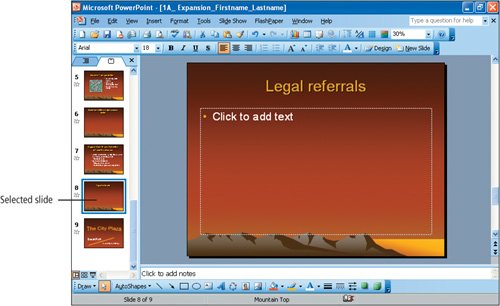
5. | In the Outline tab, on Slide 7, click anywhere in the last bulleted lineLegal referrals.
|
6. | On the Formatting toolbar, click Decrease Indent to apply a higher outline level. Click Decrease Indent again to create a new Slide 8 with the title Legal referrals.
The newly created Slide 8 displays in the Slide pane.
|
7. | On the Standard toolbar, click the Save button to save the changes you have made to your presentation file.
|
In this activity, you will delete Slide 8.
It is easy to change the order of the slides in your presentation using the Slides tab.
1. | In the Outline/Slides pane, if necessary click the Slides tab to display the slide thumbnails. Click to select the thumbnail image for Slide 7.
|
| |
2. | Point to the selected slide, press and hold down the left mouse button, drag the mouse upward, and notice the horizontal line that displays as you move the mouse. With the horizontal line positioned between Slides 4 and 5 as shown in Figure 1.21, release the left mouse button.
Figure 1.21.
(This item is displayed on page 1158 in the print version)

Slide 7 is reordered to become Slide 5.
|
|
[Page 1158] |
3. | To close the Outline/Slides pane, move your pointer to the right of the Slides tab, and then click the Close button  . .
The Outline/Slides pane section of the window closes and the Slide pane fills most of the PowerPoint window.
|
4. | In the lower left corner of your screen, point to the Normal View button and notice that the ScreenTip indicates Normal View (Restore Panes).
You can redisplay the Outline/Slides pane by clicking the Normal View button or by displaying the View menu and clicking Normal (Restore Panes).
|
5. | Make sure the Outline/Slides pane is still closed, and then Save your presentation file.
|