Creating Setup Packages
Creating a setup package to install a VSTO customized document on a user's local machine requires us to build a couple of custom installer classes. We need to update the application manifest stored in the document to refer to the location on the user's machine, and we need to update the user's security policy. Let's walk through all the steps required to add a setup package to a customized spreadsheetsay, an expense reporting application.
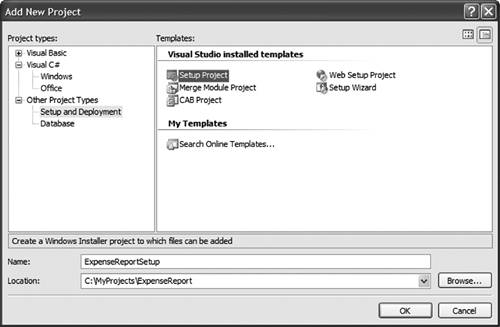
Open the solution for the customized document and right-click the solution (the root of the tree) in the Solution Explorer. Choose Add > New Project, and create a setup project as shown in Figure 20-4.
Figure 20-4. Creating a setup project.
|
This step is not necessary if you have created an Outlook Add-In VSTO project. Visual Studio will automatically create an installer project which installs the DLL, creates a manifest, and updates the Outlook add-in registry key for you. However, you will still need to ensure that the right security policy is rolled out and that the VSTO runtime assemblies are installed on the client machines. |
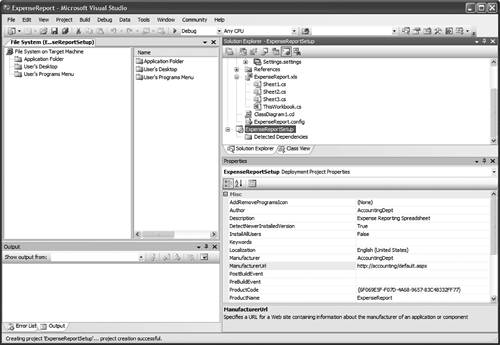
Use the Properties pane for the setup project to customize strings such as the author, description, and so on, as shown in Figure 20-5.
Figure 20-5. Setting setup project properties.
We have not yet told the setup project what files it is going to be setting up. We want it to set up all the files produced by the expense report project in this solution.
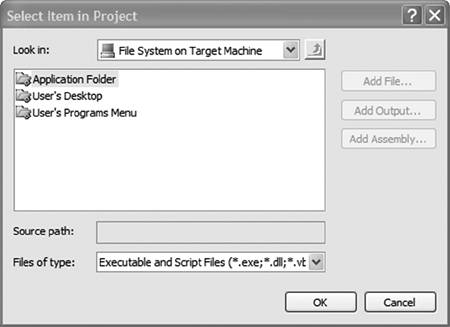
Right-click the setup project and select Add > Project Output to view the Add Project Output Group dialog shown in Figure 20-6.
Figure 20-6. Telling the setup project which files to set up.
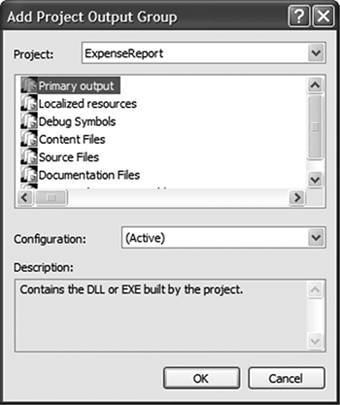
Select the Primary Output files associated with the Expense Report project and click OK.
At this point, if you want the users to take responsibility for installing the customization to a location that they trust, and do not care that that will have to copy around the customization assembly if they want to move the spreadsheet, you are done. You can build and execute the setup package, and it will copy the necessary files to the user's machine just as they are on the development machine.
However, you probably want to set the codebase in the application manifest so that it refers to the installation location rather than the current directory. You also probably want to set the user's security policy so that the customization location is fully trusted. That way the user can copy the document around without worrying about dragging the customization along with it.
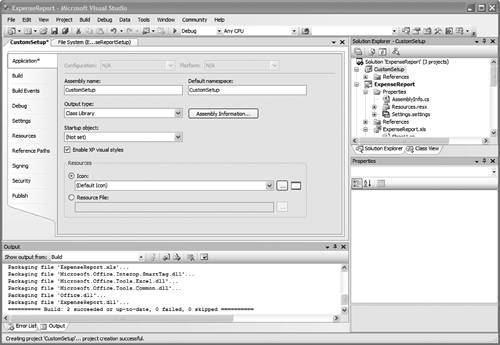
To do that, we create yet another project in this solution. Right-click the solution in the Solution Explorer again and create a new, empty C# project (in the Visual C# > Windows branch of the tree view of the Add New Project dialog) called CustomSetup. When you have the project, right-click it and select the Properties pane for the project. Change the output type to Class Library, as shown in Figure 20-7.
Figure 20-7. Setting the custom installer class project to build a class library.
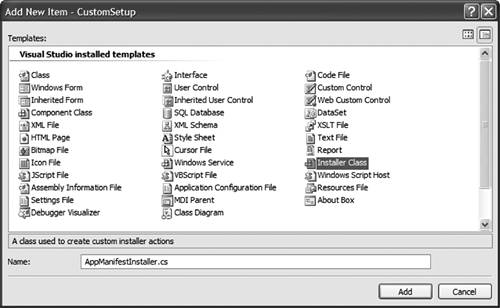
Right-click the project again and choose Add > New Item. Add a new Installer Class, as shown in Figure 20-8. In fact, add two: one for the security change, and one for the application manifest change.
Figure 20-8. Adding custom installer classes.
Right-click the References node in the CustomSetup project's tree view and add a reference to Microsoft.VisualStudio.Tools.Applications.Runtimewe are going to need to create the ServerDocument class, so we need a reference to the VSTO runtime library. Finally, right-click the application manifest installer and select View Code. The Visual Studio IDE should now look something like Figure 20-9.
Figure 20-9. Editing the custom installer classes.

Before we get into adding code to these custom actions, however, let's tell the installer about them. Right-click the installer project in the Server Explorer and choose View > Custom Actions. In the Custom Actions viewer, right-click Install and choose Add Custom Action to view the custom action dialog shown in Figure 20-10.
Figure 20-10. Selecting the custom install actions.
Click Application Folder and then Primary Output from CustomSetup. Doing so tells the setup project that it should look for classes decorated with the RunInstaller attribute in the assembly produced by the CustomSetup project. As you can see from the code editor, both the new custom install action classes are decorated with this attribute.
We must do one more thing to get the custom install actions working properly; they need to know the name of the assembly, the name of the document, and where they are located. To pass these strings from the installer to the custom action, we add the strings to the CustomActionData property of the custom action just created, as shown in Figure 20-11.
Figure 20-11. Setting the custom action data.
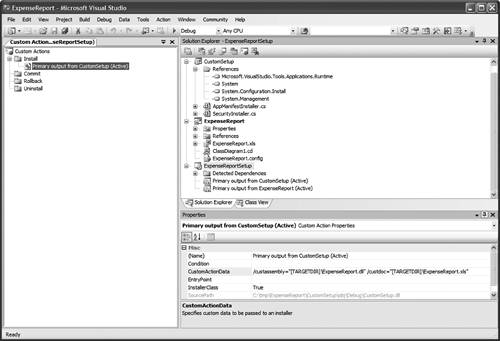
The custom action data consists of a set of keys and values:
/custassembly="[TARGETDIR]ExpenseReport.dll"
/custdoc="[TARGETDIR]ExpenseReport.xls"
Finally, we are all set up to write the custom installation actions. First, we write the application manifest editor shown in Listing 20-4. We get the strings passed by the main installer out of the installation context object, create a ServerDocument on the installed document, and set the assembly path to the absolute path. Finally, because this is a derived class, we make sure that we call the base class install method in case it does anything interesting (such as write a success message to a log file).
Listing 20-4. Creating an Application Manifest Editor Custom Install Action with Server Document
using System;
using System.Collections.Generic;
using System.ComponentModel;
using System.Configuration.Install;
using Microsoft.VisualStudio.Tools.Applications.Runtime;
namespace CustomSetup
{
 [RunInstaller(true)]
 public partial class AppManifestInstaller : Installer
 {
 public AppManifestInstaller()
 {
 InitializeComponent();
 }
 public override void Install(
 System.Collections.IDictionary stateSaver)
 {
 string assemblyPath = this.Context.Parameters["custassembly"];
 string documentPath = this.Context.Parameters["custdoc"];
 ServerDocument sd = new ServerDocument(documentPath,
 true, System.IO.FileAccess.ReadWrite);
 try
 {
 sd.AppManifest.Dependency.AssemblyPath = assemblyPath;
 sd.Save();
 }
 finally
 {
 sd.Close();
 }
 base.Install(stateSaver);
 }
 }
 }
Second, we write code similar to the code we wrote in Chapter 19 to set the local security policy. This time, we set a user security policy that trusts the installation directory explicitly as shown in Listing 20-5.
Listing 20-5. A Custom Install Action Class to Set Local Security Policy
using System;
using System.Collections;
using System.Collections.Generic;
using System.ComponentModel;
using System.Configuration.Install;
using System.Security;
using System.Security.Policy;
namespace CustomSetup
{
 [RunInstaller(true)]
 public partial class SecurityInstaller : Installer
 {
 public SecurityInstaller()
 {
 InitializeComponent();
 }
 public override void Install(
 System.Collections.IDictionary stateSaver)
 {
 PolicyLevel enterprisePolicyLevel;
 PolicyLevel machinePolicyLevel;
 PolicyLevel userPolicyLevel;
 CodeGroup assemblyGroup;
 UrlMembershipCondition assemblyCondition;
 PolicyStatement policyStatement;
 PermissionSet fullTrust;
 string assemblyPath = this.Context.Parameters["custassembly"];

// Obtain the three policy levels:

 IEnumerator policyEnumerator = SecurityManager.PolicyHierarchy();
 policyEnumerator.MoveNext();
 enterprisePolicyLevel = (PolicyLevel)policyEnumerator.Current;
 policyEnumerator.MoveNext();
 machinePolicyLevel = (PolicyLevel)policyEnumerator.Current;
 policyEnumerator.MoveNext();
 userPolicyLevel = (PolicyLevel)policyEnumerator.Current;

// Create a new group by combining a permission set with a
// membership condition:
 fullTrust = userPolicyLevel.GetNamedPermissionSet("FullTrust");
 policyStatement = new PolicyStatement(fullTrust,
 PolicyStatementAttribute.Nothing);
 assemblyCondition = new UrlMembershipCondition(assemblyPath);
 assemblyGroup = new UnionCodeGroup(
 assemblyCondition, policyStatement);

// Add the new policy to the root:

 userPolicyLevel.RootCodeGroup.AddChild(assemblyGroup);
 SecurityManager.SavePolicy();

 base.Install(stateSaver);
 }
 }
}
If you build all three projects, right-click the installation project, and choose Install, you will see how the Installation Wizard allows the user to select the location, copies the files over, and then updates the user's security policy and sets the assembly codebase in the embedded application manifest.
Of course, this section has just given a bare-bones skeleton of a customized installation program. A more robust installer includes features such as custom logging, better error handling, user-interface elements, rollback/uninstall when things go wrong, and so on.
Part One. An Introduction to VSTO
An Introduction to Office Programming
- Why Office Programming?
- Office Object Models
- Properties, Methods, and Events
- The Office Primary Interop Assemblies (PIAs)
- Conclusion
Introduction to Office Solutions
- The Three Basic Patterns of Office Solutions
- Office Automation Executables
- Office Add-Ins
- Code Behind a Document
- Conclusion
Part Two. Office Programming in .NET
Programming Excel
- Ways to Customize Excel
- Programming User-Defined Functions
- Introduction to the Excel Object Model
- Conclusion
Working with Excel Events
Working with Excel Objects
- Working with Excel Objects
- Working with the Application Object
- Working with the Workbooks Collection
- Working with the Workbook Object
- Working with the Worksheets, Charts, and Sheets Collections
- Working with Document Properties
- Working with the Windows Collections
- Working with the Window Object
- Working with the Names Collection and Name Object
- Working with the Worksheet Object
- Working with the Range Object
- Special Excel Issues
- Conclusion
Programming Word
Working with Word Events
Working with Word Objects
- Working with Word Objects
- Working with the Application Object
- Working with the Dialog Object
- Working with Windows
- Working with Templates
- Working with Documents
- Working with a Document
- Working with the Range Object
- Working with Bookmarks
- Working with Tables
- Conclusion
Programming Outlook
- Ways to Customize Outlook
- Introduction to the Outlook Object Model
- Introduction to the Collaboration Data Objects
- Conclusion
Working with Outlook Events
Working with Outlook Objects
- Working with Outlook Objects
- Working with the Application Object
- Working with the Explorers and Inspectors Collections
- Working with the Explorer Object
- Working with the Inspector Object
- Working with the NameSpace Object
- Working with the MAPIFolder Object
- Working with the Items Collection
- Properties and Methods Common to Outlook Items
- Outlook Issues
- Conclusion
Introduction to InfoPath
- What Is InfoPath?
- Getting Started
- Form Security
- Programming InfoPath
- Data Source Events
- Form Events, Properties, and Methods
- Conclusion
Part Three. Office Programming in VSTO
The VSTO Programming Model
- The VSTO Programming Model
- VSTO Extensions to Word and Excel Objects
- Dynamic Controls
- Advanced Topic: Dynamic Host Items
- Advanced Topic: Inspecting the Generated Code
- VSTO Extensions to the Word and Excel Object Models
- Conclusion
Using Windows Forms in VSTO
- Using Windows Forms in VSTO
- Introduction
- Adding Windows Forms Controls to Your Document
- Writing Code Behind a Control
- The Windows Forms Control Hosting Architecture
- Properties Merged from OLEObject or OLEControl
- Adding Controls at Runtime
- Conclusion
Working with Actions Pane
Working with Smart Tags in VSTO
- Introduction to Smart Tags
- Creating Document-Level Smart Tags with VSTO
- Creating Application-Level Smart Tags
- Conclusion
VSTO Data Programming
- VSTO Data Programming
- Creating a Data-Bound Customized Spreadsheet with VSTO
- Creating a Data-Bound Customized Word Document with VSTO
- Datasets, Adapters, and Sources
- Another Technique for Creating Data-Bound Spreadsheets
- Caching Data in the Data Island
- Advanced ADO.NET Data Binding: Looking Behind the Scenes
- Binding-Related Extensions to Host Items and Host Controls
- Conclusion
Server Data Scenarios
- Populating a Document with Data on the Server
- Using ServerDocument and ASP.NET
- A Handy Client-Side ServerDocument Utility
- The ServerDocument Object Model
- Conclusion
.NET Code Security
- .NET Code Security
- Code Access Security Versus Role-Based Security
- Code Access Security in .NET
- Location, Location, Location
- Strong Names
- Publisher Certificates
- Trusting the Document
- Deploying Policy to User Machines
- Conclusion
Deployment
- Deployment
- VSTO Prerequisites
- Deploying to an Intranet Shared Directory or Web Site
- Local Machine Deployment Without a Deployment Manifest
- Editing Manifests
- Creating Setup Packages
- Advanced Topic: Deploying Network Solutions to Be Cached Locally
- Conclusion
Part Four. Advanced Office Programming
Working with XML in Excel
- Introduction to Excels XML Features
- Introduction to XML Schema Creation in Visual Studio
- An End-to-End Scenario
- Advanced XML Features in Excel
- Excel-Friendly XML Schemas
- VSTO Support for Excel Schema Mapping
- Conclusion
Working with XML in Word
- Introduction to Words XML Features
- An End-to-End Scenario: Creating a Schema and Mapping It into a Word Document
- Exporting the Mapped XML in the Document to an XML Data File
- Importing an XML Data File into the Mapped Document
- The XML Options Dialog
- VSTO Support for Word Schema Mapping
- VSTO Support for the WordML File Format
- Conclusion
Developing COM Add-Ins for Word and Excel
- Introduction to Add-Ins
- Scenarios for Using Add-Ins
- How a COM Add-In Is Registered
- Implementing IDTExtensibility2
- Writing a COM Add-In Using Visual Studio
- The Pitfalls of MsCoree.dll
- COM Interop and Regasm.exe
- Shimming: A Solution to the Problems with MsCoree.dll
- Conclusion
Creating Outlook Add-Ins with VSTO
EAN: N/A
Pages: 214
