Writing Field Formulas
Just as there are a variety of programmable events for forms, there are a number of programmable events for fields. Just a few field events are programmable with the Formula language. There are no events with mixed languages. Table 13.1 displays the events that are scriptable by the Formula language. Different events are available for the two broad types of fields, computed and editable.
Table 13.1. Programmable Field Events
| Event | Field Type |
|---|---|
| Default Value | Editable |
| Value | Computed |
| Input Translation | Editable |
| Input Validation | Editable |
| Input Enabled | Editable |
| HTML Body Attributes | Editable and computed |
Default and Value Formulas
The Default Value event executes only when a document is composed . If you create an editable field with a default value of @UserName , the name of the user will be stored in that field when the document is first composed. Because the field is editable, if the user changes it and saves the document, it contains the new value, not the default value. In other words, when you edit the document again, it will not revert to the default value. A default value formula for an editable field is not required.
All computed fields have a similar event, the Value event. However, you must enter a value formula for a computed field before you can save the form.
In a typical workflow form, there is usually a field that contains the document's status. Quite often, a view will be created to sort and categorize by this status. If you created a sort on the status field, the View column would be sorted alphabetically , which might not be what you want. In a workflow process, a document passes through specific stages, reflected in the status field. For example, the status might go from New to Pending Approval, and then to Denied or Approved, and finally to Completed. A list of possible document status is shown in Table 13.2.
Table 13.2. Document Status Sorting
| Life-Cycle Sort | Alphabetical Sort |
|---|---|
| New | Approved |
| Pending Approval | Completed |
| Approved | Denied |
| Completed | New |
| Denied | Pending Approval |
As you can see from Table 13.2, the alphabetical sort might not be what you want to see in a By Status view. Users can still find the documents, but the sort order doesn't make much sense. It is far better to sort in the order of the life cycle of the document. To accomplish this, you can create a computed field hidden at the bottom of the form that contains numeric values for the sort order of the status conditions. The following code produces values that sort the documents in the same order as the Life-Cycle Sort column of Table 13.2:
@If(cDocStatus = "New"; 1;
 cDocStatus = "Pending Approval"; 2;
 cDocStatus = "Approved"; 3;
 cDocStatus = "Completed"; 4;
 cDocStatus = "Denied"; 5;
 99)
To create a view sorted and categorized by the document status, add a hidden column in the first position of the view and set it to the numeric sort field. Set the column to sort ascending . Next, add a sorted and categorized column set to the status field. The status column will be sorted in the proper order because of the hidden column to the left. Note that although you can use text in a sort field, numbers sort more easily.
Input-Translation Formulas
Input-translation formulas are used to enforce rules for the format of data in fields. The Input Translation event executes when the document is being refreshed and when the document is being saved. This event executes before the Input Validation event. It is available only for editable fields. Using this event, you can modify the contents of the field after the user has entered data. The result of the input-translation formula replaces the field's contents.
In some programming languages, you can enter a mask for a field that ensures that data is entered and displayed in a specific format. In Domino, this is not available as a field property, and you must write some code to enforce the desired format. This is done in the Input Translation event of the field. For example, it is relatively easy to enforce the case of a field, as shown in Table 13.3.
Table 13.3. Input-Translation Formulas
| Purpose | Formula |
|---|---|
| Proper-case a city name | @ProperCase(cCity) |
| Uppercase a state name | @UpperCase(cState) |
However, enforcing more complicated patterns is not always an easy task. Phone numbers are good examples of more difficult formats with which you might have to contend. Usually, you enter a phone number in one of the following commonly used formats (in the United States, at least):
999.999.9999
(999) 999-9999
999-999-9999
Because the user can enter the number in many different formats, you must test for many things, including length, to see whether the user entered an area code, used an incorrect length, or used incorrect characters ; to see what type of separators are used; and so forth. The following example first strips out punctuation such as parentheses, periods, and dashes, leaving only numbers. Then it tests for the length; if it is over 7, it assumes that there is an area code and builds the number accordingly . Otherwise, the formula builds a local number. The format it returns is (999) 999-9999 with an area code, or 999-9999 without the area code. Bear in mind that the following formula works only with U.S. phone numbers:
REM "Get rid of the separators, if any" ;
jcHomePhone1 := @ReplaceSubstring(cHomePhone; "("; "") ;
jcHomePhone2 := @ReplaceSubstring(jcHomePhone1; ")"; "") ;
jcHomePhone3 := @ReplaceSubstring(jcHomePhone2; "-"; "") ;
jcHomePhone := @ReplaceSubstring(jcHomePhone3; "."; "") ;

REM "Determine the length, and if it is over 7, assume an area code.";
REM "If not, assume no area code. Put the pieces together accordingly.";
@If(@Length(jcHomePhone) > 7;
 "(" + @Left(jcHomePhone; 3) + ") " +
 @Middle(jcHomePhone; 3; 3) + "-" +
@Right(jcHomePhone; 4);
 @Length(jcHomePhone) = 7; @Left(jcHomePhone; 3) + "-" +
 @Right(jcHomePhone; 4);
 cHomePhone)
Of course, you can get more sophisticated and add code to test for international numbers, but this should serve as a good example of what you can accomplish in the Input Translation event of a field.
Input-Validation Formulas
Like the Input-Translation formulas, the Input Validation event is available only for editable fields. This event also executes when a document is refreshed and when a document is saved. You use this event to make sure that the entered data is valid or to ensure that there actually is data present if the field is required.
The Input Validation event executes after the Input Translation event. If the data entered in the field fails the validity test of this event, an error message can be displayed and the user (at least in a Notes client) is returned to the field with the offending entry. In a Web client, an error message is displayed on a separate HTML page.
NOTE
Notes and Domino ensure that the correct data type is entered. For example, users cannot enter AABC in a numeric or time field. An error message is generated, and the document cannot be saved until an entry of the correct data type is made.
Continuing with the phone number example from the previous section, you might want to ensure that users don't enter characters instead of numbers for the phone number. First, remove any punctuation so that a legitimate phone number won't generate an error, as in the following code:
REM "Get rid of the separators, if any" ;
jcHomePhone1 := @ReplaceSubstring(cHomePhone; "("; "") ;
jcHomePhone2 := @ReplaceSubstring(jcHomePhone1; ")"; "") ;
jcHomePhone3 := @ReplaceSubstring(jcHomePhone2; "-"; "") ;
jcHomePhone := @ReplaceSubstring(jcHomePhone3; "."; "") ;


@If(@IsError(@TextToNumber(jcHomePhone));
 @Failure("Please use the format (999) 999-9999!");
@Success)
If the phone number is entered properly, converting the text value to a number should not generate an error, so the test @If(@IsError... is used. If an error is generated, a message box is displayed using @Failure() . Both the input-translation and the input-validation formulas can act in concert, as in this case. As the code is written now, if you were to enter ABCDEFGHIJ , you would get the error message contained in the @Failure() statement, but the input-translation formula would be applied anyway and the field would then look like (ABC)DEF-GHIJ . You need to stop the input-translation formula from executing using @Return() , as in the following code:
REM "Get rid of the separators, if any" ;
jcHomePhone1 := @ReplaceSubstring(cHomePhone; "("; "") ;
jcHomePhone2 := @ReplaceSubstring(jcHomePhone1; ")"; "") ;
jcHomePhone3 := @ReplaceSubstring(jcHomePhone2; "-"; "") ;
jcHomePhone := @ReplaceSubstring(jcHomePhone3; "."; "") ;

REM "Make sure we have all numbers. If not, stop the execution";
REM "of this formula.";
@If(@IsError(@TextToNumber(jcHomePhone));
 @Return(cHomePhone); @Success) ;
REM "Determine the length, and if it is over 7, assume an area code.";
REM "If not, assume no area code. Put the pieces together accordingly.";
@If(@Length(jcHomePhone) > 7;
 "(" + @Left(jcHomePhone; 3) + ") " +
 @Middle(jcHomePhone; 3; 3) + "-" +
@Right(jcHomePhone; 4);
 @Length(jcHomePhone) = 7; @Left(jcHomePhone; 3) + "-" +
@Right(jcHomePhone; 4);
 cHomePhone)
Frequently, you need to require the entry of data in a field. You accomplish this with input-validation formulas such as the following:
REM {Now test for a numeric value, and since this is a required};
REM {field, make sure there is data present.};
@If(cHomePhone = "" @IsError(@TextToNumber(jcHomePhone));
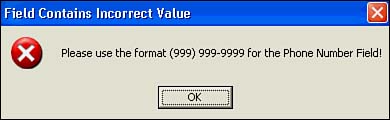
@Failure("Please use the format (999) 999-9999 for the Phone Number Field!");
@Success)
This formula builds on the earlier version of the home phone number input validation by adding a test for an empty field.
If the user leaves the Home Phone Number field empty and either refreshes or tries to save the document, this formula executes. The prompt box shown in Figure 13.2 displays. Furthermore, this keeps the user from saving the document. This is truly a very convenient feature, at least for you (although some users might get annoyed when they can't break the rules).
Figure 13.2. The error window generated by @Failure displays the message you typed within the quotes.
CAUTION
Be careful using input-validation formulas in forms used on the Web. Remember that the Web is page-based; when an error condition is generated, no dialog box is available to alert the user. Instead, a new HTML page is generated. This is particularly inconvenient if there are multiple fields with input-validation tests. If your application runs on the Web, you can use the JavaScript event onBlur . For more information on JavaScript, see Chapter 16, "Writing JavaScript for Domino Applications," and Chapter 17, "Real-World JavaScript Examples."
HTML Attributes for Fields
The HTML attributes available for fields are based on the HTML form tags , , and </tt> . As a Domino developer, you don't have to worry about the tags themselves ”the HTTP task generates them for you. These tags are HTML equivalents of data entry fields. </p> <p> You can modify certain attributes that control the display of fields to Web clients . A rich-text field is equivalent to a <tt> <TEXTAREA> </tt> in HTML and takes the <tt> ROWS </tt> and <tt> COLS </tt> tags. As the names imply, <tt> ROWS </tt> specifies the number of rows for the field and <tt> COLS </tt> specifies the width in columns . For example, <tt> "ROWS=5 COLS=30" </tt> sets up a multiline text area in an HTML document that is 5 rows deep and 30 columns wide. Table 13.4 lists commonly used tags. </p> <h5> Table 13.4. Field Body Attribute Tags </h5> <table border="1" cellspacing="0" cellpadding="1" width="100%"> <colgroup align="left" span="3"> <tbody> <tr> <th align="left" valign="top"> <span> Attribute </span> </th> <th align="left" valign="top"> <span> Tag </span> </th> <th align="left" valign="top"> <span> Effect </span> </th> </tr> <tr> <td align="left" valign="top"> <tt> SIZE </tt> </td> <td align="left" valign="top"> <tt> <INPUT> </tt> </td> <td align="left" valign="top"> Display size of the field. </td> </tr> <tr> <td align="left" valign="top"> <tt> MAXLENGTH </tt> </td> <td align="left" valign="top"> <tt> <INPUT> </tt> </td> <td align="left" valign="top"> Maximum number of characters the field will accept. If greater than the <tt> SIZE </tt> , the field scrolls during entry. </td> </tr> <tr> <td align="left" valign="top"> <tt> ROWS </tt> </td> <td align="left" valign="top"> <tt> <TEXTAREA> </tt> </td> <td align="left" valign="top"> Number of rows. </td> </tr> <tr> <td align="left" valign="top"> <tt> COLS </tt> </td> <td align="left" valign="top"> <tt> <TEXTAREA> </tt> </td> <td align="left" valign="top"> Number of columns. </td> </tr> <tr> <td align="left" valign="top"> <tt> WRAP </tt> </td> <td align="left" valign="top"> <tt> <TEXTAREA> </tt> </td> <td align="left" valign="top"> <p> Determines how text flows in a text area. </p> <p> <tt> VIRTUAL </tt> allows words to wrap within the text box. </p> </td> </tr> </tbody> </table> <adsense> <p> To restrict the length of the entry in a standard text field for a Notes client, you can use an input-validation formula to return an error using something like <tt> @If(@Length(cHomePhone) > 14, @Failure(...) </tt> . The HTML equivalent is to add the following code to the HTML body attributes: </p> <pre> "SIZE=14 MAXLENGTH=14" </pre> <p> Unlike a Notes client, which enables you to continue typing and alerts you only when you refresh or save the document, a Web client does not permit entry beyond 14 characters. The HTML attributes can be very handy for Web forms. </p> </td> </tr> </tbody> </table> <!--{cke_protected}{C}%3C!%2D%2Dpage%3D142%20end%2D%2D%3E--><!--{cke_protected}{C}%3C!%2D%2Dpage%3D143%20start%2D%2D%3E--><table width="100%" border="0" cellspacing="0" cellpadding="0"> <tbody> <tr> <td valign="top"> <h3>Writing View Formulas</h3>
Part I. Introduction to Release 6
Whats New in Release 6?
- Whats New in Release 6?
- A Brief History of Lotus Notes
- Major Features of Lotus Notes
- Types of Applications
- Whats New in Domino Designer?
- New Design Element Features
- New Language Features
The Release 6 Object Store
- The Release 6 Object Store
- Defining a Domino Database
- Understanding the Database Structure
- Creating a Database
- Working with Database Properties
- Understanding Design Templates
- Creating Your Own Templates
- Inheriting Designs from Templates
- Using Templates to Replicate Design Changes
- Using Templates as Design Libraries
- Archiving Versions with Templates
The Integrated Development Environment
- The Integrated Development Environment
- Working in the Application Design Environment
- Working with the Properties Box
- Understanding the Work Pane
- Using the Programmers Pane
- Understanding the Info List
- Understanding the Action Pane
- Customizing the Tools Menu
- Printing Source Code
- Using the HTML Editor
- Locking Design Elements
Part II. Foundations of Application Design
Forms Design
- Forms Design
- Designing Forms
- Setting Form Properties
- Working with Text Properties
- Working with Fields
- Writing Formulas in Fields
Advanced Form Design
- Advanced Form Design
- Working with Tables
- Using Graphic Objects on Forms
- Working with Form-Level Events
- Using Form Actions
- Working with Hotspots
- Understanding Sections and Section Properties
- Using Layout Regions
- Working with Special Forms
- Creating Reusable Design Objects
- Using Embedded Elements
- Using the Form Design Document
Designing Views
- Designing Views
- Defining the Elements of a View
- Creating a View
- Setting View Properties
- Creating Advanced View Selections
- Adding and Editing View Columns
- Using View Column Properties
- Adding Actions to a View
- Creating Calendar Views
- Understanding Folders
Using Shared Resources in Domino Applications
- Shared Resources
- Sharing Images Within a Database
- Creating Shared Files
- Creating Shared Applets
- Shared Code
- Creating Subforms
- Creating Shared Fields
- Creating Shared Actions
- Script Libraries
- Database Resources
Using the Page Designer
- Using the Page Designer
- Understanding Pages
- Working with the Page Properties Box
- Using the Page Designer
- Adding Layers to Your Pages
Creating Outlines
- Creating Outlines
- Creating an Outline
- Working with Outline Entries
- Embedding Outlines
- Adding an Outline to a Frameset
Adding Framesets to Domino Applications
- Adding Framesets to Domino Applications
- Creating a Frameset
- Using the Frameset Designer
- Working with Frames
- Viewing the HTML Source of Your Frameset
- Launching the Frameset
Automating Your Application with Agents
- Automating Your Application with Agents
- Working with Agents
- Creating an Agent
- Working in the Agent Builder Design Window
- Using @Commands in Agents
- Putting Your Agent to Work
- Creating a Complex Agent
- Using LotusScript in Agents
- Creating Web Agents Using Formulas and LotusScript
- Using Java in Agents
- Testing and Debugging Agents, the Agent Log, and Agent Properties
- Agent Properties via the Agent InfoBox
Part III. Programming Domino Applications
Using the Formula Language
- Using the Formula Language
- Overview of the Formula Language
- Knowing Where to Use @Functions and @Commands
- Formula Syntax
- Limitations of the Formula Language
- Working with Statements
- Using Logical @Functions
- Working with Date and Time @Functions
- Working with Strings
- Getting Session and User Information
- Working with Documents
- Retrieving Data with @DbColumn and @DbLookup
- Working with Lists
- Getting User Input
- Controlling the Flow of a Formula
- Error Handling
Real-World Examples Using the Formula Language
- Real-World Examples Using the Formula Language
- Programming Practices
- Using Formulas in Forms and Subforms
- Writing Field Formulas
- Writing View Formulas
- Using Hide When Formulas
- Working with Forms, Views, and Shared Actions
Writing LotusScript for Domino Applications
- Writing LotusScript for Domino Applications
- Software Construction
- Fundamental Elements of LotusScript
- New Technologies and LotusScript
Real-World LotusScript Examples
- Real-World LotusScript Examples
- Real-World Example 1: Importing a Delimited Text File
- Real-World Example 2: Delete a Parent Document and All Its Children: DeleteParentAndChildren
- Real-World Example 3: Schedule an Agent Robot to Refresh All the Documents in a View: Robot-DailyRefreshAllDocs
- Real-World Example 4: Return a Web User to the Place Where He Started After a Document Is Submitted: WebQuerySave-DocSubmit
Writing JavaScript for Domino Applications
- Writing JavaScript for Domino Applications
- What Is JavaScript?
- JavaScript Is Not Java
- JavaScript and the Domino IDE
- The Document Object Model
- JavaScript Support in Domino 6
- When to Use JavaScript
- A Look at JavaScript in Domino
- JavaScript Libraries in Domino
- JavaScript Principles 101
- Syntax and Command Blocks
- Statements
- Output
- Functions
- Objects
- Input Validation
- Validating Check Boxes
- Validating Radio Buttons
- Validating Selection Lists
- Calculations
- JavaScript Application
Real-World JavaScript Examples
- Real-World JavaScript Examples
- Real-World Example 1: Dynamic Drop-Down Lists on the Web
- Real-World Example 2: Dialog Boxes and window. opener on the Web
- Real-World Example 3: Dynamic Tables
- Real-World Example 4: Useful JavaScript Utilities
Writing Java for Domino Applications
- Writing Java for Domino Applications
- Introduction to Java
- Choosing a Java Solution in Domino
- Understanding the Notes Object Interface
- Writing Java Agents
- Using Other Java IDEs
- Other Uses for Java
Real-World Java Examples
Enhancing Domino Applications for the Web
- Enhancing Domino Applications for the Web
- Whats New in Designer 6
- Understanding the Domino Web Application Server
- Understanding the Basics of HTML
- Using HTML in Domino Designer
- Adding Power with Domino URLs
- Views and Forms Working Together on the Web
- Incorporating Flash into Your Web Pages
- What Its All About: XML Exposed
- How Does Domino Use XML?
Part IV. Advanced Design Topics
Accessing Data with XML
Accessing Data with DECS and DCRs
- Accessing Data with DECS and DCRs
- What Is DECS?
- The External Data Source
- DECS Administrator
- Creating the Activity
- Accessing the Application
- DECS Summary
- Data Connection Resources
- DCR Example
- Tips on External Data Access
Security and Domino Applications
- Security and Domino Applications
- How Does Domino Security Work?
- Enabling Physical Security
- Setting Server Access
- Database Access Control Lists
- The Role of the Domino Directory in Application Security
- ACL Privileges
- Enabling Database Encryption
- Using Roles
- Implementing View-Level Security
- Implementing Form-Level Security
- Implementing Document-Level Security
- Applying Field-Level Security
- Hiding the Design of Your Application
Creating Workflow Applications
- Creating Workflow Applications
- The Evolution of Groupware
- Introducing Workflow
- Creating Mail-Enabled Applications
- Using Triggers to Send Email
- Sending Mail with LotusScript
Analyzing Domino Applications
Part V. Appendices
Appendix A. HTML Reference
Appendix B. Domino URL Reference
EAN: 2147483647
Pages: 288
