Time Tools, Threads, and Animation
The last stop on our widget tour is the most unique. Tkinter also comes with a handful of tools that have to do with the event-driven programming model, not graphics displayed on a computer screen.
Some GUI applications need to perform background activities periodically. For example, to "blink" a widget's appearance, we'd like to register a callback handler to be invoked at regular time intervals. Similarly, it's not a good idea to let a long-running file operation block other activity in a GUI; if the event loop could be forced to update periodically, the GUI could remain responsive. Tkinter comes with tools for both scheduling such delayed actions and forcing screen updates:
widget.after( milliseconds, function, *args)
This tool schedules the function to be called after a number of milliseconds. function can be any callable Python object: a function, bound method, etc. This form of the call does not pause the program -- the callback function is run later from the normal Tkinter event loop. The milliseconds value can be a floating point number, to specify fractions of a second. This returns an ID which can be passed to after_cancel to cancel the callback. Since this method is so commonly used, I'll say more about it by example in a moment.
widget.after( milliseconds)
This tool pauses the program for a number of milliseconds. For example, an argument of 5000 pauses for 5 seconds. This is essentially the same as Python's library function time.sleep, and both calls can be used to add a delay in time-sensitive displays (e.g., animation programs like PyDraw and the simpler examples ahead).
widget.after_idle( function, *args)
This tool schedules the function to be called when there are no more pending events to process. That is, function becomes an idle handler, which is invoked when the GUI isn't busy doing anything else.
widget.after_cancel( id)
This tool cancels a pending after callback event before it occurs.
widget.update()
This tool forces Tkinter to process all pending events in the event queue, including geometry resizing, and widget updates and redraws. You can call this periodically from a long-running callback handler to refresh the screen and perform any updates to it that your handler has already requested. If you don't, your updates may not appear on screen until your callback handler exits. In fact, your display may hang completely during long-running handlers if not manually updated (and handlers are not run in threads, as described in the next section); the window won't even redraw itself until the handler returns if covered and uncovered by another. For instance, programs that animate by repeatedly moving an object and pausing must call for an update before the end of the animation, or only the final object position will appear on screen; worse, the GUI will be completely inactive until the animation callback returns (see the simple animation examples later in this chapter, and PyDraw in the next chapter).
widget.update_idletasks()
This tool processes any pending idle events. This may sometimes be safer than after which has the potential to set up race (looping) conditions in some scenarios. Tk widgets use idle events to display themselves.
_tkinter.createfilehandler( file, mask, function)
This tool schedules the function to be called when a file's status changes. The function may be invoked when the file has data for reading, is available for writing, or triggers an exception. File handlers are often used to process pipes or sockets, since normal input/output requests can block the caller. This is not available on Windows under Tk 8.0, and so won't be used in this book.
widget.wait_variable(var)
widget.wait_window(win)
widget.wait_visibility(win)
These tools pause the caller until a Tkinter variable changes its value, a window is destroyed, or a window becomes visible. All of these enter a local event loop, such that the application's mainloop continues to handle events. Note that var is a Tkinter variable object (discussed earlier), not a simple Python variable. To use for modal dialogs, first call widget.focus() (to set input focus) and widget.grab() (to make a window be the only one active).
We won't go into further details on all of these tools here; see other Tk and Tkinter documentation for more information.
8.7.1 Using Threads with GUIs
Keep in mind that for many programs, Python's thread support that we met in Chapter 3, can serve some of the same roles as the Tkinter tools listed in the previous section. For instance, to avoid blocking a GUI during a long-running file or socket transfer, the transfer can simply be run in a spawned thread, while the rest of the program continues to run normally. We'll meet such threaded GUI programs in Part III (e.g., PyMailGui in Chapter 11). Similarly, GUIs that must watch for inputs on pipes or sockets can do so in spawned threads (or after callbacks), without blocking the GUI itself.
If you do use threads in Tkinter programs, however, only the main thread (the one that built the GUI and started the mainloop) can make GUI calls. Even things like the update method described in the previous section cannot be called from spawned threads in a GUI program -- they'll likely trigger very strange program crashes. This GUI thread story may be improved in future Python and Tkinter releases, but imposes a few structural and platform-specific constraints today.
For example, because spawned threads cannot perform GUI processing, they must generally communicate with the main thread using global variables, as required by the application. A thread that watches a socket, for instance, might simply set global variables that trigger GUI changes in after event callbacks. Note that this is not a Python or Tkinter limitation (it's much lower in the software hierarchy that runs your GUI), and may go away in the future. In addition, some Tkinter canvas calls may actually be thread-safe (see the animation script in Example 8-31). We'll revisit this limitation later in this book, when we meet larger threaded GUI programs.
8.7.2 Using the after Method
The after method allows scripts to schedule a callback handler to be run at some time in the future, and we'll use this often in later examples in this book. For instance, in Chapter 9 we'll meet a clock program that uses after to wake up 10 times per second and check for a new time, and an image slideshow program that uses after to schedule the next photo display (see PyClock and PyView). To illustrate the basics of scheduled callbacks, Example 8-26 does something a bit different.
Example 8-26. PP2EGuiTouralarm.py
#!/usr/local/bin/python
from Tkinter import *

class Alarm(Frame):
 def repeater(self): # on every N millisecs
 self.bell() # beep now
 self.stopper.flash() # flash button now
 self.after(self.msecs, self.repeater) # reschedule handler
 def __init__(self, msecs=1000): # default = 1 second
 Frame.__init__(self)
 self.msecs = msecs
 self.pack()
 stopper = Button(self, text='Stop the beeps!', command=self.quit)
 stopper.pack()
 stopper.config(bg='navy', fg='white', bd=8)
 self.stopper = stopper
 self.repeater()

if __name__ == '__main__': Alarm(msecs=1000).mainloop()
This script builds the window in Figure 8-37 and periodically calls both the button widget's flash method to make the button flash momentarily (it alternates colors quickly), and the Tkinter bell method to call your system's sound interface. The repeater method beeps and flashes once, and schedules a callback to be invoked after a specific amount of time with the after method.
Figure 8-37. Stop the beeps!

But after doesn't pause the caller: callbacks are scheduled to occur in the background, while the program performs other processing -- technically, as soon as the Tk event loop is able to notice the time rollover. To make this work, repeater calls after each time through, to reschedule the callback. Delayed events are one-shot callbacks; to repeat the event, we need to reschedule.
The net effect is that when this script runs, it starts beeping and flashing once its one-button window pops up. And it keeps beeping and flashing. And beeping. And flashing. Other activities and GUI operations don't affect it. Even if the window is iconified, the beeping continues because Tkinter timer events fire in the background. You need to kill the window or press the button to stop the alarm. By changing the msecs delay, you can make this beep as fast or slow as your system allows (some platforms can't beep as fast as others). And this may or may not be the best demo to launch in a crowded office, but at least you've been warned.
8.7.2.1 Hiding and redrawing widgets and windows
The button flash method flashes the widget, but it's easy to dynamically change other appearance options of widgets like buttons, labels, and text, with the widget config method. For instance, you can also achieve a flash-like effect by manually reversing foreground and background colors with the widget config method, in scheduled after callbacks. Just for fun, Example 8-27 specializes the alarm to go a step further.
Example 8-27. PP2EGuiTouralarm-hide.py
from Tkinter import *
import alarm

class Alarm(alarm.Alarm): # change alarm callback
 def repeater(self): # on every N millisecs
 self.bell() # beep now
 if self.shown:
 self.stopper.pack_forget() # hide or erase button now
 else: # or reverse colors, flash...
 self.stopper.pack()
 self.shown = not self.shown # toggle state for next time
 self.after(self.msecs, self.repeater) # reschedule handler
 def __init__(self, msecs=1000): # default = 1 second
 self.shown = 0
 alarm.Alarm.__init__(self, msecs)

if __name__ == '__main__': Alarm(msecs=500).mainloop()
When this script is run, the same window appears, but the button is erased or redrawn on alternating timer events. The widget pack_forget method erases (unmaps) a drawn widget, and pack makes it show up again; grid_forget and grid similarly hide and show widgets in a grid. The pack_forget method is useful for dynamically drawing and changing a running GUI. For instance, you can be selective about which components are displayed, and build widgets ahead of time and show them only as needed. Here, it just means that users must press the button while it's displayed, or else the noise keeps going.
To hide and unhide the entire window instead of just one widget within it, use the top-level window widget withdraw and deiconify methods. The withdraw method, demonstrated in Example 8-28, completely erases the window and its icon (use iconify if you want the window's icon to appear during a hide), and the state method returns the window's current state ("normal", "iconic", or "withdrawn"). These are also useful to pop up prebuilt dialog windows dynamically, but are perhaps less practical here.
Example 8-28. PP2EGuiTouralarm-withdraw.py
from Tkinter import *
import alarm

class Alarm(alarm.Alarm):
 def repeater(self): # on every N millisecs
 self.bell() # beep now
 if self.master.state() == 'normal': # is window displayed?
 self.master.withdraw() # hide entire window, no icon
 else: # iconify shrinks to an icon
 self.master.deiconify() # else redraw entire window
 self.master.lift() # and raise above others
 self.after(self.msecs, self.repeater) # reschedule handler

if __name__ == '__main__': Alarm().mainloop() # master = default Tk root
This works the same, but the entire window appears or disappears on beeps -- you have to press it when it's shown. There are lots of other effects you could add to the alarm. Whether your buttons and windows should flash and disappear or not, though, probably depends less on Tkinter technology than on your users' patience.
8.7.3 Simple Animation Techniques
Apart from the direct shape moves in the canvasDraw example, all of the GUIs presented so far in this part of the book have been fairly static. This last section shows you how to change that, by adding simple shape movement animations to the canvas drawing example listed in Example 8-15. It also demonstrates the notion of canvas tags -- the move operations performed here move all canvas objects associated with a tag at once. All oval shapes move if you press "o", and all rectangles move if you press "r"; as mentioned earlier, canvas operation methods accept both object IDs and tag names.
But the main goal here is to illustrate simple animation techniques using the time-based tools described earlier in this section. There are three basic ways to move objects around a canvas:
- By loops that use time.sleep to pause for fractions of a second between multiple move operations, along with manual update calls. The script moves, sleeps, moves a bit more, and so on. A time.sleep call pauses the caller, and so fails to return control to the GUI event loop -- any new requests that arrive during a move are deferred. Because of that, canvas.update must be called to redraw the screen after each move, or else updates don't appear until the entire movement loop callback finishes and returns. This is a classic long-running callback scenario; without manual update calls, no new GUI events are handled until the callback returns in this scheme (even window redraws).
- By using the widget.after method to schedule multiple move operations to occur every few milliseconds. Because this approach is based upon scheduled events dispatched by Tkinter to your handlers, it allows multiple moves to occur in parallel, and doesn't require canvas.update calls. You rely on the event loop to run moves, so there's no reason for sleep pauses, and the GUI is not blocked while moves are in progress.
- By using threads to run multiple copies of the time.sleep pausing loops of the first approach. Because threads run in parallel, a sleep in any thread blocks neither the GUI nor other motion threads. GUIs should not be updated from spawned threads in general (in fact, calling canvas.update from a spawned thread will likely crash the GUI today), but some canvas calls such as movement seem to be thread safe in the current implementation.
Of these three schemes, the first yields the smoothest animations but makes other operations sluggish during movement, the second seems to yield slower motion than the others but is safer than using threads in general, and the last two both allow multiple objects to be in motion at the same time.
8.7.3.1 Using time.sleep loops
The next three sections demonstrate the code structure of all three approaches in turn, with new subclasses of the canvasDraw example we met in Example 8-15. Example 8-29 illustrates the first approach.
Example 8-29. PP2EGuiTourcanvasDraw_tags.py
##################################################################
# add tagged moves with time.sleep (not widget.after or threads);
# time.sleep does not block the gui event loop while pausing, but
# screen not redrawn until callback returns or widget.update call;
# the currently running onMove callback gets exclusive attention
# until it returns: others pause if press 'r' or 'o' during move;
##################################################################

from Tkinter import *
import canvasDraw, time

class CanvasEventsDemo(canvasDraw.CanvasEventsDemo):
 def __init__(self, parent=None):
 canvasDraw.CanvasEventsDemo.__init__(self, parent)
 self.canvas.create_text(75, 8, text='Press o and r to move shapes')
 self.canvas.master.bind('', self.onMoveOvals)
 self.canvas.master.bind('', self.onMoveRectangles)
 self.kinds = self.create_oval_tagged, self.create_rectangle_tagged
 def create_oval_tagged(self, x1, y1, x2, y2):
 objectId = self.canvas.create_oval(x1, y1, x2, y2)
 self.canvas.itemconfig(objectId, tag='ovals', fill='blue')
 return objectId
 def create_rectangle_tagged(self, x1, y1, x2, y2):
 objectId = self.canvas.create_rectangle(x1, y1, x2, y2)
 self.canvas.itemconfig(objectId, tag='rectangles', fill='red')
 return objectId
 def onMoveOvals(self, event):
 print 'moving ovals'
 self.moveInSquares(tag='ovals') # move all tagged ovals
 def onMoveRectangles(self, event):
 print 'moving rectangles'
 self.moveInSquares(tag='rectangles')
 def moveInSquares(self, tag): # 5 reps of 4 times per sec
 for i in range(5):
 for (diffx, diffy) in [(+20, 0), (0, +20), (-20, 0), (0, -20)]:
 self.canvas.move(tag, diffx, diffy)
 self.canvas.update() # force screen redraw/update
 time.sleep(0.25) # pause, but don't block gui

if __name__ == '__main__':
 CanvasEventsDemo()
 mainloop()
All three of the scripts in this section create a window of blue ovals and red rectangles as you drag new shapes out with the left mouse button. The drag-out implementation itself is inherited from the superclass. A right mouse button click still moves a single shape immediately, and a double-left click still clears the canvas too -- other operations inherited from the original superclass. In fact, all this new script really does is change the object creation calls to add tags and colors here, add a text field, and add bindings and callbacks for motion. Figure 8-38 shows what this subclass's window looks like after dragging out a few shapes to be animated.
Figure 8-38. Drag-out objects ready to be animated
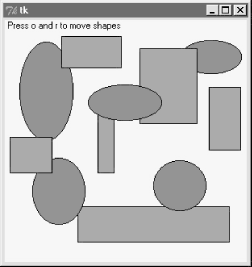
The "o" and "r" keys are set up to start animation of all the ovals and rectangles you've drawn, respectively. Pressing "o", for example, makes all the blue ovals start moving synchronously. Objects are animated to mark out five squares around their location, and move four times per second. New objects drawn while others are in motion start to move too, because they are tagged. You need to run these live to get a feel for the simple animations they implement, of course (you could try moving this book back and forth and up and down, but it's not quite the same, and might look silly in public places).
8.7.3.2 Using widget.after events
The main drawback of this first approach is that only one animation can be going at once: if you press "r" or "o" while a move is in progress, the new request puts the prior movement on hold until it finishes because each move callback handler assumes the only thread of control while it runs. Screen updates are a bit sluggish while moves are in progress too, because they only happen as often as manual update calls are made (try a drag-out or a cover/uncover of the window during a move to see for yourself). Example 8-30 specializes just the moveInSquares method to remove such limitations.
Example 8-30. PP2EGuiTourcanvasDraw_tags_after.py
########################################################################
# similar, but with .after scheduled events, not time.sleep loops;
# because these are scheduled events, this allows both ovals and
# rectangles to be moving at the _same_ time and does not require
# update calls to refresh the gui (only one time.sleep loop callback
# can be running at once, and blocks others started until it returns);
# the motion gets wild if you press 'o' or 'r' while move in progress,
# though--multiple move updates start firing around the same time;
########################################################################

from Tkinter import *
import canvasDraw_tags

class CanvasEventsDemo(canvasDraw_tags.CanvasEventsDemo):
 def moveEm(self, tag, moremoves):
 (diffx, diffy), moremoves = moremoves[0], moremoves[1:]
 self.canvas.move(tag, diffx, diffy)
 if moremoves:
 self.canvas.after(250, self.moveEm, tag, moremoves)
 def moveInSquares(self, tag):
 allmoves = [(+20, 0), (0, +20), (-20, 0), (0, -20)] * 5
 self.moveEm(tag, allmoves)

if __name__ == '__main__':
 CanvasEventsDemo()
 mainloop()
This version lets you make both ovals and rectangles move at the same time -- drag out a few ovals and rectangles, and then press "o" and then "r" right away to make this go. In fact, try pressing both keys a few times; the more you press, the more the objects move, because multiple scheduled events are firing and moving objects from wherever they happen to be positioned. If you drag out a new shape during a move, it starts moving immediately as before.
8.7.3.3 Using multiple time.sleep loop threads
Running animations in threads can sometimes achieve the same effect; it can be dangerous to update the screen from a spawned thread in general, but works in this example, at least on Windows. Example 8-31 runs each animation task as an independent and parallel thread. That is, each time you press the "o" or "r" keys to start an animation, a new thread is spawned to do the work. This works on Windows, but failed on Linux at the time I was writing this book -- the screen is not updated as threads change it, so you won't see any changes until later GUI events.
Example 8-31. PP2EGuiTourcanvasDraw_tags_thread.py
########################################################################
# similar, but run time.sleep loops in parallel with threads, not
# .after events or single active time.sleep loop; because threads run
# in parallel, this also allows ovals and rectangles to be moving at
# the _same_ time and does not require update calls to refresh the gui:
# in fact, calling .update() can make this _crash_ today, though some
# canvas calls seem to be thread safe or else this wouldn't work at all;
########################################################################

from Tkinter import *
import canvasDraw_tags
import thread, time

class CanvasEventsDemo(canvasDraw_tags.CanvasEventsDemo):
 def moveEm(self, tag):
 for i in range(5):
 for (diffx, diffy) in [(+20, 0), (0, +20), (-20, 0), (0, -20)]:
 self.canvas.move(tag, diffx, diffy)
 time.sleep(0.25) # pause this thread only
 def moveInSquares(self, tag):
 thread.start_new_thread(self.moveEm, (tag,))

if __name__ == '__main__':
 CanvasEventsDemo()
 mainloop()
This version lets you move shapes at the same time just like Example 8-30, but this time it's a reflection of threads running in parallel. In fact, this uses the same scheme as the first time.sleep version. Here, though, there is more than one active thread of control, so move handlers can overlap in time -- time.sleep only blocks the calling thread, not the program at large. This seems to work (at least on Windows), but it is usually safer to have your threads do number crunching only, and let the main thread (the one that built the GUI) handle any screen updates. It's not impossible that GUI threads may be better supported in later Tkinter releases, so see more recent releases for more details.
8.7.3.4 Other animation options
We'll revisit animation in Chapter 9's PyDraw example; there, all three techniques will be resurrected to move shapes, text, and photos to arbitrary spots on a canvas marked with a mouseclick. And although the canvas widget's absolute coordinate system make it the workhorse of most nontrivial animations, Tkinter animation in general is limited mostly by your imagination. As we saw in the flashing and hiding alarm examples earlier, it's easy to change the appearance of other kinds of widgets dynamically too; you can even erase and redraw widgets and windows on the fly.
I should also note that the sorts of movement and animation techniques shown in this chapter and the next are suitable for many game-like programs, but not all. For more advanced 3D animation needs, be sure to also see the support in the PIL extension package for common animation and movie file formats such as FLI and MPEG. As currently implemented, Python is not widely used as the sole implementation language of graphic-intensive game programs, but it can still be used as both a prototyping and scripting language for such products.[4] And when integrated with 3D graphics libraries, it can serve even broader roles. See http://www.python.org for links to other available extensions in this domain.
[4] Origin Systems, a major game software development company, uses Python in this role to script the animation in some of their games. At last report, their online game product Ultima Online II was to be scripted with Python.
Introducing Python
- And Now for Something Completely Different
- The Life of Python
- The Compulsory Features List
- Whats Python Good For?
- Whats Python Not Good For?
Part I: System Interfaces
System Tools
- The os.path to Knowledge
- Why Python Here?
- System Scripting Overview
- The sys Module
- The os Module
- Script Execution Context
- Current Working Directory
- Command-Line Arguments
- Shell Environment Variables
- Standard Streams
- File Tools
- Directory Tools
Parallel System Tools
- Telling the Monkeys What to Do
- Forking Processes
- Threads
- Program Exits
- Interprocess Communication
- Pipes
- Signals
- Launching Programs on Windows
- Other System Tools
Larger System Examples I
- Splits and Joins and Alien Invasions
- Splitting and Joining Files
- Generating Forward-Link Web Pages
- A Regression Test Script
- Packing and Unpacking Files
- User-Friendly Program Launchers
Larger System Examples II
- The Greps of Wrath
- Fixing DOS Line Ends
- Fixing DOS Filenames
- Searching Directory Trees
- Visitor: Walking Trees Generically
- Copying Directory Trees
- Deleting Directory Trees
- Comparing Directory Trees
Part II: GUI Programming
Graphical User Interfaces
- Heres Looking at You, Kid
- Python GUI Development Options
- Tkinter Overview
- Climbing the GUI Learning Curve
- The End of the Tutorial
- Python/Tkinter for Tcl/Tk Converts
A Tkinter Tour, Part 1
- Widgets and Gadgets and GUIs, Oh My!
- Configuring Widget Appearance
- Toplevel Windows
- Dialogs
- Binding Events
- Message and Entry
- Checkbutton, Radiobutton, and Scale
- Running GUI Code Three Ways
- Images
A Tkinter Tour, Part 2
- On Todays Menu: Spam, Spam, and Spam
- Menus
- Listboxes and Scrollbars
- Text
- Canvas
- Grids
- Time Tools, Threads, and Animation
- The End of the Tour
- The PyDemos and PyGadgets Launchers
Larger GUI Examples
- Building a Better Mouse Trap
- Advanced GUI Coding Techniques
- Complete Program Examples
- PyEdit: A Text Editor Program/Object
- PyView: An Image and Notes Slideshow
- PyDraw: Painting and Moving Graphics
- PyClock: An Analog/Digital Clock Widget
- PyToe: A Tic-Tac-Toe Game Widget
- Where to Go from Here
Part III: Internet Scripting
Network Scripting
- Tune in, Log on, and Drop out
- Plumbing the Internet
- Socket Programming
- Handling Multiple Clients
- A Simple Python File Server
Client-Side Scripting
- Socket to Me!
- Transferring Files over the Net
- Processing Internet Email
- The PyMailGui Email Client
- Other Client-Side Tools
Server-Side Scripting
- Oh What a Tangled Web We Weave
- Whats a Server-Side CGI Script?
- Climbing the CGI Learning Curve
- The Hello World Selector
- Coding for Maintainability
- More on HTML and URL Escapes
- Sending Files to Clients and Servers
Larger Web Site Examples I
- Things to Do When Visiting Chicago
- The PyMailCgi Web Site
- The Root Page
- Sending Mail by SMTP
- Reading POP Email
- Utility Modules
- CGI Script Trade-offs
Larger Web Site Examples II
- Typos Happen
- The PyErrata Web Site
- The Root Page
- Browsing PyErrata Reports
- Submitting PyErrata Reports
- PyErrata Database Interfaces
- Administrative Tools
- Designing for Reuse and Growth
Advanced Internet Topics
- Surfing on the Shoulders of Giants
- Zope: A Web Publishing Framework
- HTMLgen: Web Pages from Objects
- JPython ( Jython): Python for Java
- Grail: A Python-Based Web Browser
- Python Restricted Execution Mode
- XML Processing Tools
- Windows Web Scripting Extensions
- Python Server Pages
- Rolling Your Own Servers in Python
Part IV: Assorted Topics
Databases and Persistence
- Give Me an Order of Persistence, but Hold the Pickles
- Persistence Options in Python
- DBM Files
- Pickled Objects
- Shelve Files
- SQL Database Interfaces
- PyForm: A Persistent Object Viewer
Data Structures
- Roses Are Red, Violets Are Blue; Lists Are Mutable, and So Is Class Foo
- Implementing Stacks
- Implementing Sets
- Binary Search Trees
- Graph Searching
- Reversing Sequences
- Permuting Sequences
- Sorting Sequences
- Data Structures Versus Python Built-ins
- PyTree: A Generic Tree Object Viewer
Text and Language
- See Jack Hack. Hack, Jack, Hack
- Strategies for Parsing Text in Python
- String Module Utilities
- Regular Expression Matching
- Parser Generators
- Hand-Coded Parsers
- PyCalc: A Calculator Program/Object
Part V: Integration
Extending Python
- Extending Python
- I Am Lost at C
- C Extensions Overview
- A Simple C Extension Module
- The SWIG Integration Code Generator
- Wrapping C Environment Calls
- A C Extension Module String Stack
- A C Extension Type String Stack
- Wrapping C++ Classes with SWIG
Embedding Python
- Embedding Python
- Add Python. Mix Well. Repeat.
- C Embedding API Overview
- Basic Embedding Techniques
- Registering Callback Handler Objects
- Using Python Classes in C
- ppembed: A High-Level Embedding API
- Other Integration Topics
VI: The End
Conclusion Python and the Development Cycle
- Conclusion Python and the Development Cycle
- That s the End of the Book, Now Here s the Meaning of Life
- Something s Wrong with the Way We Program Computers
- The Gilligan Factor
- Doing the Right Thing
- Enter Python
- But What About That Bottleneck?
- On Sinking the Titanic
- So What s Python The Sequel
- In the Final Analysis
- Postscript to the Second Edition
- Appendix A Recent Python Changes
- Section A.1. Major Changes in 2.0
- Section A.2. Major Changes in 1.6
- Section A.3. Major Changes Between 1.3 and 1.5.2
- Appendix B Pragmatics
- Section B.1. Installing Python
- Section B.2. Book Examples Distribution
- Section B.3. Environment Configuration
- Section B.4. Running Python Programs
- Section B.5. Python Internet Resources
- Appendix C. Python Versus C++
EAN: 2147483647
Pages: 245
