Preparing to Load Data into the ODS Object, Then into an InfoCube
To load data into the ODS object, we need to create an InfoSource, transfer rules, and update rules as we did in Chapter 3. After loading the data into the ODS object, we will aggregate the data from the ODS object and load them into an InfoCube.
Prerequisites
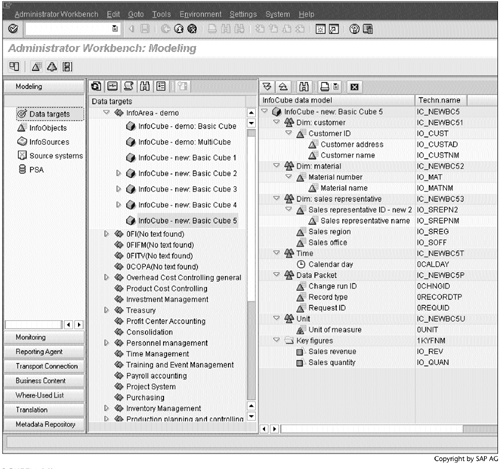
A new InfoCube has been created that will accept the data from the ODS object. Screen 9.9 shows its data model.
SCREEN 9.9
Work Instructions
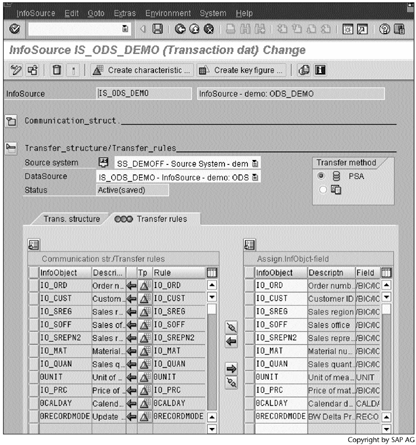
Step 1. Repeat the procedure outlined in Section 3.7 to create an InfoSource, IS_ODS_DEMO, and then create transfer rules. Screen 9.10 shows the active transfer rules.
SCREEN 9.10
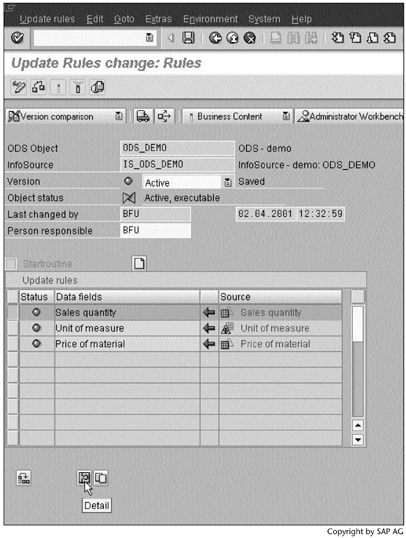
Step 2. Repeat the procedure outlined in Section 3.8 to create update rules. The InfoSource is IS_ODS_DEMO. Screen 9.11 shows the active update rules.
Let's check the update type for ODS data fields. To display the update type for Sales quantity, select Sales quantity and then click .
.
SCREEN 9.11
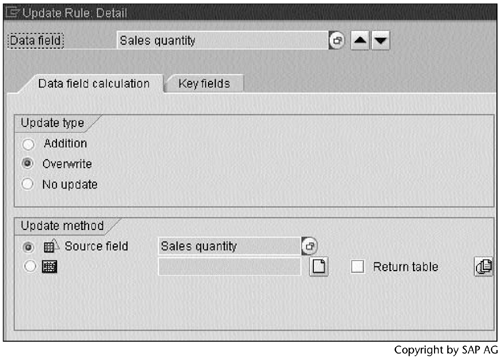
Step 3. Screen 9.12 shows one of the differences between ODS objects and InfoCubes: The default update type for an ODS object is Overwrite, and the default update type for an InfoCube is Addition.
SCREEN 9.12
Step 4. Repeat the procedure outlined in Section 3.8 to create update rules for the InfoCube shown in Figure 9.2. In this case, use the ODS object ODS_DEMO as the DataSource instead of the InfoSource as shown in Screen 3.64. Click  to continue.
SCREEN 9.13
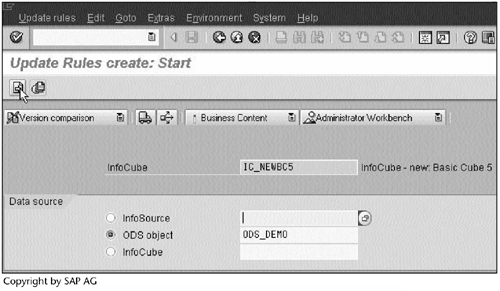
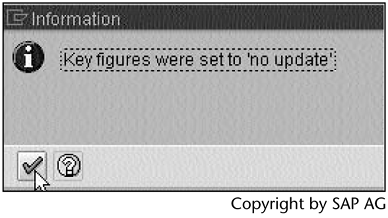
Step 5. After proposing update rules, BW finds out that one or more InfoCube key figures cannot have one-to-one mappings with the key figures in the ODS object. It therefore decides the update type for these key figures should be set to "no update."
In Screen 9.15, we will find out which InfoCube key figures do not have the one-to-one mappings with the key figures in the ODS object. Click  to continue.
SCREEN 9.14
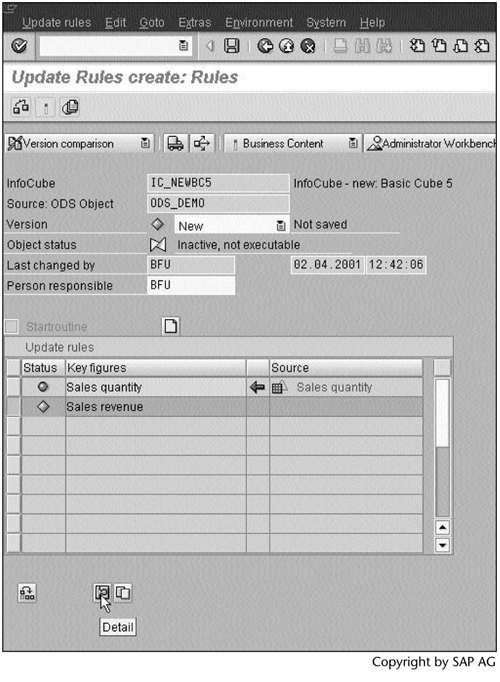
Step 6. Screen 9.15 shows that the key figure Sales revenue does not have a one-to-one mapping with a key figure in the ODS object. Let's create an update rule for it. Select Sales revenue, and then click.
SCREEN 9.15
Step 7. Click  to create an update rule.
SCREEN 9.16
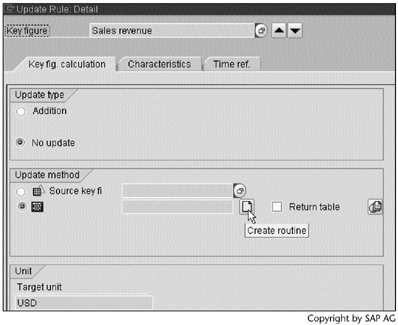
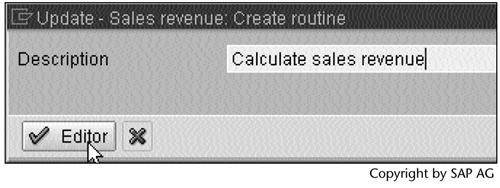
Step 8. Enter a description, and then click  to open the ABAP editor.
SCREEN 9.17
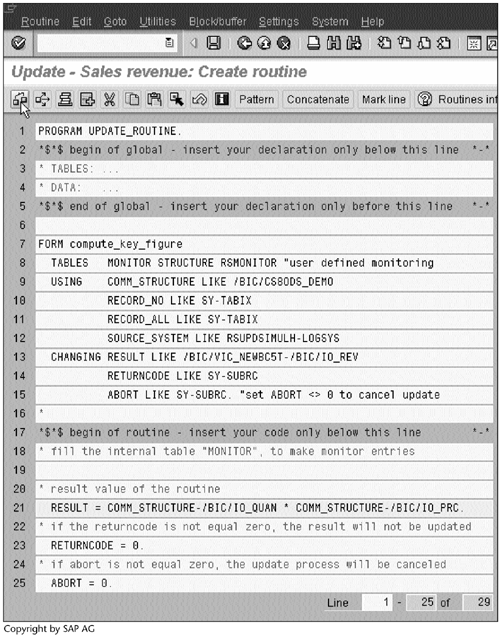
Step 9. Enter RESULT = COMM_ STRUCTURE-/BIC/IO_QUAN * COMM_ STRUCTURE-/BIC/IO_PRC. as shown on line 21, and then click  to check the routine. If it is valid, click
  to save it and go back.
SCREEN 9.18
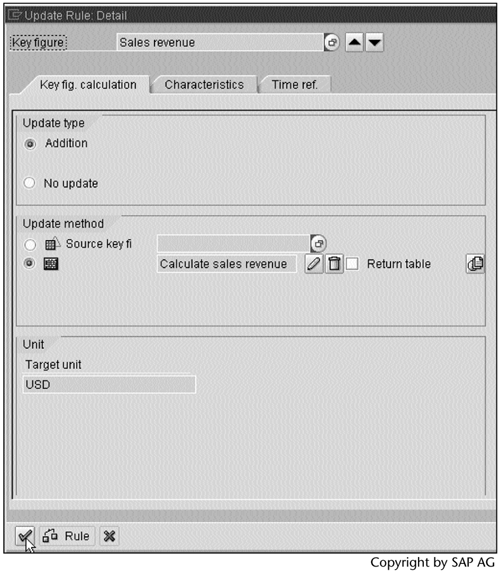
Step 10. Click  to continue.
SCREEN 9.19
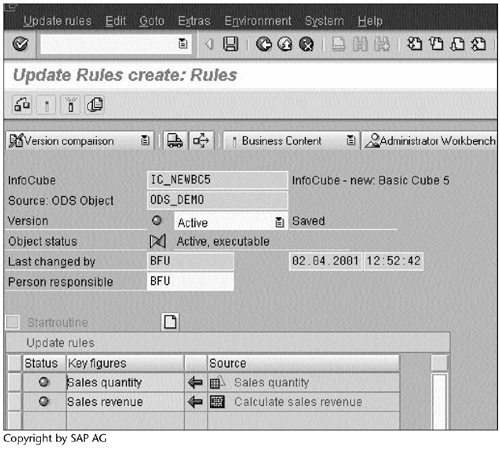
Step 11. Click  to check the update rules. If they are valid, click
  to activate them.
SCREEN 9.20
Result
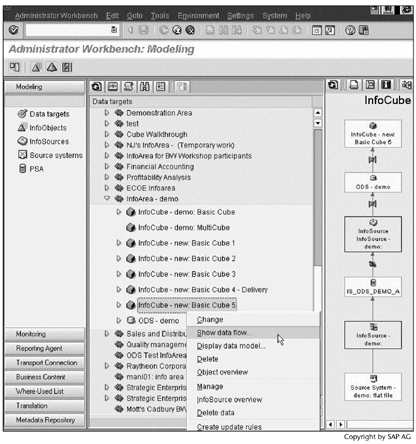
Screen 9.21 shows you have achieved a data flow path from the flat file source system all the way to the InfoCube.
SCREEN 9.21
Part I. Guided Tours
Business Scenario and SAP BW
- Business Scenario and SAP BW
- Sales Analysis A Business Scenario
- Basic Concept of Data Warehousing
- BW An SAP Data Warehousing Solution
- Summary
Creating an InfoCube
- Creating an InfoCube
- Creating an InfoArea
- Creating InfoObject Catalogs
- Creating InfoObjects Characteristics
- Creating InfoObjects Key Figures
- Creating an InfoCube
- Summary
Loading Data into the InfoCube
- Loading Data into the InfoCube
- Creating a Source System
- Creating an Application Component
- Creating an InfoSource for Characteristic Data
- Creating InfoPackages to Load Characteristic Data
- Checking Loaded Characteristic Data
- Entering the Master Data, Text, and Hierarchy Manually
- Creating an InfoSource for Transaction Data
- Creating Update Rules for the InfoCube
- Create an InfoPackage to Load Transaction Data
- Summary
Checking Data Quality
- Checking Data Quality
- Checking InfoCube Contents
- Using BW Monitor
- Using the Persistent Staging Area (PSA)
- Summary
Creating Queries and Workbooks
- Creating Queries and Workbooks
- Creating a Query Using BEx Analyzer
- Organizing Workbooks Using BEx Browser
- Using a Variable to Access a Hierarchy Node Directly
- Summary
Managing User Authorization
- Managing User Authorization
- Creating an Authorization Profile Using Profile Generator
- Creating an Authorization Object to Control User Access to the InfoCube Data
- Integrating Profile Generator and BEx Browser
- Summary
Part II. Advanced Topics
InfoCube Design
- InfoCube Design
- BW Star Schema
- InfoCube Design Alternative I Time-Dependent Navigational Attributes
- InfoCube Design Alternative II-Dimension Characteristics
- InfoCube Design Alternative III Time-Dependent Entire Hierarchies
- Other InfoCube Design Techniques
- Summary
Aggregates and Multi-Cubes
Operational Data Store (ODS)
- Operational Data Store (ODS)
- Creating an ODS Object
- Preparing to Load Data into the ODS Object, Then into an InfoCube
- Loading Data into the ODS Object
- Loading Data into the InfoCube
- Using 0RECORDMODE for Delta Load
- Summary
Business Content
- Business Content
- Creating an R/3 Source System
- Transferring R/3 Global Settings
- Replicating R/3 DataSources
- Installing Business Content Objects and Loading R/3 Data
- Summary
Generic R/3 Data Extraction
- Generic R/3 Data Extraction
- Creating Views in R/3
- Creating DataSources in R/3 and Replicating Them to BW
- Creating a Characteristic in BW
- Loading Data from R/3 into BW
- Summary
Data Maintenance
Performance Tuning
- Performance Tuning
- BW Statistics
- System Administration Assistant
- Tuning Query Performance
- Tuning Load Performance
- Summary
Object Transport
Appendix A. BW Implementation Methodology
Object Transport
Appendix B. SAP Basis Overview
Object Transport
- Object Transport
- Section B.1. SAP Basis 3-Tier Architecture
- Section B.2. Dispatcher, Work Processes, and Services
- Section B.3. Memory Management
Appendix C. Glossary
Appendix D. Bibliography
EAN: N/A
Pages: 106
