Managing Licenses
Setting Up ASDM
Before you can access the ASDM graphical console, you must install the ASDM software image on the local flash of the security Cisco ASA. The ASDM console can manage the local security Cisco ASA only; thus, if you need to manage multiple security Cisco ASA, the ASDM software must be installed on all the Cisco ASAs. However, a single workstation can launch multiple instances of ASDM clients to manage the different Cisco ASA.
A new security Cisco ASA is shipped with ASDM loaded in flash with the following default parameters:
- The GigabitEthernet0/1 interface on Cisco ASA 5520 and ASA 5540 is set up as inside with an IP address of 192.168.1.1. On Cisco ASA 5510, the Ethernet0/1 interface is set up as inside with the same address.
- The DHCP server enabled on the inside interface hands out addresses in the range of 192.168.1.2 through 192.168.1.254.
Uploading ASDM
You can use the dir command to determine whether or not the ASDM software is installed. In case the security Cisco ASA does not have the ASDM software, your first step is to upload the image from an external file server using the supported protocols. Refer to Chapter 4, "Initial Setup and System Maintenance," for a list of supported protocols. Cisco ASA needs to be set up for basic configuration, such as the interface names, security levels, IP addresses, and the proper routes. After setting up basic information, use the copy command to transfer the image file, as shown in Example 18-1, where an ASDM file, named asdm-501.bin, is being copied from a TFTP server located at 172.18.108.26. Verify the content of the local flash once the file is successfully uploaded.
Example 18-1. Uploading the ASDM Image to the Local Flash
Chicago# copy tftp flash

Address or name of remote host []? 172.18.108.26

Source filename []? asdm-501.bin

Destination filename [asdm-501.bin]? asdm-501.bin


Accessing tftp://172.18.108.26/asdm-501.bin...!!!!!!!!!!!!!!!!!!!!!!!!!!!!!!!!!!

! Output omitted for brevity.

!!!!!!!!!!!!!!!!!!!!!!!!!!!!!!!!!!!!!!!!!

Writing file disk0:/asdm-501.bin...

!!!!!!!!!!!!!!!!!!!!!!!!!!!!!!!!!!!!!!!!!!!!!!!!!!!!!!!!!!!!!!!!!!!!!!!!!!!!!!!!

! Output omitted for brevity.

!!!!!!!!!!!!!!!!!!!!!!!!!!!!!!!!!!!!!!!!!!!!!!!!!!!!!!!!!!!!!!!!!!!!!!!!!!!

5876644 bytes copied in 161.420 secs (36500 bytes/sec)

Chicago# dir

Directory of disk0:/

1260 -rw- 5124096 16:47:34 Aug 07 2005 asa701.bin

2511 -rw- 5876644 17:38:14 Aug 07 2005 asdm-501.bin


62881792 bytes total (46723072 bytes free)
Setting Up Cisco ASA
When the ASDM file is accessed, the Cisco ASA loads the first ASDM image from the local Flash. If there are multiple ASDM images in the flash, use the asdm image command and specify the location of the ASDM image you want to load. This ensures that Cisco ASA always loads the specified image when ASDM is launched. In Example 18-2, Cisco ASA is set up to use asdm-501.bin as the ASDM image file.
Example 18-2. Specifying the ASDM Location
Chicago(config)# asdm image disk0:/asdm-501.bin
The security Cisco ASA uses the Secure Sockets Layer (SSL) protocol to communicate with the client. Consequently, the security Cisco ASA acts as a web server to process the requests from the clients. You can enable the web server on Cisco ASA by using the http server enable command.
The security Cisco ASA discards the incoming requests until the client's IP address is in the trusted network to access the HTTP engine. In Example 18-3, the administrator is enabling the HTTP engine and is setting up Cisco ASA to trust the 172.18.124.0/24 network connected toward the mgmt interface.
Example 18-3. Enabling the HTTP Server
Chicago(config)# http server enable

Chicago(config)# http 172.18.124.0 255.255.255.0 mgmt
Note
The WebVPN implementation on Cisco ASA also requires that you run the HTTP server on Cisco ASA. However, you cannot run ASDM and WebVPN on the same interface.
Accessing ASDM
The GUI of ASDM can be accessed from any workstation whose IP address is in the trusted network defined on the security Cisco ASA. Before you establish the secure connection to Cisco ASA, verify that IP connectivity exists between the workstation and the Cisco ASA.
To establish an SSL connection, launch a browser and point the URL to the IP address of Cisco ASA. In Figure 18-1, the administrator is accessing ASDM by typing in https://172.18.124.205/admin/index.html as the URL.
Figure 18-1. Accessing the ASDM URL

Note
ASDM requires Java plug-in 1.4(2) or 1.5.0 installed on the web browser.
The security Cisco ASA presents a self-signed certificate to the workstation so that a secure connection can be established. If the certificate is accepted, the security Cisco ASA prompts the user to present authentication credentials. If the ASDM authentication is not set up, there is no default username. The default password is cisco, which is actually the telnet or exec password of the security Cisco ASA.
After a successful user authentication, Cisco ASA presents two ways to launch ASDM:
- ASDM as a Java applet The security Cisco ASA launches ASDM in the client's browser as a Java applet. This option is not feasible if a firewall that filters out Java applets exists between the client and the security Cisco ASA.
- ASDM as an application The security Cisco ASA offers a setup utility called asdm50-install.msi, which can be saved to the local hard drive of the workstation.
The setup utility installs the ASDM application under C:Program FilesCisco SystemsASDM as the default directory which can be changed when going through the installation process. During the install process, the setup utility creates a shortcut to the application on the Desktop and on the taskbar. This option does not rely on a web browser to launch the ASDM application. Additionally, multiple instances of this application can be launched to connect to different security Cisco ASA. One of the major advantages of using ASDM as an application is the fact that whenever a newer version of an ASDM image is uploaded to the security Cisco ASA's flash, the ASDM application is automatically upgraded without user intervention.
Note
ASDM as an application feature is currently supported on Windows-based operating systems.
ASDM can be started either from the desktop shortcut, Quick Launch, or via Start > Program Files > Cisco ASDM Launcher > Cisco ASDM Launcher, depending on the user selection. After the software installation, the ASDM launcher is automatically started.
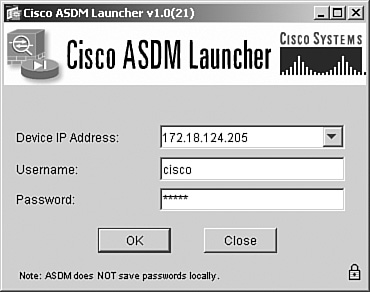
When the ASDM stub application is launched, it prompts for the IP address of the security Cisco ASA you are trying to connect and the user authentication credentials. Figure 18-2 illustrates this, where an SSL connection is being made to an Cisco ASA located at 172.18.124.205. Specify the username and password to log into ASDM.
Figure 18-2. Launching ASDM
Note
Chapters 18, 19, 20, and 21 use ASDM as an application to guide you through the configuration and monitoring features of the security Cisco ASA.
Tip
The ASDM application saves the previously connected IP addresses and username information in a file called deviceInfo.cfg. It is located under user_home_directory.asdmdata. It is highly recommended that you do not manually edit this file. It can be deleted if the IP addresses and the usernames need to be cleared.
Part I: Product Overview
Introduction to Network Security
- Introduction to Network Security
- Firewall Technologies
- Intrusion Detection and Prevention Technologies
- Network-Based Attacks
- Virtual Private Networks
- Summary
Product History
- Product History
- Cisco Firewall Products
- Cisco IDS Products
- Cisco VPN Products
- Cisco ASA All-in-One Solution
- Summary
Hardware Overview
Part II: Firewall Solution
Initial Setup and System Maintenance
- Initial Setup and System Maintenance
- Accessing the Cisco ASA Appliances
- Managing Licenses
- Initial Setup
- IP Version 6
- Setting Up the System Clock
- Configuration Management
- Remote System Management
- System Maintenance
- System Monitoring
- Summary
Network Access Control
- Network Access Control
- Packet Filtering
- Advanced ACL Features
- Content and URL Filtering
- Deployment Scenarios Using ACLs
- Monitoring Network Access Control
- Understanding Address Translation
- DNS Doctoring
- Monitoring Address Translations
- Summary
IP Routing
Authentication, Authorization, and Accounting (AAA)
- Authentication, Authorization, and Accounting (AAA)
- AAA Protocols and Services Supported by Cisco ASA
- Defining an Authentication Server
- Configuring Authentication of Administrative Sessions
- Authenticating Firewall Sessions (Cut-Through Proxy Feature)
- Configuring Authorization
- Configuring Accounting
- Deployment Scenarios
- Troubleshooting AAA
- Summary
Application Inspection
- Application Inspection
- Enabling Application Inspection Using the Modular Policy Framework
- Selective Inspection
- Computer Telephony Interface Quick Buffer Encoding Inspection
- Domain Name System
- Extended Simple Mail Transfer Protocol
- File Transfer Protocol
- General Packet Radio Service Tunneling Protocol
- H.323
- HTTP
- ICMP
- ILS
- MGCP
- NetBIOS
- PPTP
- Sun RPC
- RSH
- RTSP
- SIP
- Skinny
- SNMP
- SQL*Net
- TFTP
- XDMCP
- Deployment Scenarios
- Summary
Security Contexts
- Security Contexts
- Architectural Overview
- Configuration of Security Contexts
- Deployment Scenarios
- Monitoring and Troubleshooting the Security Contexts
- Summary
Transparent Firewalls
- Transparent Firewalls
- Architectural Overview
- Transparent Firewalls and VPNs
- Configuration of Transparent Firewall
- Deployment Scenarios
- Monitoring and Troubleshooting the Transparent Firewall
- Summary
Failover and Redundancy
- Failover and Redundancy
- Architectural Overview
- Failover Configuration
- Deployment Scenarios
- Monitoring and Troubleshooting Failovers
- Summary
Quality of Service
- Quality of Service
- Architectural Overview
- Configuring Quality of Service
- QoS Deployment Scenarios
- Monitoring QoS
- Summary
Part III: Intrusion Prevention System (IPS) Solution
Intrusion Prevention System Integration
- Intrusion Prevention System Integration
- Adaptive Inspection Prevention Security Services Module Overview (AIP-SSM)
- Directing Traffic to the AIP-SSM
- AIP-SSM Module Software Recovery
- Additional IPS Features
- Summary
Configuring and Troubleshooting Cisco IPS Software via CLI
- Configuring and Troubleshooting Cisco IPS Software via CLI
- Cisco IPS Software Architecture
- Introduction to the CIPS 5.x Command-Line Interface
- User Administration
- AIP-SSM Maintenance
- Advanced Features and Configuration
- Summary
Part IV: Virtual Private Network (VPN) Solution
Site-to-Site IPSec VPNs
- Site-to-Site IPSec VPNs
- Preconfiguration Checklist
- Configuration Steps
- Advanced Features
- Optional Commands
- Deployment Scenarios
- Monitoring and Troubleshooting Site-to-Site IPSec VPNs
- Summary
Remote Access VPN
- Remote Access VPN
- Cisco IPSec Remote Access VPN Solution
- Advanced Cisco IPSec VPN Features
- Deployment Scenarios of Cisco IPSec VPN
- Monitoring and Troubleshooting Cisco Remote Access VPN
- Cisco WebVPN Solution
- Advanced WebVPN Features
- Deployment Scenarios of WebVPN
- Monitoring and Troubleshooting WebVPN
- Summary
Public Key Infrastructure (PKI)
- Public Key Infrastructure (PKI)
- Introduction to PKI
- Enrolling the Cisco ASA to a CA Using SCEP
- Manual (Cut-and-Paste) Enrollment
- Configuring CRL Options
- Configuring IPSec Site-to-Site Tunnels Using Certificates
- Configuring the Cisco ASA to Accept Remote-Access VPN Clients Using Certificates
- Troubleshooting PKI
- Summary
Part V: Adaptive Security Device Manager
Introduction to ASDM
- Introduction to ASDM
- Setting Up ASDM
- Initial Setup
- Functional Screens
- Interface Management
- System Clock
- Configuration Management
- Remote System Management
- System Maintenance
- System Monitoring
- Summary
Firewall Management Using ASDM
- Firewall Management Using ASDM
- Access Control Lists
- Address Translation
- Routing Protocols
- AAA
- Application Inspection
- Security Contexts
- Transparent Firewalls
- Failover
- QoS
- Summary
IPS Management Using ASDM
- IPS Management Using ASDM
- Accessing the IPS Device Management Console from ASDM
- Configuring Basic AIP-SSM Settings
- Advanced IPS Configuration and Monitoring Using ASDM
- Summary
VPN Management Using ASDM
- VPN Management Using ASDM
- Site-to-Site VPN Setup Using Preshared Keys
- Site-to-Site VPN Setup Using PKI
- Cisco Remote-Access IPSec VPN Setup
- WebVPN
- VPN Monitoring
- Summary
Case Studies
EAN: 2147483647
Pages: 231
