Animation and Game Programming
Because of its powerful drawing capabilities, Java lends itself especially well to creating game programs-especially games that are created as applets so they can be played over the Internet. Game programming is a huge subject, big enough for a whole shelf of books. In this chapter, I just scratch the surface of creating basic animations and playing simple games. Specifically, you find out how to get a ball bouncing in an applet, how to create a paddle to hit the ball, and how to find out when you missed.
In other words, welcome to the 1970s! You're going to create an applet that plays Pong!
| Tip |
This chapter combines features that are presented in several different chapters throughout this book. Specifically, you find information about drawing shapes in Book IX, Chapter 2. For information about working with threads, refer to Book V, Chapter 1. For information creating event listeners, see Book VI, Chapter 2. And for details about creating and running applets, see Book VII, Chapter 1. |
Animating a Sprite
In animation and game programming, an object that moves around the screen is usually called a sprite. The sprite itself can be drawn by various means. If the sprite is a simple geometric shape such as a circle, you can just create an Ellipse2D object and use the draw or fill method to render it. More commonly, the sprite is represented by a small image. Then you use the drawImage method to render the sprite.
In some cases, the sprite may have a series of images associated with it. For example, if the sprite is a little person who walks around in your game world, you might have several images representing him walking left and right, or in various stages of his little stride. Then you can put these images in an array and use an index variable to keep track of which image to draw.
No matter what the sprite looks like, the basic technique for animating the sprite in Java is the same: Create a thread that periodically repaints the drawing component, and then calculate a new position for the sprite each time the component is repainted and draw the sprite in its new position.
For example, suppose you want to create a ball that travels across a component, starting at the left side of the component and traveling across to the right side. To do that, you have to do the following things:
- Create the component that the ball is drawn on. Usually, this component can just extend JComponent.
- Create a thread (a Runnable object) whose run method calls the drawing component's repaint method.
- In the paint method, recalculate the position of each shape being animated, and then draw it.
- Create an instance of the drawing component and add it to a frame or applet. Then pass this frame or applet to the thread (so that the thread knows which frame or applet needs to be repainted).
- To get the animation going, schedule repeated execution of the thread's code (typically every 10 or 20 milliseconds).
Sound simple enough? Listing 4-1 shows the first of several versions of an applet program that animates a moving ball. Figure 4-1 shows this applet in action when run in the applet viewer.
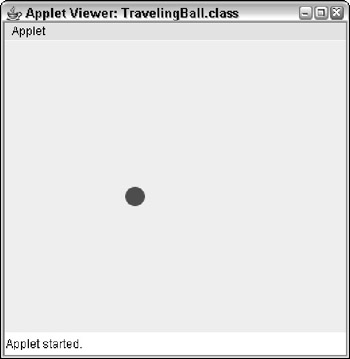
Figure 4-1: The BallRoom applet in action.
Listing 4-1: The BallRoom Applet
import java.applet.*;
import java.awt.*;
import javax.swing.*;
import java.awt.geom.*;
import java.util.concurrent.*;

public class BallRoom extends JApplet → 7
{
 public static final int WIDTH = 350;
 public static final int HEIGHT = 300;

 private PaintSurface canvas;

 public void init() → 14
 {
 this.setSize(WIDTH, HEIGHT);
 canvas = new PaintSurface();
 this.add(canvas, BorderLayout.CENTER);

 ScheduledThreadPoolExecutor executor =
 new ScheduledThreadPoolExecutor(3);
 executor.scheduleAtFixedRate(
 new AnimationThread(this),
 0L, 20L, TimeUnit.MILLISECONDS);
 }
}

class AnimationThread implements Runnable → 26
{
 JApplet c;

 public AnimationThread(JApplet c) → 30
 {
 this.c = c;
 }

 public void run() → 35
 {
 c.repaint();
 }
}

class PaintSurface extends JComponent → 41
{
 int x_pos = 0; // the starting X position
 int y_pos = 150; // the starting Y position
 int d = 20; // the diameter of the ball

 public void paint(Graphics g) → 47
 {

 Graphics2D g2 = (Graphics2D)g;
 g2.setRenderingHint(
 RenderingHints.KEY_ANTIALIASING,
 RenderingHints.VALUE_ANTIALIAS_ON);

 x_pos += 1; // move ball right one pixel

 Shape ball = new Ellipse2D.Float(
 x_pos, y_pos, d, d);
 g2.setColor(Color.RED);
 g2.fill(ball);
 }
}
The following paragraphs describe the key portions of this program:
|
→ 7 |
The BallRoom class extends JApplet and defines two public static constants, named WIDTH and HEIGHT. These constants are used to set the size of the component the ball is animated within. It also defines a PaintSurface variable named canvas that is used as the canvas on which the animated ball is drawn. |
|
→ 14 |
The init method is called when the applet starts up. It sets the size of the applet, and then creates a new instance of the PaintSurface class on which the ball is animated and adds it to the applet. It then uses the ScheduledThreadPoolExecutor class to create threads, and then calls a schedule method to start the animation. This particular schedule method (named scheduleAtFixedRate) executes a particular piece of code repeatedly. The method takes four parameters. The first parameter (new AnimationThread (this)) tells the method what code to execute. The second parameter (0L) tells the method how long to delay before beginning the code's execution (in this case, zero time units). The third parameter (20L) tells the method how often to repeat the code's execution (in this case, repeat every 20 time units). And the fourth parameter (TimeUnit.MILLISECONDS) tells the method how long each time unit is (in this case, one millisecond). |
|
→ 26 |
The AnimationThread class defines the thread that's used to animate the ball. |
|
→ 30 |
The constructor for the AnimationThread class accepts a JApplet object as a parameter and stores it in the c variable so it can be used later. |
|
→ 35 |
The run method contains the code that controls the animation. As you can see, it calls the repaint method of the JApplet object that was passed to the constructor. |
|
→ 41 |
The PaintSurface class extends JComponent. The instance variables defined for this class define the characteristics of the ball that is animated: its x and y position on the component and the ball's diameter. |
|
→ 47 |
The paint method is called whenever the PaintSurface component needs to be redrawn (every 20 milliseconds). The paint method begins by casting the graphics context to a Graphics2D object and setting antialiasing on. Then it calculates a new position for the ball by adding 1 to the x position. It then creates a Shape object to represent the ball as an ellipse at the current x_pos and y_pos positions, using the width and height specified by the d variable. Finally, it sets the color and draws the ball by calling the fill method. |
What about Double Buffering?
If you've looked into animation and game programming before, you may have heard of a technique called double buffering that's required to produce smooth, flicker-free animation. When you use double buffering, you don't draw shapes directly to the component. Instead, you create an off-screen image object called a buffer and draw the shapes to it. Then when all the shapes are drawn, you transfer the entire buffer image to the component.
Fortunately, any drawing you do on a Swing component is automatically double buffered. Before Swing, you had to manually do double buffering by creating an Image object and creating a graphics context so you could write to the Image. But with Swing, you don't have to do anything special to use double buffering.
If for some reason you want to turn double buffering off-maybe just to see how much it improves the animation for your application-you can do so by calling the setDoubleBuffered method of the component you're drawing to, like this:
this.setDoubleBuffered(false);
Bouncing the Ball
The program shown in Listing 4-1 illustrates the basic framework for a program that animates sprites. However, the ball it animates isn't very interesting: It just flies across the screen in a straight line and disappears off the right edge, never to be seen again. To be more interesting, the ball should travel in different directions and bounce off the edges of the component so it stays visible.
The trick of animating the ball so it travels in other than horizontal (or v ertical) lines and bounces off the walls is calculating the ball's new (x, y) position for each animation cycle. This problem has at least two basic approaches:
- The most realistic approach is to keep track of two variables for the ball: the angle it's traveling at and its speed. Then you can use high-school trigonometry to calculate the new (x, y) position of the ball for each cycle. And if the ball hits one of the edges, you have to calculate the ball's new angle. (You probably need some sines and cosines and maybe a square root or a logarithm or something. I'm not sure, I didn't do so good in math.)
- The easier way is to store two variables-call them x_speed and y_speed-that represent the distance the ball travels horizontally and vertically for each animation cycle. This technique is much easier because it doesn't require any math more complicated than addition. For each animation cycle, just add x_speed to the x position and add y_speed to the y position. If the ball hits the left or right edge, negate x_speed to reverse the ball's horizontal direction, and if the ball hits the top or bottom edge, negate y_speed so the ball reverses its vertical direction. The result is a pretty convincing bounce off the wall.
To add a capability for the ball to bounce, you need to add some instance variables and modify the paint method a bit. The resulting PaintSurface class is shown in Listing 4-2.
Listing 4-2: A Bouncing Version of the PaintSurface Class
class PaintSurface extends JComponent
{
 int x_pos = 0; → 3
 int y_pos = 0;
 int x_speed = 1;
 int y_speed = 2;
 int d = 20;
 int width = BallRoom.WIDTH;
 int height = BallRoom.HEIGHT;

 public void paint(Graphics g)
 {
 Graphics2D g2 = (Graphics2D)g;
 g2.setRenderingHint(
 RenderingHints.KEY_ANTIALIASING,
 RenderingHints.VALUE_ANTIALIAS_ON);
 if (x_pos < 0 || x_pos > width - d) → 17
 x_speed = -x_speed;
 if (y_pos < 0 || y_pos > height - d) → 19
 y_speed = -y_speed;
 x_pos += x_speed; → 21

 y_pos += y_speed;

 Shape ball = new Ellipse2D.Float( →24
 x_pos, y_pos, d, d);
 g2.setColor(Color.RED);
 g2.fill(ball);
 }
}
The following paragraphs describe the key elements of this class:
|
→ 3 |
For this version of the PaintSurface class, the instance variables keep track of the ball's x and y position and speed as well as its diameter and the height and width of the drawing surface. |
|
→ 17 |
This if statement checks to see if the ball has hit the left wall (the x position is less than zero) or the right wall (the x position is greater than the width of the component less the diameter of the ball). If so, the x speed is reversed. (You must take the diameter of the ball into account on the right wall because the x position indicates the position of the left side of the ball, and you want the ball to bounce when its right side hits the right wall.) |
|
→ 19 |
This if statement applies the same logic to the y speed to see if the ball has hit the top or bottom wall. |
|
→ 21 |
After the x and y speed values are adjusted for bounces, the next two statements move the ball. If x_speed is a positive number, the ball moves right. If it's negative, the ball moves left. Similarly, if y_speed is positive, the ball moves down; if it's negative, the ball moves up. |
|
→ 24 |
These lines draw the ball at its new location. |
Bouncing a Bunch of Balls
Most games require that you animate more than one sprite. For example, more than one ball may be on-screen at one time, or there might be other sprites besides balls. Thus the paint method needs to have the ability to move and draw multiple sprites.
One way to do that is to create a class for the sprites to be animated, and then add instances of that class to an array list or other collection. Then the paint method can use a loop to move and draw each sprite in the collection.
Creating a Ball class
To add the ability to animate more than one ball, start by adding a class that represents a single ball, as shown in Listing 4-3.
Listing 4-3: A Ball Class
class Ball extends Ellipse2D.Float → 1
{
 private int x_speed, y_speed; → 3
 private int d;
 private int width = BallRoom.WIDTH;
 private int height = BallRoom.HEIGHT;

 public Ball(int diameter) → 8
 {
 super((int)(Math.random() * (BallRoom.WIDTH - 20) +
 1),
 (int)(Math.random() * (BallRoom.HEIGHT - 20) +
 1),
 diameter, diameter);
 this.d = diameter;
 this.x_speed = (int)(Math.random() * 5 + 1);
 this.y_speed = (int)(Math.random() * 5 + 1);
 }

 public void move() → 18
 {
 if (super.x < 0 || super.x > width - d)
 x_speed = -x_speed;
 if (super.y < 0 || super.y > height - d)
 y_speed = -y_speed;
 super.x += x_speed;
 super.y += y_speed;
 }
}
The following paragraphs point out the highlights of this program:
|
→ 1 |
Because a ball is essentially an ellipse with a few additional characteristics, this class extends the Ellipse2D.Float class. An advantage of implementing the Ball class this way is that you can pass a Ball object directly to the draw and fill methods to paint the ball. |
|
→ 3 |
The Ball class defines five private instance variables, representing the x and y speeds, the diameter of the ball, and the width and height of the component the balls are animated within. Notice that the x and y positions of the ball have no instance variables. Because the Ellipse2D.Float class already keeps track of its x and y positions, you just use the x and y fields of the superclass when you need those values. |
|
→ 8 |
The Ball class defines a single constructor that accepts the diameter of the ball to create as a parameter, but calculates the other values at random. As a result, you can call the Ball constructor several times to create several balls, and each ball has a different starting position and trajectory. |
|
→ 18 |
The Ball class also has a move method, which can be called to move the ball. This method first adjusts the ball's trajectory if it has hit one of the edges. Then it simply adds the x_speed and y_speed values to the x and y fields of the superclass. |
Animating random balls
With the Ball class in hand, Listing 4-4 shows a version of the PaintComponent class that creates an array list with ten randomly placed balls, and then draws each one in the paint method.
Listing 4-4: The PaintSurface Class for Bouncing Balls
class PaintSurface extends JComponent
{
 public ArrayList balls = new ArrayList();

 public PaintSurface()
 {
 for (int i = 0; i < 10; i++)
 balls.add(new Ball(20));
 }

 public void paint(Graphics g)
 {
 Graphics2D g2 = (Graphics2D)g;
 g2.setRenderingHint(
 RenderingHints.KEY_ANTIALIASING,
 RenderingHints.VALUE_ANTIALIAS_ON);
 g2.setColor(Color.RED);
 for (Ball ball : balls)
 {
 ball.move();
 g2.fill(ball);
 }
 }
}
This class starts by declaring an instance variable named balls that holds the balls to be animated. Then, in the constructor, it uses a for loop to create ten balls and add them to the collection. And in the paint method, which is called once every 20 milliseconds, a for loop is used to call each ball's move method, and then pass the ball to the fill method to paint it on the component.
Figure 4-2 shows this program in action, with ten balls bouncing around randomly on-screen. If you feel daring, try changing the for statement in the PaintComponent constructor so it creates 100 balls instead of 10. The little applet window gets pretty crowded!
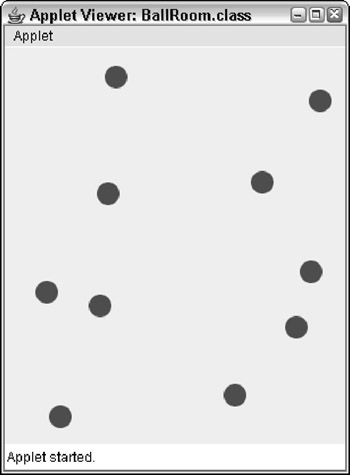
Figure 4-2: A room full of bouncing balls!
Creating Collidable Balls
The balls created by the Ball class shown previously have one slightly unrealistic behavior: They're transparent to each other. If two balls happen to arrive at the same place at the same time, they simply pass right through each other without noticing.
If you want to create balls that bounce off each other as well as off the walls, all you have to do is make a modification to the move method of the Ball class. Just get a reference to the collection that contains all the other balls and check each ball to see if the current ball has hit any of the other balls.
If so, adjust the trajectory of each ball accordingly.
Listing 4-5 shows a version of the Ball class in which the balls bounce off each other.
Listing 4-5: A Ball Class That Handles Collisions
class Ball extends Ellipse2D.Float
{
 public int x_speed, y_speed;
 private int d;
 private int width = BallRoom.WIDTH;
 private int height = BallRoom.HEIGHT;
 private ArrayList balls;

 public Ball(int diameter, ArrayList balls) →9
 {

 super((int)(Math.random() * (BallRoom.WIDTH - 20) + 1),
 (int)(Math.random() * (BallRoom.HEIGHT - 20) + 1),
 diameter, diameter);
 this.d = diameter;
 this.x_speed = (int)(Math.random() * 5 + 1);
 this.y_speed = (int)(Math.random() * 5 + 1);
 this.balls = balls;
 }

 public void move() → 20
 {
 // detect collision with other balls
 Rectangle2D r = new Rectangle2D.Float(
 super.x, super.y, d, d);
 for (Ball b : balls)
 {
 if (b != this && → 27
 b.intersects(r))
 {
 // on collision, the balls swap speeds → 30
 int tempx = x_speed;
 int tempy = y_speed;
 x_speed = b.x_speed;
 y_speed = b.y_speed;
 b.x_speed = tempx;
 b.y_speed = tempy;
 break; → 37
 }
 }
 if (super.x < 0) → 40
 {
 super.x = 0;
 x_speed = Math.abs(x_speed);
 }
 else if (super.x > width - d)
 {
 super.x = width - d;
 x_speed = -Math.abs(x_speed);
 }
 if (super.y < 0)
 {
 super.y = 0;
 y_speed = Math.abs(y_speed);
 }
 else if (super.y > height - d)
 {
 super.y = height - d;
 y_speed = -Math.abs(y_speed);
 }
 super.x += x_speed;
 super.y += y_speed;
 }
}
The following lines describe the high points of this version of the Ball class:
|
→ 9 |
The constructor accepts a reference to the array list that holds the balls. The Ball class needs this list so each ball can determine if it has struck any other balls. The reference to the array list is saved in an instance variable named balls. |
|
→ 20 |
The move method begins by creating a rectangle from the current ball. You see how this is used in a moment. Then it uses a for loop to check for a collision with each of the balls in the balls array list. |
|
→ 27 |
For each ball, an if statement tests two conditions. First, it eliminates the current ball by checking b != this. If you allowed balls to collide with themselves, the balls wouldn't be in constant collision and wouldn't be able to move. Next, the if statement checks to see if the current ball has collided with the other ball. It does that by calling intersects, a method defined by the Shape interface. This method accepts a rectangle object and returns true if the shape intersects any part of the specified rectangle. The rectangle object created before the for loop began is used as the parameter to this method. (Note that this isn't a perfect collision test; it sometimes treats near misses as collisions. But it's close enough.) |
|
→ 30 |
If a collision is detected, the x and y speed values of the two balls are swapped. That means that not only do the balls bounce away from each other, but the slower ball picks up speed, and the faster ball slows down. |
|
→ 37 |
A break statement is executed if a collision is detected. That's to prevent detecting collisions with more than one ball. Without this break statement, collisions that involve more than two balls usually result in pretty strange behavior. Try removing the break statement to see what happens. (Even with this break statement, the balls sometimes behave in unexpected ways. I think it's kind of fun to watch, but then again, I'm pretty easily entertained.) |
|
→ 40 |
The rest of this method is different from the previous version primarily because when you check for collisions with both the edges of the component and other balls, the ball always has a chance to collide with both the edge and another ball. Thus the if statements that check for edge collisions force the x and y speed values to be appropriate negative or positive numbers. |
Playing Games
The key to turning an animation program into a game program is adding user interaction via the mouse or keyboard. Either way, the technique is the same: You add event listeners to handle keyboard or mouse events. Then, in the event listeners, you make appropriate changes to the game's sprites according to the user's actions.
For example, suppose you want to create a paddle that the user can move back and forth by dragging the mouse. To do that, just add a listener for mouse motion and save the mouse pointer's x position in an instance variable that represents the top-left corner of the paddle. Here's code to do this, written as an anonymous inner class:
addMouseMotionListener(new MouseMotionAdapter()
{
 public void mouseMoved(MouseEvent e)
 {
 paddle_x = e.getX() - 30;
 }
} );
Place this code in the constructor for the component the animation is drawn on. Notice that I subtracted 30 from the x position. That's because the width of the paddle is 60, and you want the mouse position to be the center of the paddle, not the left edge.
Having stored the mouse position in an instance variable, you can use it to draw the paddle in the paint method. Here's an example:
Shape paddle = new Rectangle2D.Float(
 paddle_x, 360, 60, 8);
g2.setColor(Color.BLACK);
g2.fill(paddle);
Here the paddle is drawn as a 60 × 8 black rectangle. When the user moves the mouse over the applet, the paddle moves along with the mouse.
To show how you can incorporate this technique into a program that plays a simple game, Listing 4-6 shows the complete code for a simple, Pong-like game, where a ball bounces around and the user tries to hit it with the paddle. Each time the user hits the ball, he or she gets points based on how fast the ball is moving at the time. If the user misses the ball, 1,000 points are deducted, and the ball is replaced by a new ball with a random speed and trajectory.
To add a small amount of interest to this admittedly boring game, the player can put English on the ball by moving the mouse pointer quickly at the moment it hits the ball. When the program detects this movement, the ball changes color and its x velocity is increased by 50 percent. Thus, the ball bounces off the paddle at a skewed angle and increases its speed. The player scores more points with each hit, but of course the ball is harder to hit when it's traveling faster.
Figure 4-3 shows this program in action. As you can see, I'm getting pretty good at it.

Figure 4-3: The NotPong game in action.
Listing 4-6: The NotPong Program
import java.applet.*;
import java.awt.*;
import java.awt.event.*;
import javax.swing.*;
import java.awt.geom.*;
import java.util.concurrent.*;

public class NotPong extends JApplet → 8
{
 public static final int WIDTH = 400;
 public static final int HEIGHT = 400;

 private PaintSurface canvas;

 public void init() → 16
 {
 this.setSize(WIDTH, HEIGHT);
 canvas = new PaintSurface();
 this.add(canvas, BorderLayout.CENTER);
 ScheduledThreadPoolExecutor executor =
 new ScheduledThreadPoolExecutor(3);
 executor.scheduleAtFixedRate(new AnimationThread(this),
 0L, 20L, TimeUnit.MILLISECONDS);
 }
}

class AnimationThread implements Runnable → 27
{
 JApplet c;

 public AnimationThread(JApplet c)
 {
 this.c = c;

 }

 public void run()
 {
 c.repaint();
 }
}

class PaintSurface extends JComponent → 42
{
 int paddle_x = 0; → 44
 int paddle_y = 360;

 int score = 0; → 47
 float english = 1.0f;

 Ball ball; → 50
 Color[] color = {Color.RED, Color.ORANGE, → 52
 Color.MAGENTA, Color.ORANGE,
 Color.CYAN, Color.BLUE};
 int colorIndex;

 public PaintSurface() → 57
 {
 addMouseMotionListener(new MouseMotionAdapter()
 {
 public void mouseMoved(MouseEvent e)
 {
 if (e.getX() - 30 - paddle_x > 5)
 english = 1.5f;
 else if (e.getX() - 30 - paddle_x < -5)
 english = -1.5f;
 else
 english = 1.0f;
 paddle_x = e.getX() - 30;
 }
 } );
 ball = new Ball(20);
 }

 public void paint(Graphics g) → 75
 {
 Graphics2D g2 = (Graphics2D)g;
 g2.setRenderingHint(
 RenderingHints.KEY_ANTIALIASING,
 RenderingHints.VALUE_ANTIALIAS_ON);
 Shape paddle = new Rectangle2D.Float( → 82
 paddle_x, paddle_y, 60, 8);

 g2.setColor(color[colorIndex % 6]); → 85
 if (ball.intersects(paddle_x, paddle_y, 60, 8) → 87
 && ball.y_speed > 0)
 {
 ball.y_speed = -ball.y_speed;
 ball.x_speed = (int)(ball.x_speed * english);
 if (english != 1.0f)
 colorIndex++;
 score += Math.abs(ball.x_speed * 10);

 }

 if (ball.getY() + ball.getHeight() → 97
 >= NotPong.HEIGHT)
 {
 ball = new Ball(20);
 score -= 1000;
 colorIndex = 0;
 }
 ball.move(); → 104
 g2.fill(ball);

 g2.setColor(Color.BLACK); → 107
 g2.fill(paddle);
 g2.drawString("Score: " + score, 250, 20); → 110
 }
}

class Ball extends Ellipse2D.Float → 114
{
 public int x_speed, y_speed;
 private int d;
 private int width = NotPong.WIDTH;
 private int height = NotPong.HEIGHT;

 public Ball(int diameter)
 {
 super((int)(Math.random() * (NotPong.WIDTH - 20) + 1),
 0, diameter, diameter);
 this.d = diameter;
 this.x_speed = (int)(Math.random() * 5 + 5);
 this.y_speed = (int)(Math.random() * 5 + 5);
 }

 public void move()
 {
 if (super.x < 0 || super.x > width - d)
 x_speed = -x_speed;
 if (super.y < 0 || super.y > height - d)
 y_speed = -y_speed;
 super.x += x_speed;
 super.y += y_speed;
 }
}
The following paragraphs explain the gory details of how this program works:
|
→ 8 |
Like the other examples in this chapter, the NotPong class extends JApplet. However, you can get the program to run as a stand-alone Swing application with just a few minor changes. |
|
→ 16 |
The init method is called when the applet is started. It sets the size of the applet, creates a new PaintSurface object and adds it to the applet, and then creates and starts the thread that controls the animation. |
|
→ 27 |
The AnimationThread class in this program is the same as in the other programs in this chapter. The thread is scheduled to execute every 20 milliseconds. Inside the thread's run method, the repaint method forces the animation to update itself. |
|
→ 42 |
The PaintSurface class extends JComponent. It provides the surface on which the animations are drawn. |
|
→ 44 |
These instance variables define the initial position of the paddle. |
|
→ 47 |
These instance variables keep track of the score and the English applied to the ball. The English is initially set to 1.0, but (as you see later) it changes to –1.5 or 1.5 if the user moves the paddle quickly as the ball is hit. |
|
→ 50 |
This instance variable represents the ball. |
|
→ 52 |
An array of Color objects and an index variable are used so the ball can be drawn with several different colors. Each time the user hits the ball with English applied, the index variable is incremented so the ball is drawn with a different color. |
|
→ 57 |
The constructor for the PaintSurface class adds a mouse motion listener that extends the MouseMotionAdapter class. In this anonymous class, the mouseMoved method simply updates the paddle's x position. After the listener is added, a new ball object is created. |
|
→ 75 |
The paint method is called each time the component is repainted, which happens approximately every 20 milliseconds. This method begins by casting the graphics context object to Graphics2D and enabling antialiasing to eliminate flicker. |
|
→ 82 |
This statement creates the Shape object that represents the paddle. |
|
→ 85 |
This statement sets the color used to draw the ball. Note that the remainder division operator is used to provide an index value that's always between 0 and 6. |
|
→ 87 |
This if statement determines if the ball has struck the paddle. It does this by calling the intersects method of the ball (the Ball class inherits this method from its base class Rectangle2D.Float). (The second part of the if condition makes sure the ball is traveling downward when it hits; a hit isn't registered if the ball is traveling up. This happens on occasion, especially when the ball is moving fast.) If the ball has hit the paddle, the y speed is reversed (to make the ball travel up instead of down), and the x speed is multiplied by the English amount. Then, if the English amount is other than 1.0, the color index variable is incremented. And finally, the player's score is increased by ten times the ball's x speed. Thus the user scores more if he or she hits a fast-moving ball. |
|
→ 97 |
This if statement checks to see if the ball has hit the south wall. If so, a new ball is created, the color index is reset to zero, and 1,000 points are deducted from the score. |
|
→ 104 |
These statements move the ball and draw it in its new position. |
|
→ 107 |
These statements draw the paddle after setting the color to black. |
|
→ 110 |
This statement draws the score near the top right of the playing area. |
|
→ 114 |
This class defines the ball. As it turns out, this class is nearly identical to the Ball class shown earlier in this chapter, in the section "Creating a Ball class". For an explanation of how it works, refer to that section. |
Book I - Java Basics
Book II - Programming Basics
- Book II - Programming Basics
- Java Programming Basics
- Working with Variables and Data Types
- Working with Numbers and Expressions
- Making Choices
- Going Around in Circles (Or, Using Loops)
- Pulling a Switcheroo
- Adding Some Methods to Your Madness
- Handling Exceptions
Book III - Object-Oriented Programming
- Book III - Object-Oriented Programming
- Understanding Object-Oriented Programming
- Making Your Own Classes
- Working with Statics
- Using Subclasses and Inheritance
- Using Abstract Classes and Interfaces
- Using the Object and Class Classes
- Using Inner Classes
- Packaging and Documenting Your Classes
Book IV - Strings, Arrays, and Collections
- Book IV - Strings, Arrays, and Collections
- Working with Strings
- Using Arrays
- Using the ArrayList Class
- Using the LinkedList Class
- Creating Generic Collection Classes
Book V - Programming Techniques
Book VI - Swing
- Book VI - Swing
- Swinging into Swing
- Handling Events
- Getting Input from the User
- Choosing from a List
- Using Layout Managers
Book VII - Web Programming
Book VIII - Files and Databases
- Book VIII - Files and Databases
- Working with Files
- Using File Streams
- Database for $100, Please
- Using JDBC to Connect to a Database
- Working with XML
Book IX - Fun and Games
EAN: 2147483647
Pages: 332
