Creating Your First ASP.NET Web Application
Discussing ASP.NET in depth is beyond the scope of this book. In this chapter we will take an "as needed" approach, discussing only the techniques we will use in our applications. If you are looking for an introductory ASP.NET book, try Essential ASP.NET by Fritz Onion (published by Addison-Wesley).
To understand ASP.NET and Visual Studio .NET integration, we will write a simple non-GDI+ Web application. In this application we will add some controls to a Web page: a generic button, a text box, and an Image button. After adding these controls, we will write code in the button click event handler that will read the contents of the text box as a file name and display the file in the Image button. Let's get started!
12.1.1 Creating a Web Application Project
Creating a new ASP.NET Web application using Visual Studio .NET is simple: First we create a new project by choosing File | New | Project | Visual C# Projects and then selecting the ASP.NET Web Application template. As Figure 12.3 shows, we give our application the name FirstWebApp. It resides in the GDIPlusGuide folder of localhost, which is the default Web server on our local machine.
Figure 12.3. The FirstWebApp project
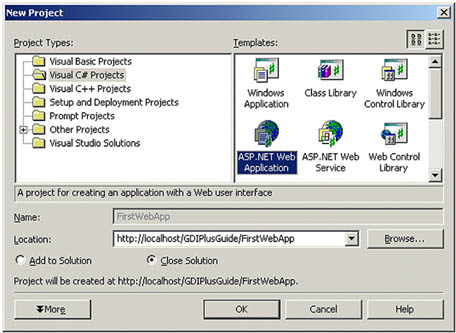
The Location box displays the default option of http://localhost and the application name. Here localhost represents the default IIS server running on our local machine. The default virtual directory for localhost is C:Inetpubwwwroot.
Note
If you are using a remote server for your development, you'll need to provide your server name instead of localhost. You can either create the project in the root of the server or create a new folder.
Clicking the OK button creates a new directory, FirstWebApp in the server's virtual directory. It also creates a new Web application and sends us to the default WebForm1.aspx page (see Figure 12.4).
Figure 12.4. The default WebForm1.aspx page

From here we can edit our page's HTML. Two modes are available: Design and HTML (see the bottom left corner of Figure 12.4). We click the HTML button to edit the code, as shown in Figure 12.5.
Figure 12.5. The HTML view of WebForm1.aspx
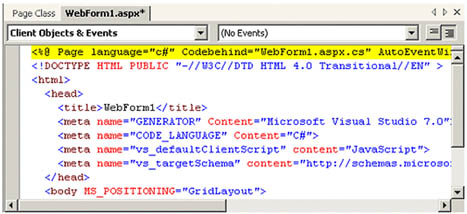
The HTML view shows us the HTML code of a page, its controls, and its control properties. The HTML editor also lets us edit the HTML manually. (Although we can edit the code of a page manually in HTML view, we will not need to do that for the examples in this book.)
If we switch back to the design mode and right-click on the page, we see several options: View HTML Source, Build Style, View in Browser, View Code, Synchronize Document Outline, and so on.
We can set the properties of a page by selecting Properties from the context menu (which we bring up with a right mouse-click). The Properties menu opens the DOCUMENT Property Pages window (see Figure 12.6). Three tabs are available in this window: General, Color and Margins, and Keywords. Most of the properties are self-explanatory. The General tab contains page title, background image, target schema, character set, page layout, and client and server language properties.
Figure 12.6. An ASP.NET document's page properties
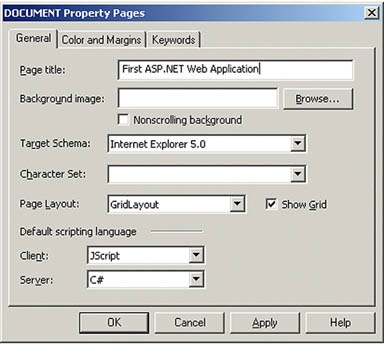
The Page Layout property has two options: GridLayout and FlowLayout. We use GridLayout when we want to drop controls to the page and reposition them. If we want to add text to the page, we must set the page layout to FlowLayout. After we set the Page Layout property to FlowLayout, the editor works as a text editor.
12.1.2 Adding Web Controls to a Web Form
Visual Studio .NET provides a Web Forms control toolbox that's similar to the Windows control toolbox. We can open the toolbox by selecting the View | Toolbox main menu item. The Web Forms category of the toolbox contains the server-side controls (controls available on the server, for which all processing is done on the server). When a browser requests a control, ASP.NET converts the request into HTML and sends it to the browser. The HTML category contains HTML controls. HTML controls are simple HTML tags with all processing done on the client side. As a result, HTML controls are often faster than server-side controls.
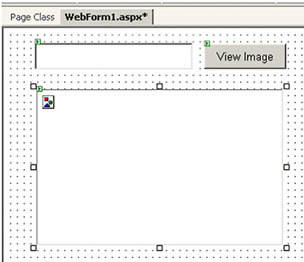
Let's switch the page back to the Design and GridLayout mode and add a button, a text box, and an Image control to the page by dragging these controls from the Web Forms toolbox to WebForm1.aspx. We will use the View Image button to view an image. The ImageUrl property of the View Image button represents the image that this control will view.
The page should now look like Figure 12.7 (after you position your controls). As the figure shows, we change the button's text to "View Image" by right-clicking on the Properties menu item, which launches the Properties window.
Figure 12.7. The WebForm1.aspx design mode after the addition of Web Forms controls
12.1.3 Writing Code on the Button Click Event Handler
The last step of this tutorial is to add an event handler for the button click event, which will set the ImageUrl property of the Image button. This is similar to adding a control event in a Windows Forms application. You can double-click on the button to add a button click event handler.
Double-clicking on the button adds a Button1_Click method to the WebForm1.aspx.cs class, which hosts code for the page controls and events. Now we write a line of code that sets the ImageUrl property of the Image control as the text of the TextBox control. The button click event handler code is given in Listing 12.1.
Listing 12.1 The button click event handler
private void Button1_Click(object sender,
System.EventArgs e)
{
Image1.ImageUrl = TextBox1.Text;
}
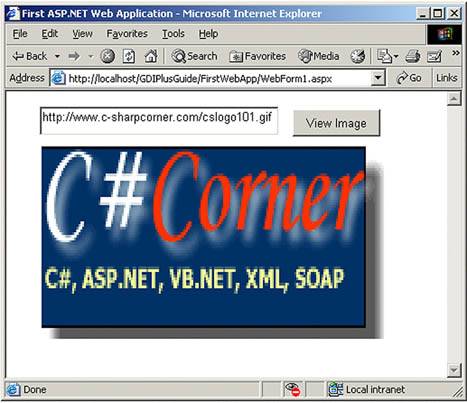
Now compile and run the project. In the text box we type "http://www.c-sharpcorner.com/cslogo101.gif" (or any valid image URL) as the URL name and click the View Image button. The output of the program looks like Figure 12.8.
Figure 12.8. Viewing an image in an Image control
Now that we have seen how to create a simple Web application using Visual Studio .NET and ASP.NET, in the next section we will move on to GDI+ and show how to use GDI+ to write graphics Web applications.
GDI+: The Next-Generation Graphics Interface
- GDI+: The Next-Generation Graphics Interface
- Understanding GDI+
- Exploring GDI+ Functionality
- GDI+ from a GDI Perspective
- GDI+ Namespaces and Classes in .NET
- Summary
Your First GDI+ Application
- Your First GDI+ Application
- Drawing Surfaces
- The Coordinate System
- Tutorial: Your First GDI+ Application
- Some Basic GDI+ Objects
The Graphics Class
- The Graphics Class
- Graphics Class Properties
- Graphics Class Methods
- The GDI+Painter Application
- Drawing a Pie Chart
Working with Brushes and Pens
- Working with Brushes and Pens
- Understanding and Using Brushes
- Using Pens in GDI+
- Transformation with Pens
- Transformation with Brushes
- System Pens and System Brushes
- A Real-World Example: Adding Colors, Pens, and Brushes to the GDI+Painter Application
Colors, Fonts, and Text
- Colors, Fonts, and Text
- Accessing the Graphics Object
- Working with Colors
- Working with Fonts
- Working with Text and Strings
- Rendering Text with Quality and Performance
- Advanced Typography
- A Simple Text Editor
- Transforming Text
Rectangles and Regions
- Rectangles and Regions
- The Rectangle Structure
- The Region Class
- Regions and Clipping
- Clipping Regions Example
- Regions, Nonrectangular Forms, and Controls
Working with Images
- Working with Images
- Raster and Vector Images
- Working with Images
- Manipulating Images
- Playing Animations in GDI+
- Working with Bitmaps
- Working with Icons
- Skewing Images
- Drawing Transparent Graphics Objects
- Viewing Multiple Images
- Using a Picture Box to View Images
- Saving Images with Different Sizes
Advanced Imaging
- Advanced Imaging
- Rendering Partial Bitmaps
- Working with Metafiles
- Color Mapping Using Color Objects
- Image Attributes and the ImageAttributes Class
- Encoder Parameters and Image Formats
Advanced 2D Graphics
- Advanced 2D Graphics
- Line Caps and Line Styles
- Understanding and Using Graphics Paths
- Graphics Containers
- Reading Metadata of Images
- Blending Explained
- Alpha Blending
- Miscellaneous Advanced 2D Topics
Transformation
- Transformation
- Coordinate Systems
- Transformation Types
- The Matrix Class and Transformation
- The Graphics Class and Transformation
- Global, Local, and Composite Transformations
- Image Transformation
- Color Transformation and the Color Matrix
- Matrix Operations in Image Processing
- Text Transformation
- The Significance of Transformation Order
Printing
- Printing
- A Brief History of Printing with Microsoft Windows
- Overview of the Printing Process
- Your First Printing Application
- Printer Settings
- The PrintDocument and Print Events
- Printing Text
- Printing Graphics
- Print Dialogs
- Customizing Page Settings
- Printing Multiple Pages
- Marginal Printing: A Caution
- Getting into the Details: Custom Controlling and the Print Controller
Developing GDI+ Web Applications
- Developing GDI+ Web Applications
- Creating Your First ASP.NET Web Application
- Your First Graphics Web Application
- Drawing Simple Graphics
- Drawing Images on the Web
- Drawing a Line Chart
- Drawing a Pie Chart
GDI+ Best Practices and Performance Techniques
- GDI+ Best Practices and Performance Techniques
- Understanding the Rendering Process
- Double Buffering and Flicker-Free Drawing
- Understanding the SetStyle Method
- The Quality and Performance of Drawing
GDI Interoperability
Miscellaneous GDI+ Examples
- Miscellaneous GDI+ Examples
- Designing Interactive GUI Applications
- Drawing Shaped Forms and Windows Controls
- Adding Copyright Information to a Drawn Image
- Reading and Writing Images to and from a Stream or Database
- Creating Owner-Drawn List Controls
Appendix A. Exception Handling in .NET
