Manipulating Images
In the previous section we covered how to read, view, and save images. In this section we will manipulate images and cover the following topics:
- Creating image thumbnails
- Rotating
- Flipping and zooming in and out (magnifying and demagnifying) images
7.3.1 Creating a Thumbnail of an Image
A thumbnail is a small representation of an image. The Image class provides a method called GetThumbnailImage, which is used to create a thumbnail. This method's first two parameters are the width and height of the thumbnail image. The third parameter is Image.GetThumbnailImageAbort, which is not used in GDI+ version 1.0 but must be passed in for compatibility. The fourth parameter must be of type IntPtr.Zero. This parameter is not used in the current version. If both the width and height parameters are 0, GDI+ will return the embedded thumbnail if there is one in the image; otherwise a system-defined size is used. For most JPEG images from digital cameras, it is better to pass both zeros in for both parameters to get the embedded thumbnail.
To test the thumbnail code, we add a menu named Options to the MainMenu control, as well as a Create Thumbnail menu item. We add Create Thumbnail as a submenu item or on a button click event handler, as Listing 7.6 shows. We create an Image.GetThumbnailImageAbort parameter, and then we call GetThumbnailImage with one-fourth the width and height of the original size, followed by the DrawImage method.
Listing 7.6 Creating and drawing a thumbnail image
private void ThumbnailMenu_Click(object sender,
 System.EventArgs e)
{
 if(curImage != null)
 {
 // Callback
 Image.GetThumbnailImageAbort tnCallBack =
 new Image.GetThumbnailImageAbort(tnCallbackMethod);
 // Get the thumbnail image
 Image thumbNailImage = curImage.GetThumbnailImage
 (100, 100, tnCallBack, IntPtr.Zero);
 // Create a Graphics object
 Graphics tmpg = this.CreateGraphics();
 tmpg.Clear(this.BackColor);
 // Draw thumbnail image
 tmpg.DrawImage(thumbNailImage, 40, 20);
 // Dispose of Graphics object
 tmpg.Dispose();
 }
}
// Must be called, but not used
public bool tnCallbackMethod()
{
 return false;
}
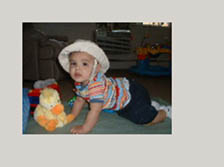
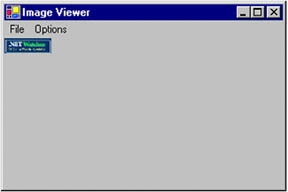
Now we run the application and open Neel01.jpg. If we click the Create Thumbnail menu item, the new thumbnail image looks like Figure 7.7.
Figure 7.7. A thumbnail image
7.3.2 Rotating and Flipping Images
Rotating and flipping are common operations in many imaging programs. Rotation rotates an image at an angle that is a multiple of 90. Flipping reflects an image on an axis.
The RotateFlip method allows us to rotate and flip images. The value of RotateFlip is of type RotateFlipType enumeration, which defines the direction of rotation and flipping. The members of the RotateFlipType enumeration (listed in Table 7.5) are easy to understand.
To rotate and/or flip an image, call RotateFlip and pass in any of the values in Table 7.5. The following code snippets show different rotation and flip options.
- Rotating 90 degrees:
curImage.RotateFlip(RotateFlipType.Rotate90FlipNone);
- Rotating 180 degrees:
curImage.RotateFlip(RotateFlipType.Rotate180FlipNone);
- Rotating 270 degrees:
curImage.RotateFlip(RotateFlipType.Rotate270FlipNone);
- Flipping on the x-axis only, with no rotation:
curImage.RotateFlip(RotateFlipType.RotateNoneFlipX);
- Flipping on the y-axis only, with no rotation:
curImage.RotateFlip(RotateFlipType.RotateNoneFlipY);
- Flipping on the x- and y-axes, with no rotation:
curImage.RotateFlip(RotateFlipType.RotateNoneFlipXY);
- Rotating 180 degrees and flipping on the x-axis:
curImage.RotateFlip(RotateFlipType.Rotate180FlipX);
7.3.3 Adding Rotate and Flip Options to the Image Viewer
Now let's add rotate and flip options to the ImageViewer application.
We add four submenus to the Options menuRotate, Flip, Fit, and Zoom. We will cover the Rotate and Flip options in this section, and Fit and Zoom in Sections 7.3.4 and 7.3.5, respectively.
|
Member |
Description |
|---|---|
|
Rotate180FlipNone |
180-degree rotation without flipping |
|
Rotate180FlipX |
180-degree rotation with a horizontal flip |
|
Rotate180FlipXY |
180-degree rotation with horizontal and vertical flips |
|
Rotate180FlipY |
180-degree rotation with a vertical flip |
|
Rotate270FlipNone |
270-degree rotation without flipping |
|
Rotate270FlipX |
270-degree rotation with a horizontal flip |
|
Rotate270FlipXY |
270-degree rotation with horizontal and vertical flips |
|
Rotate270FlipY |
270-degree rotation with a vertical flip |
|
Rotate90FlipNone |
90-degree rotation without flipping |
|
Rotate90FlipX |
90-degree rotation with a horizontal flip |
|
Rotate90FlipXY |
90-degree rotation with horizontal and vertical flips |
|
Rotate90FlipY |
90-degree rotation with a vertical flip |
|
RotateNoneFlipNone |
No rotation and no flipping |
|
RotateNoneFlipX |
No rotation, with a horizontal flip |
|
RotateNoneFlipXY |
No rotation, with horizontal and vertical flips |
|
RotateNoneFlipY |
No rotation, with a vertical flip |
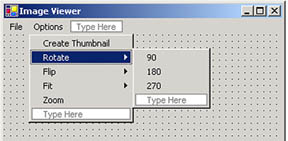
We add three items to the Rotate submenu: 90, 180, and 270 (see Figure 7.8). These items rotate an image 90, 180, and 270 degrees, respectively. You can add as many items as you want. You can even allow users to enter an arbitrary angle.
Figure 7.8. Rotate menu items
Now we add three items to the Flip submenu: FlipX, FlipY, and FlipXY (see Figure 7.9). These items flip an image about the x-, y-, and xy-axes, respectively. You can add more items if you wish.
Figure 7.9. Flip menu items

Within our program we give the menu items meaningful names. For example, the 90, 180, and 270 menu items are represented by Rotate90Menu, Rotate180Menu, and Rotate270Menu, respectively. And we use FlipXMenu, FlipYMenu, and FlipXYMenu to represent the FlipX, FlipY, and FlipXY menu items, respectively.
The next step is to write code for the menu item event handlers. To add them, we simply double-click on the menu items. The code for the Rotate menu items is given in Listing 7.7. We check whether the Image object has been created and then call RotateFlip with the appropriate value. We also call Invalidate to redraw the image with the new settings.
Listing 7.7 Rotate menu item event handlers
// Rotate 90 degrees
private void Rotate90Menu_Click(object sender,
 System.EventArgs e)
{
 if(curImage != null)
 {
 curImage.RotateFlip(
 RotateFlipType.Rotate90FlipNone);
 Invalidate();
 }
}
// Rotate 180 degrees
private void Rotate180Menu_Click(object sender,
 System.EventArgs e)
{
 if(curImage != null)
 {
 curImage.RotateFlip(
 RotateFlipType.Rotate180FlipNone);
 Invalidate();
 }
}
// Rotate 270 degrees
private void Rotate270Menu_Click(object sender,
 System.EventArgs e)
{
 if(curImage != null)
 {
 curImage.RotateFlip(
 RotateFlipType.Rotate270FlipNone);
 Invalidate();
 }
}
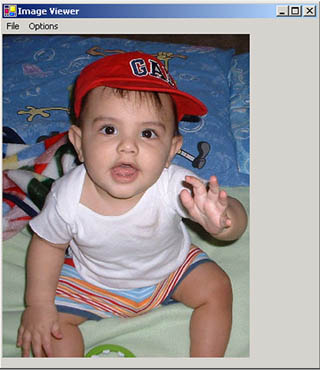
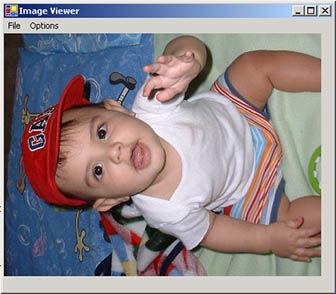
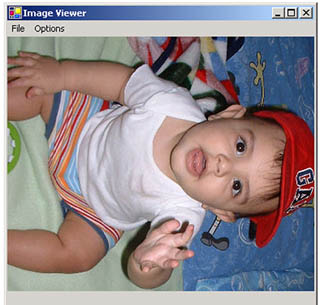
Now let's run and test the application. We open an image, and it looks like Figure 7.10.
Figure 7.10. An image with default settings
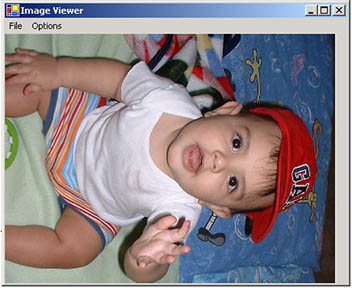
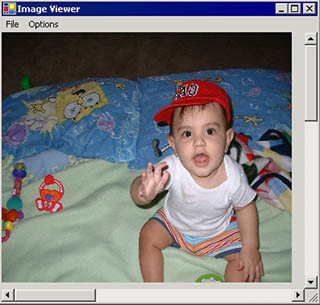
Selecting Rotate | 90 generates the image shown in Figure 7.11.
Figure 7.11. The image of Figure 7.10, rotated 90 degrees
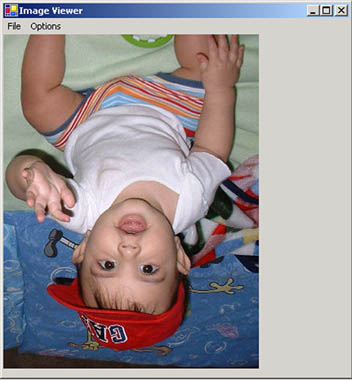
Selecting Rotate | 180 generates the image shown in Figure 7.12.
Figure 7.12. The imageof Figure 7.10, rotated 180 degrees
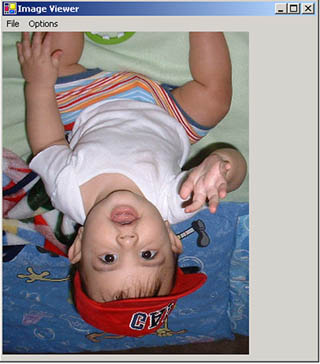
Selecting Rotate | 270 generates the image shown in Figure 7.13.
Figure 7.13. The image of Figure 7.10, rotated 270 degrees
We also add code for the Flip menu item click event handlers, as shown in Listing 7.8. We simply call RotateFlip with an appropriate value.
Listing 7.8 Flip menu item event handlers
// Flip X
private void FlipXMenu_Click(object sender,
 System.EventArgs e)
{
 if(curImage != null)
 {
 curImage.RotateFlip(
 RotateFlipType.RotateNoneFlipX);
 Invalidate();
 }
}
// Flip Y
private void FlipYMenu_Click(object sender,
 System.EventArgs e)
{
 if(curImage != null)
 {
 curImage.RotateFlip(
 RotateFlipType.RotateNoneFlipY);
 Invalidate();
 }
}
// Flip X and Y both
private void FlipXYMenu_Click(object sender,
 System.EventArgs e)
{
 if(curImage != null)
 {
 curImage.RotateFlip(
 RotateFlipType.RotateNoneFlipXY);
 Invalidate();
 }
}
Now if we flip the image shown in Figure 7.10, we can see the difference. The FlipX option generates the image shown in Figure 7.14.
Figure 7.14. The image of Figure 7.10, flipped in the x-direction
The FlipY option generates the image shown in Figure 7.15.
Figure 7.15. The image of Figure 7.10, flipped in the y-direction
The FlipXY option generates the image shown in Figure 7.16.
Figure 7.16. The image of Figure 7.10, flipped in both the x-and the y-directions
7.3.4 Fitting Images
An application that manipulates images often needs to fit them within the height and/or width of a drawing surface. A fit-width option sets the width of an image to the width of the surface (a form or a control), and a fit-height option sets the height of an image to the height of the surface. The fit-all option sets both the height and the width of an image to the height and width of the surface.
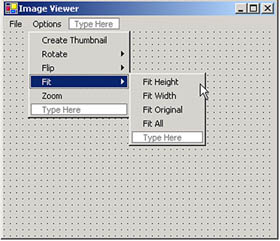
Let's add fit options to our ImageViewer application. We add four menu items to the Fit submenu: Fit Height, Fit Width, Fit Original, and Fit All, which will fit the height, width, original size of the image, and both height and width, respectively (see Figure 7.17).
Figure 7.17. Fit menu items
To implement the fit options, we need to add Rectangle and Size variables at the application level, as follows:
private Rectangle curRect;
private Size originalSize = new Size(0,0);
We will use curRect to store the current rectangle of the image and originalSize for the original size of the image.
Now we need to modify the OpenFileMenu click event handler. The new code is given in Listing 7.9. We activate autoscrolling by setting the AutoScroll and AutoScrollMinSize properties of the form to true. We create a rectangle from the current size of the image. We also save the current size of the image by setting the Width and Height properties of originalSize.
Listing 7.9 Modified Open File menu click event handler
private void OpenFileMenu_Click(object sender,
 System.EventArgs e)
{
 // Create OpenFileDialog
 OpenFileDialog opnDlg = new OpenFileDialog();
 // Set a filter for images
 opnDlg.Filter =
 "All Image files|*.bmp;*.gif;*.jpg;*.ico;"+
 "*.emf;,*.wmf|Bitmap Files(*.bmp;*.gif;*.jpg;"+
 "*.ico)|*.bmp;*.gif;*.jpg;*.ico|"+
 "Meta Files(*.emf;*.wmf;*.png)|*.emf;*.wmf;*.png";
 opnDlg.Title = "ImageViewer: Open Image File";
 opnDlg.ShowHelp = true;
 // If OK, selected
 if(opnDlg.ShowDialog() == DialogResult.OK)
 {
 // Read current selected file name
 curFileName = opnDlg.FileName;
 // Create the Image object using
 // Image.FromFile
 try
 {
 curImage = Image.FromFile(curFileName);
 }
 catch(Exception exp)
 {
 MessageBox.Show(exp.Message);
 }
 // Activate scrolling
 this.AutoScroll = true;
 this.AutoScrollMinSize = new Size
 ((int)(curImage.Width),
 (int)(curImage.Height));
 // Repaint the form, which forces the paint
 // event handler
 this.Invalidate();
 }
 // Create current rectangle
 curRect = new Rectangle(0, 0,
 curImage.Width, curImage.Height);
 // Save original size of the image
 originalSize.Width = curImage.Width;
 originalSize.Height = curImage.Height;
}
The paint event handler must also be modified. The new code is given in Listing 7.10. We use the curRect rectangle to view the image.
Listing 7.10 Modified paint event handler
private void Form1_Paint(object sender,
 System.Windows.Forms.PaintEventArgs e)
{
 Graphics g = e.Graphics;
 if(curImage != null)
 {
 // Draw image using the DrawImage method
 g.DrawImage(curImage, new Rectangle
 (this.AutoScrollPosition.X,
 this.AutoScrollPosition.Y,
 (int)(curRect.Width),
 (int)(curRect.Height)));
 }
}
The last step is to add event handler code for the Fit Height, Fit Width, Fit Original, and Fit All menu options, as shown in Listing 7.11. For the Fit Width option, we set the width of the current rectangle to the width of the form; for the Fit Height option, we set the height of the current rectangle to the height of the form; for the Fit All option, we set both the height and width of the current rectangle to the height and width of the form; and for Fit Original, we set the current rectangle's height and width to the height and width of the original file saved as originalSize.
Listing 7.11 Fit menu item event handlers
private void FitWidthMenu_Click(object sender,
 System.EventArgs e)
{
 if(curImage != null)
 {
 curRect.Width = this.Width;
 Invalidate();
 }
}

private void FitHeightMenu_Click(object sender,
 System.EventArgs e)
{
 if(curImage != null)
 {
 curRect.Height = this.Height;
 Invalidate();
 }
}

private void FitOriginalMenu_Click(object sender,
 System.EventArgs e)
{
 if(curImage != null)
 {
 curRect.Height = originalSize.Height;
 curRect.Width = originalSize.Width;
 Invalidate();
 }
}

private void FitAllMenu_Click(object sender,
 System.EventArgs e)
{
 if(curImage != null)
 {
 curRect.Height = this.Height;
 curRect.Width = this.Width;
 Invalidate();
 }
}
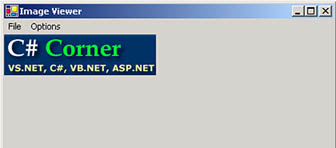
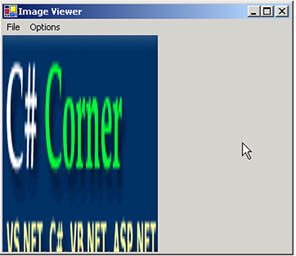
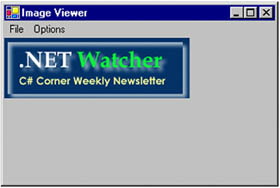
Now we compile and run the application, and we view an image. The original image looks like Figure 7.18.
Figure 7.18. An image in ImageViewer
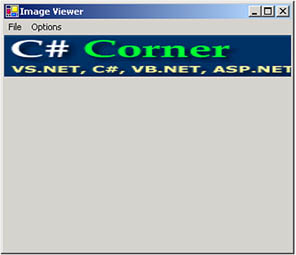
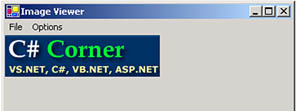
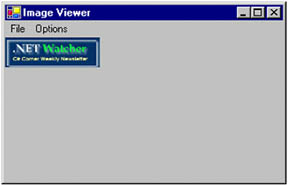
The Fit Width option generates the image shown in Figure 7.19.
Figure 7.19. The image of Figure 7.18 after Fit Width
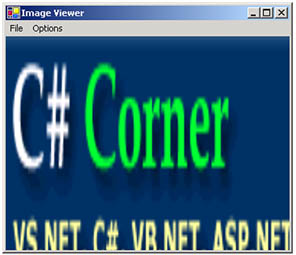
The Fit Height option generates the image shown in Figure 7.20.
Figure 7.20. The image of Figure 7.18 after Fit Height
The Fit Original option generates the image shown in Figure 7.21.
Figure 7.21. The image of Figure 7.18 after Fit Original
The Fit All option generates the image shown in Figure 7.22.
Figure 7.22. The image of Figure 7.18 after Fit All
7.3.5 Zooming In and Out
Before we finish our ImageViewer application, let's add one more option: zooming.
Adding zoom-in and zoom-out features requires only one operation: multiplying the height and width of the image by a zoom factor. The zoom factor is the ratio of the current size of the image to the desired new size of the image. For example, suppose that we want to zoom in an image by 200 percent. We must multiply the current size of the image by 200 percent, or 2 (200/100 = 2 times). If we want to zoom out an image by 25 percent, we need to multiply the size of the image by 25 percent, or 0.25 (25/100 = 0.25 times).
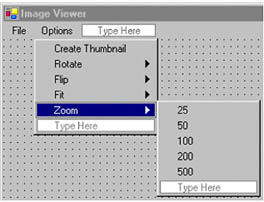
Now let's add the zoom features to our application. As is typically done, we add five items to the Zoom submenu: 25, 50, 100, 200, and 500 (see Figure 7.23). In our code we use Zoom25, Zoom50, Zoom100, Zoom200, and Zoom500, respectively, to represent these menu items, and we add the appropriate menu item click event handlers by double-clicking on the menu items.
Figure 7.23. Zoom menu items
Now we add a double variable that represents the zoom factor. The default zoom factor is 1.0. We add the following line to the class at the application level:
private double curZoom = 1.0;
Next we modify the OpenFileMenu click event handler slightly. We change the AutoScrollMinSize property as follows:
this.AutoScrollMinSize = new Size
 ((int)(curImage.Width * curZoom),
 (int)(curImage.Height * curZoom));
We multiply the image height and width by the zoom factor to represent an image with an appropriate zoom setting.
The next step is to modify the paint event handler. Here we need to multiply the height and width of the image by the zoom factor. The new DrawImage method, shown here, calls the paint event handler of Listing 7.10:
// Draw image using the DrawImage method
g.DrawImage(curImage, new Rectangle
 (this.AutoScrollPosition.X,
 this.AutoScrollPosition.Y,
 (int)(curRect.Width * curZoom),
 (int)(curRect.Height * curZoom)));
The last step is to add Zoom menu item click event handlers and calculate the zoom factor. Listing 7.12 shows the code for the Zoom menu item click event handlers. We calculate the zoom factor by dividing the zoom value by 100. We also call the Invalidate method to repaint the image with the new zoom setting.
Listing 7.12 Zoom menu item event handlers
private void Zoom25_Click(object sender,
 System.EventArgs e)
{
 if(curImage != null)
 {
 curZoom = (double)25/100;
 Invalidate();
 }
}
private void Zoom50_Click(object sender,
 System.EventArgs e)
{
 if(curImage != null)
 {
 curZoom = (double)50/100;
 Invalidate();
 }
}
private void Zoom100_Click(object sender,
 System.EventArgs e)
{
 if(curImage != null)
 {
 curZoom = (double)100/100;
 Invalidate();
 }
}
private void Zoom200_Click(object sender,
 System.EventArgs e)
{
 if(curImage != null)
 {
 curZoom = (double)200/100;
 Invalidate();
 }
}
private void Zoom500_Click(object sender,
 System.EventArgs e)
{
 if(curImage != null)
 {
 curZoom = (double)500/100;
 Invalidate();
 }
}
Using the method just described, we can zoom an image in and out to any percentage. Let's run the application and open an image. Our original image looks like Figure 7.24.
Figure 7.24. An image in ImageViewer
The Zoom | 25 option generates the image shown in Figure 7.25.
Figure 7.25. The image of Figure 7.24 with 25 percent zoom
The Zoom | 50 option generates the image shown in Figure 7.26.
Figure 7.26. The image of Figure 7.24 with 50 percent zoom
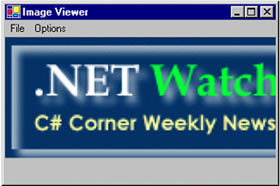
The Zoom | 200 option generates the image shown in Figure 7.27.
Figure 7.27. The image of Figure 7.24 with 200 percent zoom
The Zoom | 500 option generates the image shown in Figure 7.28.
Figure 7.28. The image of Figure 7.24 with 500 percent zoom

Congratulations! You have successfully written an image viewer application that can be used for various purposes. Now we will discuss some additional imaging options.
GDI+: The Next-Generation Graphics Interface
- GDI+: The Next-Generation Graphics Interface
- Understanding GDI+
- Exploring GDI+ Functionality
- GDI+ from a GDI Perspective
- GDI+ Namespaces and Classes in .NET
- Summary
Your First GDI+ Application
- Your First GDI+ Application
- Drawing Surfaces
- The Coordinate System
- Tutorial: Your First GDI+ Application
- Some Basic GDI+ Objects
The Graphics Class
- The Graphics Class
- Graphics Class Properties
- Graphics Class Methods
- The GDI+Painter Application
- Drawing a Pie Chart
Working with Brushes and Pens
- Working with Brushes and Pens
- Understanding and Using Brushes
- Using Pens in GDI+
- Transformation with Pens
- Transformation with Brushes
- System Pens and System Brushes
- A Real-World Example: Adding Colors, Pens, and Brushes to the GDI+Painter Application
Colors, Fonts, and Text
- Colors, Fonts, and Text
- Accessing the Graphics Object
- Working with Colors
- Working with Fonts
- Working with Text and Strings
- Rendering Text with Quality and Performance
- Advanced Typography
- A Simple Text Editor
- Transforming Text
Rectangles and Regions
- Rectangles and Regions
- The Rectangle Structure
- The Region Class
- Regions and Clipping
- Clipping Regions Example
- Regions, Nonrectangular Forms, and Controls
Working with Images
- Working with Images
- Raster and Vector Images
- Working with Images
- Manipulating Images
- Playing Animations in GDI+
- Working with Bitmaps
- Working with Icons
- Skewing Images
- Drawing Transparent Graphics Objects
- Viewing Multiple Images
- Using a Picture Box to View Images
- Saving Images with Different Sizes
Advanced Imaging
- Advanced Imaging
- Rendering Partial Bitmaps
- Working with Metafiles
- Color Mapping Using Color Objects
- Image Attributes and the ImageAttributes Class
- Encoder Parameters and Image Formats
Advanced 2D Graphics
- Advanced 2D Graphics
- Line Caps and Line Styles
- Understanding and Using Graphics Paths
- Graphics Containers
- Reading Metadata of Images
- Blending Explained
- Alpha Blending
- Miscellaneous Advanced 2D Topics
Transformation
- Transformation
- Coordinate Systems
- Transformation Types
- The Matrix Class and Transformation
- The Graphics Class and Transformation
- Global, Local, and Composite Transformations
- Image Transformation
- Color Transformation and the Color Matrix
- Matrix Operations in Image Processing
- Text Transformation
- The Significance of Transformation Order
Printing
- Printing
- A Brief History of Printing with Microsoft Windows
- Overview of the Printing Process
- Your First Printing Application
- Printer Settings
- The PrintDocument and Print Events
- Printing Text
- Printing Graphics
- Print Dialogs
- Customizing Page Settings
- Printing Multiple Pages
- Marginal Printing: A Caution
- Getting into the Details: Custom Controlling and the Print Controller
Developing GDI+ Web Applications
- Developing GDI+ Web Applications
- Creating Your First ASP.NET Web Application
- Your First Graphics Web Application
- Drawing Simple Graphics
- Drawing Images on the Web
- Drawing a Line Chart
- Drawing a Pie Chart
GDI+ Best Practices and Performance Techniques
- GDI+ Best Practices and Performance Techniques
- Understanding the Rendering Process
- Double Buffering and Flicker-Free Drawing
- Understanding the SetStyle Method
- The Quality and Performance of Drawing
GDI Interoperability
Miscellaneous GDI+ Examples
- Miscellaneous GDI+ Examples
- Designing Interactive GUI Applications
- Drawing Shaped Forms and Windows Controls
- Adding Copyright Information to a Drawn Image
- Reading and Writing Images to and from a Stream or Database
- Creating Owner-Drawn List Controls
Appendix A. Exception Handling in .NET
