Placing a Call
There are several ways to place a call in NetMeeting:
- If your party is logged on to a directory server and listed on the server, you can select his or her name in the Find Someone window and click Call (or simply double-click the name).
- You can type an entry into the NetMeeting Address bar and click the Place Call button.
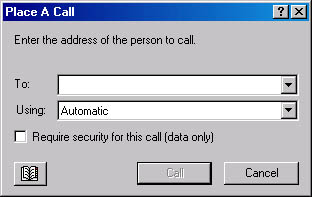
- You can choose New Call from the Call menu, or click the Place Call button when the Address bar is empty and use the Place A Call dialog box, shown in Figure 21-3.

Figure 21-3. Using the Place A Call dialog box allows you to choose to use NetMeeting's security feature on a call-by-call basis.
In either the Address bar or the Place A Call dialog box, you can enter any of the following:
- Your party's e-mail address. If your party is logged on to a different directory server from you, you can specify the server name plus your party's e-mail address using the format servername/e-mail address. For example, if your party is logged on to ils2.microsoft.com and his or her e-mail address is jeff@widgets.microsoft.com, you would type ils2.microsoft.com/jeff@widgets.microsoft.com
- If you're calling someone on your own local area network, you can enter the network name of your party's computer. Type just the name of the computer; don't precede it with a backslash or domain name. For example, if your party is working from the computer named \\MARKETING3, simply type marketing3
- If your party is connected to the Internet and you know his or her IP address, you can specify the IP address. (The IP address consists of four numbers separated by periods, like this: 192.168.1.201.) Your party doesn't need to be logged on to a directory server.
TIP
The Address bar maintains a list of recently used calling addresses. If you're calling someone again, you might be able to select that person's address from the list.
When you use the Place A Call dialog box, you can usually leave Using set to Automatic. If NetMeeting has trouble finding someone and you know the address is correct, try a more specific option.
TIP
You can find your own IP address by choosing About Windows NetMeeting from the Help menu. If you have separate connections to your local area network and to the Internet, you'll see an IP address for each one at the bottom of the About Windows NetMeeting dialog box. (If you're not sure which is your IP address on the Internet, open the Start menu, choose Run, and type cmd /k ipconfig. The window that appears shows your IP address for each network adapter.) Be aware, though, that if you're using a dial-up connection to connect to the Internet, your IP address is probably different every time you connect.
A few moments after placing your call, if all goes well, you'll hear a sound signaling that your party has answered the call. You'll see your name, the name of the party you called, and the names of anyone else who is connected with the party you called.
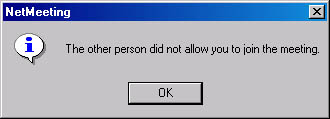
If the person you call is already talking to someone else, everyone in the meeting must accept the call or you'll see the message shown below.

NOTE
Problems with Internet Connections Through Proxy ServerIf you connect to the Internet through a proxy server, you might need to adjust some WinSock settings in order to be able to place and receive calls over the Internet, and to be able to send and receive audio and video over the Internet. If you're having trouble with any of these functions, search the Microsoft Knowledge Base (available on the Web at support.microsoft.com) for information about setting up Microsoft Proxy Server for use with NetMeeting.
Calling by Speed Dial
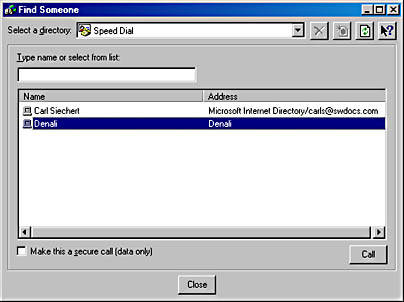
NetMeeting's Speed Dial directory, shown in Figure 21-4, lets you create a list of people with whom you communicate. You can call someone from the Speed Dial list exactly as you would from a directory list—by selecting a name and clicking the Call button. The advantage of working in the Speed Dial directory is simply that the list is, presumably, much shorter than a directory server's list, so it's easier to find the party you're trying to call. Once you've added one or more names to the Speed Dial directory, you open the directory by selecting Speed Dial from the Select A Directory list in the Find Someone window.

Figure 21-4. The Speed Dial directory makes it easy to reconnect to someone you've talked to.
Creating Speed Dial Entries
To create a Speed Dial entry, simply right-click the name you want to add to the Speed Dial directory and choose Add To SpeedDial List. You can use this method in most places where names appear in NetMeeting, including the Name list in the NetMeeting window, the Windows Address Book directory, and any conventional ILS directory. One place you can't do it is from the Microsoft Internet Directory.
Creating Speed Dial Shortcuts
You can create a Speed Dial shortcut, suitable for storage on your desktop or elsewhere, or for e-mailing to a friend. To create a shortcut:
- Choose Create Speed Dial from the Call menu.
- In the Create Speed Dial dialog box, type the address into the Address box and choose the appropriate Call Using option.
- Select the Save On The Desktop option.
If you want your Speed Dial shortcut in a folder other than Desktop, you'll need to move it after it lands on the desktop.
Calling from the History Directory
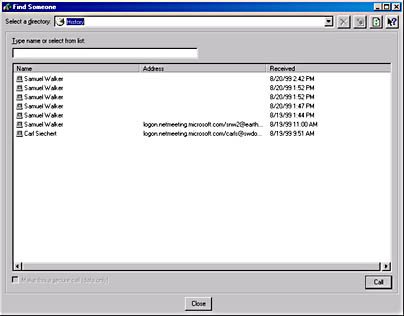
NetMeeting's History directory, shown in Figure 21-5, maintains a list of everyone you've talked to, regardless of who initiated the call. The list also includes people whose calls you have chosen not to answer.

Figure 21-5. NetMeeting's History directory keeps a log of those you've called and those who have called you.
To place another call to someone in your History list, select a name and click the Call button.
EAN: 2147483647
Pages: 317