The 45 Cheat
You can use 45 isometric projection when the floor details are more important than vertical details. For this reason, apparently, it's popular in military drawings ”it's often even referred to as military projection. In Flash, we can easily draw an isometric projection using a 45 angle with the Line Tool. In this example (called draw45.fla ) you're going to draw a basic 45 isometric cube and use it to discover some of the properties of axonometric projection and isometric 3D.
-
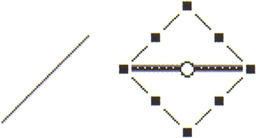
After you open a new Flash file, you need to draw the square that will constitute the base of your cube. Start out by drawing a line inclined at a 45 angle. Flash makes this very easy for you by constraining the Line Tool (N) to 45 increments when you hold down the SHIFT key while drawing. Do this now to draw a line as shown in the figure at right. Don't worry about the dimensions or position of the line while drawing it, just make sure that you snap it to a 45 angle.

-
Select the line and, using the Property Inspector, enter 50 (pixels) for the width, W , and 50 (pixels) for the height, H . For the x coordinate, enter 120 and for the y , 130 :

-
Next , you're going to draw what will become the top edge of your square. You want to make all sides of your square equal, so instead of drawing the top line manually, you're going to duplicate the slanted line and rotate it. Click on the line you drew in step 1 and choose Edit > Duplicate (Ctrl/Cmd+D). This should create a copy of the line and place it 10 pixels to the left and down from the original line. The new line should be selected by default.
-
With the new line still selected, use the Free Transform Tool (Q) to rotate it 45 clockwise so that you end up with a horizontal line. By transforming the line, you are able to keep its length the same. You could also calculate this by hand using the Pythagorean theorem. Since the height and width of the line are both 50, the length of the line (the hypotenuse ”let's call it h ) will be equal to the sum of the squares of its height and width projections. Thus, h = 50 2 + 50 2 = ˆ 5000 = 70.7. If you look at the Property Inspector, you will see the length of your rotated line is indeed 70.7 pixels.
-
Although you could keep the length of your horizontal line at 70.7, it will make it very difficult for you to position your isometric cube and to use it as a tile. So, instead, you're going to forgo a little accuracy in favor of ease of use. Using the Property Inspector, set the width of the line to 70 pixels. Set its x-coordinate to 170 and its y-coordinate to 130 to make it align with the top of your diagonal line:

-
Well, you've got half of your square base, and since a square is symmetrical, you can create the other half very easily. Using the Arrow Tool (V), click on the diagonal line, then SHIFT-click on the horizontal line to select them both. With both lines selected, duplicate them using Edit > Duplicate (CTRL/CMD+D).
-
With both lines still selected, use Modify > Transform > Flip Horizontal followed by Modify > Transform > Flip Vertical .
-
Without deselecting , use the Property Inspector to set the x-coordinate of the lines to 120 and the y-coordinate to 130 . There you are, your isometric square base is ready (it's shown opposite with the duplicated lines still selected).

-
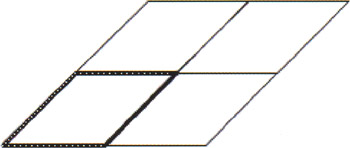
Use Edit > Select All (CTRL/CMD+A) to select all four lines, and then use CTRL/CMD+D to create a copy of the square. Position this flush left with the original square. It will be easy to do this if you use the arrow keys to move the square while you hold down SHIFT to constrain your movements to 10-pixel increments. This was the reason you made sure that the tile had whole-number dimensions divisible by 10. Repeat twice more to create a four-square grid, as shown in the image opposite.
-
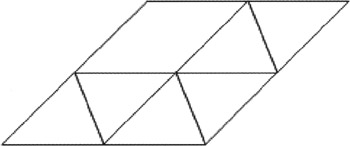
Use three lines to connect the edges of two of the diagonal square tiles to create the frame of an isometric cube, as shown opposite.
-
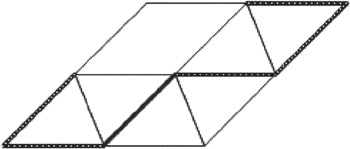
Remove the extra lines from the grid to leave just the cube. Use the image at right as a guide, where we've selected the lines that need to be removed from the grid, and then press DELETE.
-
Now that you have your wire-frame cube, you'll shade it in. Fill in the top and sides of the cube with two similar colors (we used #0099FF for the sides and #0099CC for the top) using the Paint Bucket Tool (K).
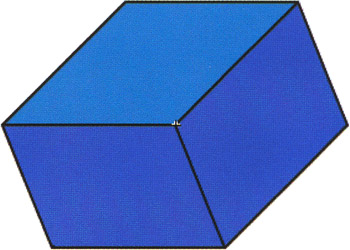
-
Next, use Edit > Select All (CTRL/CMD+A) to select all the lines and fills that make up the cube and use Insert > Convert To Symbol... (F8) to convert it to a movie clip. Call the movie clip iso cube and click OK .

-
Make duplicates of the cube using Edit > Duplication (CTRL/CMD+D) and play around with arranging the cubes to create a sculpture. Do you notice how the z-order of the clips is important in creating a believable tile-based isometric 3D representation?
You will be tackling z-order (or the stacking order) of movie clips a little later when you learn about true isometric graphics. For the moment, it's important to realize that z-ordering is a critical part of isometrics (to brush up on the basics of z-ordering, refer to the section on Z-Ordering in Flash in Chapter 3).
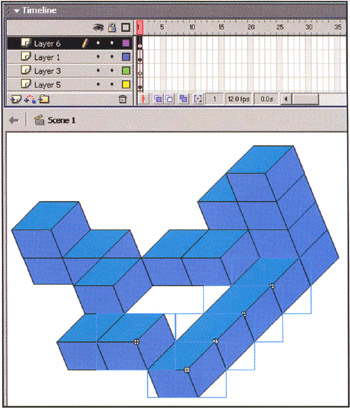
With a little patience, you can create some really great effects using just a simple isometric cube as a building block. In draw45.fla (see the image below), we scaled down the cubes to fit the stage. Also note that we had to use multiple layers when arranging the cubes to artificially handle the z-ordering. Although we could have used the Bring Forward (CTRL-UP) and Send to Back (CTRL-DOWN) options under the Modify > Arrange options, keeping each object on a separate layer is generally a preferred "best practice" technique that increases the scalability and maintainability of your movies. Since layers don't add anything to the file size of your movies, you really don't have any excuse not to keep objects in separate well-labeled layers!
Well, that's it ”you've made your first foray into the realm of isometric 3D. Although Flash makes it easy for you to create isometric 3D using a 45 angle, this is not the type of isometric drawing that immediately comes to mind when the phrase is used. Instead, isometric graphics on computer screens are usually drawn using a 25.56505 (or 30) angle. This creates much more pleasing and balanced compositions, and this is exactly what we're going to look into next.
- Challenging the Unpredictable: Changeable Order Management Systems
- ERP System Acquisition: A Process Model and Results From an Austrian Survey
- Data Mining for Business Process Reengineering
- Intrinsic and Contextual Data Quality: The Effect of Media and Personal Involvement
- Development of Interactive Web Sites to Enhance Police/Community Relations