| Rendering is how you output images once you finish modeling, animating, lighting, and texturing your scene. There are many options to setall of which you'll find in the Render Globals window. First, you must decide what your output will be. The resolution of an image is its size in pixels. The size you choose depends on the medium your images will end up on. If you're creating a small image for a Web site, you might use the default resolution of 320 by 240. If you plan to put the images on NTSC video, you'll probably use 720 by 486 (Figure 16.29). Figure 16.29. The same scene rendered in a variety of resolutions. 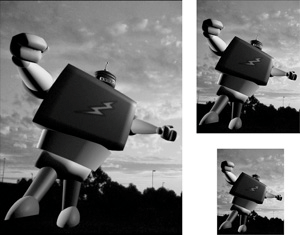
For decent-quality printing, you need a much higher resolution. Printing at 300 dots per inch (dpi) will produce a sharp image. If you want to print an 8-by-10-inch image, you will need a resolution of 2,400 by 3,300 pixelswhich will take a long time to render. You can set resolution quality in the Render Globals window. Lower-quality images will render faster, making them good for tests. Higher-quality settings will produce a cleaner, better-looking image and should be used for final output (Figure 16.30). Figure 16.30. Compare production quality (left) with preview quality (right). The image on the right renders much more quickly but looks worse. 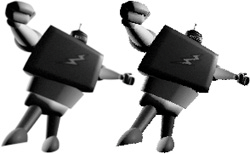
Before you render your scene, you need to save it and set your project. Taking these steps will help you avoid losing images when you render because if the project is set, the renders will automatically be sent to the correct folder. Maya provides four ways to render your scene from the Render Globals window: using Maya Software, Maya Hardware, Maya Vector, and Mental Ray (Figure 16.31). These are all accessible from the unified Render Globals window. The Render Globals window provides users with a tab-based render settings system that includes one always-accessible Common tab for setting a file name, resolution, and other attributes common to all four Render technologies. The settings on the Common tab will not be reset when the render technology is changed, saving setup time when multiple rendering technologies are used on the same file. Each of the Maya rendering technologies is discussed in the remainder of this chapter. Figure 16.31. These renderings were created with Maya's rendering technologies: Mental Ray (upper left), Hardware Renderer (upper right), Software Renderer (lower left), Vector Renderer (lower right). 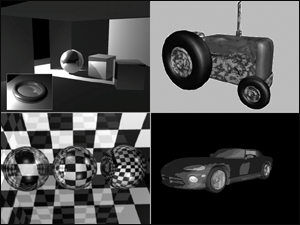
To set the Common attributes to render a single image: 1. | In the Render View, click the Render Globals button  , or from the Options menu, select Render Globals. , or from the Options menu, select Render Globals.
The Render Globals window appears (Figure 16.32).
Figure 16.32. The Common tab holds the attributes common to all rendering technologies. 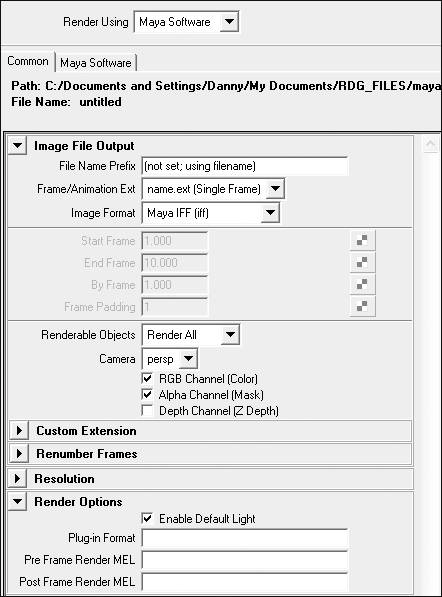
| 2. | Click the Common tab to open the common settings.
| 3. | Click the triangle next to Image File Output to expand the options; in the File Name Prefix field, type a file name for the render.
| 4. | Click the Frame/Animation Ext drop-down menu and select name.ext (Single Frame) (Figure 16.33).
Figure 16.33. Choose a name and frame extension for your file. 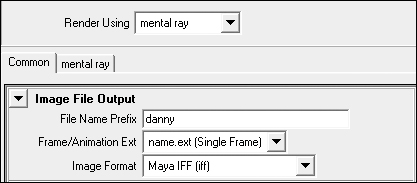
The rendered file name will now read as the file name typed in the File Name Prefix and will have the extension of the selected Image Format.
| 5. | Choose an image format.
Maya IFF is the default, but files with this format won't necessarily open in other programs. You might want to choose something more common, like TIFF or Targa.
| 6. | Choose the camera view you want to render from (Figure 16.34).
Figure 16.34. Select a camera to render from the Camera menu. 
Even if you've created new cameras, Perspective is still the default camera in the Render Globals window. It's a common mistake to overlook this and render the wrong camera view.
| 7. | Click the triangle next to Resolution.
The Resolution options are expanded.
| 8. | From the Presets menu, choose CCIR 601/Quantel NTSC (Figure 16.35).
Figure 16.35. NTSC is the standard U.S. video size; select this option to set your file to 720 by 486. 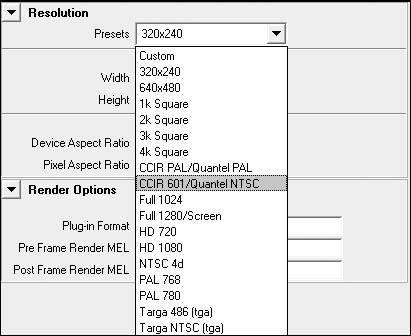
This is a good choice if your image is going to end up on NTSC video.9.
| 9. | Specify the appropriate settings for the desired render technology.
See "About the Software Renderer," "About the Hardware Renderer," "About the Vector Renderer," or "About Mental Ray" later in this chapter.
|
To set the Common attributes to render a series of images: 1. | In the Render Globals window, set the camera, anti-aliasing quality, resolution, and image-format options as in the previous section.
| 2. | Change the file name if you want the images to be named something other than the name of the scene file.
When a new name is entered, the example file name at the top of the window reflects this change (Figure 16.36).
Figure 16.36. The file name at the top of the Render Globals window changes when a different file name is entered. 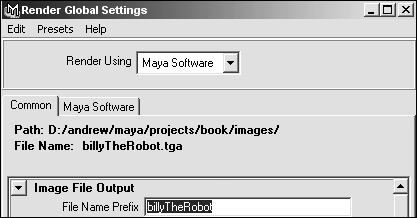
| 3. | Choose name.#.ext from the Frame/Animation Ext menu.
The example name changes to reflect this update. You must choose an option that includes the pound sign (#) to be able to render animation as opposed to rendering single frames.
The name.#.ext option is a good choice for most programs and operating systems. The choice mostly depends on the software into which you plan to bring the images. Each type of software uses a different naming convention, but Maya gives more than one choice for naming schemes to accommodate the differences. For example, an output with name.#.ext would output happy.1.tga, happy.2.tga, happy.3.tga, and an output with name.# would output happy.1, happy.2, and happy.3.
| 4. | Set the start and end frames of your animation.
These should be set to the range of time you want to render.
| 5. | Change Frame Padding to 4 and close the Render Globals window.
This will put zeros in front of the numbers in the image name so that the numbers are four digits long. This is helpful because your images will be listed in order when sorted by name (Figure 16.37).
Figure 16.37. The path name and file name appear at the top of the Render Globals window. 
| 6. | Specify the appropriate settings for the desired render technology.
See "About the Software Renderer," "About the Hardware Renderer," "About the Vector Renderer," or "About Mental Ray" later in this chapter.
|
About the Software Renderer Maya includes two basic categories of software rendering: the default (known as A-buffer, or raycasting) and raytracing. The default Software Renderer can create high-quality images with lighting, shadows, texture, and motion blur. However, for added realism, you may need reflections and refractions (See "About Raytracing" later in this chapter). This is where raytracing comes in. If you want to make a wineglass look real, you need to raytrace it (Figure 16.38). Figure 16.38. Raytracing can help bring realism to the scene. 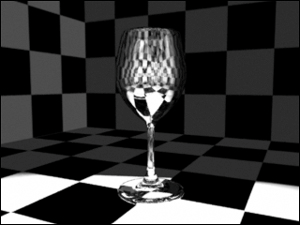
To render a scene using Maya Software Renderer: 1. | Open or create a scene to software render.
| 2. | Open the Render Globals window and set Render Using to Maya Software (Figure 16.39).
Figure 16.39. The Render Using menu changes the Render Global tabs and rendering technology. 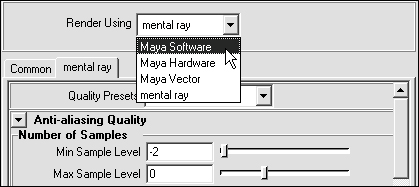
| 3. | Specify the Common settings as you did in "To set the Common attributes to render a single image" earlier in this chapter.
| 4. | On the Maya Software tab, click the triangle next to Anti-Aliasing Quality to expand the options.
| 5. | From the Quality menu, choose Production Quality (Figure 16.40).
Figure 16.40. The Quality presets can save time by automatically setting the Render Globals options to standard values. 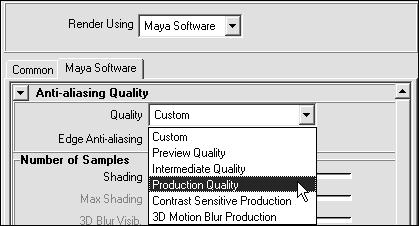
This automatically sets several of the options and is a good choice for most high-quality renders.
| 6. | From the Render menu, select Batch Render.
The render begins.
| 7. | Click the Script Editor icon  in the lower-right corner of the interface. in the lower-right corner of the interface.
The Script Editor opens. You can watch the progress of the render here (Figure 16.41).
Figure 16.41. The Script Editor shows the progress of your render. 
|
 Tip Tip
In the Render Globals window, on the Maya Software tab, turn on Motion Blur to blur moving surfaces slightly. This makes them look better because they more closely resemble moving objects captured by a real camera.
Maya's FCheck program provides an easy way to view images and animations. To view a render: 1. | From the Render menu, select Show Batch Render.
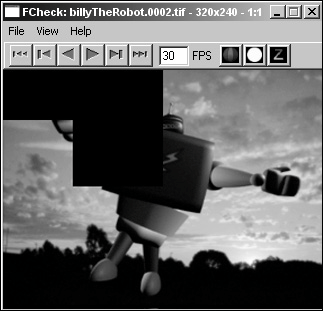
While rendering, the progress of the current frame opens in FCheck (Figure 16.42). If finished the last frame opens FCheck.
Figure 16.42. Since the batch render is still in process, the progress of the current frame shows up in FCheck. This view will not be updated as the render continues. 
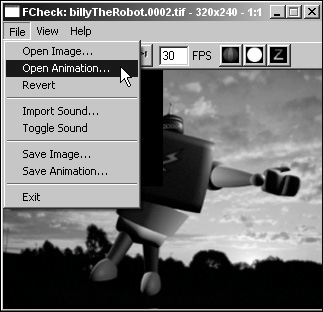
| 2. | From the File menu in the FCheck window, select Open Animation (Windows) or Open Sequence (Mac) (Figure 16.43).
Figure 16.43. You can open an animation in the FCheck window that can play back all of the frames you've rendered. 
A file-browsing window opens.
| 3. | Browse for your rendered image files in the Images folder of the project folder you are currently using.
| 4. | Open the first image in the series.
The animation will load slowly and play back at full speed, unless it includes lots of images or the resolution is high. Animation speed also depends on your computer's hardware.
| 5. | Drag from left to right to scroll through the animation.
|
 Tip Tip
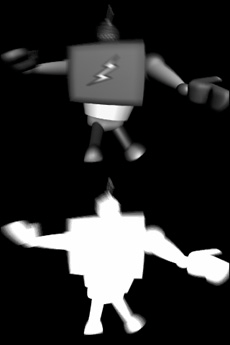
Using the Hardware Render Buffer Software rendering can take a long time. If you want to make a preview of your animation without having to software render it, you can hardware render it instead. This provides a kind of a middle ground between a playblast and a software render. Hardware rendering is essentially a series of screen snapshots of your scene. Hardware rendering does a few things that playblast cannot. It can anti-alias the edges of your surfaces and create motion blur so that the animation looks smoother. It can also create an alpha channel, so that you can easily composite with other images (Figure 16.44). One approach is to hardware render some elements of your scene and composite them with a software-rendered background. Figure 16.44. The robot was rendered using the Hardware Render Buffer with Motion Blur turned on. At the bottom, you can see the alpha channel created for this image; you can use it for compositing. 
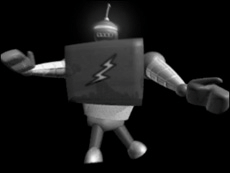
There are also a number of things that hardware rendering doesn't do that software rendering does. Hardware rendering cannot create shadows, reflections, or refractions. And it doesn't do as good a job with textures and lights. Special effects like glow don't work, and you can't see bump maps. In general, hardware renders are great for scenes that have minimal textures, and/or have hardware-rendered particle effects that you may want to layer into a high-res file later (Figure 16.45). Figure 16.45. This robot was software rendered. Note the bump map on the arms, the glow on the visor, and the reflectivity of the robot's chest. 
To use the Hardware Render Buffer: 1. | Open or create a scene that includes animation.
| 2. | From the Window menu, select Rendering Editors > Hardware Render Buffer.
The Hardware Render Buffer appears.
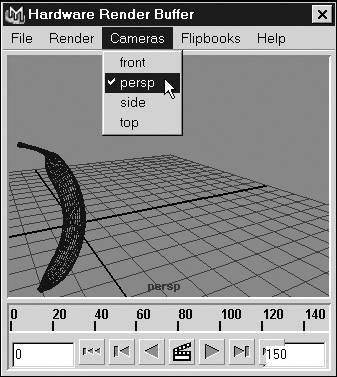
| 3. | From the Cameras menu in the Hardware Render Buffer, select the camera view you want to render (Figure 16.46).
Figure 16.46. Choose a camera view from the Cameras menu in the Hardware Render Buffer. 
To adjust the view, you can tumble, track, and dolly inside the Hardware Render Buffer.
| 4. | From the Render menu in the Hardware Render Buffer, select Attributes.
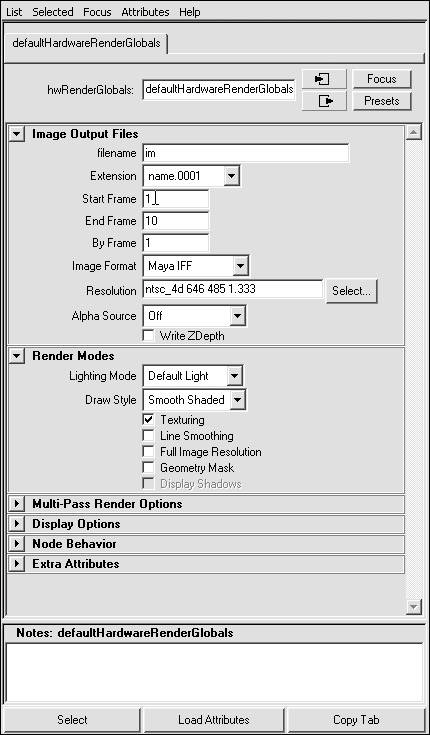
The Attribute Editor for the Hardware Render Globals window opens (Figure 16.47). The Hardware Render Globals window contains a collection of settings for outputting your image files using the Hardware Render Buffer. Note that this is not the same as the Render Globals window, which is used to set the render attributes for Maya's Hardware Renderer feature. See "About the Hardware Renderer" later in this chapter.
Figure 16.47. The Hardware Render Globals window is where you indicate the file name, resolution, range of frames, and numerous other attributes for the render. 
| 5. | Set the file name, extension, start frame, end frame, image format, and resolution as desired.
| 6. | From the Render menu in the Hardware Render Buffer, select Render Sequence.
The sequence quickly renders. The image files are put in the Images folder of the project you are currently using.
|
To adjust the Hardware Render Buffer's render quality: 1. | From the Window menu, select Rendering Editors > Hardware Render Buffer.
The Hardware Render Buffer appears.
| 2. | Set up the hardware-render attributes as in the preceding task.
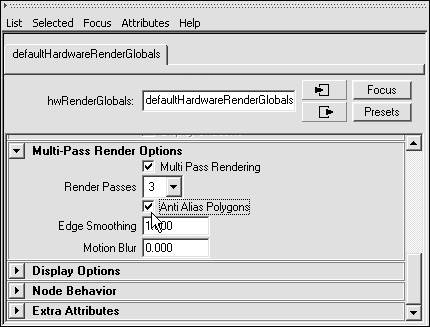
| 3. | Scroll down to Multi-Pass Render Options. Select Multi Pass Rendering and Anti Alias Polygons (Figure 16.48).
Figure 16.48. Turning on Multi Pass Rendering and Anti Alias Polygons will improve the look of your render by smoothing aliased (stair-stepped) edges. 
| 4. | Click the Test Render button in the Hardware Render Buffer to see the result  . .
Three passes of the image are created and then composited together automatically. The edges of the surfaces are anti-aliased.
| 5. | Change Render Passes to 5 and Motion Blur to 1.
| 6. | Click the Test Render button in the Hardware Render Buffer to see the result.
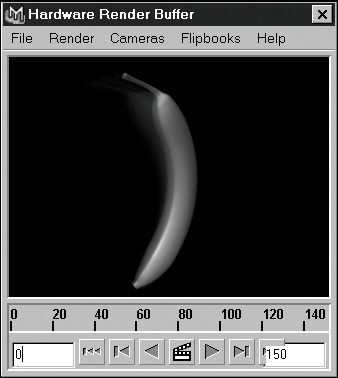
| 7. | Five passes of the image are completed. With Motion Blur set to 1, the passes occur over the duration of one frame (Figure 16.49).
Figure 16.49. Since the banana was animated and Motion Blur was turned on in the Hardware Render Globals settings, you can see some blur in the resulting image. 
|
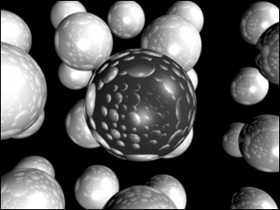
About raytracing Achieving realistic renders often requires reflections and refractions. To achieve these effects, you must turn on raytracing. Although renders can take significantly longer with raytracing on, they look much more realistic. When you can see other objects in an object's reflection, the light rays are bouncing off one surface and then bouncing off another surface and into your eyes or a camera lens. You need other objects in the scene in order to see a reflection of them; the object has to have something to reflect (Figure 16.50). Figure 16.50. This scene is made up exclusively of spheres. The spheres reflect one another because Raytracing is turned on. 
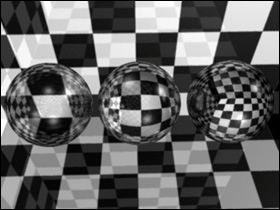
Refraction is the bending of light as it travels through a dense, transparent material such as glass or liquid. Without it, glass doesn't look real. You can set a refraction index, which controls how much the light bends as it passes through the surface (Figure 16.51). Figure 16.51. Each transparent sphere has a different refraction index: left 1.0, middle 1.333, right 2.0. 
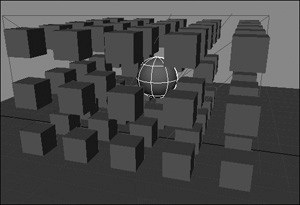
You can see a good example of refraction when you're standing in a lake and see a fish under water: If you were to reach in the water and try to grab that fish, you would miss it because refraction bends the image of the fish so that from your point of view it appears to be in a position other than its actual one. You must compensate for the bending of light to catch the fish. To create reflections: 1. | Create a scene with a large plane, a sphere, many cubes, and some lights (Figure 16.52).
Figure 16.52. This scene has a plane, a sphere surrounded by many cubes, a directional light, and an area light. 
| 2. | For the cubes, assign a red Phong material; for the plane, assign a checkered Phong material, and for the sphere, assign a reflective Phong material.
| 3. | Open the Render Globals window and set Render Using to Maya Software.
| 4. | Change the Anti-Aliasing Quality Preset to Production Quality.
| 5. | Scroll down and click the triangle next to Raytracing Quality.
The Raytracing Quality options are expanded.
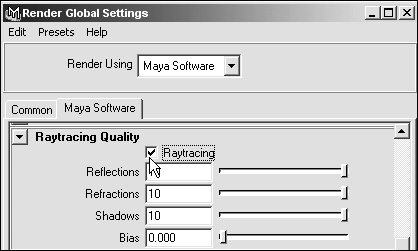
| 6. | Select Raytracing to activate Raytracing (Figure 16.53).
Figure 16.53. Raytracing is turned on in the Render Globals window. Reflections and refractions are not rendered unless this option is selected. 
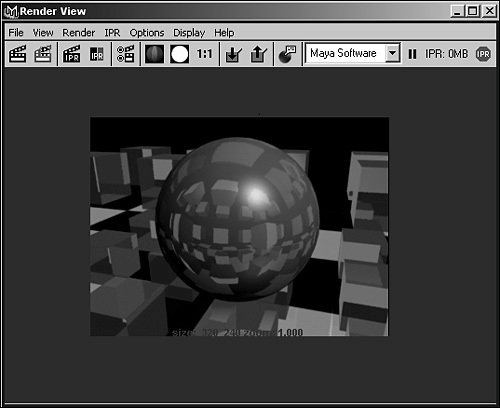
| 7. | Frame the sphere in the Perspective view; then click the Render button  . .
The Render View appears, and the image is rendered with reflections (Figure 16.54).
Figure 16.54. When the scene is rendered, you can see the cubes reflected in the sphere. 
|
 Tip Tip
Objects can be visible or invisible in reflections. To change an object's reflection state, select the object and open the Attribute Editor, expand the Render Stats section, and uncheck Visible in Reflections to make the object not visible in reflections.
To create refraction: 1. | Continue with the scene in the previous task; select the sphere.
| 2. | Click the Graph Materials on Selected Items button in the Hypershade  . .
The material for the sphere appears in the work area of the Hypershade.
| 3. | Double-click the Phong material assigned to the sphere.
The Attribute Editor for the Phong material opens.
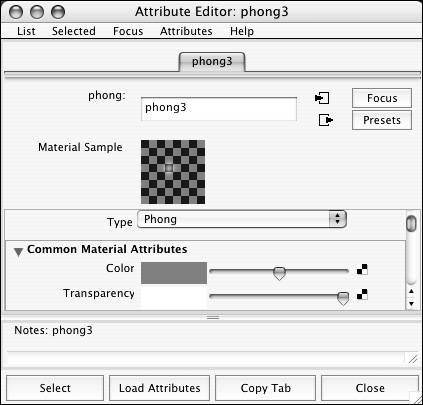
| 4. | Drag the Transparency slider all the way to the right.
The color field next to Transparency becomes white (Figure 16.55).
Figure 16.55. The Transparency slider is dragged to the right, which makes the color field white. White is transparent, and black is opaque in Maya. 
| 5. | Scroll down in the Attribute Editor and click the arrow next to Raytrace Options.
The Raytrace Options are expanded.
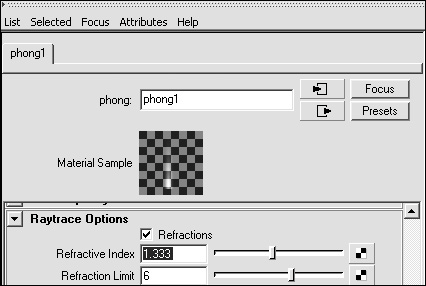
| 6. | Select Refractions.
| 7. | Change Refractive Index to 1.333 (Figure 16.56).
Figure 16.56. Refractions are turned on, and the Refractive Index is set to 1.333. If you do not do this, reflections will render but refractions will not. 
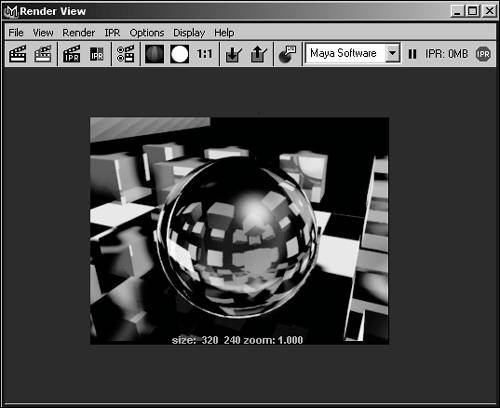
| 8. | Click the Render button  . .
The Render View window appears, and the scene is rendered. The sphere refracts the light, which causes the objects seen through it to appear warped (Figure 16.57).
Figure 16.57. The transparent sphere is rendered and refracts light. It is dark because the scene surrounding it is dark. 
|
 Tip Tip
Objects can be visible or invisible in refractions. To change an object's refraction state, select the object and open the Attribute Editor, expand the Render Stats section, and uncheck Visible in Refractions to make the object not visible in refractions.
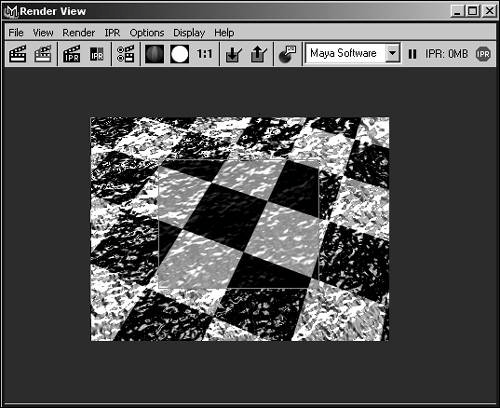
About Interactive Photorealistic Rendering Every time you make a change to a material or a light, you need to render it again. This makes tweaking elements like lights or bump maps time consuming because of the wait for the rendering. To address this problem, Maya offers Interactive Photorealistic Rendering, or IPR. If you render using IPR, you can select a region of the render, and the changes you make will update interactively (Figure 16.58). Figure 16.58. A bump map is tweaked in IPR. The selected area updates when the bump depth for this surface is changed from 1.0 to 0.1. 
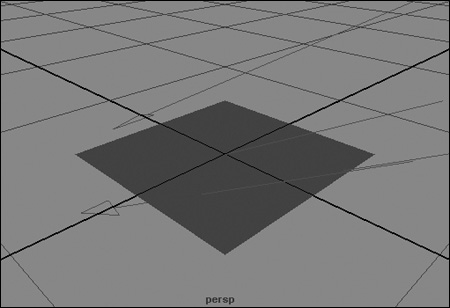
IPR, however, has some limits. It won't update the positions of objects or changes to the camera. It won't update the position of a shadow. It doesn't do any raytracing, which means no reflections or refractions. And it always performs low-quality anti-aliasing. However, IPR will update most changes to materials and lightsand that capability alone can save you a great deal of time. A good workflow is to use IPR rendering while you're setting up and tweaking your objects' color and lighting and then use software rendering for your final images and tweaks. To use IPR: 1. | Create a plane, assign a material with a bump map to it, and create a directional light pointed diagonal to the plane (Figure 16.59).
Figure 16.59. A plane with a bump map and a directional light pointed at it. 
See "To assign a bump map to a surface" in Chapter 15, "Shaders, Materials, and Mappings," for more on bump maps.
| 2. | Click the IPR button  . .
The Render View appears, and the scene is rendered. You will see the prompt "Select a region to begin tuning" at the bottom of the Render View.
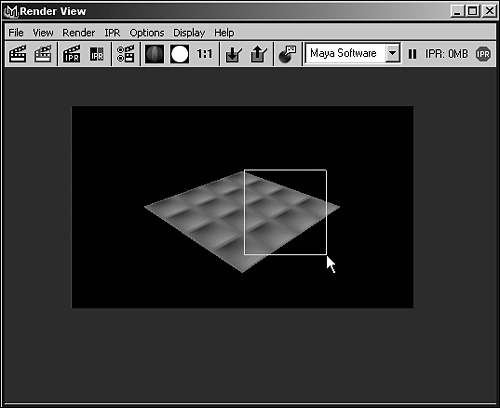
| 3. | Marquee-select a region in the Render View (Figure 16.60).
Figure 16.60. After being prompted in the Render View, select a region. Only this region will update when you make changes, but you can select the whole image as the region if you want. 
| 4. | Select the plane.
| 5. | Click the Graph Materials on Selected Objects button in the Hypershade  . .
The nodes for the shader appear in the work area of the Hypershade.
| 6. | Double-click the bump2d utility in the Hypershade.
The Attribute Editor for bump2d opens.
| 7. | Change Bump Depth to 2.
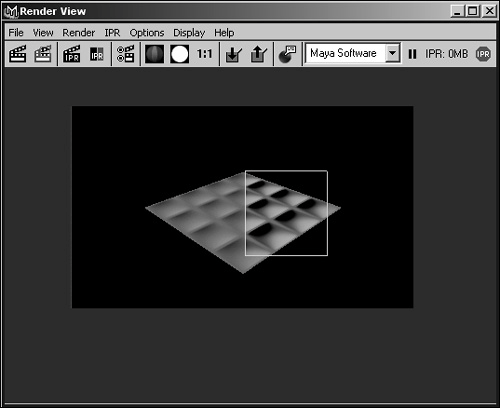
The selected region of the Render View updates the change quickly (Figure 16.61). Try updating other elements, such as the intensity and color of lights or the color or type of material.
Figure 16.61. When the bump depth is changed, the selected region updates interactively in the Render View. 
|
 Tip Tip
About the Hardware Renderer Maya's Hardware Renderer takes advantage of the next-generation graphics card's power and speed. In addition to being integrated with the Unified Render Globals, the new Hardware Renderer produces higher-quality images than the Hardware Render Buffer (see "Using the Hardware Render Buffer" earlier in this chapter). The Hardware Renderer helps the user produce broadcast-quality images in significantly less time than the Software Renderer. As with the Hardware Render Buffer, the new Hardware Renderer is great for producing animation previews, hardware-rendered particles, and object render passes, all of which can later be integrated with higher-resolution layers in the compositing stage of the animation, cutting down on overall rendering time. One advantage that the Hardware Renderer has over the Hardware Render Buffer is the ability to batch render. The current Hardware Render Buffer uses a screen-capture technology that can be interrupted when other application windows open over your render; this can now be avoided by batch rendering using the new Hardware Renderer. To render an image using the Hardware Renderer: 1. | Open or create a scene to software render.
| 2. | Open the Render Globals window and set Render Using to Maya Hardware (Figure 16.62).
Figure 16.62. Choose Render Using Maya Hardware. 
| 3. | Set the Common settings by following the steps in "To set the Common attributes to render a single image" earlier in this chapter.
| 4. | On the Maya Hardware tab, click the triangle next to Quality to expand the options.
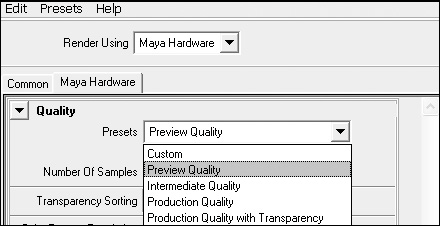
| 5. | From the Quality menu, choose Preview Quality (Figure 16.63).
Figure 16.63. Preview Quality is great for quick feedback on your renders when high quality is not needed. 
This will automatically set several of the options and is a good choice for quick render tests. For high-quality renders, choose Production Quality.
| 6. | From the Render menu, select Batch Render.
The rendering begins.
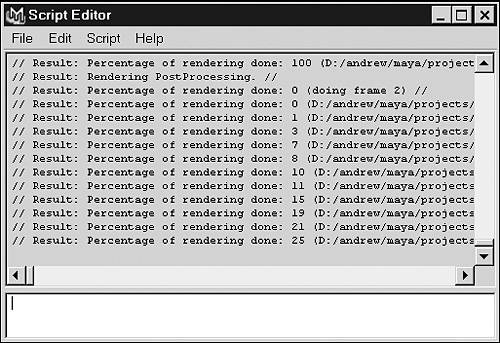
| 7. | Click the Script Editor icon in the lower-right corner of the interface.
The Script Editor opens. You can watch the progress of the render here (Figure 16.64).
Figure 16.64. The Script Editor displays the progress of your rendering. 
|
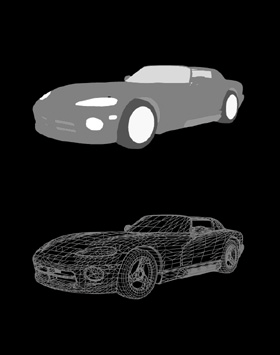
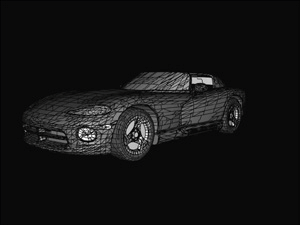
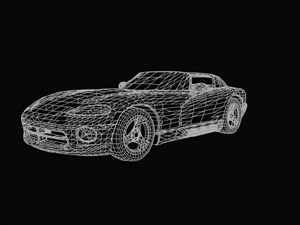
About the Vector Renderer The Vector Renderer is unlike the other Maya renderersSoftware Renderer, Hardware Renderer, and Mental Raybecause they render each image as a bitmap. If you scale a rendered bitmap larger, the image blurs and degrades. Vectors, on the other hand, are mathematical curves that can be scaled larger or smaller without loss of image quality. Maya's Vector Renderer can be used to render SWF files for Macromedia Flash, AI files for Adobe Illustrator, Encapsulated Postscript (EPS) files, and Scalable Vector Graphics (SVG), covering all of the most common vector formats. Rendered vector files can be imported into Adobe Illustrator to create 3D logos, brought into Flash files to add 3D animation and graphics to a Web site, or imported into a Photoshop collage to add depth and interest, to name just a few of the Vector Renderer's applications. You can use the Vector Renderer to render just the flat color of a character or object or to render the entire wireframe of the character or object (Figure 16.65). Maya gives you the option of filling the wireframe with color or simply rendering the lines of the wireframe to produce the final image. With all of Maya's vector rendering options, you have solid control over how much of the scene is rendered and how large or small the file size. Figure 16.65. One-color Vector Render (top); and Include Edges turned on to show the wireframe of an object (bottom). 
In the following task, we will render our vector file in SWF format. When a rendered SWF file has animation and is imported into Flash, each frame is rendered and will appear in the Flash timeline, ready for further editing or symbol creation. To render an image as vectors: 1. | Open or create a scene to render as vectors.
| 2. | Open the Render Globals window and set Render Using to Maya Vector.
| 3. | On the Common tab in the Render Globals window, name your file, select name.ext (Vector Multi Frame) for Frame/Animation Ext, and select Macromedia SWF (swf) for Image Format. You can set the resolution to a small size, 320x240, for example, because the vector file can be scaled without degrading.
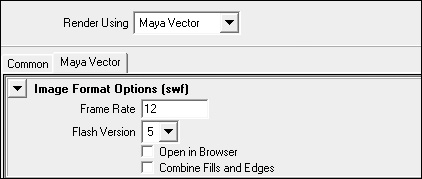
| 4. | On the Maya Vector tab in the Image Format Options (swf) area, set the frame rate to the desired Flash frame rate; for example, choose 12. (Be aware that the larger the frame rate, the larger the overall file size.) Set the Flash version; here, we will use the default Flash 5 (Figure 16.66).
Figure 16.66. Set Frame Rate and Flash Version for your SWF file. 
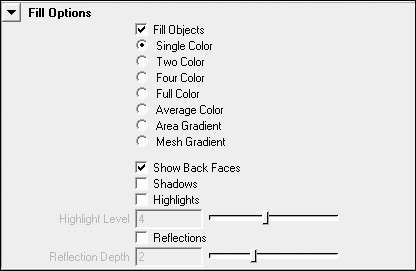
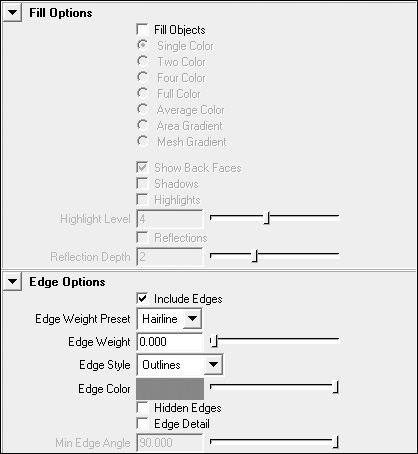
| 5. | In the Fill Options area, turn on Fill Objects, set the radio button to Single Color, and turn on Show Back Faces (Figure 16.67).
Figure 16.67. The settings in the Fill Options area control the amount of color and the color styles, as well as shadows and highlights. 
| 6. | Click the Render the Current Frame button in the Status Bar.
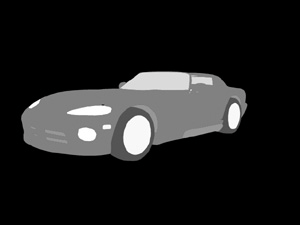
The scene is rendered in the Render View. Each color assigned to an object is rendered flat because Single Color is selected in the Fill Options area (Figure 16.68).
Figure 16.68. The one-color setting will create flat color for each surface material assigned to a surface. 
| 7. | In the Fill Options area, select Four Color.
| 8. | Click the Render the Current Frame button in the Status Bar.
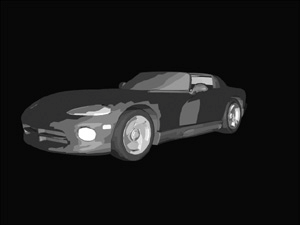
The scene is rendered in the Render View. Each color assigned to an object is rendered with four versions of the color because Four Color is selected in the Fill Options area (Figure 16.69).
Figure 16.69. The more colors, the more detail in a surface and the larger the file size. 
| 9. | Below the Fill Options area is the Edge Options area. Open the Edge Options panel and turn on Include Edges.
| 10. | Click the Render the Current Frame button.
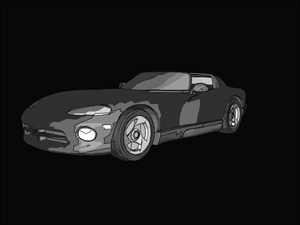
The scene is rendered in the Render View. You can now see outlines on the object (they're most noticeable on the wheels in the figure) because Include Edges is turned on in the Edge Options area (Figure 16.70).
Figure 16.70. The edges outline the colored areas with the stroke color you choose. 
| 11. | In the Edge Options area, turn on Edge Detail and set Min Edge Angle to 1.
| 12. | Click the Render the Current Frame button.
The scene is rendered in the Render View. You now see outlines on the object, and some of the wireframe is visible because Edge Detail is turned on and Min Edge Angle is turned down in the Edge Options area (Figure 16.71).
Figure 16.71. Including edges and fills can increase the render file size. 
| 13. | In the Edge Options area, change Edge Color to bright red and turn off Fill Objects (Figure 16.72).
Figure 16.72. The Include Edges option controls the outlines and wireframes of objects. 
| 14. | Click the Render the Current Frame button.
The scene is rendered in the Render View. Now only the wireframe is rendered (Figure 16.73).
Figure 16.73. Setting the Vector Renderer to render wireframes only can reduce your render file size because the shapes don't need to be filled. 
|
 Tip Tip
About Mental Ray Mental Ray is similar to Maya's Software Render, but adds advanced rendering features such as caustic light patterns and global illumination. Caustics and global illumination can help produce advanced lighting effects, which can produce more realistic renders. Caustics are light patterns similar to those created at the bottom of a pool on a bright day. Caustics are created due to the refraction of light and are created when light illuminates a diffuse surface from specular reflections. These patterns cannot be produced with normal raytracing. To overcome the standard raytracing shortcomings, Mental Ray uses photon maps, which store the global illumination information and can be invoked during standard raytracing. When standard raytracing is used to render a scene, light rays illuminate only the directly hit objects in the scene. Mental Ray's Global Illumination allows light to reflect around the scene, partially illuminating objects that are not directly hit with a light source. The Final Gather option creates very realistic shading effects by bouncing an object's color onto other objects, as in real life. When Final Gather is turned on, light rays are cast from the light; then when the light ray hits an object, additional rays are projected from the object used to calculate the amount of energy that is coming from the surrounding objects, in turn producing the effect of bounced light and color. To a point, final gather turns every object into a type of light source. Mental Ray can produce very photorealistic renders, but the realism requires long rendering time. Be aware that using Global Illumination or Final Gather in Mental Ray can give fantastic results, but often it is more efficient to find another way to achieve the advanced photorealism and to use the faster, scanline (non raytracing) Maya Software Renderer or Mental Ray to render your scenes. Mental Ray has many options and rendering capabilities; for more advanced information about Mental Ray, see the Maya Help files. To create caustics: 1. | Create a NURBS primitive plane.
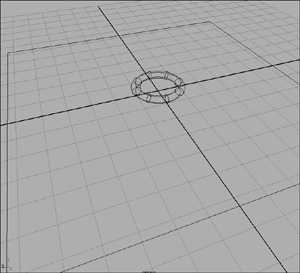
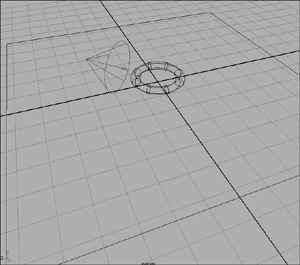
| 2. | Create a NURBS primitive torus, set the height ratio to .2, and move the torus up so it sits on the plane (Figure 16.74).
Figure 16.74. We will use a ring-like surface to reflect our caustic patterns. 
| 3. | Open the Render Globals window and set Render Using to Mental Ray.
| 4. | Specify the Common settings by following the steps in "To set the Common attributes to render a single image" earlier in this chapter.
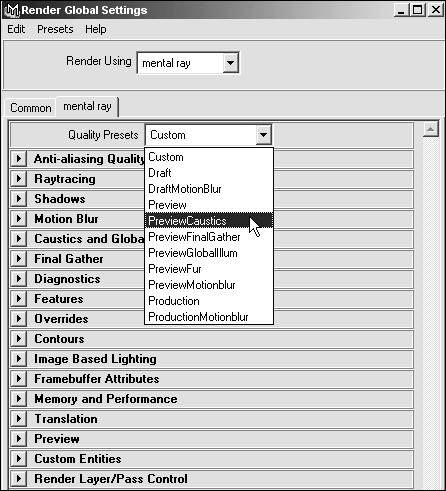
| 5. | On the Mental Ray tab, from the Quality menu, choose PreviewCaustics (Figure 16.75).
Figure 16.75. Select PreviewCaustics from the Quality menu to set Render Globals to the caustics presets. 
Caustics is now on in the Caustics and Global Illumination section.
| 6. | In the Caustics and Global Illumination section, set Caustic Accuracy to 64.
Setting Caustic Accuracy to 64 or less reduces spotting.
| 7. | Create a spotlight and point it at the torus (Figure 16.76).
Figure 16.76. The rays from the spotlight will produce the reflected caustics on the plane. 
| 8. | Open the spotlight's Attribute Editor and set the intensity to 13, the decay rate to Quadratic, and the cone angle to 80.
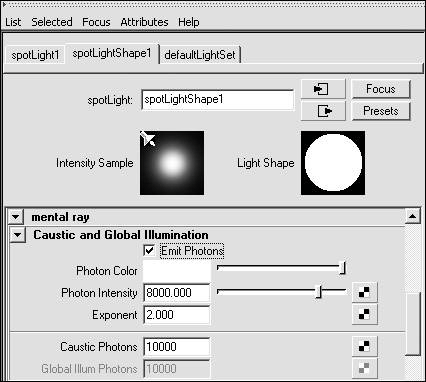
| 9. | In the Mental Ray Caustic and Global Illumination section inside the light, turn on Emit Photons (Figure 16.77).
Figure 16.77. Emit Photons around the scene to help reflect light around the scene. 
Using a higher number of photons increases rendering time, but increasing energy values does not increase rendering time. We are using the default settings here. The light will now emit photons, used to reflect light around the scene.
| 10. | In the Hypershade, create a Phong material and assign it to the torus.
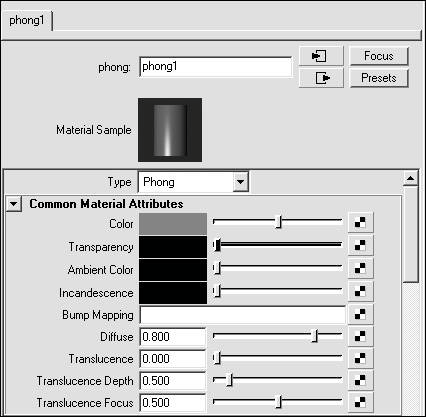
| 11. | Open the Phong's Attribute Editor, change the color to bright yellow, and set the Diffuse attribute to 0.3 (Figure 16.78).
Figure 16.78. Set the Diffuse attribute to 0.3 to turn the diffusion down. 
The caustics-casting object should have a low diffuse shader assigned to it, like our Phong set to 0.3.
| 12. | Create a Lambert material and assign it to the plane.
| 13. | Open the Lambert's Attribute Editor, change the color to light gray, and set the Diffuse attribute to 0.8.
The caustics-receiving object should have a highly diffuse material assigned to it, like our Lambert set to 0.8.
| 14. | Click the Render the Current Frame button.
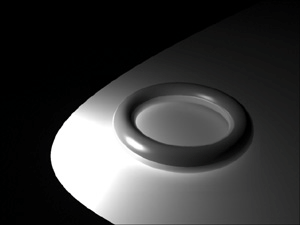
The scene is rendered in the Render View (Figure 16.79). Be aware that the rendering may take quite a few minutes.
Figure 16.79. The caustic reflections appear on the plane's surface. 
|
 Tips Tips
Turn off Photon Map Rebuild in final renders to reduce rendering time. To show caustics, the light can be any of the Maya lights. To specify whether the object is casting caustics or receiving caustics, select the object and open its Attribute Editor. In the Attribute Editor, expand the Mental Ray section and turn off DeriveFromMaya. Set the caustic flag to Cast Only or Receive Only.
To turn on Final Gather: 1. | Continue with the previous scene; open the Render Globals window.
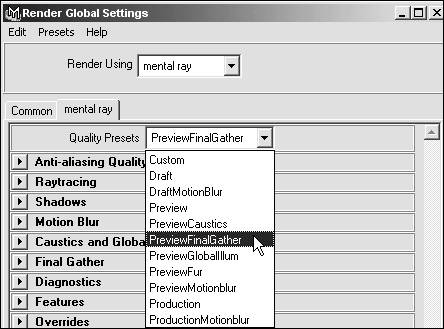
| 2. | Under the Mental Ray tab, set the Quality menu to PreviewFinalGather (Figure 16.80).
Figure 16.80. Set Quality to PreviewFinalGather. 
Final Gather is now on in the Final Gather section.
| 3. | Set the number of Final Gather Rays desired.
The higher the number the longer the render. We will use the default of 1000 here.
The Min and Max Radius values also have an impact on how long the scene will take to render. Using the default setting of 0 forces Maya to estimate this for you. Usually the Min value is 10% of the Max value.
| 4. | Click the Render the Current Frame button.
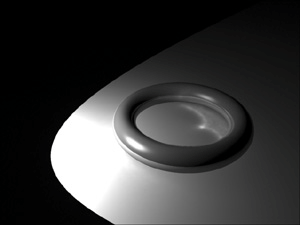
The scene is rendered in the Render View (Figure 16.81). Be aware that the rendering may take quite a few minutes.
Figure 16.81. The Final Gather render reflects the yellow color of the ring onto the plane. 
|
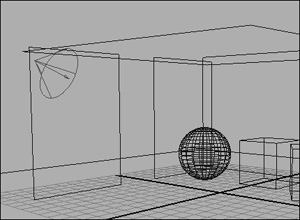
To create a raytraced practice scene: 1. | Create a new scene similar to the one in Figure 16.82.
Figure 16.82. Create the scene using a floor, ceiling, and two side walls. 
Be sure to leave the door-like shape on the left wall open for the light to come through.
| 2. | Open the Render Globals window, set Render Using to Maya Software, and set Quality to Production Quality; then turn on Raytracing in the Raytracing Quality section.
We will first create a raytraced render to compare to our Mental Ray rendered scene.
| 3. | Set the Common settings by following the steps in the task "To set the Common attributes to render a single image" earlier in this chapter.
| 4. | Create a spotlight and point it into the room from the outside (Figure 16.83).
Figure 16.83. Make sure the light is outside the room and pointing in. 
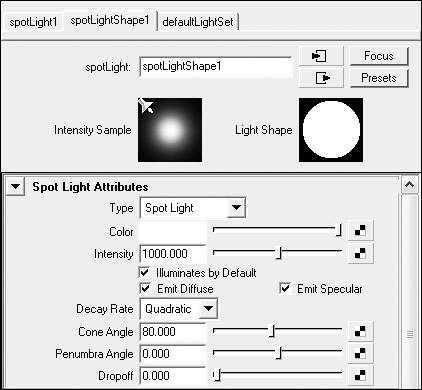
| 5. | Open the spotlight's Attribute Editor and set the intensity to 1000, the decay rate to Quadratic, and the cone angle to 80 (Figure 16.84).
Figure 16.84. Turn up the intensity when you set the decay rate to Quadratic to make up for the extremely light decay. 
| 6. | Click the Shadows arrow in the spotlight's Attribute Editor to open the shadow options; turn on Use Ray Trace Shadows.
The light will now cast raytraced shadows.
| 7. | Click the Render the Current Frame button.
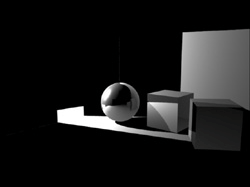
The scene is rendered in the Render View (Figure 16.85).
Figure 16.85. A standard raytraced scene; notice that only areas hit with direct light are illuminated. 
|
To add global illumination: 1. | Follow the steps in the previous task, "To create a raytraced practice scene."
| 2. | On the Mental Ray tab in the Render Globals window, choose PreviewGlobalIllum from the Quality menu.
Global Illumination is now on in the Caustics and Global Illumination section.
| 3. | In the Caustics and Global Illumination section, set Global Illum Accuracy to 6000, Global Illum Radius to 35, and Photon Volume Accuracy to 5000.
| 4. | Select the spotlight; then open the spotlight's Attribute Editor.
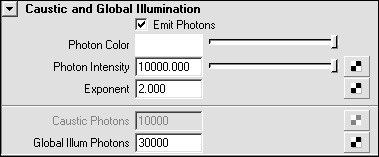
| 5. | In the Mental Ray Caustic and Global Illumination section inside the light, turn on Emit Photons and set Photon Intensity to 10000.
| 6. | Set Global Illum Photons to 30000 (Figure 16.86).
Figure 16.86. Protons are emitted throughout the scene to reflect the light around the scene. 
| 7. | In the Hypershade, create a Phong material and assign it to the sphere and cubes (not the walls).
| 8. | Open the Phong's Attribute Editor and change the color to bright yellow and set the Diffuse attribute to .3.
| 9. | Click the Render the Current Frame button.
The scene is rendered in the Render View (Figure 16.87). Be aware that the rendering may take quite a while.
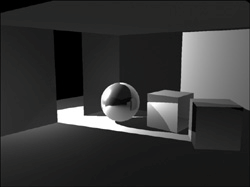
Figure 16.87. The final Mental Ray rendering lights areas of the room that are not directly hit with direct light. 
Image-based lighting, or IBL, is a complimentary feature to both Global Illumination and Final Gather. IBL uses an image to create the overall lighting for a scene. This is especially useful if you are trying to match lighting for 3D objects to the lighting of a live action set. IBL also simulates outdoor lighting very well because it typically uses a round "dome" to encompass the objects being lit.
|
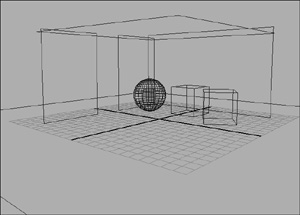
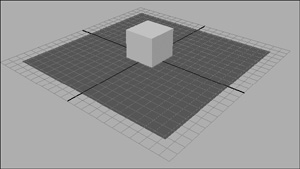
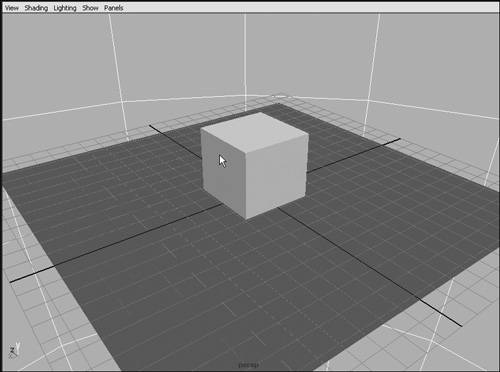
To add image-based lighting: 1. | Create a new scene similar to the one in Figure 16.88.
Figure 16.88. Create a scene similar to the one pictured. 
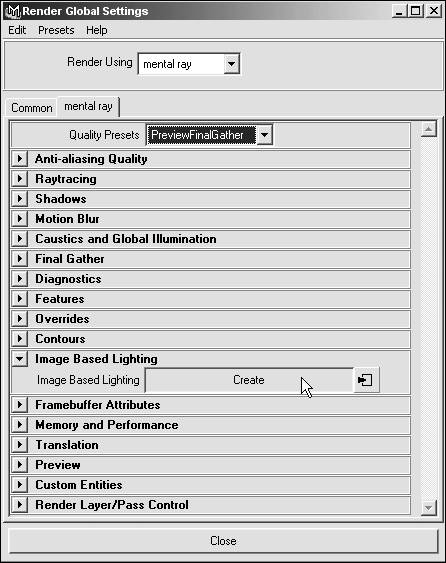
| 2. | Open the Render Globals window and click the Mental Ray tab; then select PreviewFinalGather from the Quality Presets pull-down menu to turn on Final Gather.
| 3. | In the Image Based Lighting section, click Create (Figure 16.89).
Figure 16.89. Click Create in the Image Based Lighting section of the Render Globals window. 
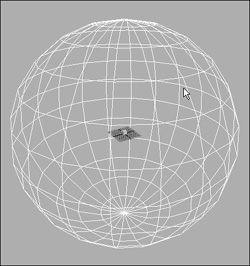
A sphere appears in the scene (Figure 16.90).
Figure 16.90. A sphere that surrounds the objects appears in the scene. 
| 4. | If the sphere does not fit around all the objects in the scene, click  to activate the Scale tool and scale the sphere until it fits. to activate the Scale tool and scale the sphere until it fits.
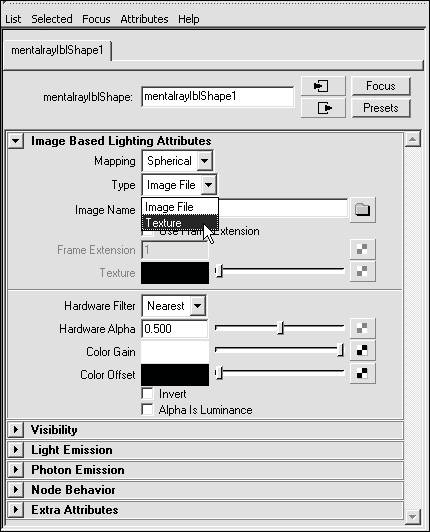
| 5. | In the sphere's Attribute Editor, which is automatically activated when you create an IBL sphere, select Texture from the Type pull-down menu (Figure 16.91).
Figure 16.91. In the sphere's Attribute Editor, you can assign a texture or an image file to use for the source of the IBL. 
The Texture option becomes available.
| 6. | Click the map  icon next to the Texture option. icon next to the Texture option.
The Create Render Node window appears.
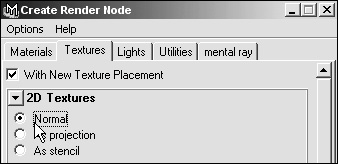
| 7. | In the 2D Textures section, select Normal (Figure 16.92).
Figure 16.92. Click Normal in the Create Render Node window. 
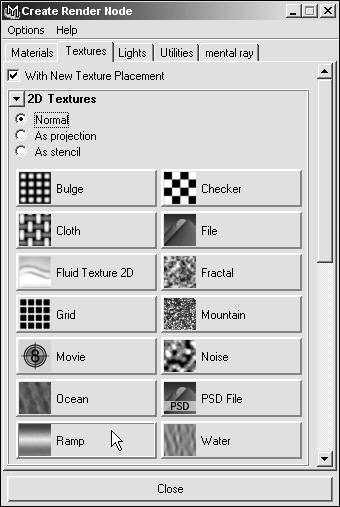
| 8. | Click the Ramp button (Figure 16.93).
Figure 16.93. A ramp appears in the Attributes Editor. 
A ramp appears in the Attribute Editor.
| 9. | In the scene, position the camera so that it is inside the sphere (Figure 16.94).
Figure 16.94. Position the camera so that it is inside the IBL sphere. 
| 10. | Select Render > Render the Current Frame.
The scene is rendered in the Render View. The objects are lit by the colors in the ramp assigned to the IBL sphere (Figure 16.95).
Figure 16.95. Render the scene to observe the effect of IBL lighting. 
|
Compositing For complex scenes, it is often necessary to render in passes or sections. This not only allows the renderer to use smaller amounts of RAM but also gives the artist more control if revisions are necessary. Say you've got a scene with a complex background where the camera does not move. You could easily speed things up by rendering one frame of the background and then compositing the character or other foreground objects on top. To facilitate this, Maya uses Render Layers, which tell the renderer to only render specific objects and save them to a separate image file. Maya also uses Render Passes, which separate Beauty, Color, Shadow, Diffuse, and Specular values into separate files. This way, you can make fast changes in the compositing program rather than having to re-render the entire 3D scene. If the shadows in your scene are too dark, for example, it may take days to re-render the entire scene in 3D; but in composite, it can take just a matter of a few minutes to make the shadows lighter. If you're interested in learning more about compositing, Adobe After Effects, Apple Shake, Discreet Combustion, and Eyeon Digital Fusion are all popular programs. |
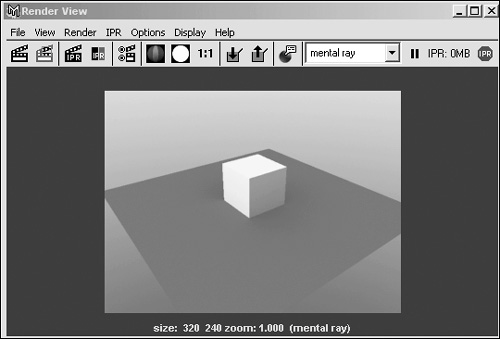
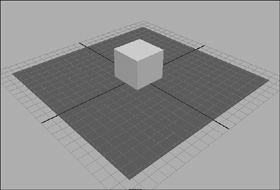
To use render layers: 1. | Create a new scene similar to the one in Figure 16.96.
Figure 16.96. Create a scene similar to the one pictured. 
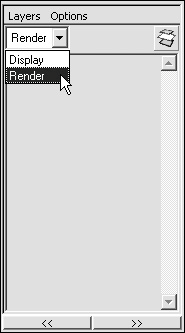
| 2. | From the pull-down menu in the Layer Editor, select Render to access the Render Layers (Figure 16.97).
Figure 16.97. Choose Render to access the Render Layers. 
| 3. | Select one of the objects and click Create a New Layer  . .
A new Render Layer appears in the Layer Editor.
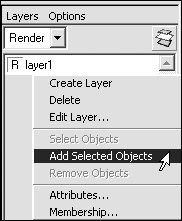
| 4. | Right-click the new render layer and select Add Selected Objects from the pull-down menu that appears (Figure 16.98).
Figure 16.98. Right-click the new layer and select Add Selected Objects. 
The selected object is now in layer1.
| 5. | Repeats steps 3 and 4 for the other object.
| 6. | Open the Render Globals window and select the Maya Software renderer.
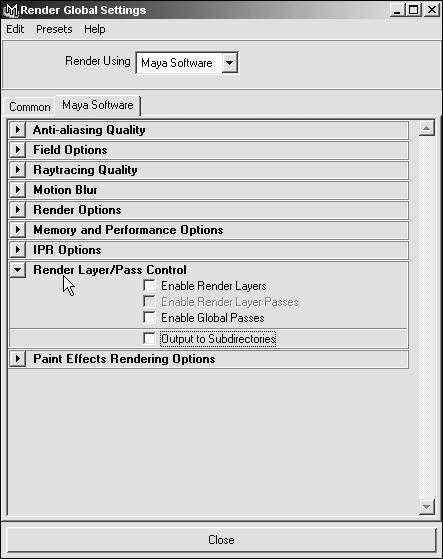
| 7. | In the Maya Software tab, click Render Layer/Pass Control to display more options below (Figure 16.99).
Figure 16.99. In the Maya Software tab, expand the Render Layer/Pass Control section. 
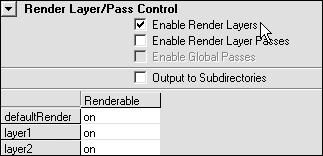
| 8. | Click Enable Render Layers to display a list of available render layers (Figure 16.100).
Figure 16.100. A list of created layers appears. 
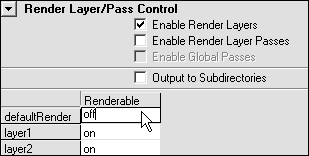
| 9. | In the defaultRender field, type off (Figure 16.101).
Figure 16.101. Turn off defaultRender. 
By default, Maya creates a render layer for any objects that have not been assigned a render layer. Since we have assigned layers for each of the objects in the scene, we can disable this feature.
| 10. | From the Render menu, select Batch Render to render the scene.
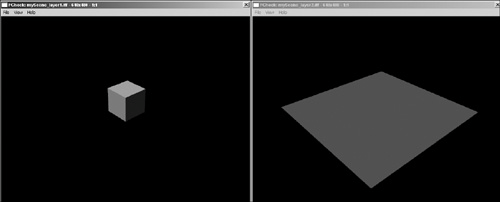
When the render is complete, the images folder of your project directory will contain a separate image for each render layer (Figure 16.102).
Figure 16.102. Launch a Batch Render of the scene to create two images in your project directory; when composited, these will create the whole image. 
|
To use render passes: 1. | Create a polygonal sphere and assign a blinn shader to it.
See Chapter 3, "Creating Primitives and Text," for more information
| 2. | Open the Render Globals window and select the Maya Software renderer.
| 3. | In the Maya Software tab, click Render Layer/Pass Control to display more options.
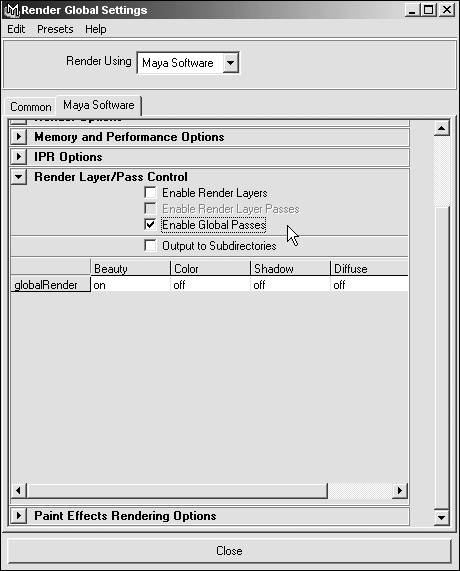
| 4. | Click Enable Global Passes to display the Beauty, Color, Shadow, Diffuse, and Specular render passes (Figure 16.103).
Figure 16.103. Click the Enable Global Passes check box. 
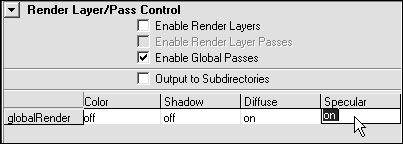
| 5. | In the Beauty field, type off; in the Diffuse and Specular fields, type on (Figure 16.104).
Figure 16.104. Turn on Diffuse and Specular. 
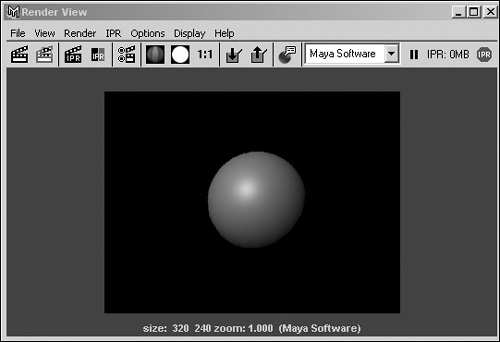
| 6. | Render the scene in the Render View (Figure 16.105).
Figure 16.105. Render the scene in the Render View to see what the image looks like. 
The scene renders and displays the combined render passes.
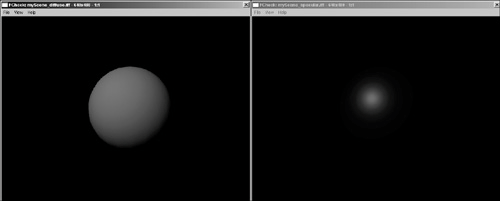
| 7. | Render the scene using Render > Batch Render.
When the render is complete, the images folder of your project directory will contain a separate image for each render pass (Figure 16.106). When these images are combined in a compositing program they will resemble Figure 16.105.
Figure 16.106. After launching a Batch Render, the Diffuse and Specular passes are rendered to your project directory. 
|
 Tip Tip
For larger scenes, you will need as much RAM as possible. To reduce memory usage, close all open programs, including Maya.
|


 Tip
Tip