Appendix A WSH Administrative Scripting
Overview
In this book you learned a great deal about both VBScript and the WSH through the development of computer games. In the real world, of course, VBScript and the WSH are used to automate the execution of tasks. These tasks are typically mundane, repetitive and time-consuming, or extremely complex and therefore subject to human error. Automating such tasks using VBScript and the WSH makes perfect sense. The purpose of this appendix is to provide you with a collection of sample scripts that demonstrate some real-world tasks that can be scripted.
None of the VBScripts that you will see in this appendix should be considered finished products. For example, you won't see any complex programming logic or a lot of error checking. These scripts were developed on a computer running Windows XP; you'll want to review and test them before running them on other operating systems. My intention for providing these sample scripts is to give you a feel for some of the real-world tasks that you can automate using VBScript and the WSH. I wanted to provide you with a collection of starter scripts from which you can begin to create and develop your own collection of scripts.
I won't spend a lot of time going over the development of these scripts, nor will I attempt to explain every operation that they perform. By now, you should be able to look at each of these scripts and be able to determine what it is doing. To help you out a little, I made sure to include plenty of comments.
Desktop Administration
The administration of the Windows desktop on a single computer is not too terribly time-consuming. However, for those responsible for the maintenance and care of a large number of computers, scripting is a Godsend. For example, a lot of small companies purchase their computers directly from the manufacture. These computers arrive with the operating system already installed. However, desktop settings such as the color of the Windows desktop background or screen-saver settings will vary depending on just how the computer manufacturer choose to set them up.
Companies often try and keep the configuration of their computer settings standardized. This makes maintaining their computers easier and reduces a lot of user confusion. One way of configuring computers in this scenario is to develop VBScripts that automate the configuration of desktop settings according to company policy. Then all you need to do to prepare a new computer for deployment is to copy over the scripts and have the user run them the first time he or she logs on to the computer.
Configuring the Desktop Background
The following VBScript demonstrates how to use the WshShell object's RegWrite() method to configure values that are stored in the Windows registry and which affect Windows desktop background.
'*************************************************************************
'Script Name: BackGround.vbs
'Author: Jerry Ford
'Created: 12/07/02
'Description: This script changes the user's background selection to none
'and sets the default background color to white
'*************************************************************************


'Initialization Section

Option Explicit

On Error Resume Next

Dim WshShl, ChangeSettings

Set WshShl = WScript.CreateObject("WScript.Shell")


'Main Processing Section

'Verify that the user intends to change his or her screen saver settings
ChangeSettings = PromptForConfirmation()

If ChangeSettings = 6 Then
 ModifySettings()
End If

WScript.Quit()


'Procedure Section

'This function determines if the user wishes to proceed

Function PromptForConfirmation()
 omptForConfirmation = MsgBox("Set standard desktop background?", 36)
End Function


'This subroutine alters screen saver settings

Sub ModifySettings()
 'Turn off the wallpaper setting
 WshShl.RegWrite "HKCUControl PanelDesktopWallpaper", " "

 'Setting the background color to white
 WshShl.RegWrite "HKCUControl PanelColorsBackground", "255 255 255"
End Sub
The script begins by prompting for confirmation and then proceeds to modify the following registry values:
WshShl.RegWrite "HKCUControl PanelDesktopWallpaper", ""
WshShl.RegWrite "HKCUControl PanelColorsBackground", "255 255 255"
The first statement sets the Windows Wallpaper setting to "". This is the equivalent to right-clicking on the Windows desktop, selecting Properties, and then setting the Background setting on the Desktop property sheet of the Windows Display Properties dialog to None.
The second statement sets the value of the Background setting to 255 255 255. This is the equivalent of selecting white as the color setting on the Desktop property sheet.
To test this script, run it and then log off and on again.
Configuring the Screen Saver
The following VBScript demonstrates how to change the configuration of the Windows screen saver. The overall construction of this script is very similar to the previous example, the only difference being which registry keys are edited.
'*************************************************************************
'Script Name: ScreenSaver.vbs
'Author: Jerry Ford
'Created: 12/07/02
'Description: This script changes the user's screen saver to a default
'collection of settings.
'*************************************************************************

'Initialization Section

Option Explicit

On Error Resume Next

Dim WshShl, ChangeSettings
Set WshShl = WScript.CreateObject("WScript.Shell")


'Main Processing Section

'Verify that the user intends to change his or her screen saver settings
ChangeSettings = PromptForConfirmation()

If ChangeSettings = 6 Then
 ModifySettings()
End If

WScript.Quit()


'Procedure Section

'This function determines if the user wishes to proceed

Function PromptForConfirmation()
 PromptForConfirmation = MsgBox("Set standard screen saver settings?", 36)
End Function


'This subroutine alters screen saver settings

Sub ModifySettings()
 'Enables the Windows screen saver
 WshShl.RegWrite "HKCUControl PanelDesktopScreenSaveActive", 1

 'Turns on password protection
 WshShl.RegWrite "HKCUControl PanelDesktopScreenSaverIsSecure", 1

 'Establishes a 10 minute inactivity period
 WshShl.RegWrite "HKCUControl PanelDesktopScreenSaveTimeOut", 600

 'Enable the Starfield screen saver
 WshShl.RegWrite "HKCUControl PanelDesktopSCRNSAVE.EXE",
 "C:WindowsSystem32ssstars.scr"
End Sub
As you can see, this script modifies four registry values. The modification of the first value enables the Windows screen saver. The modification of the second value enables screen saver password protection, meaning that if the screen saver kicks in, the user will have to retype his password to get back into Windows. The third modification sets up the screen saver to begin running after a 10-minute period of user inactivity. Finally, the last modification selects the screen saver that is to be run.
To test this script, run it and then log off and on again.
Network Administration
Network administration means many things to many different people. For one thing, it may mean establishing connections to network drives so that a script can move, copy, create, and delete files and folders residing on network computers. Network management also means establishing or removing connections to network printers. In the next several sections I'll provide you with scripts that demonstrate how to connect to, and disconnect from, network drives and printers.
Mapping Network Drives
When you create a connection to a network drive (known as mapping), you make the network drive look as if it were local to your computer by assigning it a local drive letter—that is, as long as you have the appropriate set of security permissions on the network drive. Connecting to and disconnecting from a network drive is achieved using methods belonging to the WshNetwork object.
Mapping to Network Drives
To create a drive mapping you must use the WshNetwork object's MapNetworkDrive() method. Its syntax is as follows:
WshNetwork.MapNetworkDrive letter, name, [persistent], [username],
[password]
Letter is an available logical disk drive letter on your computer. Name is the UNC name and network path of the network drive. Persistent is optional; it determines whether or not the mapping is permanent. A value of True creates a permanent mapping. The default value of this setting is False, which causes the connection to last only for the current working session. Username and password are optional and are used to supply the username and password required to access the drive.
| TRAP |
When you run scripts from the Windows desktop or command line, they execute using your security credentials. However, if you schedule the execution of your VBScript, then your scripts will not have the authority that you have and will be unable to establish a network drive connection. One way to get around this is to embed a username and its password inside your script. However, doing so is really bad for security. Another option is to set up your script to prompt for a valid username and password at execution time and authorize someone who might be around to supply these credentials. |
The following VBScript demonstrates how to establish a temporary network drive mapping:
'*************************************************************************
'Script Name: DriveMapper.vbs
'Author: Jerry Ford
'Created: 12/07/02
'Description: This script demonstrates how to add logic to VBScripts in
'order to support network drive mapping
'*************************************************************************


'Initialization Section

Option Explicit

On Error Resume Next

Dim WshNet

'Instantiate the WshNetwork object
Set WshNet = WScript.CreateObject("WScript.Network")


'Main Processing Section

'Call the procedure that maps drive connections, passing it an available
'drive letter and the UNC pathname of the drive
MapNetworkDrive "z:", "\ICS_ServerD"

'Terminate script execution
WScript.Quit()
'Procedure Section

'This subroutine creates network drive mappings

Sub MapNetworkDrive(DriveLetter, NetworkPath)
 'Use the WshNetwork object's MapNetworkDrive() method to map to the drive
 WshNet.MapNetworkDrive DriveLetter, NetworkPath
End Sub
Disconnecting Mapped Drives
You can use the WshNetwork objects' RemoveNetworkDrive() method to disconnect a mapped drive when it is no longer needed. For example, you might want to do this at the end of the script that created the drive mapping, once it has completed its assigned task. The syntax of the RemoveNetworkDrive() method is as follows:
WshNetwork.RemoveNetworkDrive letter, [kill], [persistent]
Letter is the drive that that has been assigned to the mapped drive. Kill is an optional setting with a value of either True or False. Setting it to True disconnects a mapped drive even if it is currently in use. Persistent is also optional. Set it to True to disconnect a permanently mapped drive.
The following VBScript demonstrates how to disconnect the network drive that was mapped by the previous script.
'*************************************************************************
'Script Name: DriveBuster.vbs
'Author: Jerry Ford
'Created: 12/07/02
'Description: This script demonstrates how to add logic to VBScripts in
'order to terminate a network drive mapping
'*************************************************************************


'Initialization Section

Option Explicit

On Error Resume Next

Dim WshNet
'Instantiate the WshNetwork object
Set WshNet = WScript.CreateObject("WScript.Network")


'Main Processing Section

'Call the procedure that deletes network drive connections, passing it the
'the drive letter to be removed
MapNetworkDrive "z:"

'Terminate script execution
WScript.Quit()


'Procedure Section

'This subroutine disconnects the specified network drive connection

Sub MapNetworkDrive(DriveLetter)
 'Use the WshNetwork object's RemoteNetworkDrive() method to disconnect
 'the specified network drive
 WshNet.RemoveNetworkDrive DriveLetter
End Sub
Printer Administration
Printer administration consists of a number of tasks. One task is the setup of network printer connections. Other tasks include the management of print jobs and the physical management of the printer, including refilling its paper, ink, ribbon, or toner supply. Another task includes the removal of printer connections when they are no longer needed. The next two sections will demonstrate how to use VBScript and the WSH to set up and disconnect network printer connections.
Connecting to a Network Printer
To create a connection to a network printer, you'll need to use the WshNetwork object's AddWindowsPrinterConnection() method. This method has two different types of syntax, depending on the operating system on which the script is executed.
The syntax for the AddWindowsPrinterConnection() method when used on a computer running Windows NT, 2000 or XP is as follows:
WshNetwork.AddWindowsPrinterConnection(strPrinterPath)
The syntax for the AddWindowsPrinterConnection() method when used on a computer running Windows 95, 98, or Me is as follows:
WshNetwork.AddWindowsPrinterConnection(strPrinterPath, strDriverName[,
strPort])
StrPrinterPath is the UNC path and name for the network printer. StrDriverName is the name of the appropriate printer software driver, and StrPort is an optional port assignment for the printer connection.
The following VBScript demonstrates how to set up a network printer connection:
'*************************************************************************
'Script Name: PrinterMapper.vbs
'Author: Jerry Ford
'Created: 12/07/02
'Description: This script demonstrates how to use a VBScript to set up a
'connection to a network printer
'*************************************************************************


'Initialization Section

Option Explicit

'On Error Resume Next

Dim WshNet

'Instantiate the WshNetwork object
Set WshNet = WScript.CreateObject("WScript.Network")


'Main Processing Section

'Call the procedure that creates network printer connections, passing
'it a port number and the UNC pathname of the network printer
SetupNetworkPrinterConnection "\ICS_ServerCanonPrinter"
'Terminate script execution
WScript.Quit()


'Procedure Section

'This subroutine establishes a network printer connection

Sub SetupNetworkPrinterConnection(NetworkPath)
 'Use the WshNetwork object's AddWindowsPrinterConnection() method
 'to connect to the network printer
 WshNet.AddWindowsPrinterConnection NetworkPath
End Sub
Disconnecting from a Network Printer
As with network drives, the removal of a printer connection is a little easier to perform than its initial connection. Printer connections need to be removed for a number of reasons. For example, every printer eventually breaks and must be replaced. Sometimes people move from one location to another, necessitating changes to printer connections. By scripting the setup and removal of printer connections, you can automate this process. To remove a network printer connection you'll need to use the WshNetwork object's RemovePrinterConnection() method. This method's syntax is as follows:
WshNetwork.RemovePrinterConnection resource, [kill], [persistent]
Resource identifies the printer connection and may be either the connection's assigned port number or its UNC name and path. Kill is an optional setting with a value of either True or False. Setting it to True disconnects a printer connection even if it is currently in use. Persistent is also optional. Set it to True to disconnect a permanent printer connection.
The following VBScript demonstrates how to remove the printer connection established by the previous VBScript.
'*************************************************************************
'Script Name: PrinterBuster.vbs
'Author: Jerry Ford
'Created: 12/07/02
'Description: This script demonstrates how to use a VBScript to disconnect
'a network printer connection
'*************************************************************************
'Initialization Section

Option Explicit

'On Error Resume Next

Dim WshNet

'Instantiate the WshNetwork object
Set WshNet = WScript.CreateObject("WScript.Network")


'Main Processing Section

'Call the procedures that disconnect network printer connections passing
'it the UNC pathname of the network printer
SetupNetworkPrinterConnection "\ICS_ServerCanonPrinter"

'Terminate script execution
WScript.Quit()


'Procedure Section

'This subroutine disconnects a network printer connection

Sub SetupNetworkPrinterConnection(NetworkPath)
 'Use the WshNetwork object's RemovePrinterConnection() method to
 'disconnect from a network printer
 WshNet.RemovePrinterConnection NetworkPath, "True", "True"
End Sub
Computer Administration
The term computer administration represents a very broad category of tasks. Rather than try to list or explain them all, I'll simply present you with two computer administration examples. The first example will demonstrate how to use VBScript and the WSH to manage Windows services, and the second example will demonstrate automated user account creation.
Managing Services
On computers running Windows NT, 2000, and XP operating systems, much of the operating system's core functionality is provided in the form of services. These services perform tasks, such as managing Windows plug-and-play, handling the spooling of printer jobs, and administering the execution of scheduled tasks. By starting and stopping Windows services, you can enable and disable specific Windows functionality (that is, control just what users can and cannot do).
You can use the Windows NET STOP and NET START commands to stop and start Windows services. To execute these commands from within a VBScript, you can use the WshShell object's Run() method, as demonstrated in the following script:
'*************************************************************************
'Script Name: ServiceCycler.vbs
'Author: Jerry Ford
'Created: 12/07/02
'Description: This script demonstrates how to use VBScript to stop and
'start Windows services
'*************************************************************************


'Initialization Section

Option Explicit

'On Error Resume Next

Dim WshShl, ServiceToManage

'Instantiate the WshShell object
Set WshShl = WScript.CreateObject("WScript.Shell")


'Main Processing Section

'Prompt the user to specify the name of the service to cycle
ServiceToManage = InputBox("What service would you like to cycle?")

'Call the procedure that stops a service
StopService ServiceToManage
'Pause for 5 seconds
WScript.Sleep(15000)

'Call the procedure that starts a service
StartService ServiceToManage

'Terminate script execution
WScript.Quit()


'Procedure Section

'This subroutine stops a specified service
Sub StopService(ServiceName)
 WshShl.Run "net stop " & ServiceName, 0, "True"
End Sub

'This subroutine starts a specified service
Sub StartService(ServiceName)
 WshShl.Run "net start " & ServiceName, 0, "True"
End Sub
User Account Administration
User administration involves a number of tasks, including the creation, modification, and removal of user accounts from the computer or the Windows domain to which the computer is a member. In order to perform user account administration, you need to have administrative privileges within the context that the script will execute (that is, on the computer or at the domain level).
One way to create a new user account is with the Windows NET USER command.
| TRICK |
You can also use the NET GROUP command to add a newly created user account into a global domain group account or the NET LOCALGROUP command to add the user account to a local group. |
For example, the following VBScript uses the WshShell object's Run() method and the NET USER command to create a new user account on the Windows NT, 2000, or XP computer on which the script is executed.
'*************************************************************************
'Script Name: AccountCreator.vbs
'Author: Jerry Ford
'Created: 12/07/02
'Description: This script demonstrates how to use VBScript to create new
'user accounts
'*************************************************************************


'Initialization Section

Option Explicit

'On Error Resume Next

Dim FsoObject, WshShl, NewAcctFile, AcctName, Result

'Instantiate the FileSystemObject object
Set FsoObject = CreateObject("Scripting.FileSystemObject")

'Instantiate the WshShell object
Set WshShl = WScript.CreateObject("WScript.Shell")

'Specify the location of the file containing the new user account name
Set NewAcctFile = FsoObject.OpenTextFile("c:TempUserNames.txt", 1, "True")


'Main Processing Section

'Call the procedure that creates new user accounts
CreateNewAccts()

'Terminate script execution
WScript.Quit()


'Procedure Section

'This procedure creates new accounts using an input file
Sub CreateNewAccts()
 'Create a Do While loop to process each line in the input file
 Do while False = NewAcctFile.AtEndOfStream

 'Each line of the file specifies a unique username
 AcctName = NewAcctFile.ReadLine()

 'Create the new account
 WshShl.Run "net user " & AcctName & " " & AcctName & "/add", 0

 Loop

 'Close the input file
 NewAcctFile.Close

End Sub
In order to make the script more flexible, it has been set up to use VBScript FileSystemObject methods that allow it to open and retrieve a list of names from an external file called UserNames.txt, located in the c:Temp folder. This way, the script can be used over and over again without any modification. All you need to do is modify the script's input text file.
Scheduling the Execution of Administrative Scripts
Windows operating systems provide two means of scheduling script execution. The first option is the AT command, which is executed from the Windows Command Prompt. This command allows you to develop scripts that can schedule the execution of other scripts. The second option is to use the Scheduled Task Wizard, which provides a guided, step-by-step walk-through of the scheduling process.
The AT Command
The Windows AT command allows you to set up and manage scheduled tasks from the Windows Command Prompt, which you can access from within your VBScripts using the WshShell object's Run() method.
There are two different types of syntax for the AT command. The syntax used to delete scheduled tasks is as follows:
at [\computername] [[id] [/delete] | /delete [/yes]]
| TRICK |
To view a list of currently scheduled tasks, type the AT command at the Windows Command Prompt and press the Enter key. |
To set the computer at which a new scheduled task is to be executed, specify the computer's name in place of \computername. Id identifies a numbered task id assigned to every task by the scheduler service. /Delete performs a task deletion. /Yes is used to supply a confirmation for a delete operation.
The syntax used to create a new scheduled task is as follows:
at [\computername] time [/interactive] [/every:date[,...] | /next:
date[,...]] command
\Computername specifies the computer where the task is to be scheduled. Time specifies the time that task is to be executed in the format of hh:mm on a 24-hour clock. Specify /interactive to allow the script to interact with the desktop and the logged on user. /Every:date[,...] specifies the task's schedule using specified days of the week or month. For example, dates are specified as M, T, W, Th, F, S, Su, and days of the month are specified as 1 - 31. /Next:date[,...] sets the tasks to run on the next occurrence of a specified day or date. Finally, command specifies the name of the application or script to be scheduled.
The following VBScript demonstrates how to use the Windows AT command to set up scheduled tasks for three VBScripts:
'*************************************************************************
'Script Name: AtScheduler.vbs
'Author: Jerry Ford
'Created: 12/07/02
'Description: This script demonstrates how to use the Windows AT command
'within a VBScript to schedule the execution of other scripts
'*************************************************************************


'Initialization Section

Option Explicit

On Error Resume Next

Dim WshShl
'Instantiate the WshShell object
Set WshShl = WScript.CreateObject("WScript.Shell")


'Main Processing Section

'Call the procedure that schedules the execution of VBScripts
ScheduleTheScripts()

'Terminate script execution
WScript.Quit()


'Procedure Section

'This procedure schedules the execution of other VBScripts
Sub ScheduleTheScripts()
 'Use the WshShell object's Run() method to run the AT command
 WshShl.Run "at 20:00 /every:M,T,W,Th,F cmd /c GenerateRpts.vbs", 0, "True"
 WshShl.Run "at 21:00 /every:M,T,W,Th,F cmd /c CopyFiles.vbs", 0, "True"
 WshShl.Run "at 22:00 /every:M,T,W,Th,F cmd /c ClearOutFolders.vbs", 0, "True"
End Sub
The Windows Scheduler
If you prefer to point and click your way through the setup of an automation schedule for your VBScripts, then you can use the Windows Scheduled Task Wizard. To start this wizard on a computer running Windows XP, click on Start, Control Panel, Performance and Maintenance, and then select Scheduled Tasks. This opens the Scheduled Tasks folder, as demonstrated in Figure A.1.
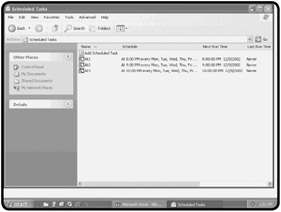
Figure A.1: Using the Scheduled Tasks folder to view the three scheduled tasks set up by the previous VBScript
To set up a new scheduled task for one of your VBScripts, double-click on the Add Scheduled Task icon. This starts the Scheduled Task Wizard. Click on Next and follow the instructions presented by the wizard.
IN THE REAL WORLD
Scripts that you execute manually run using the security permissions assigned to you. However, tasks run using the Windows Task Scheduler services will not, by default, have this same level of access. One way to get around this problem is to associate a specific username and password with each scheduled task. You can do this from the Scheduled Tasks folder by right-clicking on a scheduled task and specifying a username in the Run as field, and then clicking on Password and typing in the password associated with the account.
Part I - Introducing the WSH and VBScript
Part II - Learning VBScript & WSH Scripting
- VBScript Basics
- Constants, Variables, and Arrays
- Conditional Logic
- Processing Collections of Data
- Using Procedures to Organize Scripts
Part III - Advanced Topics
- Handling Script Errors
- Using the Windows Registry to Configure Script Settings
- Combining Different Scripting Languages
Part IV - Appendices
EAN: 2147483647
Pages: 137
