Server-Side Web Scripting
Overview
Talk to most people about VBScript and usually the first thing that pops into their heads is Active Server Pages (ASP). The two technologies are linked together in the minds of many Web developers. Sure, you can do a lot with VBScript on the client side and even create stand-alone applications, but ASP is where all the power is!
In the preceding chapter, we've been focusing mainly on client-side scripting and applications. Now it's time to take a look at the server side of things. Creating Web sites with only client-side scripting is all well and good, but your functionality and power are severely limited. By adding server-side scripting, you add a whole new dimension to the Web site and gain a huge advantage. You are able to draw upon the wealth of data available to you on the server and across the enterprise in various databases. You are able to customize pages to the needs of each different user that comes to your Web site. In addition, by keeping your code on the server side you can build a library of functionality. This library can be drawn from again and again to further enhance other Web sites. Best of all, using server-side script libraries will allow your Web sites to scale to multitier, or distributed, Web applications.
To do this, you'll need a good understanding of the HTTP protocol, and how an HTTP server interacts with a browser. This model is important to understand when developing Web applications that exist on the client and server side.
Next, we'll introduce you to Active Server Pages. ASP is Microsoft's server-side scripting environment. ASP can be used to create everything from simple, static Web pages to database-aware dynamic sites, using HTML and scripting. Another important use is as 'programming glue.' Through the use of ASP you can create and manipulate server-side components. These components can perhaps provide data to your application such as graphic image generation, or may link to a mainframe database. The important thing to always remember is that the ASP code does nothing more than to facilitate the use of these components on the Internet.
ASP comes with some built-in objects that are important to understand before their full potential can be unleashed. We will cover these objects in depth.
Finally, we'll look at some real-world examples of using ASP on a Web site. These should give you some idea of the power and beauty of server-side scripting with ASP.
The Anatomy of the HTTP Protocol
As you know, surfing the Web is as simple as clicking links on your browser. But do you know what really goes on beneath the hood of your Web browser? It can be quite complex, but isn't too difficult to understand. More importantly, it will help you to understand the intricacies of client and server-side scripting.
Overview
The Hypertext Transfer Protocol, or HTTP, is an application level TCP/IP protocol. An application level protocol is one that travels on top of another protocol. In this instance, HTTP travels on top of TCP, which is also a protocol. When two computers communicate over a TCP/IP connection, the data is formatted and processed in such a manner that it is guaranteed to arrive at its destination. This elaborate mechanism is the TCP/IP protocol.
HTTP takes for granted, and largely ignores, the entire TCP/IP protocol. It relies instead on a set of text commands such as GET and PUT . Application level protocols are implemented, usually, within an application (as opposed to at the driver level), hence the name . Some other examples of application level protocols are the File Transfer Protocol (FTP) and the mail protocols, Standard Mail Transfer Protocol (SMTP) and the Post Office Protocol (POP3). Pure binary data is rarely sent via these protocols, but when it is, it is always encoded into an ASCII format. This is inefficient at best, and future versions of the HTTP protocol may attempt to rectify this problem. The most up-to-date version of HTTP is version 1.1, and almost all Web servers available today support this version.
| Tip |
For more information on the HTTP/1.1 protocol, visit the W3 Website at www.w3.org/protocols/ . |
The HTTP Server
To carry out an HTTP request, there must be an HTTP or Web server running on the target machine. This server is an application that listens for and responds to HTTP requests on a certain TCP port (by default this is port 80). An HTTP request is for a single item from the Web server. The item may be anything from a Web page to a sound file. The server, upon receipt of the request, attempts to retrieve the data asked for. If the server finds the correct information, it formats and returns the data to the client. If the requested information could not be found, the server will return an error message.
Pulling up a single Web page in your browser may cause dozens of HTTP transactions to occur. Each element on a Web page that is not text needs to be requested from the HTTP server individually. The main point of all this is that each HTTP transaction consists of a request and a response.
And it is in this transaction model that you must place yourself when you are programming Web applications.
Protocol Basics
There are four basic states that make up a single HTTP transaction. They are:
- The Connection
- The Request
- The Response
- The Disconnection
A client connects to a server and issues the request. It waits for a response, then disconnects. A connection typically lasts only for a few seconds. On Web sites where the data is not laden with graphics, and the information is fairly static, requests will last less than one second.
The Connection
The client software, a Web browser in this case, creates a TCP/IP connection to an HTTP server on a specific TCP/IP port. Port 80 is used if one is not specified. This is considered the default port for an HTTP server. A Web server may, however, reside on any port allowed. It is completely up to the operator of the Web server, and port numbers are often deliberately changed as a first line of defense against unauthorized users.
The Request
Once connected, the client sends a request to the server. This request is in ASCII, and must be terminated by a carriage -return/line-feed pair. Every request must specify a method, which tells the server what the client wants. In HTTP 1.1, there are eight methods :
- OPTIONS
- GET
- HEAD
- POST
- PUT
- DELETE
- TRACE
- CONNECT
For more information about the different methods and their use, please check out the HTTP specification on the W3C Web site. For the purpose of this chapter, we are going to focus on the GET method.
The GET method asks the Web server to return the specified page. The format of this request is as follows :
GET
You can make HTTP requests yourself with the telnet program. Telnet is a program that is available on most computer systems and it was originally designed for use on UNIX systems. Since basic UNIX is character-based, one could log in from a remote site and work with the operating system. Telnet is the program that allows you to connect to a remote machine and all versions of Windows come with a telnet program. Figure 17-1 shows a telnet application in action.
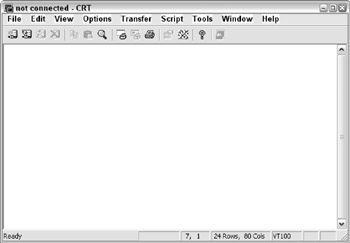
Figure 17-1
| Tip |
Microsoft's telnet program leaves much to be desired. However, there are many third-party commercial products available that you can use. One is made by a company called Van Dyke Technologies ( www.vandyke.com ) and it is called CRT (current version is version 4.0). |
Telnet defaults to using TCP/IP port 23. On UNIX systems, in order to telnet into a machine, that machine must be running a telnet server. This server listens for incoming telnet connections on port 23. However, almost all telnet programs allow you to specify the port on which to connect. It is this feature that we can utilize to examine HTTP running under the hood.
If you choose not to download the Van Dyke telnet client, you can test this by running Window's own telnet.
In the Van Dyke telnet client select Quick Connect from the File menu and you'll be presented with the dialog box shown in Figure 17-2, which requires filling in before proceeding.
Next, type in the name of any Web server and then enter the Web server's port. This is almost always 80 . An example of these settings is shown in Figure 17-3.
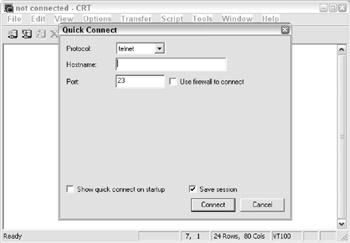
Figure 17-2

Figure 17-3
Once you are connected, the title bar will change to contain the name of the server to which you are connected. There is no other indication of connection. It is at this point that you need to type in your HTTP command. Type in the following, all in upper case.
GET / HTTP/1.0
The Response
Upon receipt of the request, the Web server will answer. This will most likely result in some sort of HTML data as shown previously. However, you may get an error as shown in Figure 17-4.
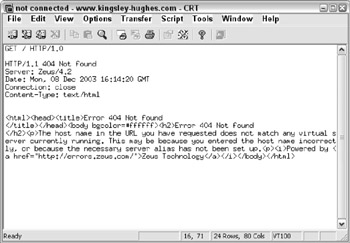
Figure 17-4
Again, the response is in HTML, but the code returned is an error code (404) instead of an OK (200).
HTTP Headers
What was actually returned is a two-part response. The first part consists of HTTP headers. These headers provide information about the actual response to the request, the most important header being the status header. In the previous listing, it reads HTTP/1.1 404 Object Not Found. This indicates the actual status of the request.
The other headers that were returned with this request are Server , Date , Connection , and Content-Type . There are many different types of headers, and they are all designed to aid the browser in easily identifying the type of information that is being returned.
The Disconnect
After the server has responded to your request, it closes the connection thus disconnecting you. Subsequent requests require you to reestablish your connection with the server.
Introducing Active Server Pages
With the HTTP architecture laid out in the last section, you can clearly see that the real heart of the HTTP protocol lies in the request and the response. The client makes a request to the server, and the server provides the response to the client. What we're looking at here is really the foundations of client/server computing. A client makes a request from a server and the server fulfills that request. We see this pattern of behavior throughout the programming world today, not only in Web programming.
Microsoft recognized this pattern and developed a new technology that rendered Web programming a much more accessible technique. This technology is Active Server Pages or ASP. ASP is a server-side scripting environment that comes with Microsoft's Internet Information Services.
ASP allows you to embed scripting commands inside your HTML documents. The scripting commands are interpreted by the server and translated into the corresponding HTML and sent back to the server. This enables the Web developer to create content that is dynamic and fresh. The beauty of this is that it does not matter which browser your Web visitor is using when they visit the pages because the server returns only pure HTML. Sure, you can, if you want, extend your returned HTML with browser specific programming, but that is your choice. By no means is this all that ASP can do, but we'll cover more of its capabilities such as form validation and data manipulation later in this chapter.
Although you can use languages such as JavaScript or even Perl, by default the ASP scripting language is yes, you've guessed it, VBScript!
How the Server Recognizes ASPs
ASP pages do not have an .html or .htm extension; instead they have an .asp extension. The reason for this is twofold. First, in order for the Web server to know to process the scripting in your Web page, it needs to know that there is some script in there. Well, by setting the extension of your Web page to .asp , the server can assume that there are scripts in your page.
A nice side-effect of naming your ASP pages with the .asp extension is that the ASP processor knows that it does not need to process your HTML files. It used to be the case, as in ASP 2.0, that any page with the .asp extension, no matter whether it contained any server-side scripting code or not, was automatically sent to the server, and would thereby take longer to process. With ASP 3.0, introduced in Windows 2000, the server is now able to determine the presence of any server-side code and process or not process the page accordingly . This increases the speed of your HTML file retrieval and makes your Web server run more efficiently .
Secondly, using an .asp extension (forcing interpretation by the ASP processor every time your page is requested ) hides your ASP scripts. If someone requests your .asp file from the Web server, all he is going to get back is the resultant processed HTML. If you put your ASP code in a file called mycode.scr and requested it from the Web server, you'll see all of the code inside.
ASP Basics
ASP files are just HTML files with scripting embedded within them. When a browser makes a request for an ASP file from the server, it is passed on to the ASP processing DLL for execution. After processing, the resulting file is then sent on to the requesting browser. Any scripting commands embedded from the original HTML file are executed and then are removed from the results. This is excellent because all of your scripting code is hidden from the person viewing your Web pages with a browser. That is why it is so important that files containing ASP scripts have an .asp extension.
The Tags of ASP
To distinguish the ASP code from the HTML inside your files, ASP code is placed between < % and % > tags. This convention should be familiar to you if you have ever worked with any kind of server-side commands before in HTML. The tag combination implies to the ASP processor that the code within should be executed by the server and removed from the results. Depending on the default scripting language of your Web site, this code could be VBScript, JScript, or any other language you've installed. Since this book is for the VBScript programmer, all of our ASP scripts will be in VBScript.
In the following snippet of HTML, you'll see an example of some ASP code between the < % and % > tags:
| <% x = x + 1 y = y - 1 ans = x * y %> |
The Default Scripting Language
As stated previously, the default scripting language used by ASP is VBScript. However, you may change it for your entire site, or just a single Web page. Placing a special scripting tag at the beginning of your Web page does this. This tag specifies the scripting language to use for this page only.
<%@ language="ScriptingLanguage" %>
' ScriptingLanguage ' can be any language for which you have the scripting engine installed. ASP comes with JScript, as well as VBScript.
Mixing HTML and ASP
You've probably guessed by now that one can easily mix HTML code with ASP scripts. The power of this feature is quite phenomenal! VBScript, as you know, has all of the control flow mechanisms such as If Then , For Next , and Do While loops . But with ASP you can selectively include HTML code based on the results of these operators. Let's look at an example.
Suppose you are creating a Web page that greets the viewer with a 'Good Morning,' 'Good Afternoon,' or 'Good Evening' depending on the time of day. This can be done quite easily as follows:
Sample ASP Page
The time is now <%=Time()%>
<% Dim iHour iHour = Hour(Time()) If (iHour >= 0 And iHour < 12 ) Then %> Good Morning! <% ElseIf (iHour > 11 And iHour < 16 ) Then %> Good Afternoon! <% Else %> Good Evening! <% End If %>
First, we print out the current time. The < % = notation is shorthand to print out the value of an ASP variable or the result of a function call. We then move the hour of the current time into a variable called iHour . Based on the value of this variable we write our normal HTML text.
Notice how the HTML code is outside of the ASP script tags. When the ASP processor executes this page, the HTML that lies between control flow blocks that aren't executed is discarded, leaving you with only the correct code. Here is the source of what is returned from our Web server after processing this page.
Sample ASP Page
The time is now 15:27:12 PM
Good Afternoon!
As you can see, the scripting is completely removed leaving only the HTML and text.
The other way to output data to your Web page viewer is using one of ASPs built-in objects called Response . We'll cover this approach in the next section as you learn about the ASP object model.
Commenting Your ASP Code
As with any programming language, it is of utmost importance to comment your ASP code as much as possible. Try looking back at code you wrote a few days, weeks, or months ago and you'll then appreciate the comments! Do remember to make comments clear and concise -unclear comments are not worth putting in your code.
Comments in ASP are identical to comments in VBScript. When ASP comes across the single quote character it will graciously ignore the rest of the line.
<%


Dim iNumber


'Here is a comment


iNumber = iNumber + 1


%>
The Active Server Pages Object Model
ASP, like most Microsoft technologies, utilizes the Component Object Model, or COM, to expose functionality to consumer applications. ASP is actually an extension to your Web server that allows server-side scripting. At the same time it also provides a compendium of objects and components , which manage interaction between the Web server and the browser. These objects form the Active Server Pages Object Model. These 'objects' can be manipulated by scripting languages.
ASP neatly divides up into six objects, which manage their own part of the interaction between client and server. At the heart of the interaction between client and server are the Request and Response objects, which deal with the HTTP request and response; but we will be taking a quick tour through all of the different objects and components that are part of ASP.
Four of the six core objects of the object model (the Request , Response , Application , and Session objects) can use collections to store data. Before we look at each object in turn we need to take a quick overview of collections.
Collections
Collections in ASP are very similar to their VBScript namesakes. They act as data containers that store their data in a manner close to that of an array. The information is stored in the form of name /value pairs.
The Application and the Session objects have a collection property called Contents . This collection of variants can hold any information you wish to place in it. Using these collections allow you to share information between Web pages.
To place a value into the collection, simply assign it a key and then assign the value
Application.Contents("Name") = "Homer Simpson"
Or you can follow this for numerical values:
Session.Contents("Age") = 39
Fortunately for us, Microsoft has made the Contents collection the default property for these two objects. Therefore, the following shorthand usage is perfectly acceptable:
Application("Name") = "Homer Simpson"


Session("Age") = 39
Having entered this data, you will want to retrieve it. To read values from the Contents collections just reverse the call:
sName = Application("Name")


sAge = Session("Age")
Iterating the Contents Collection
Because the Contents collections work like regular VBScript collections, they are easily iterated. You can use the collections Count property or use the For Each iteration method.
for x = 1 to Application.Contents.Count


...


next


for each item in Application.Contents


...


next
| Tip |
Note that the Contents collections are 1 based. That is to say that the first element in the collection is at position 1, not 0. |
To illustrate this, the following ASP script will dump the current contents of the Application and Session objects' Contents collections.
Sample ASP Page 2
The Application.Contents
<% Dim Item For Each Item In Application.Contents Response.Write Item & " = [" & Application(Item) & "]
" Next %>
The Session.Contents
<% For Each Item In Session.Contents Response.Write Item & " = [" & Session(Item) & "]
" Next %>
Removing an Item from the Contents Collection
The Application Object's Contents collection contains two methods , and these are Remove and RemoveAll . These allow you to remove one or all of the items stored in the Application.Contents collection.
Let's add an item to the Application.Contents collection, and then remove it.
<%


Application("MySign") = "Gemini"


Application.Contents.Remove("MySign")


%>


Or we can just get rid of everything


<%


Application.Contents.RemoveAll


%>
Not all of the collections of each object work in this way, but the principles remain the same and we will explain how each differs when we discuss each object.
The Request Object
When your Web page is requested, along with the HTTP request, information such as the URL of the Web page request and the format of the data requested is passed. It can also contain feedback from the user such as the input from a text box or drop-down list box. The Request object allows you to get at information passed along as part of the HTTP request. The corresponding output from the server is returned as part of the Response . The Request object has several collections to store information that warrant discussion.
The Request Object's Collections
The Request object has five collections. Interestingly, they all act as the default property for the object. That is to say, you may retrieve information from any of the five collections by using the abbreviated syntax:
ClientIPAddress = Request("REMOTE_ADDR")
The REMOTE_ADDR value lies in the ServerVariables collection. However, through the use of the collection cascade, it can be retrieved with the previous notation. Please note that for ASP to dig through each collection, especially if they have many values, to retrieve a value from the last collection is extremely inefficient. It is always recommended that you use the fully qualified collection name in your code. Not only is this faster, but it improves your code in that it is more specific and less cryptic.
ASP searches through the collections in the following order:
- QueryString
- Form
- Cookies
- ClientCertificate
- ServerVariables
If there are variables with the same name, only the first is returned when you allow ASP to search. This is another good reason for you to fully qualify your collection.
QueryString
This contains a collection of all the information attached to the end of an URL. When you make an URL request, the additional information is passed along with the URL to the Web page appended with a question mark. This information takes the following form.
URL?item=data[&item=data][...]
The clue to the server is the question mark. When the server sees this, it knows that the URL has ended and variables are starting. So an example of a URL with a query string might look like this:
http://www.kingsley-hughes.com/book.asp?bookname=VBScriptProgrammersReference
We stated earlier that the collections store information in name/value pairs. Despite this slightly unusual method of creating the name/value pair, the principle remains the same; bookname is the name and VBScriptProgrammersReference is the value . When ASP gets hold of this URL request, it breaks apart all of the name/value pairs and places them into this collection for easy access. This is another excellent feature of ASP. Query strings are built up using ampersands to delimit each name/value pair so if you wished to pass the user information along with the book information, you could pass the following:
http://www.kingsley-


hughes.com/book.asp?bookname=VBScriptProgrammersReference&buyer=HSimpson
Query strings can be generated in one of three ways. The first is, as discussed, by a user typed URL. The second is as part of a URL specified in an Anchor tag.
<a href="book.asp?bookname=VBScriptProgrammersReference">Buy this book!</a>
So when you click on the link, the name/value pair is passed along with the URL. The third and final method is via a form sent to the server with the GET method.
Type your name:
Type your requested book:
This form that the last code generates is shown in Figure 17-5.
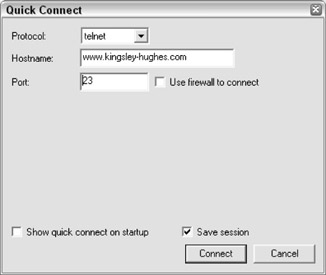
Figure 17-5
Next, you need to be able to retrieve information, and you use this technique to retrieve from each of the three methods used to generate a query string.
Request.QueryString("buyer")


Request.QueryString("bookname")
Please note that these lines won't display anything by themselves , you need to add either the shorthand notation (equality operator) to display functions in front of a single statement, or when a number of values need displaying then use Response.Write to separately display each value in the collection. For example:
<%=Request.QueryString("buyer")%> or Response.Write(Request.QueryString


("bookname"))
The first of the two Request object calls should return the name of HSimpson on the page and the second of the two should return VBScript Programmers Reference. Of course, you could always store this information in a variable for later access.
sBookName = Request.QueryString("bookname")
Form
Contains a collection of all the form variables posted to the HTTP request by an HTML form. Query strings aren't very private as they transmit information via a very visible method, the URL. If you want to transmit information from the form more privately then you can use the form collection to do so which sends its information as part of the HTTP Request body. The easy access to form variables is one of ASPs best feature.
If we go back to our previous example, the only alteration we need to make to our HTML form code is to change the METHOD attribute. Forms using this collection must be sent with the POST method and not the GET method. It is actually this attribute that determines how the information is sent by the form. So we change the method of the form as follows .
Type your name:
Type your requested book:
Once the form has been submitted in this style, then we can retrieve and display the information using the following:
=Request.Form("buyer")
Cookies
Contains a read-only collection of cookies sent by the client browser along with the request. Because the cookies were sent from the client, they cannot be changed here. You must change them using the Response.Cookies collection. A discussion of cookies can be found in the discussion of the Response object.
ClientCertificate
When a client makes a connection with a server requiring a high degree of security, either party can confirm who the sender/receiver is by inspecting their digital certificate. A digital certificate contains a number of items of information about the sender, such as the holder's name, address, and length of time the certificate is valid for. A third party, known as the Certificate Authority or CA, will have previously verified these details.
The ClientCertificate collection is used access details held in a client-side digital certificate sent by the browser. This collection is only populated if you are running a secure server, and the request was via an https :// call instead of an http:// call. This is the preferred method to invoke a secure connection.
ServerVariables
When the client sends a request and information is passed across to the server, it's not just the page that is passed across, but also information such as who created the page, the server name, and the port that the request was sent to. The HTTP header that is sent across together with the HTTP request also contains information of this nature such as the type of browser and type of connection. This information is combined into a list of variables that are predefined by the server as environment variables. Most of them are static and never really change unless you change the configuration of your Web server. The rest are based on the client browser.
These server variables can be accessed in the normal method. For instance, the server variable HTTP_USER_AGENT, which returns information about the type of browser being used to view the page, can be displayed as follows.
<%=Request.ServerVariables("HTTP_USER_AGENT")%>
Alternatively you can printout the whole list of server variables and their values with the following ASP code.
For Each key in Request.ServerVariables


Response.Write "" & (Key) &" "


Response.Write (Request.ServerVariables(key)) & "
"


Next
Server variables are merely informative, but they do give you the ability to customize page content for specific browsers, or to avoid script errors that might be generated.
Request Object Properties and Methods
The Request object contains a single property and a single method. They are used together to transfer files from the client to the server. Uploading is accomplished using HTML forms.
TotalBytes Property
When the request is processed , this property will hold the total number of bytes in the client browser request. Most likely you'd use it to return the number of bytes in the file you wish to transfer. This information is important to the BinaryRead method.
BinaryRead Method
This method retrieves the information sent to the Web server by the client browser in a POST operation. When the browser issues a POST , the data is encoded and sent to the server. When the browser issues a GET , there is no data other than the URL. The BinaryRead method takes one parameter, the number of bytes to read. So if you want it to read a whole file, you pass it the total number of bytes in the file, generated by the TotalBytes property.
It's very rarely applied because Request.QueryString and Request.Form are much easier to use. This is because BinaryRead wraps its answer in a safe array of bytes. For a scripting language that essentially only handles variants, this makes life a little complicated. However this format is essential for file uploading.
| Tip |
You can find full details on how to upload files and then decode a safe array of bytes in an excellent article at 15seconds.com ( www.15seconds.com/Issue/981121.htm ). |
The Response Object
After you've processed the request information from the client browser, you'll need to be able to send information back. The Response object is just the ticket. It provides you with the tools necessary to send anything you need back to the client.
The Response Object's Collection
The Response object contains only one collection: Cookies. This is the version of the Request object's Cookies collection that can be written to.
If you've not come across them before, cookies are small (limited to 4KB of data) text files stored on the hard drive of the client that contain information about the user, such as whether they have visited the site before and on what date they last visited the site. There are lots of misapprehensions about cookies being intrusive as they allow servers to store information on the user's drive. However, you need to remember that firstly, the user has to voluntarily accept cookies or activate an Accept Cookies mechanism on the browser for them to work; secondly, this information is completely benign and cannot be used to determine the user's e-mail address or such like. They are used to personalize pages that the user might have visited before.
| Tip |
Examples of things to store in cookies are unique user IDs, or user names ; then, when the user returns to your Web site, a quick check of cookies will let you know if this is a return visitor or not. |
You can create a cookie on the user's machine as follows:
Response.Cookies("BookBought") = "VBScript Programmers Reference"
You can also store multiple values in one cookie using an index value key. The cookie effectively contains a VBScript Dictionary object and using the key can retrieve individual items. Its functioning is very close to that of an array.
Response.Cookies("BookBought")("1") = "VBScript Programmers Reference "


Response.Cookies("BookBought")("2") = "XSLT Programmers Reference"
A cookie will automatically expire-disappear from the user's machine-the moment a user ends their session. To extend the cookie beyond this natural lifetime, you can specify a date with the Expires property. The date takes the following format WEEKDAY DD-MON-YY HH:MM:SS .
Response.Cookies("BookBought").Expires = #31-Dec-04#
The # sign can be used to delimit dates in ASP (as in VBScript).
Other properties that can be used in conjunction with this collection are:
- Domain : a cookie is only sent to page requested within the domain from which it was created
- Path : a cookie is only sent to pages requested within this path
- HasKeys : specifies whether the cookie uses an index/dictionary object or not
- Secure : specifies whether the cookie is secure. A cookie is only deemed secure if sent via the HTTPS protocol
You can retrieve the cookies information using the Request object cookies collection, mentioned earlier. To do this you could do the following:
You purchased <%=Request.Cookies("BookBought")%> last time you visited the site.
If there were several cookies in the collection you could iterate through each cookie and display the contents as follows ASP code:
For Each cookie in Request.Cookies


Response.Write (Request.Cookies(cookie))


Next
The Response Object's Methods
To understand what the Response Object's methods and properties do, we need to examine the workings of how ASP sends a response in more detail. When an ASP script is run, an HTML output stream is created. This stream is a receptacle for the Web server to store details and create the dynamic/interactive Web page. As mentioned before, the page has to be created entirely in HTML for the browser to understand it (excluding client-side scripting, which is ignored by the server).
The stream is initially empty when created. New information is added to the end. If any custom HTML headers are required then they have to be added at the beginning. Then the HTML contained in the ASP page is added next to the script, so anything not encompassed by < % %> tags is added. The Response object provides two ways of writing directly to the output stream, either using the Write method or its shorthand technique.
Write
Probably the most used method of all the built-in objects, Write allows you to send information back to the client browser. You can write text directly to a Web page by encasing the text in quotation marks.
Response.Write "Hello World!"
Or to display the contents of a variant you just drop the quotation marks.
sText = "Hello World!"


Response.Write sText
For single portions of dynamic information that only require adding into large portions of HTML, you can use the equality sign as shorthand for this method, as specified earlier, for example:
My message is <% =sText %>
This technique reduces the amount of code needed, but at the expense of readability. There is nothing to choose between these techniques in terms of performance.
AddHeader
This method allows you to add custom headers to the HTTP response. For example, if you were to write a custom browser application that examined the headers of your HTTP requests for a certain value, you'd use this method to set that value. Usage is as follows:
Response.AddHeader "CustomServerApp", "CustomApp/1.2"
This would add the header CustomServerApp to the response with the value of CustomApp/1.2 . There are no restrictions regarding headers and header value.
AppendToLog
Calling this method allows you to append a string to the Web server log file entry for this particular request. This allows you to add custom log messages to the log file.
BinaryWrite
This method allows you to bypass the normal character conversion that takes place when data is sent back to the client. Usually, only text is returned, so the Web server cleans it up. By calling BinaryWrite to send your data, the actual binary data is sent back, bypassing that cleaning process.
Clear
This method allows you to delete any data that has been buffered for this page so far. See discussion of the Buffer property for more details.
End
This method stops processing the ASP file and returns any currently buffered data to the client browser.
Flush
This method returns any currently buffered data to the client browser and then clears the buffer. See discussion of the Buffer property for more details.
Redirect
This method allows you to relinquish control of the current page to a different Web page. For example, you can use this method to redirect users to a login page if they have not yet logged on to your Web site.
<%


If (Not Session("LoggedOn")) Then


Response.Redirect "login.asp"


End If


%>
The Response Object's Properties
Let's take a look at the properties of the Response object.
Buffer
You may optionally have ASP buffer your output for you. This property tells ASP whether or not to buffer output. Usually, output is sent to the client as it is generated. If you turn buffering on (by setting this property to True ), output will not be sent until all scripts have been executed for the current page, or the Flush or End methods are called.
Response.Buffer has to be inserted after the language declaration, but before any HTML is used. If you insert it outside this scope you will most likely generate an error. A correct use of this method would look like:
<@ language="VBScript">


<% Response.Buffer = True %>
...
The Flush method is used in conjunction with the Buffer property. To use it correctly you must set the Buffer property first and then at places within the script you can flush the buffer to the output stream, while continuing processing. This is useful for long queries, which might otherwise worry the user that nothing was being returned.
The Clear method erases everything in the buffer that has been added since the last Response.Flush call. It erases only the response body however, and leaves intact the response header.
CacheControl
Generally when a proxy server retrieves an ASP Web page, it does not place a copy of it into its cache. That is because by their very nature ASP pages are dynamic and, most likely, a page will be stale the next time it is requested. You may override this feature by changing the value of this property to Public .
Charset
This property will append its contents to the HTTP content-type header that is sent back to the browser. Every HTTP response has a content-type header that defines the content of the response. Usually the content-type is ' text/html '. Setting this property will modify the type sent back to the browser.
ContentType
This property allows you to set the value of the content-type that is sent back to the client browser.
Expires
Most Web browsers keep Web pages in a local cache. The cache is usually good as long as you keep your browser running. Setting this property allows you to limit the time the page stays in the local cache. The value of the Expires property specifies the length of time in minutes before the page will expire from the local cache. If you set this to zero, the page will not be cached.
ExpiresAbsolute
Just like the Expires property, this property allows you to specify the exact time and date on which the page will expire.
IsClientConnected
This read-only property indicates whether or not the client is still connected to the server. Remember that the client browser makes a request then waits for a response. Well, imagine you're running a lengthy script and during the middle of processing, the client disconnects because he was waiting too long. Reading this property will tell you if the client is still connected or not.
Status
This property allows you to set the value returned on the status header with the HTTP response.
The Application and Session Objects
The Application and Session objects like Request and Response work together very closely. Application is used to tie all of the pages together into one consistent application, while the
Session object is used to track and present a user's series of requests to the Web site as a continuous action, rather than an arbitrary set of requests.
Scope
Normally, you will declare a variable for use within your Web page. You'll use it, manipulate it, then perhaps print out its value or whatever. But when your page is reloaded or the viewer moves to another page, the variable and its value are gone forever. By placing your variable within the Contents collection of the Application or Session objects, you can extend the life span of your variable!
Any variable or object that you declare has two potential scopes: procedure and page. When you declare a variable within a procedure, its life span is limited to that procedure. Once the procedure is executed, your variable is gone. You may also declare a variable at the Web page level but like the procedure-defined variable, once the page is reloaded the value is reset.
The Contents collections of these two objects allow you to extend the scope of your variables to session-wide and application-wide. If you place a value in the Session object, it will be available to all Web pages in your site for the life span of the current session (more on sessions later). Good session scope variables are user IDs, user names, login time, and other data items that pertain only to the session. Likewise, if you place your value into the Application object, it will exist until the Web site is restarted. This allows you to place application-wide settings into a conveniently accessible place. Good application scope variables are font names and sizes, table colors, system constants, and other data that pertains to the application as a whole.
The global.asa File
Every ASP application may utilize a special script file. This file is named global.asa and it must reside in the root directory of your Web application. It can contain script code that pertains to the application as a whole or each session. You may also create ActiveX objects for later use in this scripting file.
The Application Object
ASP works on the concept that an entire Web site is a single Web application. Therefore, there is only one instance of the Application object available for use in your scripting at all times.
| Tip |
Please note that it is possible to divide up your Web site into separate applications, but for the purposes of this discussion we'll assume there is only one application per Web site. |
Collections
The Application object contains two collections: Contents and StaticObjects . The Contents collection is discussed earlier. The StaticObjects collection is similar to Contents , but only contains the objects that were created with the < object > tag in the scope of your application. This collection can be iterated just like the Contents collection.
You cannot store references to ASPs built-in objects in the Application collections.
Methods
The Application object contains two methods as detailed in the following table.
| Method | Description |
|
Lock |
The Lock method is used to 'lock-down' the Contents collection so that it cannot be modified by other clients . This is useful if you are updating a counter, or perhaps grabbing a transaction number stored in the Application's Contents collection |
|
Unlock |
The Unlock method 'unlocks' the Application object thus allowing others to modify the Contents collection |
Events
The Application object generates two events: Application_OnStart and Application_OnEnd .
The Application_OnStart event is fired when the first view of your Web page occurs. The Application_OnEnd event is fired when the Web server is shut down. If you choose to write scripts for these events they must be placed in your global.asa file.
The most common use of these events is to initialize application-wide variables. These would include items such as font names, table colors, and database connection strings. This could also include writing information to a system log file. The following is an example of global.asa file with script for these events:
The Session Object
Each time a visitor comes to your Web site, a Session object is created for the visitor if the visitor does not already have one. Therefore, there is an instance of the Session object available to you in your scripting as well. The Session object is similar to the Application object in that it can contain values. However, the Session object's values are lost when your visitor leaves the site. The Session object is most useful for transferring information from Web page to Web page. Using the Session object, there is no need to pass information in the URL.
The most common use of the Session object is to store information in its Contents collection. This information would be session-specific in that it would pertain only to the current user.
Many Web sites today offer a 'user personalization' service. That is, to customize a Web page to their preference. This is easily done with ASP and the Session object. The user variables are stored in the client browser for retrieval by the server later. Simply load the user's preferences at the start of the session and then, as the user browses your site, utilize the information regarding the user's preferences to display information.
Suppose your Web site displays stock quotes for users. You could allow users to customize the start page to display their favorite stock quotes when they visit the site. By storing the stock symbols in your Session object, you can easily display the correct quotes when you render your Web page.
This session management system relies on the use of browser cookies. The cookies allow the user information to be persisted even after a client leaves the site. Unfortunately, if a visitor to your Web site does not allow cookies to be stored, you will be unable to pass information between Web pages within the Session object.
Collections
The Session object contains two collections, Contents and StaticObjects.
We discussed the Contents collection earlier in this chapter. The StaticObjects collection is similar to Contents , but only contains the objects that were created with the < object > tag in your HTML page. This collection can be iterated just like the Contents collection.
Properties
Following are the properties that the Session object exposes for your use.
| Property | Description |
|
CodePage |
Setting this property will allow you to change the character set used by ASP when it is creating output. This property could be used if you were creating a multinational Web site |
|
LCID |
This property sets the internal locale value for the entire Web application. By default, your application's locale is your server's locale. If you server is in the United States, then your application will default to the United States. Much of the formatting functionality of ASP utilizes this locale setting to display information correctly for the country in question. For example, the date is displayed differently in Europe versus the United States. So based on the locale setting, the date formatting functions will output the date in the correct format. |
You can also change this property temporarily to output data in a different format. A good example is currency. Let's say your Web site had a shopping cart and you wanted to display totals in U.S. dollars for U.S. customers, and Pounds Sterling for U.K. customers. To do this you'd change the LCID property to the British locale setting and then call the currency formatting routine
|
SessionID |
Every session created by ASP has a unique identifier. This identifier is called the SessionID and is accessible through this property. It can be used for debugging ASP scripts. |
|
Timeout |
By default, an ASP session will timeout after 20 minutes of inactivity. Every time a Web page is requested or refreshed by a user, this internal ASP time clock starts ticking. When the time clock reaches the value set in this property, the session is automatically destroyed . You can set this property to reduce the timeout period if you wish |
Methods
The Session object contains a single method, Abandon . This instructs ASP to destroy the current Session object for this user. This method is what you would call when a user logs off your Web site.
Events
The Session object generates two events, Session_OnStart and Session_OnEnd. The Session_OnStart event is fired when the first view of your Web page occurs. The Session_OnEnd event is fired when the Web server is shut down. If you choose to write scripts for these events they must be placed in your global.asa file. The most common use of these events is to initialize session-wide variables, items such as usage counts, login names, real names, user preferences, and so on.
The following is an example global.asa file with script for these events.
The Server Object
The next object in the ASP object model is the Server object. The Server object enables you to create and work with ActiveX controls in your Web pages. In addition, the Server object exposes methods that help in the encoding of URLs and HTML text.
Let's take a look at the properties and methods associated with it.
ScriptTimeout
This property sets the time, in seconds, that a script will be allowed to run. The default value for all scripts on the system is 90 seconds. That is to say, that if a script has run for more than 90 seconds, the Web server will intervene and let the client browser know something is wrong. If you expect your scripts to run for a long time, you will want to use this property.
CreateObject
This method is the equivalent to VBScript's CreateObject , or using the New keyword-it instantiates a new instance of an object. The result can be placed into the Application or SessionContents collection to lengthen its life span.
Generally you'll create an object at the time the session is created and place it into the Session.Contents collection. For example, let's say you've created an ActiveX DLL with a class that converts Fahrenheit to Celsius and vice versa. You could create an instance of this class with the CreateObject method and store it in the Session.Contents collection like the following:
Set Session("MyConverter") = Server.CreateObject("MyDLL.CDegreeConverter")
This object would be around as long as the session is and will be available for you to call. As you'll see in later chapters, this method is invaluable when working with database connections.
ASP comes with its own built in set of components that you can create instances of using the CreateObject method. These are:
- Ad Rotator-used to display a random graphic and link every time a user connects to the page.
- Browser Capabilities-manipulates a file browscap.ini contained on the server computer to determine the capabilities of a particular client's browser.
- Content Linker-provides a central repository file from where you manage a series of links and their URLs, and provide appropriate descriptions about them.
- Content Rotator-a cut down version of the Ad Rotator that provides the same function but without optional redirection.
- Page Counter-counts the number of times a page has been hit.
- Permission Checker-checks to see if a user has the permission before allowing them to access a given page.
- Counters-counts any value on an ASP page from anywhere within an ASP application.
- MyInfo-can be used to store personal information about a user within an XML file.
- Status-used to collect server profile information.
- Tools-a set of miscellaneous methods that are grouped under the generic heading of Tools.
- IIS Log-allows you to create an object that allows your applications to write to and otherwise access the IIS log.
Execute
This method executes an ASP file and inserts the results into the response. You can use this call to include snippets of ASP code, such as subroutines.
GetLastError
This method returns an ASPError object that contains all of the information about the last error that has occurred.
HTMLEncode
This method encodes a string for proper HTML usage. This is useful if you want to actually display HTML code on your Web pages.
MapPath
This method returns a string that contains the actual physical path to the file in question. Subdirectories of your Web site can be virtual. That is to say that they don't physically exist in the hierarchy of your Web site. To find out the true whereabouts of a file, you can call this method.
Transfer
The Transfer method allows you to immediately transfer control of the executing page to another page. This is similar to the Response.Redirect method except for the fact that the Transfer method makes all variables and the Request collections available to the called page.
URLEncode
This method, as the title says, encodes a URL for transmission. This encoding includes replacing spaces with a plus sign (+) and replacing unprintable characters with hexadecimal values. You should always run your URLs through this method when redirecting.
The ObjectContext Object
The final object we shall consider is the ObjectContext object, which comes into play when you use transactions in your Web page. When an ASP script has initiated a transaction, it can either be committed or aborted by this object. It has two methods to do this.
SetAbort
SetAbort is called when the transaction has not been completed and you don't want resources updated.
SetComplete
SetComplete is called when there is no reason for the transaction to fail. If all of the components that form part of the transaction call SetComplete , then the transaction will complete.
Using Active Server Pages Effectively
Is it true that a little bit of knowledge is a bad thing? In the realm of ASP, I think not. A little bit of knowledge is probably just enough to get you interested in learning more!
For the final part of this chapter we're going to build a Web site to demonstrate some of the features of ASP. This sample site will demonstrate many of the ASP features and principles described earlier in this chapter.
Designing the Site
Before we start creating our new Web site, we should discuss the design. For your first ASP application, we'll keep it quite simple. What we want to create is an HTML form that accepts for input the following information:
- First name
- Last name
- E-mail address
After the user submits the form, our ASP page will reformat the first and last name and check the e-mail address for proper syntax.
Creating the global asa file
The first step in creating a new ASP application is to create your global.asa file. This is the file that houses your event handlers for the Application and Session objects. In addition, in this file you may set application and session-wide variables to their default values. To create this file, in the root of your Web server directory create a file called global.asa . Following is the content of our sample global.asa.
Our file has handlers defined for Application_OnStart , Application_OnEnd , Session_OnStart , and Session_OnEnd . The Application_OnEnd and Session_OnEnd events are shown earlier for completeness but are not used in this example.
We want to set a limit on the number of submissions the user gets before a warning message is shown. Since this is a feature of the application and affects all users, we will store this constant in the Application.Contents collection. This is done in the Application_OnStart event. We add to the collection an item named AllowedErrorsBeforeWarning and set its value to 3 .
Now that we know how many times a user can try to get it right, we need a place to store the number of times the user has tried to get it right. Since this counter is different for each user, we'll place this into the Session.Contents collection. We initialize our variable to 0. This is done in the Session_OnStart event. We add to the collection an item named, appropriately, ErrorCount , with a value of .
Creating Our Main Page
Now that we've laid the groundwork for our ASP application, it's time to build the main page. Since this is a simple example, we will only utilize a single Web page. Let's begin by creating this single page.
Create a new Web page on your site and name it default.asp . This is the file name used by IIS as the default Web page. The default Web page is the page that is returned by a Web server when no Web page is specified. For example, when you call up www.wrox.com/ , you aren't specifying a Web page. The server looks through its list of default file names and finds the first match in the Web site's root directory.
The following shows the contents of your default.asp page.
<%@ language="VBScript" %>


<%


Dim txtFirstName, txtLastName, txtEmailAddr


Dim sMessage


'**********************************************************************


'* Main


'*


'* The main subroutine for this page...


'**********************************************************************


Sub Main()


'Was this page submitted?


if ( Request("cmdSubmit") = "Submit" ) Then


'Reformat the data into a more readable format...


txtFirstName = InitCap(Request("txtFirstName"))


txtLastName = InitCap(Request("txtLastName"))


txtEmailAddr = LCase(Request("txtEmailAddr"))


'Check the email address for the correct components...


if (Instr(1, txtEmailAddr, "@") = 0 _


or Instr(1, txtEmailAddr, ".") = 0 ) Then


sMessage = "The email address you entered does not " _


& "appear to be valid."


Else


'Make sure there is something after the period..


if ( Instr(1, txtEmailAddr, ".") = Len(txtEmailAddr) _


or Instr(1, txtEmailAddr, "@") = 1 or _


(Instr(1, txtEmailAddr, ".") = Instr(1, txtEmailAddr, "@") + 1) ) Then


sMessage = "You must enter a complete email address."


end if


End If


'We passed our validation, show that all is good...


if ( sMessage = "" ) Then


sMessage = "Thank you for your input. All data has " _


& "passed verification."


else


Session("ErrorCount") = Session("ErrorCount") + 1


if ( Session("ErrorCount") > _


Application("AllowedErrorsBeforeWarning") ) then


sMessage = sMessage & "
You have exceeded " _ & "the normal number of times it takes to get this right!" end if End If Else 'First time in here? Set some default values... txtFirstName = "Enter Your First Name" txtLastName = "Enter Your Last Name" txtEmailAddr = "Enter Your Email Address" End If End Sub '********************************************************************** '* InitCap '* '* Capitalizes the first letter of the string '********************************************************************** Function InitCap(sStr) InitCap = UCase(Left(sStr, 1)) & LCase(Right(sStr, Len(sStr) - 1)) End Function '********************************************************************** '* Call our main subroutine '********************************************************************** Call Main() %>
My First ASP Application
<a href="http://www.wrox.com" target="_blank"> </a> </a> |
My First ASP Application |
||||||||||||
Please fill out the following form and press the [Submit] button. The information you enter will be reformatted and the email address will be verified.
|
|||||||||||||
As you can see, the page is quite long. But it breaks logically into two distinct sections: the ASP/VBScript portion and the HTML portion. Let's examine each section individually.
The ASP VBScript Section
The top half of our file is where the ASP code lives. This code is executed by the server before the page is returned to the browser that requested it. As you've seen, any code that is to be executed on the server before returning is enclosed in the special < % and % > tags.
For clarity (and sanity !) the ASP code has been divided into subroutines. This not only makes the code more readable, but also will aid in its reuse. Our code has two routines: Main and InitCap . Before we do anything however, we declare some variables.
Dim txtFirstName, txtLastName, txtEmailAddr


Dim sMessage
When variables are declared outside of a subroutine in an ASP page, the variables retain their data until the page is completely processed . This allows you to pass information from your ASP code to your HTML code as you'll see.
After our variables have been declared, we have our Main routine. This is called by our ASP code every time a browser retrieves the page. The Main subroutine is not called automatically: we must explicitly call it ourselves .
'**********************************************************************


'* Main


'*


'* The main subroutine for this page...


'**********************************************************************


Sub Main()


' Was this page submitted?


if ( Request("cmdSubmit") = "Submit" ) Then


' Reformat the data into a more readable format...


txtFirstName = InitCap(Request("txtFirstName"))


txtLastName = InitCap(Request("txtLastName"))


txtEmailAddr = LCase(Request("txtEmailAddr"))


' Check the email address for the correct components...


if ( Instr(1, txtEmailAddr, "@") = 0 or Instr(1, txtEmailAddr, ".") _


= 0 ) Then


sMessage = "The email address you entered does not appear to be valid."


Else


' Make sure there is something after the period..


if ( Instr(1, txtEmailAddr, ".") = Len(txtEmailAddr) _


or Instr(1, txtEmailAddr, "@") = 1 or & _


(Instr(1, txtEmailAddr, ".") = Instr(1, txtEmailAddr, "@") + 1) ) _


Then


sMessage = "You must enter a complete email address."


end if


End If


' We passed our validation, show that all is good...


if ( sMessage = "" ) Then


sMessage = "Thank you for your input. All data has " _


& "passed verification."


else


Session("ErrorCount") = Session("ErrorCount") + 1


if ( Session("ErrorCount") > _


Application("AllowedErrorsBeforeWarning") ) then


sMessage = sMessage & "
You have exceeded " _ & "the normal number of times it takes to get this right!" end if End If Else ' First time in here? Set some default values... txtFirstName = "Enter Your First Name" txtLastName = "Enter Your Last Name" txtEmailAddr = "Enter Your Email Address" End If End Sub
First, we see if the form was actually submitted by the user, otherwise we initialize our variables. To determine if the page has been submitted, we check the value of the cmdSubmit Request variable. This is the button on our form. When pressed, the form calls this page and sets the value of the cmdSubmit button to Submit. If a user just loads the page without pressing the button, the value of cmdSubmit is blank ( " " ). There are other ways to determine if a Web page was submitted, but this method is the simplest.
After we have determined that the page was in fact submitted, run the names through the second function on this page: InitCap . InitCap is a quick little function that will format a word to proper case. That is to say that the first letter will be capitalized and the rest of the word will be lowercase. Following is the function.
'**********************************************************************


'* InitCap


'*


'* Capitalizes the first letter of the string


'**********************************************************************


Function InitCap(sStr)


InitCap = UCase(Left(sStr, 1)) & LCase(Right(sStr, Len(sStr) - 1))


End Function
Now that we've cleaned up the names, we need to check the e-mail address for validity. To do this we ensure that it contains an ' @ ' sign and a period ( . ). Once past this check, we make sure that there is data after the period and before the ' @ ' sign. This is 'quick and dirty' e-mail validity checking.
If either of these checks fails, we place a failure message into the string sMessage . This will be displayed in our HTML section after the page processing is complete.
Now, if our e-mail address has passed the test, we set the message ( sMessage ) to display a thank you note. If we failed our test, we increment our error counter that we set up in the global.asa file. Here we also check to see if we have exceeded our limit on errors. If we have, a sterner message is set for display.
Finally, the last thing in our ASP section is our call to Main . This is what is called when the page is loaded.
'**********************************************************************


'* Call our main subroutine


'**********************************************************************


Call Main()
The HTML Section
This section is a regular HTML form with a smattering of ASP thrown in for good measure. The ASP that we've embedded in the HTML sets default values for the input fields and displays any messages that our server-side code has generated.
The most important part of the HTML is where the ASP code is embedded. The following snippet illustrates this.
value="<%=txtFirstName%>" tabindex="1">
Here we see a normal text input box. However, to set the value of the text box we use the Response.Write shortcut (< % =) to insert the value of the variable txtFirstName . Remember that we dimensioned this outside of our ASP functions so that it would have page scope. Now we utilize its value by inserting it into our HTML.
We do exactly the same thing with the Last Name and Email Address text boxes:
value="<%=txtLastName%>" tabindex="2">


size="40" value="<%=txtEmailAddr%>" tabindex="3">
The last trick in the HTML section is the display of our failure or success message. This message is stored in the variable called sMessage . At the bottom of the form, we display the contents of this variable.
<%=sMessage%>
The beauty of this code is that if sMessage is blank then nothing is shown, otherwise the message is displayed.
Summary
You have learned much in this chapter! We first covered how HTTP is the transaction system that sends Web pages to requesting clients . It is a very important piece of the puzzle. We then discussed Active Server Pages or ASP. You learned how ASP pages are created, and what special HTML tags you need to include in your files to use ASP.
We looked through the ASP object model and saw that the Request and Response objects are used to manage details of the HTTP request and responses. We saw that the Application object is used to group pages together into one application and we saw that the Session is used to create the illusion that the interaction between user and site is one continuous action. Finally, we created a small application that demonstrates two uses for ASP: form validation and data manipulation.
Introduction
- A Quick Introduction to Programming
- What VBScript Is and Isn™t!
- Data Types
- Variables and Procedures
- Control of Flow
- Error Handling and Debugging
- The Scripting Runtime Objects
- Classes in VBScript (Writing Your Own COM Objects)
- Regular Expressions
- Client-Side Web Scripting
- Super-Charged Client-Side Scripting
- Windows Script Host
- Windows Script Components
- Script Encoding
- Remote Scripting
- HTML Applications
- Server-Side Web Scripting
- Adding VBScript to Your VB Applications
- Appendix A VBScript Functions and Keywords
- Appendix B Variable Naming Convention
- Appendix C Coding Convention
- Appendix D Visual Basic Constants Supported in VBScript
- Appendix E VBScript Error Codes and the Err Object
- Appendix F The Scripting Runtime Library Object Reference
- Appendix G The Windows Script Host Object Model
- Appendix H Regular Expressions
- Appendix I VBScript Features not in VBA
- Appendix J VBA Features not in VBScript
- Appendix K The Variant Subtypes
- Appendix L ActiveX Data Objects
EAN: 2147483647
Pages: 242
