| Christopher's dynamic video is much simpler than Jennifer's. His objective is only to create a fun home video from the stills he shot at the party, so he's happy to use the automatic Ken Burns Effect in iPhoto. But with a little additional effort, he found that he could make a pretty remarkable slideshow with iMovie. He started by dragging shots from his Birthday Party album into iMovie and used pretty much the same Ken Burns Effect move in each one, with some slight variations. He wants only a basic title at the start; after that, simple dissolves between some of the shots are more than adequate. All of this is already in place in the iMovie project you'll work with in this part of the lesson. But Christopher wants to do a couple of quick tweaks, such as adjusting slide duration, which will give you a chance to see how to reedit a project. You'll also add music to Christopher's slideshow. 1. | Open the file Birthday Party, which is in the Start_Birthday_Project5 folder (in the Lesson05 folder).
As you can see, most of the still shots have been converted to video clips and are already assembled in the workspace. Notice that the opening title is in place at the start. Clip view is handy for reviewing and arranging still images and slideshows (which is why it's very clear and similar, in fact, to the way iPhoto represents shots).
 As you'd do in iPhoto, if you don't like the order of any shots, you can move them around by dragging them to a new location in the workspace. As you'd do in iPhoto, if you don't like the order of any shots, you can move them around by dragging them to a new location in the workspace.
For this project, however, change to the Timeline view of the workspace.
| 2. | Click the Timeline Viewer button (the little clock button at the top left of the workspace).
Timeline view is good for dealing with issues typical of moving videothe length of shots, the positions of moments relative to running time, relative durations, and, of course, music.
 Additional controls are available when you're in this view. In particular, the Zoom slider appearsit controls how much of the sequence you can see at one time in the workspace. Push the Zoom slider all the way to the left, and all your shots are reduced so they fit in the window. Additional controls are available when you're in this view. In particular, the Zoom slider appearsit controls how much of the sequence you can see at one time in the workspace. Push the Zoom slider all the way to the left, and all your shots are reduced so they fit in the window.
| 3. | Adjust the Zoom slider as needed to see your shots.
| | | 4. | Christopher doesn't like the second shot (the first one after the title), so select it and press Delete.
  | 5. | Christopher thinks the Ken Burns move is too fast on shot 5, so select the shot.
 | 6. | Click the Media button.
| 7. | Click the Photos button.
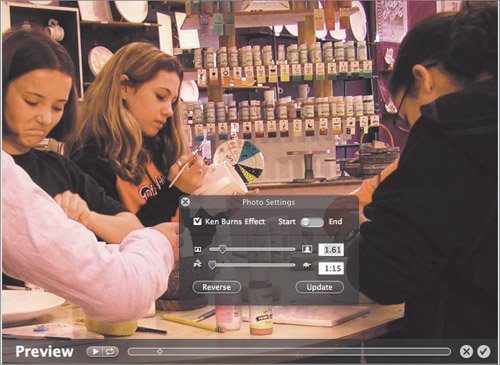
The shot will reappear, previewing in the Viewer, ready for adjustments.
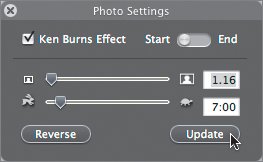
 | | | 8. | Change the duration of the Ken Burns Effect.
It should be much longer for such a long pantry 6 or 7 seconds.
| 9. | Click Update.
 iMovie will render the new duration.
 Except for this updated shot, every shot has a transition effect across itmostly cross dissolve, but a few fade-out/fade-in pairs.
| 10. | Add a 20-frame cross dissolve to the beginning and end of this updated shot.
Adding a cross dissolve is the same as adding a fade, except that it affects both the end of one shot and the beginning of the next. Drag the effect into the space between two shots.
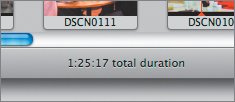
iMovie always tells you the total length of your video (called the total running time in professional circles and total duration in iMovie). At this point in your reedit, the running time of the sequence should be around 1:25, give or take. It's displayed below the timeline or clip workspace, at the bottom center of the iMovie window.
 |
|
 Additional controls are available when you're in this view. In particular, the Zoom slider appearsit controls how much of the sequence you can see at one time in the workspace. Push the Zoom slider all the way to the left, and all your shots are reduced so they fit in the window.


