Adobe Bridge
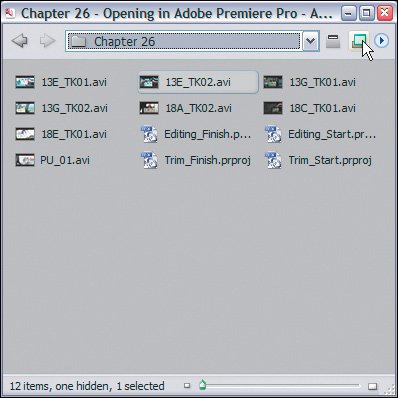
| To open Adobe Bridge from Premiere Pro 2.0 (or any other Production Studio application), choose File > Browse (Figure 12.1). You can also launch Adobe Bridge from the Program menu of Windows XP. Figure 12.1. You can open Adobe Bridge from any Production Studio application by choosing File > Browse from the menu bar Calling Adobe Bridge a file browser does it a bit of a disservice because it offers so much more (which I'll discuss in a moment), but its browser functions are the first you see (Figure 12.2). When you open Bridge, the top-left tabs enable you to access either Favorites (pre-assigned folders and locations to navigate to) or Folders (List view showing your system's entire folder hierarchy). Above the tabs is a drop-down menu that shows the current folder; click on this menu to reveal the path of that folder as well as your Favorites folders and recently accessed folders. Figure 12.2. Here, Bridge displays the contents of the Chapter 26 folder of lesson files in Expanded mode. Notice the two tabs for Favorites and Folders (upper left). Below is a Preview tab, which enables you to play back, pause, and view any of the selected audio, video, or still image files revealed in the content area on the right. At the bottom left are two more important tabs: Metadata and Keywords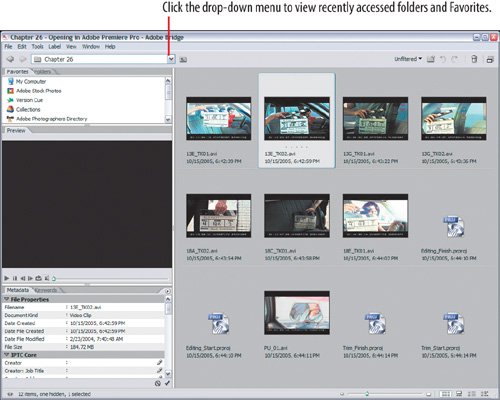 When you select a folder from either of the navigation tabs or drop-down menu, the folder's contents displays in the content area. Browsing and Displaying Your FilesBridge has two display modes, Expanded (see Figure 12.2) or Compact (Figure 12.3). By default, Bridge opens in Expanded mode; click the Switch to Compact Mode button in the top-right corner (or press Ctrl+Enter) to reduce the window size and display only the content area with dramatically smaller icons. Figure 12.3. Compact mode reduces the size of Bridge and reveals the contents of only the selected folder in the smallest icon size. To expand Bridge, click the Expand button in the top-right corne (beneath the cursor in the image) Compact mode is great for those times when you need Bridge open, but don't want to obscure so much of your desktop. Because you can drag and drop files directly from Bridge into any open application, for example, you might need to see more of your host application behind Bridge. In addition to changing Bridge's overall display size, you can easily adjust the size of the icons displayed in the content area (see Figures 12.4 a and b) as well as whether they're viewed in Thumbnail (the default), Filmstrip (vertically or horizontally oriented), Details, Versions, or Alternates view (see Figure 12.5 a, b, and c). You can easily toggle between these depending on how many files you're displaying and the way you like to work. I tend to work in either Thumbnails (when I want to see actual images from each file that I am browsing) or Details (when I am selecting and adjusting multiple files). Figures 12.4a and b. In Thumbnail mode, you can reduce the size of the content area's icons by dragging the icon scale slider to the left (a). Drag the slider right to enlarge the icons (b)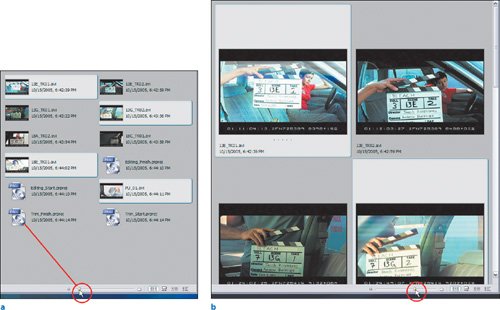 Figures 12.5a, b and c. Filmstrip view can be oriented horizontally or vertically (a). Details view provides vital statistics for each file (b), while Versions (c) and Alternates views show you your options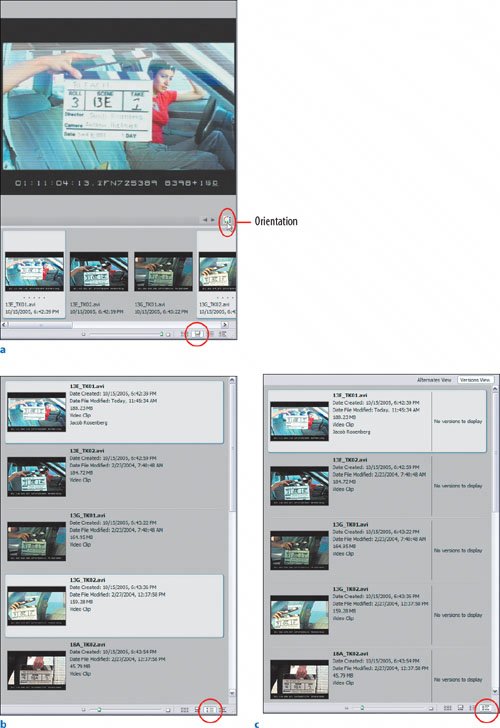 Notes You can reduce Bridge to Compact mode to give your primary application more visibility and to ease dragging and dropping between applications. Just pres Ctrl+Enter to compact, then press Ctrl+Enter again to expand back to full size. Your preferred viewing mode and icon size settings persist when you close and reopen Bridge. I find, however, it is often worth leaving Bridge open while you work in Production Studio applications to ease the importing and labeling of files. Adding Metadata to Your FilesBeyond dragging and dropping files among applications, Bridge gives you the valuable ability to add and modify metadata embedded within the files on disk. Metadata can be almost anything: the name of the person who filmed a video file, copyright details, or logging notes, such as a tape name or log comment. In addition to adding or modifying a ton of information to the files, you can add searchable keyword tags and star ratings. Tip Certain files, such as Write Only files, cannot have metadata added to them. If you were to try to add metadata to one of these files either through Bridge or through Premiere Pro's File > File Info menu item (which opens the same dialog), the entries on the right side of the dialog would be closed so that you could not click in them to add information into any of the fields. If a file is open and in use (busy) by another application you will not be able to add metadata to it either, so be sure the files you are editing are not open and active in any other applications. If detailed information about the file isn't articulated in the filename, adding metadata to the file is how you can stamp the information into it. Why is this important? Imagine a project for which you must share your source material with many other people. Adding metadata that answers potential questions about the owner of the material, the content of the material, and intellectual property rights attributed to the material can clarify facts, credits, and details about the material quickly. Although you can manually manipulate the Metadata tab by selecting a file in the content area and then adding information to the file's metadata fields, the easiest way to access a clip's full metadata is to right-click the file in the content area and choose File Info (Figure 12.6). Figure 12.6. Right-click on a file in the contents area and select File Info to open the File Info dialog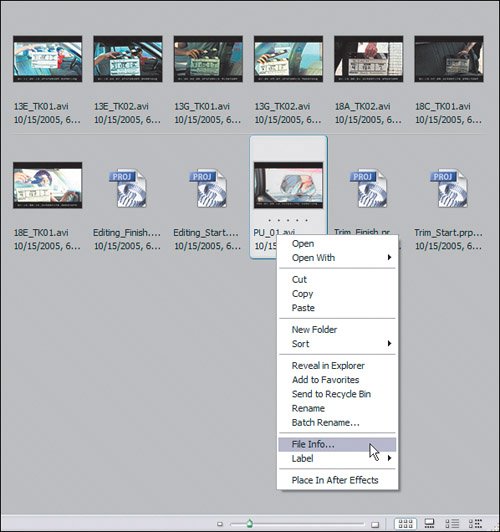 The left side of the resulting File Info dialog lists the categories of data you can modify and add to; the right side of the dialog holds the individual fields associated with the categories (Figure 12.7). Figure 12.7. To add metadata to a file, select a category on the left and enter data into the correspondng field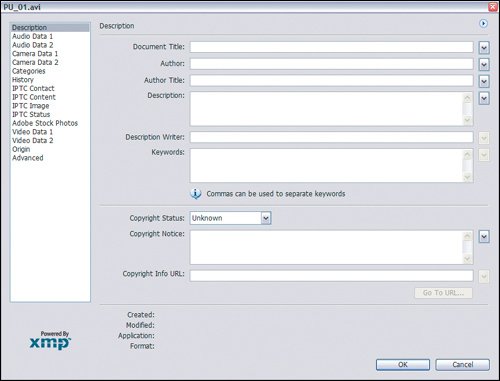 To add new data to a file, simply select the category and enter data into the appropriate field. Clicking OK adds the data into the file. Now any project to which the file is added will reference the newly added metadata. If you need to add the same data to several files, you have two choices. The first method is to select multiple files in the content area and modify the metadata fields in the Metadata tab (Figure 12.8). The second method is to create and save a metadata template: Click on the File Info dialog's wing menu and choose Save Metadata Template (Figure 12.9). Premiere Pro asks you for a template name, then saves the metadata information in the active fields for further use later. Figure 12.8. With multiple files selected, you can click on any of the metadata fields to modify their information. Here I named the Job Title for all of the files BLEACH, and then clicked the Apply button to apply the changes to the files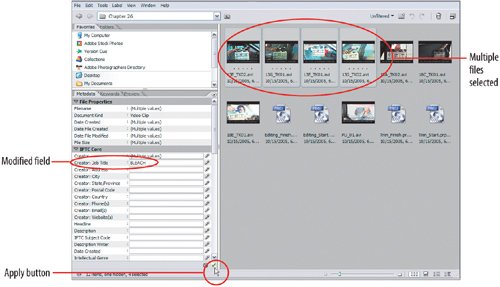 Figure 12.9. With metadata added to the File Info dialog, clicking on the wing menu allows you to save the current metadata as a template to be applied to other files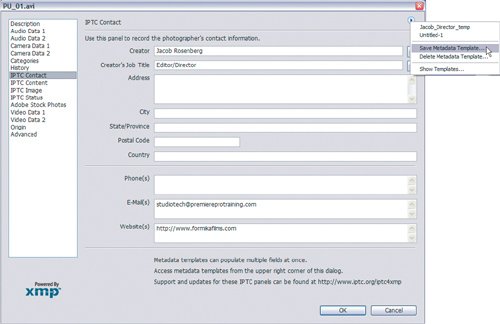 When you want to apply that saved template to other files, select them in the content area, choose Tools > Append Metadata or Replace Metadata, and select your template from the submenu (see Figure 12.10). Figure 12.10. Using the Append Metadata function, you can add the metadata from a saved template onto the four files selected in the content area. Append Metadata adds data to the files, while Replace Metadata replaces every field so that it matches the template exactly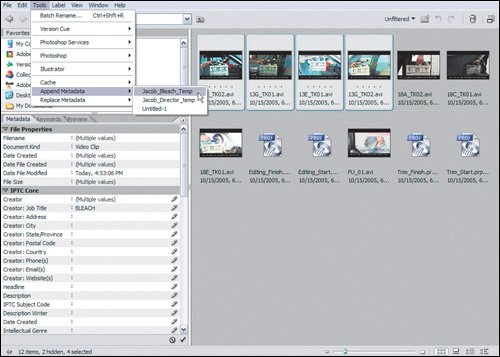 Because Replace Metadata replaces metadata already assigned to your file with the exact data from the template, I recommend using the Append Metadata function instead. Append Metadata adds all the data from your template into the file but keeps the original information intact. |
EAN: 2147483647
Pages: 200
- Linking the IT Balanced Scorecard to the Business Objectives at a Major Canadian Financial Group
- Measuring and Managing E-Business Initiatives Through the Balanced Scorecard
- Technical Issues Related to IT Governance Tactics: Product Metrics, Measurements and Process Control
- Managing IT Functions
- The Evolution of IT Governance at NB Power

