Title Panels Overview
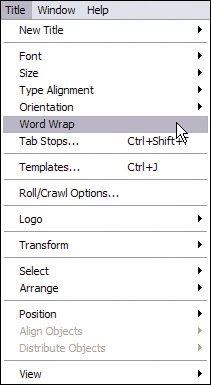
| To open the Titler, press F9 or select File > New > Title. At the prompt, name the title that you are about to create. Using this name, Premiere Pro saves a placeholder for the title into your Project panel; as you work on the title, the file updates live. Tip If it is important for you to preview specific characters in the Font Browser, go to Edit > Preferences > Titler. In the Titler Preferences panel, you can specify exactly which characters are displayed in the Font Browser. The Titler is made up of five panels (Figure 10.1). The primary panel is the Titler panel. The Titler panel's top row of controls holds several function buttons for font types, text justifications, and specifying the type of title you want to create (still, roll, or crawl). You add objects and text to the drawing area (center section) with the Tools panel. The Title Properties panel allows you to manipulate the text and object style, as well as adjust the position of the text or objects.From the Title Styles panel, you can add, select, and apply custom or default styles to objects and text. Finally, the Title Actions panel enables you to align and distribute text and objects within the boundaries of your title frame. Figure 10.1. The Titler is composed of five panels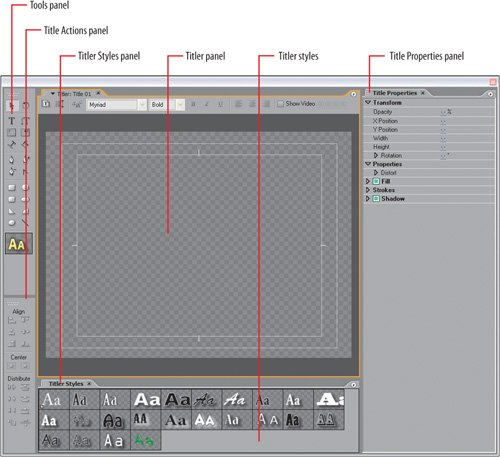 When the Titler is open, you have access to the Title menu in the main menu bar (Figure 10.2). The Title menu contains shortcuts and items that help arrange and adjust the open title or selection. You can assign keyboard shortcuts for most of the listed Title menu items. Premiere Pro 2.0 moves a number of buttons and shortcuts, such as the Templates function, from the Titler interface into the Title menu. Figure 10.2. Some controls, such as Word Wrap, are available only from the Title menu. You can access a subset of the full Title menu by right-clicking in empty space of the drawing area The Titler PanelThe top row of controls in the Titler (Figure 10.3) begins with the Create New Title Based on Current Title button. This button is useful when you finish a title and want to create a duplicate with minor changes. Simply click the button, name the title, and get back to work on making the changes you want. The second button is the Roll/Crawl Options button. You can create three types of titles: Figure 10.3. The top row of controls contains the Create New Title, Roll/Crawl option, Font Browser, and Font Style buttons as well as three Type Alignment buttons, the Show Video check box and a hot-text field for the background/sequence video timecode
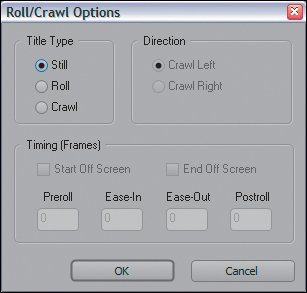
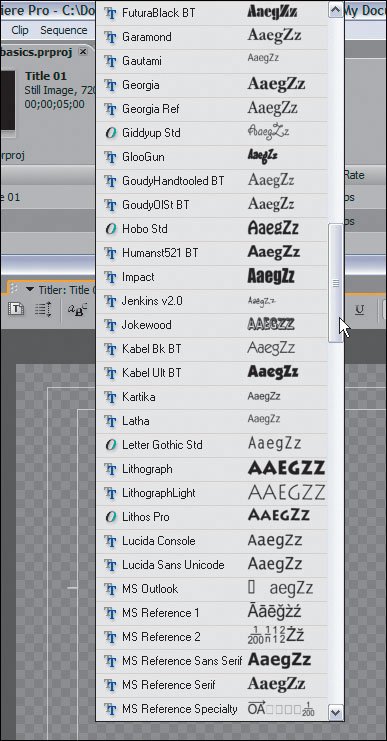
When you click Roll/Crawl Options, you access a dialog where you can define what type of title you want (roll or crawl) as well as its dynamics. If you want your roll or crawl to start or end with the entire title off screen, check the appropriate box in the dialog (Figure 10.4). You then can assign frame values for how long you want the title to be off screen before it comes on (Preroll), how long you want it to take to move to its center position (Ease-In), how long you want it to take to get back off screen (Ease-Out), and finally how long you want it to hold off screen (Postroll). Figure 10.4. In the Roll/Crawl Options dialog you specify the type of title you want: Still, Roll, or Crawl. Click the Start Off Screen and End Off Screen check boxes to allow your rolling or crawling title to start completely out of view then roll (vertically) or crawl (horizontally) on and off screen. You can also adjust the direction of the crawl, either left or right Next to the Roll/Crawl Options button is the Font Browser button. Select any text, click this button, and you can scroll through a list of font choices (Figure 10.5). Click on a font, and Premiere updates your text in a preview of the selected font. You also can use the Up and Down arrows to navigate to the next and previous fonts quickly. I really like the Font Browser, because it gives you an exact image of what each font looks like. From the enormous default list, you can see that Premiere Pro installs a ton of fonts for you. Next to the Font Browser button is a new drop-down Font menu that displays the same fonts as your browser, except slightly smaller and in a long menu (Figure 10.6). Figure 10.5. The Font Browser is a great interface for previewing what a font looks like and applying the font to your text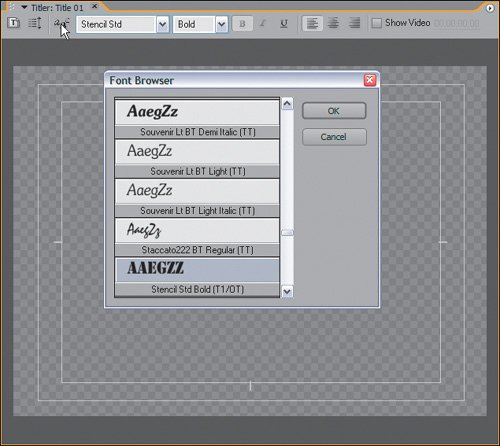 Figure 10.6. The Font drop-down menu achieves the same results only the fonts display slightly smaller. Either way, using these options allows you to see a visual preview of the font you want to use The three buttons following the Font menu are self-explanatory, enabling you to make your selected text bold, italic, or underlined. The next three buttonsLeft, Center, and Rightare for assigning type alignment justification. With any paragraph or text item selected, clicking an alignment button will align the text to that setting. The Show Video check box toggles on or off the Video Frame display from the open sequence. If the box is checked, you will see the associated video frame beneath your title. The hot text box to the right is tied to the timecode value in the open sequence. If you enter a timecode value or scrub the hot-text value, the displayed video frame updates to the frame in that timecode position. This is very helpful when you want to determine the exact positioning or proper color choices for a title. Checking Show Video and navigating with the timecode hot text enables you to see what your title looks like over any frame in your sequence. If you want the displayed video frame to snap back to a special point in the sequence, position the CTI there. Now, click the Sync to Timeline Timecode button to move the title-over-video display to the CTI's position in the sequence. |
EAN: 2147483647
Pages: 200
