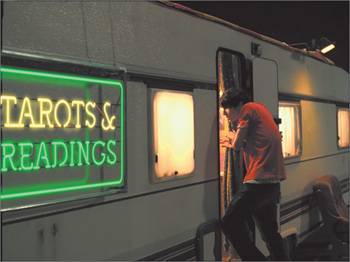
| The MultiPlane node supports .ma (Maya ASCII) files, allowing you to import 3D camera paths or use 3D tracking data clouds generated by third-party tracking applications. The imported tracking data can be used to match-move elements within the MultiPlane node. Note The MultiPlane node automatically puts layers within your camera view so you can find them easily. However, if you attach layers after applying the camera or tracking data, you may find the newly attached layers with unexpected offsets.
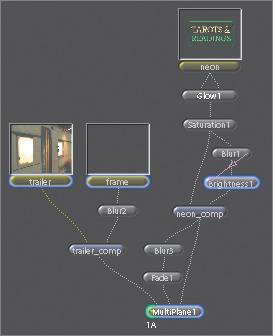
Connecting the Elements 1. | Rename IAdd2 as trailer_comp and IAdd1 as neon_comp.
| 2. | Right-click a MultiPlane node from the Layer tab and choose Create.
| 3. | Connect trailer_comp first and then neon_comp twice to the MultiPlane node.
|
Two copies of neon_comp are used because one of them will serve as a reflection element. 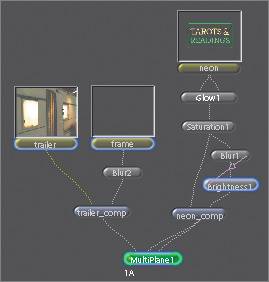 Importing the 3D Tracking Data The trailer_comp clip has a camera dolly move with noticeable changes in perspective. The neon_comp clip is a static sign with an animated glow, which must be matched to the trailer's camera move. Only neon_comp will make use of the MultiPlane camera move. Since trailer_comp already has a camera move, you will need to lock it to the camera view to avoid a perspective change. 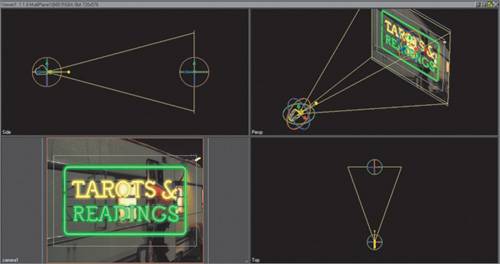 1. | With the pointer over the camera1 view, press F to fit the image to the Viewer.
| 2. | To start with, activate the Hardware rendering mode for faster interaction.
 | 3. | In the MultiPlane1 parameters, click the Camera tab.
 | 4. | Click the Load button at the bottom of the Camera tab.
 | 5. | In the File Browser, navigate to the Lesson12 folder, then select the camera.ma file and click OK.
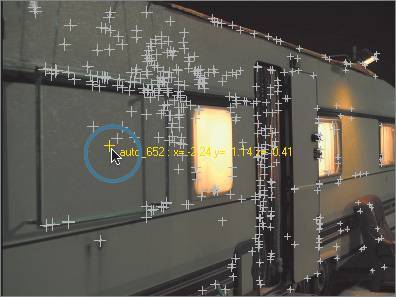
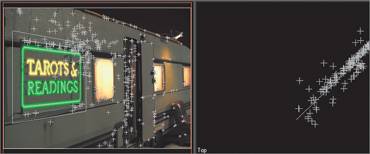
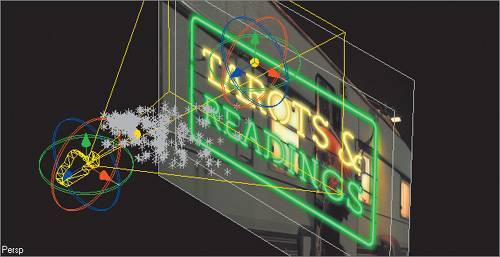 The point cloud data appears. A point cloud is a series of tracked points that follow along with features in the image. The point cloud data appears. A point cloud is a series of tracked points that follow along with features in the image.
Every new MultiPlane node is created with one camera, named camera1. Importing an .ma file adds a camera to the renderCamera pop-up menu in the Camera tab of the MultiPlane node's parameters.
| 6. | Go back to the Images tab.
 I can't stand it anymore! The points in the cloud are so large, my head is going to explode.
| 7. | Go to the Globals tab, open the guiControls subtree, and adjust the multiPlaneLocatorScale to 0.2.
 Thank you.
| 8. | Go back to the Parameters1 tab.
|
Attaching Layers to the Tracking Data Attaching the layer that produced the tracking data to the camera forces the attached layer to follow along with the camera as it moves according to the tracking data. As a result, the attached layer itself doesn't appear to be moving in the camera output, while the unattached layers that are positioned within the 3D workspace appear as if they're moving along with the features in the attached layer. 1. | Scroll down to the L1 (trailer_comp) layer, and then click the Attach Layer to Camera button to lock this element to the camera perspective.
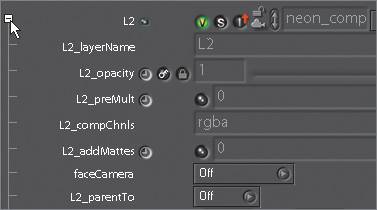
 To make the composite as real as possible, a reflection of the neon sign should be added to the trailer. Because L2 will be used as the reflection element, it should be parented to L3. Any adjustments to L3 will cascade down to L2.
| 2. | Open the L2 subtree.
 | 3. | Change the L2_parentTo parameter to L3.
 Wherever L3 moves, L2 will follow.
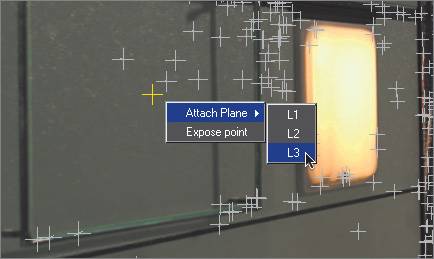
In addition to attaching layers to the camera, you can also attach a layer to any locator point in the data cloud. This lets you quickly set a layer's position in space to match that of a specific feature in a tracked background plate. In this case, you should attach one of the locator points to L3 (neon_comp).
| 4. | Go to frame 109.
There's a point in the middle of the metal frame.
 | 5. | Right-click the point and choose L3 (neon_comp) from the Attach Plane menu.
 Layer 3 and Layer 2 (because it is parented to L3) both have the tracking data applied to them.
|
Massaging the Tracking Data Sometimes the tracking data isn't completely accurate because of factors such as lens distortion. In that case, you will need to set some extra keyframes to have an accurate track. Before the accuracy of the track can be determined, the rotation and scale of L3 (neon_comp) need adjusting so that it properly fits within the metal frame. 1. | Make sure that you are still at frame 109.
| 2. | Open the L3 (neon_comp) subtree.
| 3. | Set the L3_scale X and Y parameters to 0.0884 and 0.1297, respectively.
 | 4. | Zoom in to the top view of the point cloud.
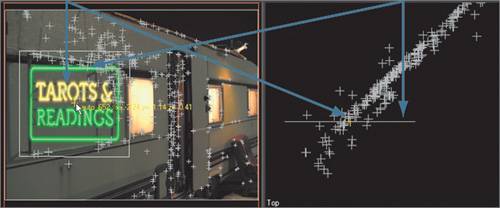
 | 5. | Hover over the locator point that you attached to L3.
The locator becomes highlighted in both the camera and top views. Note that the horizontal line in the top view represents L3. It should be rotated to be on the same plane as the point cloud to maintain the same perspective as the tracked points.
| 6. | Control-drag in the L3_angle Y parameter (the center parameter) until the layer lines up with the point cloud. I came up with a value of 43.9.
 | 7. | Click the Point Cloud Display button to disable it. We no longer need to look at those stinking points.
 The Z rotation is slightly off.
| 8. | Adjust the L3_angle Z parameter (the far right parameter) until the sign lines up with the frame. A value of 0.7 worked for me.
| 9. | Make a flipbook to see how the tracking looks.
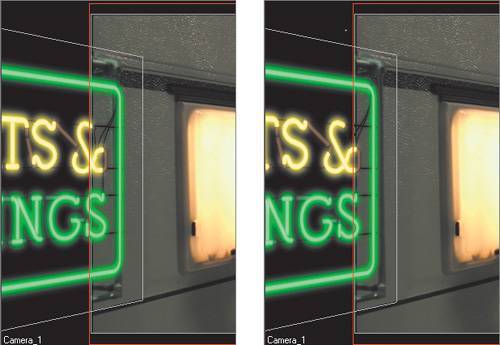
All in all, the neon sign is locked to the trailer image, except for some horizontal sliding. At frame 20, the neon is to the right of the frame. At frame 80, the neon fits perfectly within the frame. If a couple of keyframes are set, the neon sign will be completely locked. Normally, you would think of using the pan parameters to fix the horizontal sliding. Since the pan parameters are taken over by the tracking data, the center controls can be used instead to make the necessary corrections.
| 10. | Click the Viewer Layout button below the Viewer until you have a single pane.
 | 11. | Go to frame 80 and open the L3_center subtree.
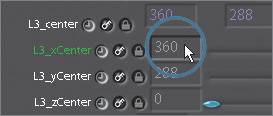
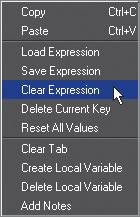
| 12. | Right-click the L3_xCenter numeric field and choose Clear Expression from the pop-up menu.
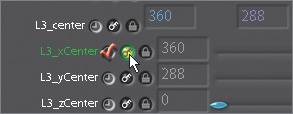
  | 13. | Activate keyframing for the L3_xCenter parameter.
 When the Keyframe toggle is activated, an xCenter keyframe is set at the current value. This sets the end position for the tracking correction.
| 14. | Go to frame 20 and Control-drag in the L3_xCenter field until the neon is just to the left of the frame. A value of 382.2 is good.
 | 15. | Make another flipbook to check the tracking.
Tracking looks good.
|
Making the Reflection In the last part of the lesson, we'll cast a reflection of the neon sign onto the trailer. 1. | Go to frame 80.
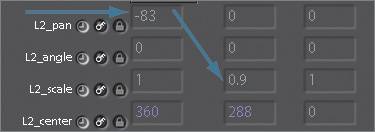
| 2. | Open the L2 subtree and scroll to the L2_pan and L2_scale parameters.
| 3. | Set the L2_pan X to 83 and L2_scale Y to 0.9.
 The positioning of the reflection looks OK. Let's just add some blur and fade it out a touch.
| 4. | Highlight neon_comp and Shift-click Blur in the Filter tab to create a new branch.
| 5. | Set Pixels to 40.
| 6. | Select a Fade node on the Color tab and set it to 0.5.
| 7. | Connect Fade1 to the L2 or middle input of the MultiPlane1 node.
 | 8. | Double-click the MultiPlane1 node and make a flipbook.
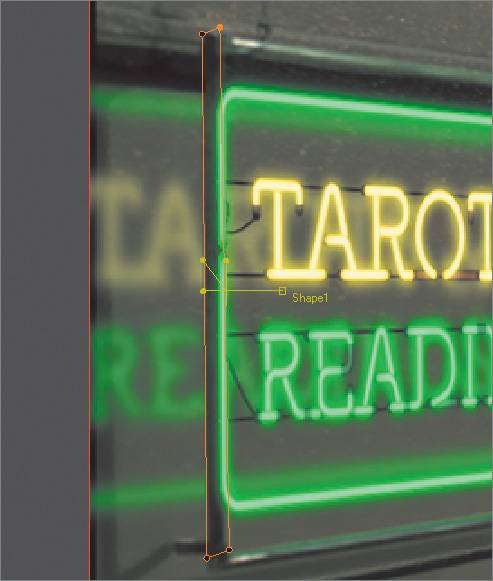
At frame 109, the reflection is spilling over the left vertical frame bar. This bugs me, because it isn't right.
 To fix this minor problem, we'll use an Outside node with a rotoshape to knock a hole into the reflection element.
| 9. | Select a RotoShape node from the Image tab.
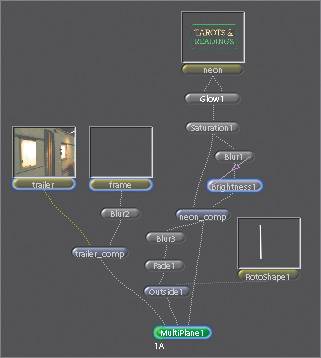
| 10. | Highlight Fade1 and, from the Layer tab, add an Outside function.
Remember, the Outside node cuts a hole in the first image based on the alpha channel from the second image.
| 11. | Connect the output of RotoShape1 to the second input of Outside1.
| 12. | Make sure you are on frame 109.
| 13. | Click the left side of MultiPlane1 to edit its parameters, and click the right side of RotoShape1.
 | 14. | Set the Res parameters to 720x576.
| 15. | Draw a shape around the left vertical frame bar.
 This knocks out the reflection from the left side of the frame.
| 16. | Make one last flipbook.
 That's all she wrote. Congratulations!
| 17. | Quit Shake.
|
|


 The point cloud data appears. A point cloud is a series of tracked points that follow along with features in the image.
