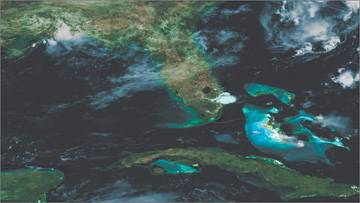
Very often, you will encounter two images from the same location that are not color matched. By looking at the individual color channels in the Viewer, you can easily color-match these types of shots.
1. | Choose File > New Script and click No when prompted whether to save your script.
|
2. | FileIn the florida_cu.0001.iff and florida_ms.0001.iff clips from the Lesson05 folder.
|
3. | Double-click each clip to view them individually.
|
4. | You may need to click the Fit Image to Viewer button to see the entire picture.
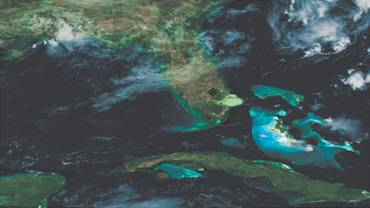
These are two aerial views of Florida with different framing and color correction. You will cut out a portion of the florida_cu clip, color-correct it, and composite it over the florida_ms clip. You'll start by using a RotoShape node to create the cutout.
|
5. | Select RotoShape from the Image tab and click the left side of the florida_cu clip so that it can be viewed.
|
6. | Set the Res parameters to 1920 by 1080.
|
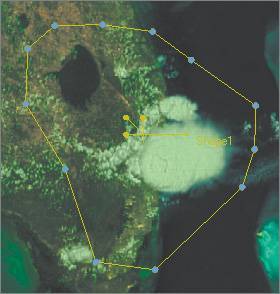
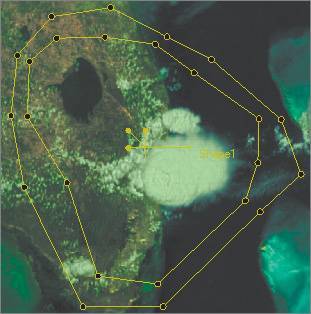
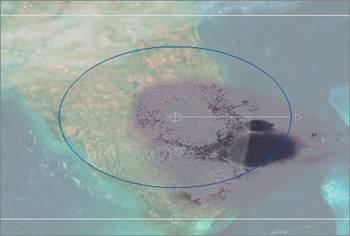
7. | Draw a shape that looks approximately like the one below.
 |
8. | Click the Edge icon and drag from the various points to create a soft edge.
This will help blend the two images together.
 |
9. | Click the florida_cu clip and select SwitchMatte from the Layer tab.
 SwitchMatte copies a channel from the second image into the matte channel of the first image.
|
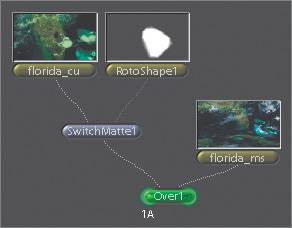
10. | Connect the output of the RotoShape1 node to the second output of the SwitchMatte1 node.
The cutout can now be composited over the wider shot.
|
11. | Select Over from the Layer tab and connect florida_ms to the right input.
 The trick now will be to exactly match the size of the florida_cu clip.
|
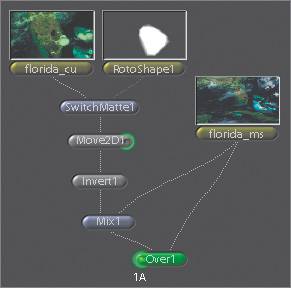
12. | Select the SwitchMatte1 node and insert a Move2D node from the Transform tab.
You could drive yourself crazy adjusting the position and scaling manually, or you could use the nifty alignment technique shown in the following steps.
|
13. | Add an Invert node from the Color tab and a Mix node from the Layer tab after the Move2D1 node.
|
14. | Connect the output of the florida_ms node into the right input of Mix1.
 |
15. | Click the left side of Mix1 to load it into the Viewer, and click the right side of the Move2D1 node to load it into the Parameters tab.
The Move2D onscreen controls appear.
The combination of Invert and Mix lets you clearly see the differences between the two images. When you adjust the Move2D1controls, the image will turn gray where it is aligned exactly. Because our two images have obvious differences (one has clouds), the aligned result will never look completely gray.
|
16. | Adjust the Move2D1 controls until the images are aligned as well as possible.
Your final alignment will look something like this.
 In case you are curious, I used the following settings to achieve the alignment: xPan = 136.8; yPan = 51.7; xScale = .4115; yScale = .2503.
Since the images are aligned, the Invert and Mix nodes can be deactivated, as they are no longer needed.
|
17. | Drag a box around the Invert1 and Mix1 nodes to select them, and press the I key to ignore the nodes.
|
18. | Double-click the Over1 node to view it.
The composite looks good except for the color correction of the inserted element. We will use a Mult node to adjust it.
 |
19. | Insert a Mult node from the Color tab between florida_cu and SwitchMatte1.
|
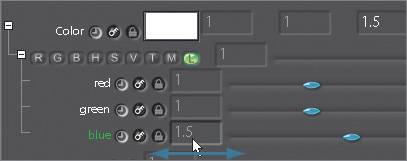
20. | Expand the color channels by first clicking the + next to the Color parameter and then the + next to the R button.
|
21. | In the Viewer, look only at the blue channel. You can do this by placing the pointer over the Viewer and pressing the B key.
By isolating individual color channels, it is easier to match the colors.
|
22. | Zoom in to the area that you are color-correcting, and adjust the Blue slider until the florida_cu cutout matches the background.
 You may find it difficult to match the two images exactly using the slider. You can adjust the Blue parameter with more accuracy by using the "virtual" sliders, which change the value interactively and give you finer controlleft-drag lowers the value, right-drag raises the value. The virtual sliders are activated when you Control-drag in a Color parameter box.
|
23. | Control-drag the Blue field to adjust it with the virtual slide.
 Tip Set your Update mode to Always. As you drag a parameter, Shake is constantly rendering. This makes the color adjustments more interactive. |
24. | In the Viewer, look only at the red channel.
|
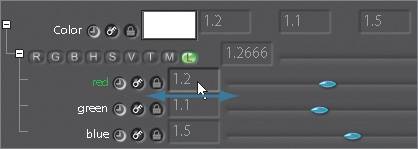
25. | Control-drag the Red field to adjust it.
 |
26. | In the Viewer, look only at the green channel.
|
27. | Adjust the Green parameter until the florida_cu cutout matches the background.
I set the Red, Green, and Blue parameters to: 1.2, 1.1, and 1.5, respectively.
|
28. | Now look at the RGB channels in the Viewer at the same time.
If you zoom out, you'll see that the background clip is softer than the florida_cu cutout. To finish the composite, we'll use a Blur node.
|
29. | Add a Blur node after Move2D1 and set the pixels to 5, 5.
 The two images are now matched perfectly (depending on your standards) to the background. Another way to color-match the two shots would be to use the ColorMatch node, explained in the following section.
|
