Task 2 How to Optimize the Tonal Range
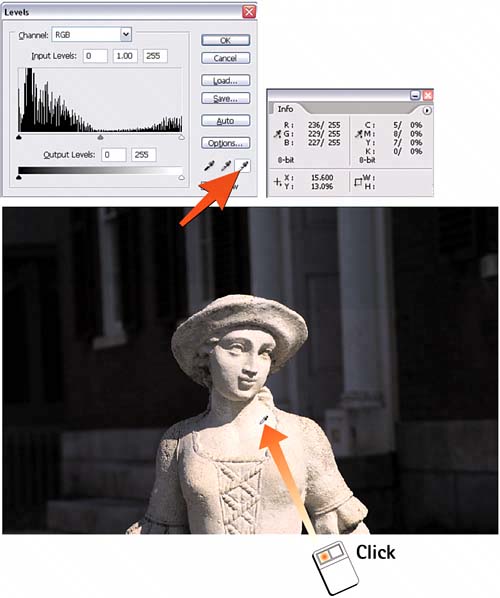
| When you capture an image with a digital camera or scanner, chances are that the tonal range in your image is lacking in highlights or shadows. An optimized tonal range is one in which the darks are completely black, the highlights are white, and the other tones are well distributed. In Photoshop, you adjust the tonal range of an image with the Levels option. Not only does adjusting tone ensure good contrast and detail, but it also can correct any unwanted color casts. Even if the image looks pretty good to start with, optimizing the tone can improve things even further. 1. Open the Info PaletteOpen the image for which you want to adjust the tonality. Select Window, Info to open the Info palette.
2. Open LevelsSelect Image, Adjustments, Levels to open the Levels dialog box.  3. Select the Black PointClick the black Eyedropper icon in the lower-right corner of the Levels dialog box. Move the cursor over the image; the pointer changes to an eyedropper as it enters the image. Using the readings from the Info palette, find the darkest area of the image and click to set the black point.  4. Select the White PointClick the white Eyedropper icon in the lower-right corner of the Levels dialog box. Move the cursor over the image; the pointer changes to an eyedropper as it enters the image. This time, find the lightest area of the image and click to set the white point.  5. Click OKClick OK to apply the effect. By setting the black and white points for the image, you are telling Photoshop what the darkest shadows and brightest highlights in the image are. Doing so establishes the tonal range of the scanned image. You can experiment with setting a black point that is not the darkest area of the image or a white point that is not the brightest area of the image to see what effect this skewed tonal range has.
|
EAN: 2147483647
Pages: 184


