The Tones and the Zones
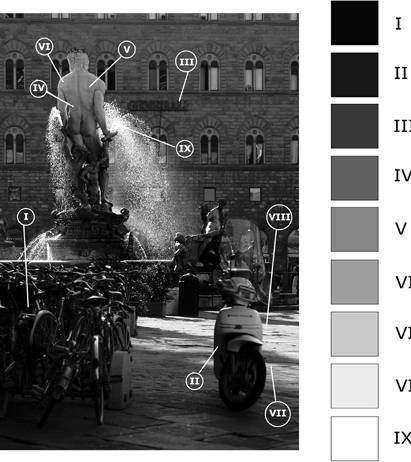
| Photographers break the tonal spectrum into zones that are classified and targeted in the exposure process. Ansel Adams' zone system is based on this philosophy, breaking the light spectrum into nine grayscale zones, with solid black at zone I, middle gray at the center as zone V, and solid white at zone IX. These zones are distributed equally so that increasing an exposure variable (ISO, f-stop, or shutter speed) by one setting brightens the exposure, making each tonal area one zone brighter. When tones fall into the first or last zone, they flatten into flat black or flat white, loosing their ability to describe form or modulated tones. Tonal areas falling into these zones are described as being "clipped." I'll explain the process for assessing and revising tonal values later in this chapter, but for now it's important to understand that the tonal range of an image can be described in specific zones that correspond to the camera's exposure controls. Figure
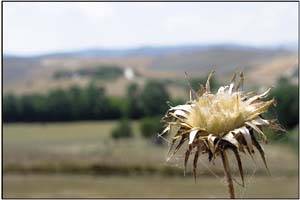
Looking at TonesAs a photographer, it's critical that you play an active role in the images you capture. It's one thing to look at a grayscale zone chart and understand that a neutral gray is zone V, but it's another to look at a red sunset or green meadow and understand how that scene relates to the zone system. The easiest thing in the world is to press the button and hope for the best, but in many ways you're leaving the process to chance and will undoubtedly miss (or mess up) some great shots. The easiest way to approach the process is not to impose a set of rules or zone-based constructs onto the scene, but rather to identify the areas of the scene that are important to you and then study the exposure to make sure that those areas are visible and detailed in the final image. On the other hand, playing an active role does not mean you should over-analyze every shot, metering every corner of the scene and bracketing like crazy. For one thing, your camera's internal meter is set up to handle many scenes flawlesslyperhaps as many as 70%80% of your shots will look just fine without any special work on your part. For another thing, you could spend so much time measuring and analyzing every area in a composition that the world passes you by and you miss the shot you wanted to capture. The key is to analyze each scene, looking for exceptions to your meter's capabilities. Before you shoot, remember a few basic rules and check a few things as explained in the next sections. Your results will be more consistent and satisfying. Make a Decision, Form a VisionIn each image, you should compose and expose based on your reaction to the scene. What's the most important area? Where is the emotion or drama? What is it about this scene that made you stop and decide to shoot it? When you have a sense of what's important, make a decision about what you're going to do with it. We'll process this comment more in Chapter 4, "Composition," but composing your shot is also relevant to exposure in that you must make sure that the exposure enhances and communicates the important areas in the image. For example, in Figure
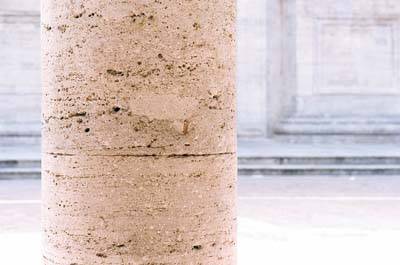
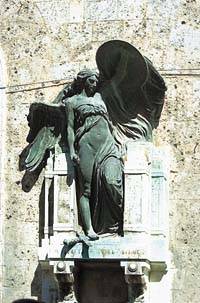
While assessing the tones in the image, I took a mental note of the background, trying to assess what would happen to it as I made the two-stop shift (the background would also lighten by two stops, along with the column and everything else in the image). Because I knew the main area of interest was the column, I determined that the image would still look good if the background was brighter. In the context of the zone system technique, the two-stop shift moved the background from zone V to zone VII. In the process of lightening the main areas of the column, I sacrificed some of the highlight detail because the zone VII image detail at the bottom of the background was clipped to the flat white of zone IX. Watch the ContrastAs you assess the scene in front of you, be on the lookout for high-contrast regions where bright areas and deep shadows are dominant. In scenes such as these, you might have some difficult choices to make. If the shadow detail is most important, you might want to brighten the image to catch the shadow detail. Be aware, however, that you risk clipping some of the details in the highlights, reducing them to flat white. The inverse is also true: Darkening the image to bring out detail in the highlights can flatten the shadows. In Figure
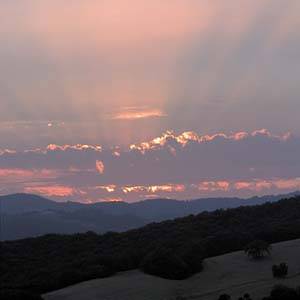
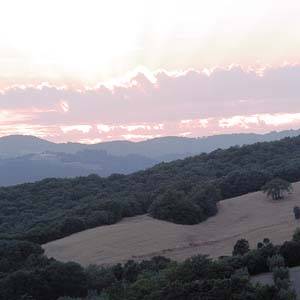
If these trade-offs are acceptable, go ahead and take the shot. If you want to have your cake and eat it too, there are a few tricks you can try to hold the detail in both the shadow and highlight areas. See the discussion on multiple exposures in Chapter 4. Special Lighting SituationsIn certain situations, you will want to capture and emphasize the overall light in a scene. These "Kodak moments" are familiar to most photographers and might even be deemed cliché by some. If you simply rely on the overt lighting elementssuch as the atmospheric quality in a sunsetyour image will probably look pretty cliché. Combine this one lighting attribute with an interesting composition or a unique point of view, and you can transcend the cliché and use the special lighting situation to your advantage. Sunrise /SunsetA Good Color ContrastThe light at the beginning and end of the day has a warm glow that is rightly prized by photographers. As you take stock of these lighting situations, there are at least two factors to keep in mind. First, make sure that you retain the color of the light in the scene. If your camera is set to Auto White Balance, you could find that it automatically corrects for the warm yellow/orange tint to the light, making the color relationships feel like a neutral mid-day setting. The second factor to consider is how you want to position the tonal range. The shadows will probably be dark and filled in, and you will probably have some beautiful color in the sky. The decision you need to make is whether it's more important to emphasize the shadow detail or the saturated sky color. If you lighten the image to bring out shadow details, the color saturation in the sky goes away. Don't be passivemake a decision and go with it (or bracket and shoot it both ways). For example, in Figures
Incandescent/Florescent LightingA Bad Color CastShooting indoors usually imposes a yellow or green cast to your images, depending on whether the lighting is incandescent (yellow) or florescent (green). In most cases, these color casts are unflattering, and you'll want to remove them. There are filters that can neutralize these effects, such as a Blue 80a filter for incandescent light, and an FL-D filter for florescent light. In addition, remember that you can always rely on your camera's Auto White Balance setting to do its job and neutralize a color cast caused by artificial lighting. Also keep in mind that the flash will neutralize much of the color casts caused by indoor light sources. |
EAN: 2147483647
Pages: 141
