Creating a Channel Mask: The (Practical) Details
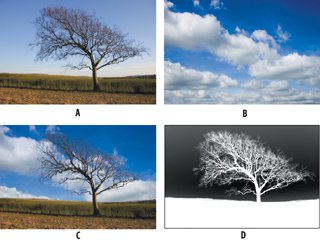
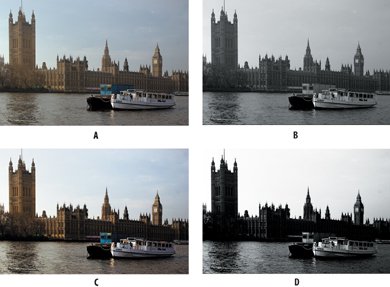
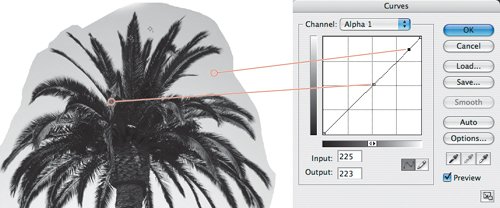
| Create a channel mask in six easy steps is the theory. Of course, most images aren't as straightforward. Let's look at some tricks you can use when creating channel masks for more challenging images. Because every image presents a unique set of challenges, use these techniques as needed. Determining Your IntentYour intention for an image once you've masked it determines how accurate you need to make the mask. If you're preparing a cutout figure that will be placed in a page layout on white paper, your mask will be quite forgiving and may not need to be super-accurate. If, however, you're putting your cutout subject on a brightly colored background, perhaps with different lighting conditions, then every inaccuracy will be painfully obvious. If the masked subject will be composited with other layers, experiment with blend modes to conceal edge inaccuracies. Depending on the nature of your image and the layer or layers you are compositing it with, it may not be necessary to force the contrast to opaque black and white. In the following example of a tree, the black parts of the mask are only 70% opaque in some places. This works because the original masked sky resembles the sky color of the background layer that replaces it. Not forcing the contrast makes it possible to retain as much of the fine detail in the branches and twigs as possible. Figure 6.6. The original images (examples A and B), the finished composite (example C), and the mask (example D). Not forcing the contrast on the mask to opaque black and white retains more of the details in the tree branches. This works in this context because one blue sky is replacing another. Choosing Your ChannelChoosing your channel is easiest when your image has a dominant color. The most obvious example is a blue sky, which can often be easily isolated using, not surprisingly, the Blue channel. Color channels have different contrast in different color modes. If none of your RGB channels has enough contrast, try duplicating the image and converting it to CMYK to check the channels there. Once your image is in CMYK color mode, duplicate the channel with the most contrast. To use this duplicate channel, go to your original RGB image and choose Select > Load Selection, then choose the CMYK image as the source document, and select the appropriate channel from the Channel drop-down menu. As an alternative to duplicating a channel, you may get better results using either of two options under the Image menu, Apply Image or Calculations, to make your alpha channel (a potential selection, stored in a channel as a grayscale image). Use Apply Image to combine a duplicate channel with any other channel or with itself, using the same blend mode options available for layers. Calculations works slightly differently, letting you blend two individual channels (or two copies of the same channel) as a new channel. Both Apply Image and Calculate potentially yield the same result. For example, using Apply Image to apply the source Blue channel with a blend mode of Overlay to a duplicate (target) of the Blue channel is the same as using Calculations to blend the (source 1) Blue channel with itself (source 2) using Overlay blend mode. For both options Overlay blend mode usually, but not always, works best, lightening values less than 50% gray and darkening values more than 50% gray. Figure 6.7. The Apply Image (example A) and Calculations (example B) dialog boxes.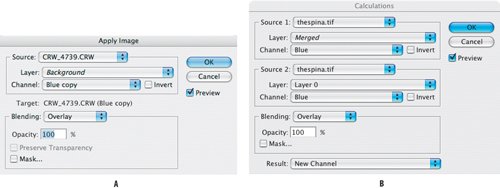 Figure 6.8. A copy of the Blue channel (example A), and a more contrasty result using Calculations to blend the Blue channel with itself using the Overlay blend mode (example B).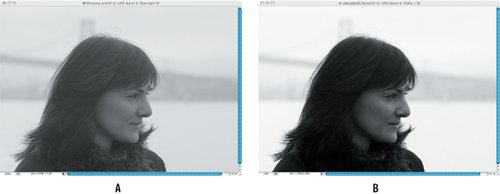 You can make it easier to choose your channel mask by adding more contrast to your image with a temporary adjustment layer. Add a Curves adjustment layer and pull the curve down in the shadows and up in the highlights to increase the contrast. Now, when you view your color channels one of them should have the contrast you need. Once you have made (or calculated) your duplicate channel and refined it into a mask, you can trash the adjustment layer. Note that you can also use this approach to help out any of your Selection tools. Figure 6.9. The original image (example A), and a duplicate of its Blue channel (example B). Adding a temporary Curves adjustment layer to increase the contrast (example C) and duplicating the Blue channel using Calculations yield a much more contrasty alpha channel (example D)a better starting point for your channel mask. Blocking OutIn step 3 of "Creating a Channel Mask," I advised that when painting on your mask you should stay well away from the edges. In some circumstances, however, you can paint up to the edges. If an edge already has a good amount of contrast, try painting in Overlay blend mode. Painting in white in Overlay blend mode turns the gray areas white, but leaves the black areas unaffected; painting in black has the opposite effect. We saw this in "Using Quick Mask to Paint Selections" in Chapter 2, "Channels." Forcing ContrastMake sure that what looks like black is actually black (100%) and what looks like white is actually white (0%) by opening your Info palette and taking a tour around the edges with your Eyedropper tool to note the exact gray values. You may find it helpful to Shift-click a couple of places to take color samples of your edge areas. These samples remain fixed so that you can compare the before and after values on the Info palette. Note that if you don't want sharp edges, then forcing your mask to opaque black and white is neither necessary nor desirable. Because the gray values of your edges may vary, some parts of the edge may require more force than others to turn them black or white. Here are the steps you can take to force contrast.
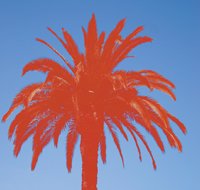
Figure 6.12. Using the Median filter to remove any stray pixels, before (example A) and after (example B).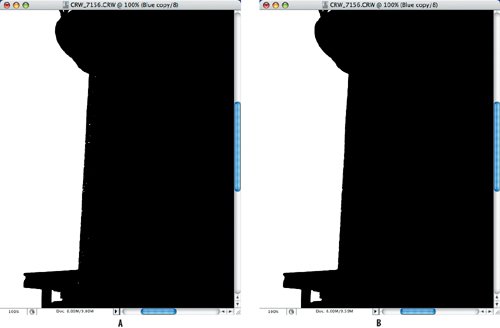 |
EAN: 2147483647
Pages: 93
