Drawing Your Own Shapes and Lines
Now you can finally get to the fun part of GDI+: drawing your own images. You saw some of this in action earlier in the chapter. The steps involved are quite easy: Grab the Graphics class and then draw or fill the objects you want using the appropriate method. I listed all the methods you will likely use back in Table 11-3, so you might want to take a quick peek back there to refresh your memory.
Because all it really takes to draw an image is calling methods, let's create a simple piece of artwork with the example in Listing 11-15.
Listing 11-15: A Piece of Art
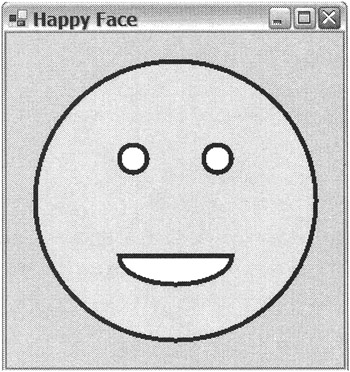
namespace HappyFace { using namespace System; using namespace System::ComponentModel; using namespace System::Collections; using namespace System::Windows::Forms; using namespace System::Data; using namespace System::Drawing; public __gc class Form1 : public System::Windows::Forms::Form { public: Form1(void) //... protected: void Dispose(Boolean disposing) //... private: System::ComponentModel::Container * components; void InitializeComponent(void) { this->AutoScaleBaseSize = System::Drawing::Size(6, 15); this->ClientSize = System::Drawing::Size(300, 300); this->Name = S"Form1"; this->Text = S"Happy Face"; this->Paint += new System::Windows::Forms::PaintEventHandler(this,Form1_Paint); } private: System::Void Form1_Paint(System::Object * sender, System::Windows::Forms::PaintEventArgs * e) { Graphics *g = e->Graphics; Pen *b4pen = new Pen(Color::Black, 4); Rectangle rect = Drawing::Rectangle(25, 25, 250, 250); g->FillEllipse(Brushes::Yellow, rect); g->DrawEllipse(b4pen, rect); g->FillPie(Brushes::White, 100, 175, 100, 50, 0, 180); g->DrawPie(b4pen, 100, 175, 100, 50, 0, 180); rect = Drawing::Rectangle(100, 100, 25, 25); g->FillEllipse(Brushes::White, rect); g->DrawEllipse(b4pen, rect); rect = Drawing::Rectangle(175, 100, 25, 25); g->FillEllipse(Brushes::White, rect); g->DrawEllipse(b4pen, rect); } }; } Figure 11-15 shows the results of HappyFace.exe, which is about the limit of my artistic abilities.

Figure 11-15: A happy face
Managed C++ and .NET Development: Visual Studio .NET 2003 Edition
ISBN: 1590590333
EAN: 2147483647
EAN: 2147483647
Year: 2005
Pages: 169
Pages: 169
Authors: Stephen R. G. Fraser