Using Struts Console Inside NetBeans and Sun Java Studio
Using Struts Console Inside IntelliJ IDEA
Struts Console can be run as a plugin inside JetBrains' IntelliJ IDEA versions 3.0 build 668 and later. To do so, you first have to install the Struts Console IDEA plugin. Following is the list of steps for installing the Struts Console IntelliJ IDEA plugin:
-
Shut down IntelliJ IDEA if it is currently running.
-
Navigate to the directory in which you have IntelliJ IDEA installed (e.g., c:\ Program Files\IntelliJ-IDEA-4.0) and then navigate into the plugins directory.
-
In another window, navigate to the directory in which you installed Struts Console (e.g., c:\java\struts-console-5.0) and then navigate into the com.jamesholmes.console.struts directory and then into the lib directory.
-
Copy the struts-console.jar file from the Struts Console lib directory into the IDEA plugins directory.
After you have installed the Struts Console IDEA plugin, you must restart IDEA.
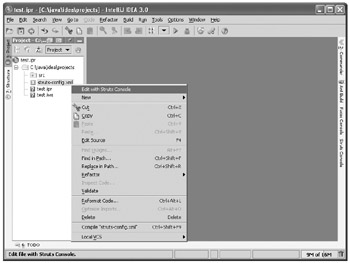
Once IDEA is running, to use Struts Console, simply right-click a valid configuration file and select Edit With Struts Console, as shown here:

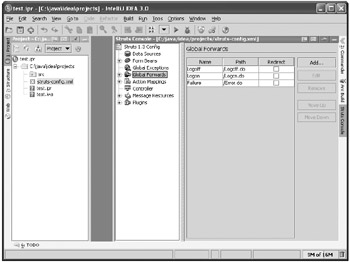
After you have opened the file, it will load into the Struts Console editor, as shown in Figure A-6.

Figure A-6: Struts Console editor inside IDEA
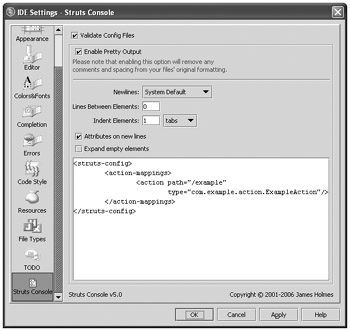
Struts Console also allows you to modify some of its configuration settings from inside IDEA. To access the Struts Console configuration settings, select Options | IDE Settings. Here is the Struts Console IDE Settings dialog box.

For more information on these configuration settings, see the "Configuring the Struts Console Output Options" section later in this appendix.
EAN: 2147483647
Pages: 165