Creating a Newsletter
A newsletter can serve as a promotional piece for a business or as a periodical for an organization and is often produced on a monthly or quarterly basis. Publisher provides many newsletter styles that you can modify to speak to your audience. In this section, you'll also learn how to create a newsletter for a mass mailing by using Publisher's mail-merge feature.
Using the Tilt Newsletter Wizard (and inserting some clip art), you can create a small business newsletter that looks like the one shown in Figure 30-5.
ON THE WEB
The Holiday.pub file, used for the example in Figure 30-5, is located on the Running Office 2000 Reader's Corner page.
When you begin creating a newsletter using a Publisher wizard, you'll notice that the template provides a complete mock-up of a newsletter. It might be useful to print this and review it now. As you examine the layout and read the guidelines, you can begin to plan how and where you'll insert your own information. The guidelines go into great detail, even specifying how many words fit into each column. You can reuse all this information when you let Publisher convert your newsletter into a Web site. (For more information, see Chapter 32, "Designing A Web Publication")
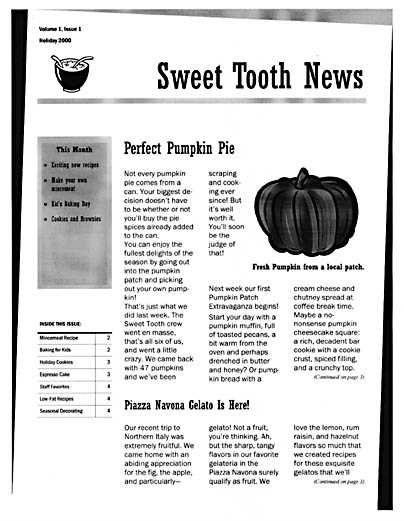
Figure 30-5. A seasonal newsletter created by using the Newsletter Wizard's Tilt design.
When you've found a newsletter design that works for you, and you've customized it with your company or organization's logo, masthead (the main title of the newsletter), contributors' articles, or other unique design features, you can save it as a template. Reusing design elements is especially important in a periodical publication, because it saves you time during your publication cycle and creates a familiar, recognizable look for your piece.
Editing the Masthead and Headlines
You can replace the generic headline text that the wizard provides by selecting it and entering your own text. If you have created a unique masthead or headline that you would like to repeat on the inside pages of your publication, follow these steps:
- Select the frame you want to copy. (If the text frame includes a logo or graphic, you might have to group the two objects to copy the whole design element.)
- Right-click the frame, and click Copy.
- Use the Page Navigation buttons to move to an inside page.
- On the View menu, click Go To Background.
- Right-click in the new page, and click Paste.
- Then click Go To Foreground on the View menu.
You'll need to resize and position the masthead to suit your design scheme, but it will repeat in the background of every page, giving your periodical a consistent identity.
If you want to replace the entire masthead, click the masthead, and then click Design Gallery Object on the Insert menu. The Microsoft Publisher Design Gallery dialog box appears, as shown on the next page.
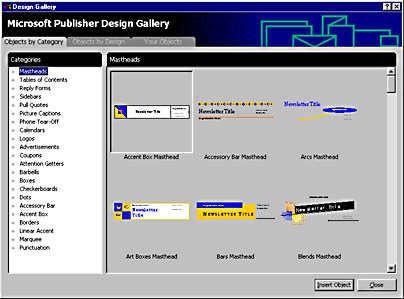
Select a more pleasing masthead, and then click Insert Object. You'll notice that the Design Gallery contains many categories of objects that you can insert to customize your publication.
Using Pull Quotes
Pull quotes are lively quotations that are drawn from the text of your story to provide interest and variety on your page. They're typically placed in the margins of your pages. To add one to the newsletter, follow these steps:
- Click the Pull Quote placeholder, and press Delete.
- Revisit the Design Gallery Object on the Insert menu. Select Pull Quotes in the Categories list. The window to the right displays examples of different design styles for pull quotes.
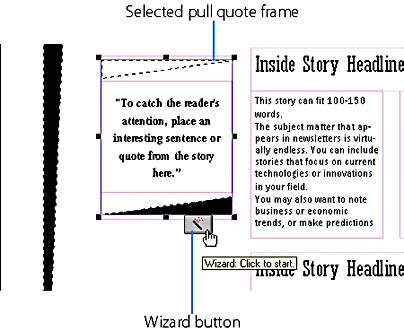
- Select one that is suitable for your format, and click Insert Object. The selected pull quote appears in its own frame, as shown here, with a button at the bottom that you can click to activate the Pull Quote Wizard:
The Pull Quote Creation Wizard, shown here, is a dialog box that contains a list of pull quote designs that you can use to change your design choice:
Inserting a Word Document
The newsletter template tells you the number of words that fit into each story frame. You can create a story in Microsoft Word and place it in your newsletter or import a document that you've already saved. First delete the text in the placeholder. Then click Text File on the Insert menu, and select the file you want to insert into the newsletter. After you click OK to insert, you might find that your story runs over onto the next page of your publication. You can control this overflow by using the Autoflow option. Simply click Yes in the message box that Publisher displays, asking if you want to use this option. You can also manually control overflow by using the Connect Frames toolbar. To do this, follow these steps:
- Click the text frame that is overflowing.
- Click Connect Text Frames on the Tools menu. The Connect Frames toolbar appears.
- Click Connect Text Frames, and move the pointer to the frame that the story will flow into.
- If your story wraps to another page, right-click the text frame, point to Change Frame, and then click Text Frame Properties. The Text Frame Properties dialog box appears:

- Follow the design tip in this dialog box.
You can use the Continued On Page or Continued From Page options to notify your readers that the story flows between pages.
- Use the Page Navigation buttons on the Publisher window's status bar to move from page to page in your newsletter as you add and edit text.
Creating a Mass Mailing
Newsletters can be a way of keeping in touch with your readers on a consistent basis as well as extending a service to them in the form of some absorbing content. To automate the mailing process for you, Publisher provides a mail-merge feature. (You might already be familiar with mail merge from your experience with Word.) Mail merge refers to the merging of two documents: in this case, the main document, a newsletter, and the data document, which is your mailing list. To create a mass mailing, you'll first need a mailing list.
SEE ALSO
For a more detailed discussion of mail merge in Microsoft Word, see Chapter 14, "Using Word to Automate Mailing"
- On the Mail Merge menu, click Create Publisher Address List. The following dialog box appears:
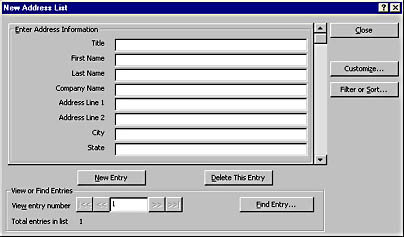
- Enter the information for the first addressee in the appropriate fields. Click the New Entry button when you're finished with one and ready for the next.
- Click the Close button when you've entered your entire mailing list.
- Enter a name for the list in the File Name list box of the Save As dialog box.
Now you're ready to merge the two documents. To do so, follow these steps:
- Select a field (or line in the address frame) where you want to insert data.
- Click Open Data Source on the Mail Merge menu. The following dialog box appears:
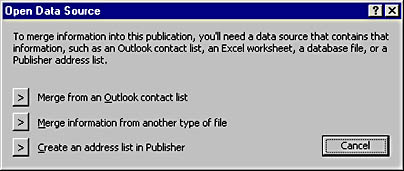
- Click Merge Information From Another Type Of File.
- Select the name of the address list file you just created in the next dialog box. Then click Open.
- In the Insert Fields dialog box, click the first field that you want to insert, and click Insert. The field appears in the box on the right.
- Continue inserting fields and typing spaces, punctuation, and returns, as necessary, to properly format your fields into an address format. For example, type a comma and a space between the field codes for city and state.
- Repeat steps 5 and 6 for each field code you want to insert.
- When your fields are properly arranged in an address format, click Merge on the Mail Merge menu.
When you are ready to send the merged documents (in this case, a newsletter addressed to names from your mailing list) to your printer, you'll notice that the usual Print command on the File menu is replaced by the Print Merge command. Take advantage of the opportunity Print Merge offers to print a test to check that the mail merge is functioning as you anticipated.
EAN: 2147483647
Pages: 228