| You're now going to experience the most fundamental way to edit video: chopping up a clip of video and tossing out the parts you don't want. As a business owner, Jennifer doesn't have a lot of time for editing video. Editing is the art of cutting up video and making something interesting out of the pieces. Far simpler, and better suited to Jennifer's schedule, is simply cutting up video and throwing out the bits that aren't good. Actually, this isn't really editing; it's called culling. Jennifer culls all her video material. It's fast and easy. Making a time-lapse video is really just a specific method of culling videotape and looking for good bits. Before you begin to cull Jennifer's video, here's a quick editing lesson:Whenever you chop up a piece of video, you should think of each cut you make as actually two cutsthe first indicates where a segment of the video will begin, and the second indicates where it will end. When you do this, you will have cut the original clip into three pieces (in order, left to right in the timeline): the material ahead of the section you liked, the section you liked, and the material after the section you liked. But you don't always want to throw out the bits you don't use. There's plenty of good video in those trimmings. Keep that in mind over the next few steps. 1. | Start playing the time-lapse clip from the very beginning.
Don't think of this as watching your video, but rather as looking for where you want your video to start. If you want your video to start at the beginning of this clip (which makes sense with this video), then pretend you already made a chop right at the beginning and threw away the material you didn't need.
| | | 2. | Look for a nice frame on which to end the first "shot."
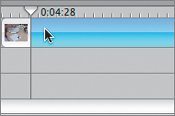
You can stop anywhere in the clip by pressing the spacebar. You can advance forward or backward with the precision of one frame at a time by using the arrow keys on your keyboard.
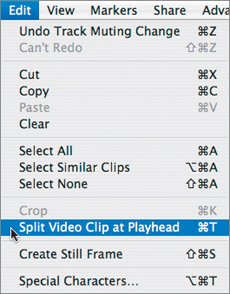
Note When you make the transition from video consumer to video producer, one of the first skills you must develop is the ability to separate yourself from your material. It may be video of your family, your company, or your vacation, but when you sit down to edit, you need to stop watching your video and start looking at it. You're looking for things in it, and observing how subjects on the screen move around. It's very different from watching (and enjoying) a video. | | | 3. | When you have the playhead at the spot where you want the shot to end, choose Edit > Split Video Clip at Playhead.
 You can see the frame in the Viewer.
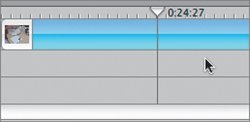
When you chop your video into pieces, you'll see that although none of them moves, the timeline shows that what was formerly one clip is now two.
And while this book doesn't delve into most keyboard shortcuts, the Split Video Clip at Playhead command is such an elemental part of cutting your video that it's critical to learn its shortcut: Command-T. It's an important toolperhaps the most important you will learn in this lesson. With this excellent chopper, you can cut, delete, and rearrange video with the power of a professional. You are going to see more-sophisticated tools for editingin iMovie as well as in professional-level software like Final Cut Express and Probut not much beats a good digital razor blade to simplify editing down to the basics.
Tip Command-T has many powerful uses in iMovie. In the Lesson 5 Sgraffito video, for instance, Jennifer used it to force a break in clips when she wanted a title to begin at someplace other than the start of a shot. By breaking any clip, you can add a title in the middle. Each time Jennifer clicked Record (which creates the material between the jumps), she recorded for 10 or 20 seconds. As you roll through each segment she recorded, look for one 3- to 6-second clip.
Let's recap: Your video starts at the beginning of the big clip. You rolled a few seconds in and found a good place for the first shot to end, and you chopped it there. That defines the first shot.
 Note In time-lapse video projects, you will find a rhythm between how long a shot is and how much time you cut out before the next shot. For this video, each shot seems to work when it is 3 to 6 seconds long. If shots are much longer, you start to lose the momentum in the time-lapse effect. | 4. | Keep rolling through your video from this point and look for the spot where you want the second shot to begin.
You will pass a jumpa place where Jennifer stopped the camera and then started it a little bit later. You don't want to see any of Jennifer's jumps in your finished project.
| | | 5. | When you find a good starting place for the next shot, make another chop (Command-T).
 Now you have created three pieces of video: The first is the first shot; the middle one is basically garbage that you've decided you don't need; and the third is the remainder of the video.
| 6. | Select the middle piece (the one you don't want) and delete it.
  Note It's a little hard to see in an illustration, but you just created a good jump. You threw out a snippet of video and have begun the process to reduce the 2½ minutes of video into something shorter and more interesting. | | | 7. | Continue this process: From here, keep rolling through and find a good frame with which to end the second shot.
Again, keep it between 3 and 6 seconds long.
Note About two-thirds of the way through the video, Jennifer repositioned the camerashe zoomed in tighter. During a shoot, it's generally never a good idea to move or zoom the camera in, but on long projects it can sometimes work if you do it once (and only once). Snip, snip, delete. Snip, snip, delete. Work through the whole source clip until you reach the end. Your sequence should be about 60 seconds long, with 13 individual shots.
 One addition that makes the time-lapse video effect particularly striking is to drop cross dissolves over every transition. One addition that makes the time-lapse video effect particularly striking is to drop cross dissolves over every transition.
| 8. | Add 1-second cross dissolves between every pair of shots.
As described in Lesson 5, click the Editing button, click the Transitions button to open the Transitions pane, select Cross Dissolve, set the duration to 1:00 (1 second), and then drag the Cross Dissolve icon onto each transition in the timeline.
You'll have to zoom out to see the transitions.
 Note Once you've set the duration of the cross dissolve (or any transition effect), iMovie will default to this setting next time you select this effect. Since in general you want to have consistent durations for these kinds of transitions, it's a great feature. | 9. | Add a title card.
To do this, as you learned in Lesson 5, click the Editing button and open the Titles window. From the Titles window, make a simple, centered title card over black as the first shot in the sequence. Jennifer's title is The Italian Brushstroke Technique. (If you really want to have fun, you can try some of the other title methods now and see what each one does. They'll automatically start previewing in the Viewer when you select them. But remember, particularly for Jenniferwho uses her video in her businesssimple is usually better.)
|
And now you (and Jennifer) have created a time-lapse video. If you'd like to see Jennifer's finished project, check out Finished_Timelapse_Project6 in the Lesson06 folder. The setup and editing method you just practiced works for any topic, not just painting ceramics. With a digital video camera and without any complicated tricks in iMovie, you now know enough to cull any video as well as a professional. In addition, you understand the fundamentals of iMovie and editing well enough so that expanding your skills will be easy. Note iMovie '06 has the ability to create time-lapse video automatically. It's an option available at the time of capture. Using the Capture Frame checkbox, you tell iMovie how many frames of video you want captured at every specific time interval. Video rolls at 30 frames per second. You do the math. This could work brilliantly for some projects, like a sunset, where the "action" is spread evenly across time, but you'll get better control of more sporadic events doing it the way Jennifer just did.
|
