| Before moving on to the next type of editing function, let's take a moment to prepare your project. In the following steps, you will duplicate a sequence, delete markers, work with clips in icon view, copy a bin of clips, and remove edit points from a group of clips. You will also arrange clips in a bin using the icon view, and change the representative frame for a clip. Having a duplicate set of clips allows you to organize the same clips in different ways. For example, in this exercise, you will duplicate the set of marked Intro clips and remove the edit points from the duplicate set. Remember, copying clips in the Browser doesn't duplicate media files, just the links to those files. 1. | In the Browser, duplicate the Intro Markers sequence, and rename the new sequence Replace Edit. Double-click it to open it in the Timeline. Close all other open sequences.
In the next exercise, you will learn to replace edits in the Timeline and will not need the markers in the ruler area.
| 2. | Make sure no clips are selected in the Timeline, and press Ctrl-` (grave) to delete all the markers in the ruler area.
| 3. | In the Browser, double-click the Intro Clips Marked bin to open it as a separate window.
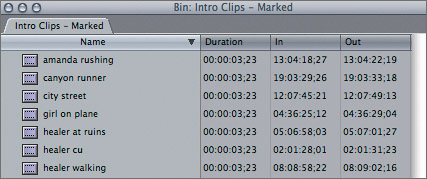
In the Duration column, you see that all the video clips have the same marked duration. These durations match the music beats in the sequence. For the next exercise, you will want to work with unmarked clips. However, you may want to use the edit points on these clips again at a later time.
| 4. | Close the open Intro Clips Marked bin. In the Browser, with this bin still selected, press Cmd-C to copy the bin. Press Cmd-V to paste it back into the project.

A duplicate bin is created in the Browser. You can copy any clip, sequence, or bin in a project and paste it within that project, or in a different project. Final Cut Pro will still link back to the original media.
| 5. | Name the lower bin Intro Clips NOT Marked. Double-click this bin to open it as a separate window.
NOTE You can perform the following steps in the Browser without opening the bin. Opening the bin in a separate window here just helps focus on this set of clips. Since this is a duplicated set of clips, we can remove the In and Out points for these clips without affecting the clips in the Intro Clips Marked bin.
| 6. | Ctrl-click the first video clip's timecode number under the In column. In the shortcut menu, choose Clear In.
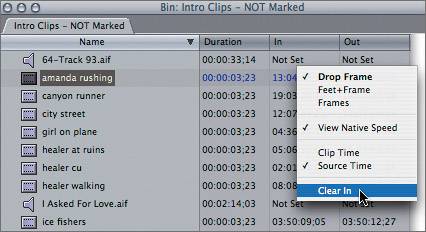
The In point for this clip is removed, and Not Set appears under the In column. You generally remove In and Out points for a clip in the Viewer, but you can also remove an In or Out point in an opened bin or Browser column. But in the bin or Browser, you can remove edit points for a group of clips.
| 7. | To remove all of the In points on all of the clips in this bin at one time, select the clips by pressing Cmd-A. Ctrl-click any timecode number in the In column and choose Clear In from the shortcut menu.
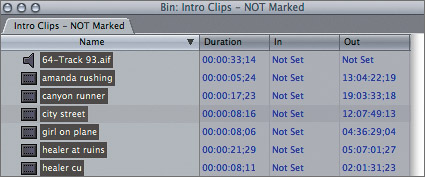
Not Set appears in the In column for all the selected clips, and the clip durations are extended accordingly.
| 8. | To remove all of the clips' Out points, Ctrl-click any timecode number in the Out column and choose Clear Out from the shortcut menu.
Not Set appears in the Out column for all the selected clips, and the durations revert to the full length of the clip.
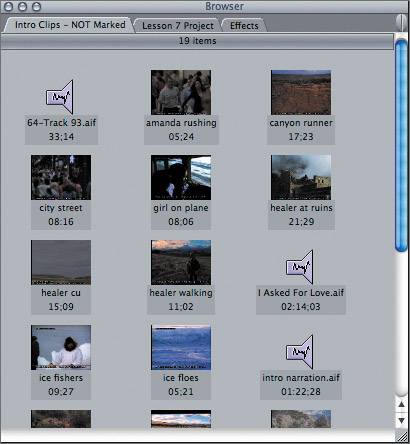
NOTE You will learn more about organizing and customizing Browser columns in the next lesson. | 9. | Drag the lower-right corner of this bin to the right to make it wider. Ctrl-click under the Name column of this bin and choose View As Medium Icons from the shortcut menu.
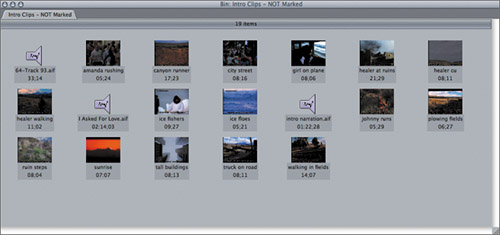 In the icon view, you can drag a clip or group of clips to arrange them however you like. In the icon view, you can drag a clip or group of clips to arrange them however you like.
| 10. | Group the clip icons in this bin according to content, such as city clips, nature clips, healer clips, Alaskan clips, and so on.
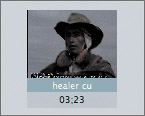
Notice that the clip icons in the bin display the first captured frame of each clip. This frame is called a poster frame, just as a movie poster is a visual representation of a film. In some cases, the poster frame does not represent the clip content. You can choose any frame within this clip to use as its poster frame.
| 11. | Double-click the healer cu clip to open it in the Viewer. In the Viewer, position the playhead when you see the healer in the middle of the frame. Choose Mark > Set Poster Frame, or press Ctrl-P.

Now the poster frame for the healer cu clip makes the clip content easier to identify in this view.
| 12. | In the Browser window, Option-double-click the Intro Clips NOT Marked bin to simultaneously close that bin's window and open it as a tab in the project. Ctrl-click in the gray area and choose Arrange > By Name from the shortcut menu.

You will use this view of these clips in the next exercise. To see the other clips in this bin, you can either use the scroll bar or use a scrolling mouse.
|
TIP You can change the bin views in these lesson projects at any time according to your preference.
|


 In the icon view, you can drag a clip or group of clips to arrange them however you like.