| Publishing movies for the Web is really pretty easy, as you've seen, but there are many variations that you can use. In this section we'll look at the various publish settings available for Shockwave movies, as well as the different publishing templates available. Let's begin with a discussion on media compression, and learn why you couldn't fly through the tunnel in the published movie from the last section. Compressing Images Compressing thingsimages, sounds, video, and morehas become a way of life on the Web today and something you must consider when creating content that will be viewed in a browser. Whoever is viewing your movie has to download it first, so you want your files to be as small as possible. When you import bitmap images into a Director cast they are set, by default, to use the movie's compression settings as shown here: 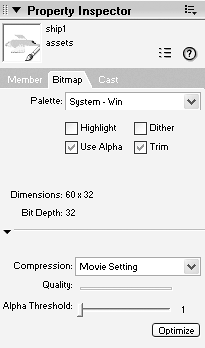
The movie's compression settings are determined in the Publish Settings dialog, within the Shockwave tab. 1. | Select File > Publish Settings and choose the Shockwave tab:
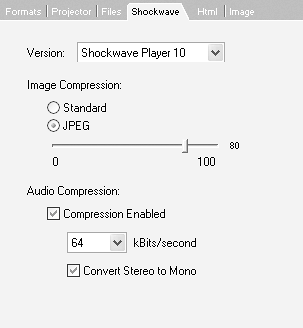
Under the Image Compression heading you will see two options, Standard and JPEG. Standard uses a lossless compression that results in larger images, but without any loss of image data. JPEG uses a lossy compression scheme, but still usually results in very high-quality images.
As you can see, the default is JPEG, at a compression level of 80. That's a fairly low level of compression, resulting in a fairly high-quality image.
So if a JPEG level of 80 results in a high quality image, why couldn't you navigate the tunnel? The answer to this lies in the following images:
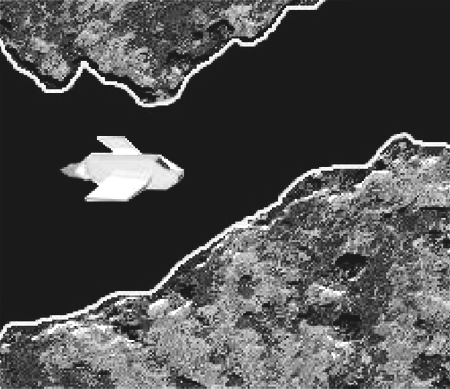
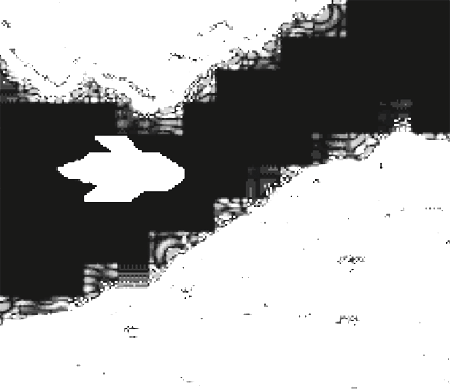
Both images show the exact same thing, but the one on the right has been image enhanced to show the artifacting on the edges of the tunnel walls created by the JPEG compression algorithm. As you can see, the algorithm works in a block-wise manner and in doing so creates a kind of "spill-over" effect within the blocks. Normally, this would be fine. Without enhancing the image you can't detect the artifacting unless you use very high compression ratios. However, because the artifacting produces pixels that aren't solid black, or rgb(0,0,0), the getPixel method doing the collision detection will see those pixels as collisions.
Luckily, Director allows you to set the compression settings for each image in your cast individually.
| 2. | Close the Publish Settings dialog and make the assets cast active. Select the tunnelcast member and choose the Bitmap tab of the Property inspector. Change the Compressionfrom Movie Setting to Standard, as shown here:
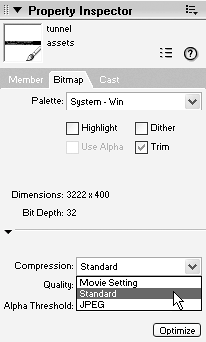
If you use the default of Movie Setting, the image will be compressed with the settings in the Publish dialog. Choosing Standard or JPEG lets you set the image to use its own individual settings.
Because the JPEG artifacting causes problems with our collision-detection scheme, changing the image's compression to Standard will eliminate the problem. This is because the Standard setting uses a lossless compression scheme and won't result in any change in the actual image.
| 3. | Select the mountains cast member and choose the Bitmap tab in the Property inspector. Change the compression to JPEG, with a quality level of 30.
Because the mountains are faded so much into the background, using a very high level of compression won't be noticeable and will help to reduce the size of the published movie.
Being able to modify the compressions levels for each image individually gives you a fine level of control over your final output. Now, let's take a look at compressing your sounds.
|
Compressing Sound Sounds, much like bitmap images, are also compressed when you publish your movies to Shockwave. Unlike bitmaps, however, there is no individual compression control for sound members. You can still achieve individual compression settings by turning off Director's sound compression, and importing compressed files, like MP3s, to begin with. Let's begin by looking at the sound compression settings in the Publish Settings dialog. 1. | Select File > Publish Settings and go to the Shockwave tab.
Within the Shockwave tab, the audio compression settings appear under the image compression settings, as shown here:
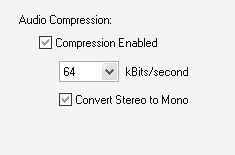
By default, audio compression is enabled and set to 64 Kbits (kilobits per second). This is about half the perceived quality of CD audio if you consider the MP3 format, at which 128 Kbits is considered CD quality. Using the drop-down menu you can select a range of between 16 and 160 Kbitsfrom quite poor quality to very high-fidelity audio.
Tip You can press the Defaults button within any panel of the Publish Settings dialog in order to return just that panel to its default settings. That's all well and good, but why compare to the MP3 format? Because Director actually compresses its audio using the MP3 algorithm. In fact, as you will see in a moment, you can even use Director to compress wav files to MP3 files if you're in Windows.
At this point you may wish to test the difference between 16 and 160 Kbits, but with the sound effects the movie is using. The difference is actually negligible. This is because MP3 is a good algorithm, but also because the sounds don't have enough range for the difference to be noticeable.
| 2. | Choose 16 from the audio compression drop-down menu and click OK to close the dialog. Select the assets cast and import bg_sound.aif from the Lesson14\media folder on the CD.
This is a short, high-quality sound loop that you can use for testing.
| 3. | With the sound selected in the cast, select the Sound tab in the Property inspector and make sure that Loop is checked on. Press the play button, in the Property inspector, to hear the sound in its original form. Press stop when you're finished.
| 4. | If the effects channels in the Score are not showing, right-click in the frame bar and choose Effect Channels from the context menu. Drag the bg_sound member into sound channel 1 and adjust its span so it starts at frame 1 and ends at frame 25:
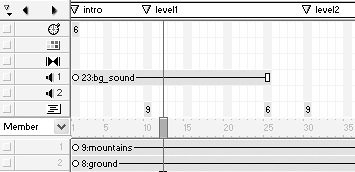
Because you've already established the publish settings so that Director will create a Shockwave file, you can simply publish the movie to test the results of the audio being compressed to 16 Kbits.
| 5. | Save the movie and press the Publish button in the toolbar.

After a moment, your browser will appear with the game in it. The background audio is clearly of lower quality than the original file, although it might still be acceptable, depending on the application.
Note that as soon as you shoot, the background will stop. This is because the background sound is in audio channel 1 in the Score, the same channel you are playing the fire sound in, using Lingo.
| 6. | Stop the movie and choose File > Publish Settings. Pick the Shockwave tab and change the audio compression to 160 Kbits, using the drop-down menu. Press the Publish button within the dialog.
The background audio now sounds as good as the original, although it contains much more data, resulting in a larger Shockwave file. Your application will typically dictate the audio quality you need to use. If you'll be using narration, you'll probably want a lower level of compression than you'd use for sound effects.
| 7. | Close the Publish Settings dialog and delete the bg_sound sprite from channel 1, and also delete its member from the assets cast.
This was just a test of audio compression, so there's no reason to keep the audio in the movie. Later in this lesson you will add an actual background track in the form of an external file.
| 8. | Choose File > Save and Compact.
Using Save and Compact removes unused space in the cast and can dramatically reduce the size of your saved movies. When you imported the bg_sound file into the assets cast, Director reserves room in the movie for the new member. But when you delete that member, as you just did, the space reserved for it isn't automatically reclaimed. If you were to just save the movie, its size on disk would be the same as if the sound were still in the file. Using the Save and Compact feature removes that wasted space, creating a smaller working file.
Now, let's look at how you can create MP3s with Director.
|
Making MP3s As stated previously, Director uses the MP3 algorithm to compress audio. If you're using the Windows version of Director there is a feature that allows you to convert WAV format audio files into SWA, Shockwave Audio, files. SWA files? Yes, but SWA is really just MP3 with a slight twist. If you use a sound-editing program, such as Sound Forge, you can add markers, or cue points, to your WAV files. When those files are converted into SWA by Director, the cue points will remain and can be used to synchronize elements to the audio. But, the file is still an MP3 audio file, with a different extension. Simply changing the extension from SWA to MP3 will allow it to be played with WinAmp or any other MP3 player you might use. Let's convert a WAV audio file into MP3 to see how this feature works. 1. | Choose Xtras > Convert WAV to SWA.
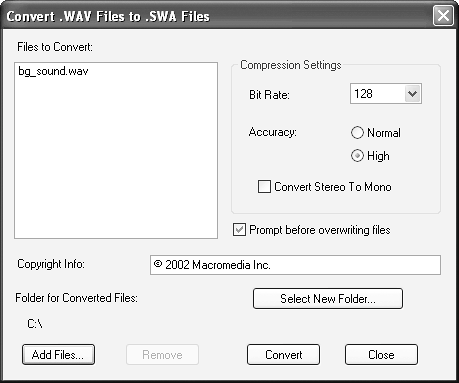
By adding multiple files to the converter you can batch process many WAV files into SWA files at once. You can also change the interpolation accuracy between Normal and High, although I recommend using High for everything. It's a little slower to process, but the resulting files are of higher quality, at the same compressed size.
| 2. | Click the Add Files button and add the bg_sound.wav file from the Lesson14\media folder on the CD.
| 3. | Under Compression Settings set the Bit Rate to 128, make sure High is checked, and Convert Stereo To Mono is unchecked. Click the Select New Folder button to select an output folder for the SWA file; choose the root of your C: drive if you're on Windows, or the root level of Macintosh HD if you're on a Mac.
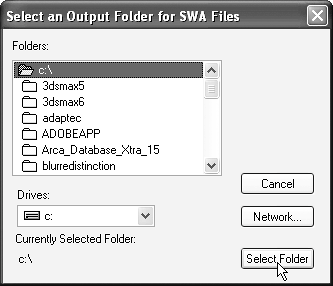
When converting multiple files in batch mode you'll most likely want to choose a temporary folder to process the files into. For this test, the root of your hard drive will work just fine.
| 4. | Click the Convert button.

A dialog will appear displaying a progress bar for each file being processed. When finished, the dialog will disappear, letting you know the job is complete.
| 5. | Click the Close button. Switch to your desktop and open My Computer. Navigate to the root of your hard drive and find bg_sound.swa. Edit the name of the file and change the extension to MP3 so that the file's name is now bg_sound.mp3.
The file can now be played by any player capable of playing MP3 files, such as Windows Media Player, WinAmp, and many others.
| 6. | If you have an MP3 player, double-click the file to play it. Close the player when you are finished listening.
As you can see, Director's SWA format is really just MP3, and you can use the converter to compress WAV files to either SWA or MP3.
| 7. | Delete the MP3 file from your hard drive and return to Director.
You should now have a good idea of how to compress audio for your movies. Let's now take a look at the various publishing templates available within the HTML tab of the Publish Settings dialog.
|
Using Publish Templates Publish templates are there to make your life easier. They provide a means of creating an HTML page with the proper coding already in place to embed your Shockwave movie. With the templates you can provide your users with a progress bar as the main movie is downloaded, make your movie fill the entire browser window, even have a small break-out style game appear for your users to play while the main movie downloads in the background. Of course you can do all these things on your own, but using the templates will save you a lot of time. They are especially useful for quick mock-ups and such. Let's look at a couple of the more useful templates available so you will understand how to use them. 1. | Select File > Publish Settings and choose the HTML tab.
Within the HTML tab you will find the Template drop-down menu where you can choose the different templates available. By default, the template is set to Shockwave Default, which simply provides the necessary OBJECT and EMBED tags within the HTML code to display your movie.
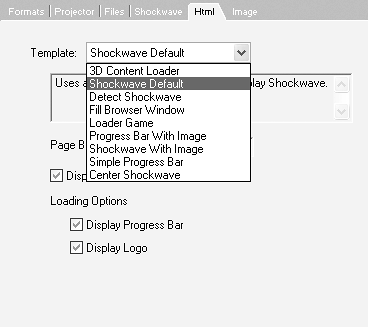
| 2. | Choose the Fill Browser Window option and make sure the Dimensions option in the Object/Embed Rectangle is set to Percentage of Browser Window.
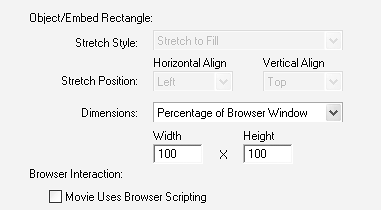
Leave the width and height settings at 100 percent so the movie will fill the entire browser window.
| 3. | Click the Shockwave tab and turn on the Allow movie scaling option.
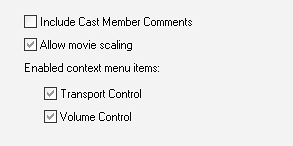
The Allow movie scaling option lets the browser stretch and scale the movie.
| 4. | Click the Publish button.
After a brief moment your browser appears with the game in it. You can scale the browser to any size you like and the game will fill the browser window, as shown here:
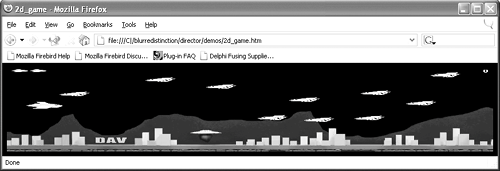 You won't be surprised to notice that the bigger you scale the game, the slower it runs. By scaling the movie larger than its published size you increase the load on your processor proportionately. You won't be surprised to notice that the bigger you scale the game, the slower it runs. By scaling the movie larger than its published size you increase the load on your processor proportionately.
| 5. | Close your browser, return to the Publish Settings dialog and select the HTML tab. Choose the Loader Game template, then publish the movie by clicking the Publish button.
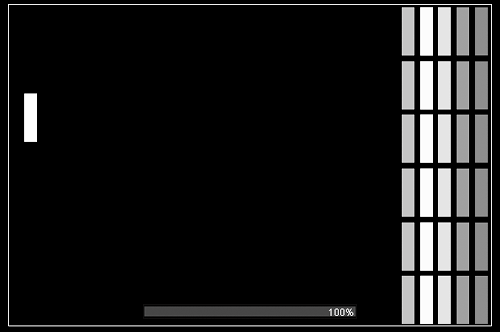
Although you will probably only see the loader game very briefly, you should still catch a glimpse of it. This is because it takes very little time for the pre-loader movie to load the game off of your local hard drive. Had you uploaded the files to a Web server, you'd get to play the game for a bit while the movie loaded.
Let's look at one more example with the publish templates before moving on.
| 6. | Close your browser and, in the Publish Settings dialog choose the Progress Bar With Image template. Press the Publish button.
Again, the game will appear, with no more than a glimpse of the preloaded movie containing the progress bar. However, even if you did briefly see the progress bar, you didn't see any image. Although Director leaves a spot in the HTML code for you to enter an image name, you need to enter the name manually.
To enter a name for the image, you will need to edit the HTML page. You can do that with an HTML editor, such as Dreamweaver, or you can use any text editor you have available.
The following portion of code is from the OBJECT tag of the HTML page we just created:
<param name=src value="progbar_w_bkgnd_image.dcr"> <param name=sw1 value="2d_game.dcr"> <param name=sw2 value="">
and, from the EMBED tag:
<EMBED src="/books/2/874/1/html/2/progbar_w_bkgnd_image.dcr" sw1="2d_game.dcr" sw2=""
Because some browsers use the OBJECT tag and some the EMBED, both are present in the HTML created by Director. This ensures that your movie will be seen by the widest possible audience.
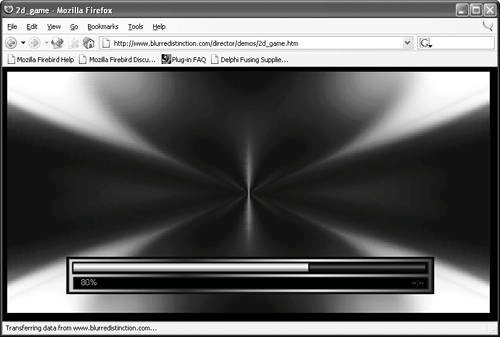
Notice the src parameter is set to "progbar_w_bkgnd_image.dcr". This is the main file to be loaded by the HTML page. This file is placed in the same folder as your published movie. When this pre-loader movie runs it gets the values assigned to the sw1 and sw2 parameters from the HTML code, and uses those values when it plays. The value assigned to sw1 is the movie that should be loaded, and played, by the pre-loader. The value assigned to sw2, which is blank ("") by default, is the name of the image file that should be displayed while the main movie is loaded. By entering a name into the sw2 parameter you will see an image displayed behind the progress bar:
 You should experiment using the other templates as much as you want. Note that you can open the pre-loader movies to see how they were created, and even create your own custom one. You can find the pre-loader movies in the following location, within Director's main application folder: You should experiment using the other templates as much as you want. Note that you can open the pre-loader movies to see how they were created, and even create your own custom one. You can find the pre-loader movies in the following location, within Director's main application folder:
Director MX 2004 \ Configuration \ Publish Templates \ Loader Movies
Now that you have a good understanding of publishing your movies to Shockwave, let's look at using Xtras with those movies.
| 7. | Click the Defaults button within the HTML tab and then click OK to close the Publish Settings dialog. Save the movie before continuing.
Clicking the Defaults button will return the template to Shockwave Default.
|
|


 You won't be surprised to notice that the bigger you scale the game, the slower it runs. By scaling the movie larger than its published size you increase the load on your processor proportionately.
 You should experiment using the other templates as much as you want. Note that you can open the pre-loader movies to see how they were created, and even create your own custom one. You can find the pre-loader movies in the following location, within Director's main application folder: