Appendix A Using Java on the AS/400
Appendix A Using Java on the AS 400
Overview
This appendix is a brief tour of getting, installing, and using Java on OS/400. You might start your Java journey on your personal computer, or by adding a GUI to your existing OS/400 applications. However, OS/400 is committed to being a first-class Java platform based on its own merits, so you can run Java applications on OS/400 itself. Because Java is so portable, there are not too many special instructions for doing this, but the following additional information will give you a leg up.
Using Java on OS/400 involves at least a passing knowledge of the following:
- AS/400 Developer Kit for Java (the JDK)
- Integrated File System (IFS), where Java files live and run on the AS/400
- QShell Interpreter, the UNIX shell required for working with the JDK commands
- AS/400 Toolbox for Java, a set of pure Java classes for accessing OS/400 resources from OS/400 Java or client Java
- VisualAge for Java, or its follow-on; IBM's premier development product for Java
Each of these is covered in the following sections, except for VisualAge for Java, which at the time of this writing was on the brink of a major new generation. Further, if you decide to use Java servlets and JavaServer Pages, you need to read up on WebSphere Application Server and the IBM HTTP Server. As of V4R3, everything you need to run servlets and JSPs is built into OS/400.
You might also wish to explore Enterprise JavaBeans, available with the Advanced edition of WebSphere Application Server. This is not part of the base operating system, but an optional product. Beyond what has been covered in the rest of this book, we leave the topic of servlets, JSPs and Enterprise JavaBeans for your own research. You can start at www.ibm.com/iseries/websphere.
Installing the Components
Table A.1 shows the information for installing the various pieces, as of Version 4. Note that versions after V4 will have a different number than 5769, such as 5722 for Version 5.
|
Product |
Product Number |
Notes |
|---|---|---|
|
AS/400 Developer Kit for Java |
5769JV1 |
You can choose from multiple JDKs to install and use. Each is a different option. |
|
Qshell Interpreter |
5769SS1, Option 30 |
|
|
AS/400 Toolbox for Java |
5769JC1 |
To find out if these products are installed, use GO LICPGM, and select F11 after finding the products in the list. They will show *COMPATIBLE in the Installed Status field. If they are not in this status, use option 1 to install them. If they are on the list, use RSTLICPGM to install them from the OS/400 CD-ROM.
The AS 400 Developer KIT for Java
As mentioned in Chapter 1, the JDK was originally written for Sun Solaris and Microsoft Windows operating systems by Sun Microsystems. IBM licenses the JDK, and the IBM Hursley, England laboratory ports it to all operating systems. The OS/400 team in Rochester, Minnesota then pushes it deep into the operating system to get great performance. Because the JDK is standard, and by the terms of the licensing agreement, IBM and others can only add to it, not take away from it, you will find that all the standard JDK commands are available on OS/400. These include java, javac, javap, javadoc, and jar, among others.
Of course, these are not the standard OS/400-style command names that you are used to. Furthermore, they have to work on Java source files and class files that are ASCII-based, not EBCDIC-based as your RPG source and programs are. This is because the goal is to be able to run any Java class file from anywhere without changing or even recompiling it. Enabling all this-that is, making OS/400 Java support as industry-standard as possible-requires that the JDK be based not in the library/file native file system, but rather on the Integrated File System.
Using the Integrated File System and QShell Interpreter
RPG development uses the native OS/400 file system, which involves libraries inside QSYS, files and other objects inside libraries, and members inside files. Files, and hence their members, are either data files (physical file or logical file) or source files (Source Physical Files). There are other file types, too, like display files and printer files. The underlying collating sequence is EBCDIC, which differs from the ASCII sequence used on most other operating systems (except for OS/390, which is also EBCDIC-based).
The Integrated File System (IFS) is an alternative to the native file system. It is actually multiple file systems in one, but the one you are most interested in is the "root." This is very similar to the file system on Windows. It has directories that can contain other directories and stream files, much like Windows. Stream files are simply flat files that contain a sequence of bytes, with no record partitioning and no relational database constructs-just like files on Windows.
The highest-level directory, the root, is designated by a single forward slash: /. Unlike Windows, the IFS uses a forward slash for path names, not a backward slash. So, if you have a file named  HelloWorld.class in directory myJava which is in directory Phil, the fully qualified path name is /Phil/myJava/HelloWorld.class. Note that directory and file names are case-tolerant in the IFS, as with RPG IV. However, all names in Java commands are case-sensitive, as always. If a given path name does not start with a forward slash, then it is "relative" to the current directory.
Prior to Java coming along in V4R2, you could only work with the IFS through OS/400 CL commands. For example, to create a directory, you would use the CRTDIR command, like this:
CRTDIR DIR('/Phil')
CRTDIR DIR('/Phil/myJava')
You have to create the parent directory before creating the child directory. Each job has a "current directory" that can be determined by the CL command DSPCURDIR, and changed by CHGCURDIR or CHDDIR. To list files and work with them in a given directory, you would use the command WRKLNK. To see all the IFS CL commands, you would type GO FILESYS.
These CL commands are still of value. For example, the first thing you need to do is create a directory for your Java files. First, check to see if the administrator has created one for you in homeUserID, where UserID is your user ID. Use WRKLNK to look for this directory. If one doesn't exist, use CRTDIR to create it. Then, to always make it your default current directory, use CHGPRF (Change Profile) and the HOMEDIR parameter, like this:
CHGPRF HOMEDIR('/Phil/myJava')
Of course, you might need to get the system operator to do this for you if your profile lacks the necessary authority.
Once you have a directory, and have made it your current directory, you can use the new (as of V4R2) QShell Interpreter. To start it, use the CL command STRQSH or QSHELL. This puts you in a command shell where you can enter standard UNIX commands, instead of OS/400 CL-style commands. This will be more comfortable if you are familiar with UNIX. It is also where you enter the familiar JDK commands, as you'll soon see.
Table A.2 lists some of the common commands you might do on Windows, and their equivalent in IFS-both the CL version and the QShell version. This little table should be enough to get you going with IFS. More detailed information is available online at the iSeries information center.
|
Command |
Windows |
CL |
QShell |
|---|---|---|---|
|
Show current directory name |
cd (no parameters) |
DSPCURDIR |
pwd ("present working directory") |
|
Change current directory name |
cd path or path |
CHGCURDIR |
cd path or /path |
|
Make a directory |
md or mkdir |
CRTDIR |
mkdir |
|
Delete a directory |
rd or rmdir |
RMVDIR |
rmdir |
|
Rename a directory |
rename |
||
|
Display or change directory owner |
Windows explorer |
chown |
|
|
Display or change directory authority |
attrib |
DSPAUT, CHGAUT |
chgrp, chmod |
|
List files in directory |
dir |
WRKLNK |
ls |
|
Display file contents |
type |
pr, cat, tail, head |
|
|
Copy a file |
copy |
COPY |
cp |
|
Move a file |
move |
MOVE |
mv |
|
Delete a file |
erase |
WRKLNK |
rm |
|
Rename a file |
rename |
RENAME |
mv |
|
Display or change file owner |
Windows explorer |
WRKOBJOWN |
chown |
|
Display or change file authority |
attrib |
DSPAUT, CHGAUT |
chgrp, chmod |
|
Create link |
ADDLNK |
ln |
|
|
Define an alias (shortcut) command |
alias |
||
|
Exit shell or prompt |
exit |
F3 |
|
|
Run CL command |
system |
||
|
Search files for a string |
grep |
||
|
Set environment variable |
set |
WRKENVVAR |
export |
|
Display commands previously entered |
history |
||
|
Compress/uncompress files |
WINZIP or jar |
tar/untar or jar |
|
|
Get online help for a command |
help |
man |
Working with Java on OS 400
Now that some of the basics are out of the way, it's time to focus on working with Java. To run a Java class on OS/400, you enter the QShell Interpreter, ensure you are in the directory containing the Java class file, and then run it using the java command. It's that simple. All the JDK commands are there and are identical to their Windows counterparts-well, actually their UNIX counterparts, but other than remembering to use a forward slash instead of a backslash for path names, it is the same.
So, the first order of business is to get a Java class to run. You have two choices for doing that: either create the .class file using javac on Windows (say) and copy it to the OS/400 IFS, or copy the .java source file from Windows (say) and use javac on OS/400 to create it. Note that in either case, development of Java is done on a workstation running Windows (say) and Java development tools like VisualAge for Java. You don't use the old workhorses PDM and SEU to create Java applications because these tools work on EBCDIC-based native file system objects, and Java is a new breed of ASCII-based IFS objects. If you really are addicted to minimalist green-screen tools, you could use SEU to edit a source member containing Java, and then use CPYTOSTMF (Copy To Stream File) to copy that member to an IFS file.
So, how do you get your .java or .class files from Windows to OS/400 IFS? A few options are listed in Table A.3.
|
Option |
Description |
|---|---|
|
Use ftp (File Transfer Protocol) |
If your TCP/IP configuration allows this, using ftp from the Windows command line is an easy way to copy any file to OS/400. |
|
Use a mapped drive |
Using Windows Explorer, map a network drive to your system and simply use the Windows copy command to copy any file to OS/400 via the mapped drive. |
|
Use CODE/400 |
If you use CODE/400 anyway for your RPG, CL, and DDS programming (and you should!), it has support under File for saving source to an IFS file and support under Actions for exporting any file to the IFS. |
|
Use VisualAge for Java |
The Enterprise Toolkit for AS/400 has easy-to-use support for exporting your Java source or class files to OS/400 IFS, directly from the IDE. You only specify the target location once, and it remembers it every time. This is the easiest option! |
Pick whatever you like, or whatever is handy. The only one that you might need help with is ftp, so here is a sample script from a Windows command-prompt window as an example:
c:PhilmyJava>ftp MYSYSTEM
User: coulthar
Password:
230 COULTHAR logged on.
ftp> cd /Phil/myJava
250 "/Phil/myJava" is current directory.
ftp> binary
200 Representation type is binary IMAGE.
ftp> put HelloWorld.class
467 bytes sent in 0.02 seconds
ftp> ascii 200 Representation type is ASCII
ftp> put HelloWorld.java
206 bytes sent in 0.03 seconds
ftp> quit
The first cd into your IFS directory is important. When using ftp to the AS/400, it decides whether you are working with the IFS or the native file system based on the syntax of the first place you "cd" into. If the location starts with a forward slash, IFS is assumed; otherwise, QSYS is assumed. Also, it is important to switch into binary mode for class files and ASCII mode for source files. By the way, for multiple files, use the mput (multiple put) command, instead of put. There are also get and mget commands for going the other way.
Setting your classpath in QShell
Your Java files are now in the IFS and you know how to find your way to them and run them, using QShell. You're on our way. The last thing you really need to know is how to set your CLASSPATH so that Java can find your Java classes. By default, it only looks in the current directory, which is not very useful, since you'll probably have classes spread over multiple directories.
The first important note about the CLASSPATH environment variable on OS/400 is that it is based on UNIX, so it uses a colon to separate the entries, not a semicolon as in Windows, for example:
/Phil/myJava:/George/myJava
To set your CLASSPATH dynamically-that is, each time you run Java-use the -classpath parameter to the java command, like this:
java -classpath /Phil/myJava:/George/myJava HelloWorld
This is nice, but a pain to remember each time. To make it more permanent, you can set it once for your QShell session using the export command, much like the set command on Windows, for example:
export -s CLASSPATH=.:/Phil/myJava:/George/myJava
If you type this in your QShell session, that classpath remains in effect for the duration of the session. To see all current environment-variable settings, type export with no parameters. The -s option tells QShell to make this not only a variable for use by QShell scripts, but also for use by applications like the Java interpreter.
This, then, is a little better, but only marginally. To get a little more permanence, create a file named .profile ("dot profile") in your directory in the IFS and put the export command in it:
export -s CLASSPATH=.:/Phil/myJava:/George/myJava
Use the same options discussed for .java files to create your .profile file, and copy it to the appropriate IFS directory. This is an example where SEU and CPYTOSTMF might be just fine. The "dot" (.) included in the above example represents your current directory. We recommend always putting this on your CLASSPATH, even in Windows. For this .pro-file to work correctly, it must be in your home directory, as specified on the HOMEDIR of your user profile. By convention, your home directory should be /home/userID, where userID is your user profile name.
You will most often use the .profile option for your own personal Java exploration. However, eventually, you or your system operator might install a Java application for general use on your system, and the time will come to set the CLASSPATH globally for all users. To this, just place that .profile file in a special directory, specifically /etc/pro-file, where it will be applied to all users on the system.
Actually, this file probably already exists, so you will want to append to it, not create it. To do this, use CPYFRMSTMF to copy into a source member for editing by SEU. Alternatively, just use CODE/400, which has support for directly editing IFS source files. When running a Java program, the CLASSPATH specified in /etc/profile/.profile is checked first for Java classes, and the CLASSPATH specified in your home directory .profile is searched if the class is still not found. Thus, these two files are cumulative, not mutually exclusive.
Using CL commands for Java and the Java Transformer
If you could only run Java classes from QShell, you might be in trouble if you wanted to mix RPG and Java in the same application. For example, how could RPG call Java if there is no CL command to invoke via the command analyzer API? Well, an alternative to the java command in QShell is the RUNJVA (Run Java) CL command, or its identical twin the JAVA CL command. These commands allow you to run a Java class directly from the OS/400 command line, a CL program, or any of the traditional ways of running CL commands. Note the Java class files still exist in the IFS. These CL commands will run the QShell java command behind the scenes.
To use them, specify the class file on the CLSF parameter, using the usual fully qualified syntax for IFS files, for example:
RUNJVA CLSF('/Phil/HelloWorld')
The only tricky part is specifying the CLASSPATH in this situation. The answer is to use the CLASSPATH parameter to specify it dynamically, similar to the -classpath option on the java QShell command. If specifying dynamically doesn't cut it, specify it in the CLASSPATH environment variable using the ADDENVVAR or CHGENVVAR commands. The syntax for the path itself is the same as discussed for QShell.
Note that the CL CLASSPATH environment variable only pertains to you, and only lives as long as your job (much like the QTEMP library). This means you have to add the ADDENVVAR command to a CL program that is run when you sign on, if you want permanence. Also note that this CLASSPATH is only searched after the CLASSPATH in the export-s classpath statement in /etc/profile/.profile, as was the case for .profile in your home directory. And by the way, that profile will be run too, since RUNJVA will invoke QShell and hence this .profile file will be run if it is in your home directory. Really, then, the .profile file in your home directory is the best option for setting up your own persistent and unique classpaths.
When you use RUNJVA, it actually does a little bit more than the java command in QShell. It actually transforms your Java class into OS/400 machine code (PowerPC instructions) the first time you run the class. This is the work of the Java Transformer. On subsequent runs, that machine code is executed, instead of the bytecode. This truly compiled Java is much faster than interpreted Java. Behind the scenes, a new object is created-a *JVAPGM (Java Program) object, which is referred to as a direct execution (DE) object. The .class file remains untouched, so it can still be copied to another operating system and run there, which means portability is not affected. So, you get the best of both worlds: the performance benefits of compiled Java and the portability of interpreted Java. Note that if you subsequently change the .class file by replacing it with a new version, the *JVAPGM is invalidated and so is re-created when you next use RUNJVA.
You can explicitly compile a single class or an entire .jar file of classes in a separate step, if you prefer, using the CRTJVAPGM command. In both commands, you can specify the optimization level, anywhere from 10 to 40. The lower number is best for debugging, while the higher number offers the most optimization.
Two other commands to use with Java Program are DLTJVAPGM and CHGJVAPGM (for example, to change the optimization). Note that DLTJVAPGM only deletes the hidden *JVAPGM object, not the original class file. Finally, there is a DSPJVAPGM command that displays attributes about Java Program, such as its optimization level.
By the way, you can use the green-screen system debugger to debug a Java application. You might want to use interpret mode versus compile mode for this, in which case you can specify INTERPRET(*YES) on the RUNJVA command. To actually debug your Java program, use the RUNJVA command and specify OPTION(*DEBUG), which puts you in a source-level debug session. For this to work, your class must have been compiled with the -g option (javac -g MyJava.java), and the source must exist in the same directory as the class file.
Another option for debugging Java running on the AS/400 is the IBM Distributed Debugger that comes with CODE/400 and VisualAge for Java. It runs on Windows while debugging your interpreted or transformed Java program on the AS/400.
One last point on the Transformer: If you use the java command in QShell, it will use the direct execution object if it exists. Otherwise, it will interpret the class. Thus, many people first explicitly transform their class files using CRTJVAPGM, and then subsequently run them in QShell using java.
AS 400 Toolbox for Java
The Java Program that the Java Transformer creates is not an ILE service program because Java is not an ILE language. You cannot bind or link a Java Program into a non-Java ILE program or service program. Thus, to "get out" of Java, and access you data, other programs, data queues, message files, and so on, you have to rely on some unique-to-OS/400 Java code written by the IBM Rochester team. These classes are called the AS/400 Toolbox for Java.
You are going to love these! They are well-designed, well-written, and come free with the system (and with CODE/400, VisualAge for Java, and Inprise J/Builder). Furthermore, because they are written entirely in Java using only industry-standard TCP/IP sockets for their communication layer, they run everywhere. By extension, so does your code that uses them. This means you can write Java code to access your DB2/400 files or your RPG programs, and run that code anywhere. Run it on the same AS/400, a different AS/400, on Windows, on Linux, on UNIX, in a Web Browser, in a network station, in a personal device. Anywhere. This is the ultimate OS/400 middleware!
The downside (there is always one, isn't there?) is that while your code will run anywhere, it will always be trying to talk to an AS/400 somewhere in the world. So, if you are interested or worried about server portability, you will have to forgo the Toolbox, or carefully isolate its usage so that your move to OS/390, for example, is easy. The one exception to this rule is the JDBC driver inside the Toolbox, as described in Chapter 13. It is the one portable set of classes in the Toolbox, as JDBC is industry standard, not unique to OS/400. To switch databases, you need only change the code to register the driver and connect to the database (assuming your SQL statements are standard).
At the time of this writing, there were more than 500 classes in this product, and there are more to come. A brief description of the functionality that these classes provide follows. Refer to the IBM redbook Accessing the AS/400 System with JAVA (SG24-2152) for a well-done and more detailed introduction to these classes. Also see the documentation for the AS/400 Toolbox for Java, available at publib.boulder.ibm.com/html/as400/infocenter.html.
Table A.4 lists the functions offered by the AS/400 Toolbox for Java, in their likely order of importance for most Java applications.
|
Function |
Description |
|---|---|
|
Data access via JDBC |
SQL access, as described in Chapter 13. |
|
Data access via record-level access |
Much like RPG's chain, setll, read, write, update, and delete statements. |
|
Command call |
Runs an OS/400 command in batch. Any messages sent by the command are returned to your Java application. |
|
Program call |
Runs any program object in batch. Parameters can be passed and updated. Any messages sent by the program are returned to Java. |
|
Data queues |
Your Java application can create, read, write, and delete data queues, both sequential and queued. It can also work with the attributes of a data queue. |
|
Data areas |
Your Java application can create, read, write, and delete data areas. It can also work with the attributes of a data area. |
|
Function |
Description |
|
User space |
Your Java application can create, read, write, and delete user spaces. It can also read and write the attributes of a user space. |
|
IFS file system |
Your Java application can access directories and files in the IFS. This is a superset (and super classes) of java.io in the JDK, tweaked specifically for local or remote IFS access. |
|
Network print |
Allows your Java application to work with spooled files, output queues, printers, printer files, writer jobs, and AFP resources. Yes, you can create reports, but it's pretty scary stuff, as you have to create SCS data streams. Reading a spool file is pretty cool, though! |
|
System values |
Your Java application can read and change system values and network attributes. |
|
Jobs |
Your Java application can retrieve lists of jobs (all, or by name, number, or user) and job log messages, and read the details about a particular job. |
|
Users and groups |
Your Java application can retrieve lists of users and groups. |
|
System status |
Your Java application can retrieve system status information. It can also access system pool information. |
|
Permissions |
Your Java application can retrieve and change OS/400 object authorities. |
|
Digital certificates |
Manages digital certificates, which are used for secure transactions over the Internet. For example, they are used by the Secure Socket Layer (SSL). |
|
ftp |
Allows you to connect, run ftp commands, and get/put files from Java. |
|
Java application call |
Allows you to remotely run Java classes on the AS/400. |
|
Service program call |
Allows you to call ILE service program procedures from Java. |
|
Security |
Support for the SSL and user authentication. |
|
HTML classes |
Classes can be used and run from a servlet or JSP, and generate common HTML tags that can be tedious to code by hand. |
|
Servlet classes |
These classes are specifically for use in servlets, for generating HTML output from the other Toolbox classes. |
|
Proxy classes |
This thin client-side proxy of the full Toolbox allows Toolbox classes to be used locally, yet actually executed remotely. |
|
System properties |
For configuring properties that affect certain Toolbox functions. |
These major functions are offered through a myriad of classes. To use these classes, numerous other helper classes are supplied that are quite useful in their own right. They are listed in Table A.5. All of these classes are in a package named com.ibm.as400.access. (Notice that the JDBC classes do not require or use these explicitly. They are used under the covers.)
|
Helper Classes |
Description |
|---|---|
|
AS/400 object |
All service classes except JDBC require one of these as input into their constructor. This class manages OS/400 logins, optionally prompting the user for ID and password (on GUI clients). |
|
AS/400 data types |
These classes help you easily translate OS/400 values to and from appropriate Java data types. |
|
AS/400 messages |
This class represents an OS/400 message returned from a program or command call. |
|
AS/400 record format information |
These classes represent DB2/400 field definitions, record formats, and actual data records. They are used when doing record-level data access, and can be used when working with program calls and data queues. |
|
AS/400 QSYS object path name |
This represents objects in the IFS. Because the QSYS file system can be accessed through the IFS, you can use IFS objects to get at your library-based objects, for example: /qsys.lib/mylibr.lib/myfile.fil The helper class QSYSObjectPathName makes it easy to convert native file system object names to IFS-style path names, which all the Toolbox classes expect. Specifically, the static method toPath takes library, object, and object type names and returns a string of the form above. |
|
Exceptions |
The Toolbox has a rich set of its own exception objects. |
|
Trace |
Using the Trace class, you can enable logging to help with problem determination. There are five levels of tracing you can enable: information, warning, error, diagnostic, and data stream. |
The AS/400 Toolbox for Java also contains a number of visual classes, which are Java Swing GUI components that use these base non-visual classes. The visual classes are found in the package com.ibm.as400.vaccess, and they are designed to allow you to easily embed them inside your own Swing GUI applications, saving you some time you would otherwise spend writing them yourself. They all leverage the concept of reusable panels, as discussed in Chapter 12. The GUI classes have to run on a client, so regardless of your OS/400 level, you can always use the latest level of the Toolbox when running Java code on a client. The only thing to beware of is that some newer functions might not apply to a back level of OS/400.
The following are the GUI functions available as of V5R1:
- Function
- Command call
- Data queues
- Error events
- IFS
- JDBC
- Record-level access
- Jobs
- Messages
- Network print
- Permissions
- Program call
- System status
- System values
- Users and groups
- Java application call
We do not describe these classes here because you will probably not be writing Java GUIs. (Instead, we believe you will probably be writing HTML UIs via servlets and JSPs.) We leave them to your own exploration.
In addition to all this, the Toolbox comes with some other functionality:
- Program Call Markup Language (PCML), an XML language that makes it is easy to code calls to *PGM objects from Java, and even procedures inside *SRVPGM objects from Java. This allows you to define the target program or procedure and its parameters via a simple tag-based language. This is interpreted and turned into the appropriate ProgramCall and ServiceProgramCall classes.
- Panel Definition Markup Language (PDML), an XML language for defining GUIs that is arguably easier to write than Swing classes, although in the end that is how it is rendered.
- GUI Builder, a tool for visually defining PDML windows and panels, generating the PDML tags for you. Also included is a conversion tool to convert Windows resource files into PDML.
Getting the AS 400 Toolbox for Java classes
To use the AS/400 Toolbox for Java, you must first get it. If you have V4R2 or later, it is on your system CD-ROM or tape. To install it, use GO LICPGM, select option 11, and install 5769 JC1 (for a Version 4 operating system). This places the files jt400.jar and jt400.zip in your IFS, in the directory /QIBM/ProdData/HTTP/Public/jt400/lib. You don't need both of these files; either one will do. We prefer the .jar file because it is smaller.
There is also a file jt400doc.zip, which contains the English JavaDoc detailed help for the Toolbox classes. (The jt400mri.zip file has the other languages). To see the JavaDoc help, download this file to your workstation and unzip it. You can use the jar tool in the JDK to unzip a file, as in jar -xvf jt400doc.zip. This gives you many HTML files, so start with the one named Index.htm in the doc_en subdirectory. If you prefer to get the very latest version of the Toolbox, go to www.ibm.com/iseries/toolbox. The Toolbox is an open-source product, meaning you can even get the source code for it! Alternatively, you can simply get the Toolbox as part of WebSphere Development Tools for iSeries, which also includes CODE/400, VisualAge for Java, VisualAge for RPG, WebSphere Studio, and WebFacing.
If you are going to use the Toolbox classes from Java code running on a client, and you don't have it as part of one of the products listed above, simply copy the jt400.jar file from the IFS to your workstation. Use any number of methods for this, such as ftp. Once on your workstation, add it to your CLASSPATH. You do not have to unzip this file.
If you are going to use the Toolbox classes for Java code running on the OS/400 itself, you will have to add the /QIBM/ProdData/HTTP/Public/ jt400.lib/jt400.jar file to your OS/400 CLASSPATH, using one of the methods described earlier in this appendix. As of V4R4, there is also a jt400access.zip file, which is a smaller version containing only the non-visual classes. You probably want to use that on OS/400. This file has already been optimized for you with the CRTJVAPGM command.
As of this writing, the Toolbox had just been transformed into an open-source product. This means that anyone can get its source and contribute to its functionality, as is the case for other popular open-source products like the Apache Web Server and the Linux operating system. It also means that in order to get the very latest version of the Toolbox, you have to register at the Toolbox Web site for the open-source version and download it. This product is known as JTOpen.
Most of the additional functionality described above, such as PCML, is not part of the base jt400.jar file. Therefore, you will need to get JTOpen to get the additional necessary .jar files needed to compile code that uses this functionality. After installing JTOpen, you will find all the .jar files in the lib subdirectory.
Finally, the Toolbox requires the QUSER user ID, so ensure its password has not expired. Also, be sure to start all the host servers (STRHOSTSVR *ALL) and the TCP/IP DDM server (STRTCPSVR SERVER(*DDM)). By the way, ensure you have the TCP/IP Connectivity Utilities for AS/400 installed (5769-TC1).
Using the AS 400 Toolbox for Java classes
The following discussion is independent of the JDBC classes, described in Chapter 13.
To write code that uses the AS/400 Toolbox, import the package com.ibm.as400.access. Your first job is to create an instance of the AS400 class. This class will manage a connection to your local or remote AS/400 and is required as a parameter into the constructor of all the other primary Toolbox classes. The AS400 class can be instantiated with no parameters, or you can specify the AS/400 host name, user ID, and/or password. If you run your Java class on the AS/400 itself, and don't specify any parameters, the object will implicitly use localhost for the system and *CURRENT for the user ID and password. When running on a client, however, the user will be prompted for any of the missing three values:
AS400 systemHome = new AS400();
AS400 systemNY = new AS400("NYC","NYCID,"NYCPWD");
For a Secure Socket Layer (SSL) connection, use the SecureAS400 subclass of AS400 instead. Once you have an AS400 or SecureAS400 object, it can be used with any of the classes. All the primary classes, like CommandCall and ProgramCall, take an AS400 object as a parameter on their constructor. It is at this time, when running on the client, that the user is prompted for any missing information. It is also at this time that the actual connection is established. You can explicitly force the connection at any time by calling the method connectService. This takes one parameter identifying the type of connection you desire, which in the end tells the Toolbox which AS/400 server subsystem to connect with. The parameter value constants are shown in Table A.6.
|
Constant |
Service |
AS/400 Subsystem |
AS/400 Job |
|---|---|---|---|
|
FILE |
Access Integrated File System |
QSERVER |
QPWFSERVSO |
|
COMMAND |
Run AS/400 commands or call AS/400 programs |
QSYSWRK |
QZRCSRVS |
|
|
Access AS/400 spool files |
QSYSWRK |
QNPSERVS |
|
DATAQUEUE |
Access AS/400 data queues or data areas |
QSYSWRK |
QZHQSSRV |
|
RECORDACCESS |
Access DB2/400 via record-level access |
QSYSWRK |
QRWRTSRVR |
It's your choice whether to have only a single AS400 object with multiple connections for different services, or a separate AS400 object for each service. When you are done with your connection, you must use the method disconnectAllServices to disconnect from OS/400. To end your application, you must use System.exit(0) to kill the daemon threads created by the Toolbox.
The following sections look briefly at the most popular Toolbox classes.
The CommandCall class
Assuming you have an AS400 object named (say) system400 already, you can use it to call one or more non-interactive commands on that AS/400. Just instantiate a CommandCall object with the AS400 object as a parameter, and then call the run method for each command to be run. This will return true if the command ran successfully. To get any AS/400 messages that resulted from the command, call the getMessageList method. It returns an array (possibly null) of AS400Message objects, which you can simply walk and call the getText method on. Listing A.1 shows an example.
Listing A.1: An AS/400 Command Call via the Toolbox
import com.ibm.as400.access.*;

public class TestCommandCall
{
 public static void main(String args[])
 {
 AS400 system400 = new AS400();
 CommandCall cmdObj = null;
 try
 {
 System.out.println("Connecting...");
 system400.connectService(AS400.COMMAND);
 System.out.println("Creating CommandCall object...");
 cmdObj = new CommandCall(system400);
 } catch (Exception exc)
 {
 System.out.println("Error connecting: " +
 exc.getMessage());
 System.exit(1);
 }
 runCmd(cmdObj, "ADDLIBLE CUSTLIB");
 runCmd(cmdObj, "ADDLIBLE CUSTLIB");
 system400.disconnectAllServices();
 System.exit(1);
 }

 public static boolean runCmd(CommandCall cmdObj,
 String cmdString)
 {
 boolean cmdOK = false;
 try
 {
 System.out.println("Calling command "+cmdString+"...");
 cmdOK = cmdObj.run(cmdString);
 System.out.println("Command returned. Result = "+cmdOK);
 } catch (Exception exc) {}
 AS400Message msgs[] = cmdObj.getMessageList();
 if (msgs != null)
 {
 for (int idx=0; idx < msgs.length; idx++)
 System.out.println("Message: " +
 msgs[idx].getText());
 }
 System.out.printIn();
 return cmdOK;
 } // end runCmd method
}
The static method runCmd is created in this example to run any given command string, given a previously instantiated CommandCall object. The main method creates the AS400 object and explicitly does the appropriate connection, then calls the runCmd method twice with the same ADDLIBLE command, so you can see what happens when the command works and when it does not.
The result of running this command from Windows is that you are prompted for your system, user ID, and password values (at the time of the connectService method call), after which you get the following:
ListingA-1>java TestCommandCall
Connecting...
Creating CommandCall object...
Calling command ADDLIBLE CUSTLIB...
Command returned. Result = true
Message: Library CUSTLIB added to library list.

Calling command ADDLIBLE CUSTLIB...
Command returned. Result = false
Message: Library CUSTLIB already exists in library list.
The ProgramCall class
It's easy to call any *PGM object on OS/400, but only if the program does not take any parameters. We'll cover this scenario first, then show how to handle parameters.
Again, first instantiate an AS400 object and optionally explicitly connect to the COMMAND service. Then, instantiate a ProgramCall object, passing it the AS400 object, and call any AS/400 program using the ProgramCall method run. Specify as parameters to this method the name of the program to run (in IFS style syntax) and an empty array of type ProgramParameter. (You will see later that, to pass parameters, you simply pass a non-empty array for the second parameter.) Again, run returns true if the call went okay, and you can retrieve program-queue messages using the getMessageList method.
Listing A.2 shows an example of calling program PRINTRPT in library CUSTLIB.
Listing A.2: Calling an AS/400 Program without Parameters
import com.ibm.as400.access.*;
public class PrintRpt
{
 protected AS400 system400 = null;
 protected ProgramCall pgmObj = null;
 protected String pgmLib, pgmName, pgmIFSName;
 protected ProgramParameter[] parms= null;
 protected boolean pgmRanOk = false;

 public PrintRpt(AS400 system400)
 {
 this.system400 = system400;
 pgmName = "PRINTRPT";
 pgmLib = "CUSTLIB";
 pgmIFSName =
 QSYSObjectPathName.toPath(pgmLib,pgmName,"PGM");
 pgmObj = new ProgramCall(system400);
 parms = setPgmParms(); // call our helper method
 }
 protected ProgramParameter[] setPgmParms()
 {
 parms = new ProgramParameter[0]; // empty array
 return parms;
 }
 public boolean callPgm()
 {
 try {
 System.out.println("Calling pgm "+pgmName+"...");
 pgmRanOk = pgmObj.run(pgmIFSName, parms);
 System.out.println("Result = " + pgmRanOk);
 } catch (Exception exc)
 System.out.println("Exc: " + exc.getMessage()); }
 {
 AS400Message msgs[] = pgmObj.getMessageList();
 if (msgs != null)
 for (int idx=0; idx < msgs.length; idx++)
 System.out.println("Message: "+msgs[idx].getText());
 System.out.println();
 return pgmRanOk;
 } // end callPgm method
}
Listing A.2 does not show its main method, which exists only for testing purposes. Here it is:
public static void main(String args[])
{
 AS400 system400 = new AS400();
 try {
 system400.connectService(AS400.COMMAND);
 } catch (Exception exc) {
 System.out.println("Error connecting: "+exc.getMessage());
 System.exit(1);
 }
 PrintRpt printRpt = new PrintRpt(system400);
 printRpt.callPgm();
 system400.disconnectAllServices();
 System.exit(1);
}
Notice how we designed this class. It has the same name as the program itself, and it contains a constructor that prepares the ProgramCall object and the parameter list (an array of ProgramParameter that has zero elements for no-parameter calls). Callers simply pass an AS400 object into the constructor. They then simply call the method callPgm, which actually calls the program, returning true or false to indicate its success. The main method shows how easy it is to use the class. Your team can simply use this class anytime they want to call this program, rather than having to write their own Toolbox code every time. It nicely encapsulates the program as a Java class.
The program called in this example does nothing. Its source is on the CD-ROM included with this book ( PrintRpt.irp), if you are interested in running the example. Use File->SaveAs in CODE/400 to save it to an AS/400 source member, then compile it with CRTBNDRPG in library CUSTLIB (which you will have to create, of course).
Running the Java program gives this result:
ListingA-2>java PrintRpt
Calling pgm PRINTRPT...
Result = true
If you have any trouble running this example or any of the following examples, be sure to use WRKACTJOB on the AS/400, prompting it to specify subsystem QSYSWRK. Look for jobs named QZRCSRVS, in status *MSGW. Use option 7 to look at the message, and you'll probably find the job is waiting on a response to an inquiry message, indicating a library list or authority error.
When you pass parameters, you enter the world of data conversion. Basically, the difference is that the ProgramParameter array will be populated with actual ProgramParame ter objects, one for every parameter the program expects. These objects require you to specify the length of the parameter in bytes, and the actual data for input parameters in the form of a byte array. The tricky part, then, is determining the length and producing the byte array. After you call the program, the next trick is to retrieve the updated parameter values as byte arrays and then convert those arrays to actual Java objects.
The reason the data is passed back and forth as byte arrays is that all data sent across a network must be send as a byte stream, as that is how computers communicate with each other. You need help to determine the byte length given the data type and digit length of a parameter, and you need help to convert the data to a byte stream and back again (and from Unicode to EBCDIC, for text). As it turns out, the Toolbox supplies all this help, in the form of a set of helper classes, one per AS/400 data type.
A Java class named CUSTBAL, which calls an RPG program, will illustrate all this. This program takes a 10-digit (four-byte), unsigned integer value representing a customer ID, and a 7.2 packed decimal parameter that will be updated to hold this customer's current balance. The first parameter is input-only, while the second parameter is output-only. Here is the simple RPG program, just for testing purposes:
H DFTACTGRP(*NO) ACTGRP('QILE')
D*--------------------------------------
D* Prototype for main entry
D*--------------------------------------
D CUSTBAL PR EXTPGM('CUSTBAL')
D Id 10U 0
D Balance 7P 2
D*--------------------------------------
D* Actual main entry
D*--------------------------------------
D CUSTBAL PI
D Id 10U 0
D Balance 7P 2
C EVAL Balance = 76543.21
C EVAL *INLR = *ON
As you can see, RPG IV prototyping defines the parameters, and the return value is hard-coded, but this is enough to test calling an RPG program with parameters from Java. You are welcome to create and populate a database, and enhance this example to use a CHAIN operation to get the requested record.
The Java class that calls this program will need to have two elements in its ProgramParameter array. To create a ProgramParameter object, you need to pass to its constructor the length for that parameter, in bytes. The helper classes from the Toolbox help with that. For the four-byte unsigned integer (10 digits equals four bytes), use the AS400UnsignedBin4 class, and for the packed decimal, use the AS400PackedDecimal class. The former is instantiated with no parameters, while the latter requires you to specify the total length and decimal digits (seven and two in this example).
Here are two instance variables for this:
protected AS400UnsignedBin4 parm1Converter = new AS400UnsignedBin4();
protected AS400PackedDecimal parm2Converter = new AS400PackedDecimal(7,2);
All the data-type helper classes contain a method named getByteLength that returns the number of bytes a parameter of this type will require in the resulting byte stream. This makes it easy to create the ProgramParameter array entries, as you can see here:
protected ProgramParameter[] setPgmParms()
{
 parms = new ProgramParameter[2];
 parms[0] = new ProgramParameter(parm1Converter.getByteLength());
 parms[1] = new ProgramParameter(parm2Converter.getByteLength());
 return parms;
}
The next requirement is to actually set the data for input parameters. The data-type helper objects help here, as well. In the example, only the first parameter (customer ID) requires input, as the other is output-only.
To set data, use the setInputData method of the ProgramParameter object. However, this takes only a byte array as input, so use the AS400UnsignedBin4 helper object parm2Converter to convert the data into a byte array. All these helper classes support a toBytes method, which takes a Java object as input and gives back a byte array version of that object. The type of that Java object input is different for each of the helper classes.
For AS400UnsignedBin4, it requires a Long object. This might surprise you, since long integers are eight bytes in Java, but this is because unsigned four-byte numbers won't fit in signed four-byte fields, so the next size up is required.
To allow callers of the Java class to set the customer ID, you'll need to supply a method that takes an int value, converts it to a Long object, and finally uses the toBytes method of the helper object to turn that into a byte array. That byte array is subsequently passed as input into the setInputData method on the ProgramParameter array entry for the first parameter. Here is the method:
public void setCustId(int custID)
{
 custIdObj = new Long(custID);
 try {
 parms[0].setInputData(parm1Converter.toBytes(custIdObj));
 } catch (Exception exc) {}
}
The setInputData method can throw exceptions, so you have to use a try/catch block.
Now you are ready to call the program, with a parms array. You can do this by simply using the same callPgm method from Listing A.2. After callers call the program, they will want to retrieve the customer balance, which is now sitting in the second ProgramParameter array element. To get this value out, you only have a getOutputData method, which gives the result in a byte array-that's not very useful!
What you want instead is a BigDecimal object, Java's equivalent to RPG's packed decimal. Again, use a helper object, this time the AS400PackedDecimal object named parm2Converter. You simply use its toObject method, which converts a byte array into (in this case) a 7.2 BigDecimal object. Once again, a method hides the complexity from callers:
public BigDecimal getCustBalance()
{
 BigDecimal custBalance = null;
 if (pgmRanOk)
 custBalance = (BigDecimal)
 parm2Converter.toObject(parms[1].getOutputData());
 return custBalance;
}
The assumption is that callers will call this method right after callPgm, in which case you need to be sure that was successful. That's the reason for the code to check the pgmRanOk instance variable. Also, the toObject method requires you to cast the result.
Listing A.3 is the full class, named consistently with the target program. The idea is to instantiate the class, call the setXXX methods for each input parameter, call the program via the callPgm method, and then extract the results by calling the getXXX methods for each output parameter.
Listing A.3: A Java Class Encapsulating the CUSTBAL Program, which Takes Parameters
import com.ibm.as400.access.*;
import java.math.*;
public class CustBal
{
 *** SAME INSTANCE VARIABLES AS IN LISTING A.2 ***
 protected AS400UnsignedBin4 parm1Converter =
 new AS400UnsignedBin4();
 protected AS400PackedDecimal parm2Converter =
 new AS400PackedDecimal(7,2);

 public CustBal(AS400 system400)
 {
 this.system400 = system400;
 pgmName = "CUSTBAL";
 pgmLib = "CUSTLIB";
 pgmIFSName =
 QSYSObjectPathName.toPath(pgmLib,pgmName,"PGM");
 pgmObj = new ProgramCall(system400);
 parms = setPgmParms(); // call our helper method
 {
 protected ProgramParameter[] setPgmParms()
 }
 parms = new ProgramParameter[2];
 parms[0] = new ProgramParameter(parm1Converter.getByteLength());
 parms[1] = new ProgramParameter(parm2Converter.getByteLength());
 return parms;
 }
 public void setCustId(int custID)

 {
 Long custIdObj = new Long(custID);
 try {
 parms[0].setInputData(parm1Converter.toBytes(custIdObj));
 } catch (Exception exc) {}
 }
 public BigDecimal getCustBalance()

 {

 {
 BigDecimal custBalance = null;
 if (pgmRanOk)
 custBalance = (BigDecimal)
 parm2Converter.toObject(parms[1].getOutputData());
 return custBalance;
 }
 public boolean callPgm()
 {
 *** SAME AS LISTING A.2 ***
 }


}
As usual, a main method is supplied to test this:
public static void main(String args[])
{
 AS400 system400 = new AS400(); try
 {
 system400.connectService(AS400.COMMAND);
 } catch (Exception exc)
 {
 System.out.println("Error connecting: " + exc.getMessage());
 System.exit(1);
 }
 CustBal custBal = new CustBal(system400);
 custBal.setCustId(123456);
 custBal.callPgm();
 BigDecimal balance = custBal.getCustBalance();
 System.out.println("Customer Balance: " + balance);
 system400.disconnectAllServices();
 System.exit(1);
}
When you run the class, you get the following:
ListingA-3>java CustBal
Calling pgm CUSTBAL...
Result = true
Customer balance: 76543.21
It worked!
Did you notice a lot of redundant code between the first program-call class in Listing A.2 and the second in Listing A.3? As you write more of these, you'll get more redundancy. What is the answer to redundancy in Java? Inheritance! We recommend you create an abstract base class that all your program-call classes extend. It can supply all the common instance variables, the common constructor code, and even the common callPgm method. Your unique child classes per program will override the setPgmParms method and add the appropriate setXXX and getXXX method for the input and output parameters. Also, each child class would supply its own main method for testing. This isn't shown here, but you can see it on the CD-ROM in the UsingCommonParent subdirectory of the ListingA-3 directory. The parent class is named AS400Program.
Also included in the parent class is a method named addLibraryListEntry that takes a library name as input and adds it to the library list, using the CommandCall class. Most programs you call require the library list to be set up properly. You might want to supply a similar method for doing file overrides. Each child class can call these inherited methods in their constructors. You might also want to supply a default constructor so the class can be used as a bean, for example in the Visual Composition Editor of VisualAge for Java. To support a default constructor, put the code currently in the constructor into its own init method that takes an AS400 object as a parameter. Callers will then have to be instructed to call the init method immediately after instantiating the object.
By the way, the other data-type helper classes (besides AS400UnsignedBin4 and AS400PackedDecimal) are listed in Table A.7.
|
Toolbox Class |
OS/400 Data Type |
Java Data Type |
|---|---|---|
|
AS400Bin2 |
Signed two-byte numeric |
short |
|
AS400Bin4 |
Signed four-byte numeric |
int |
|
AS400ByteArray |
Hexadecimal, or any type |
byte[] |
|
AS400Float4 |
Signed four-byte floating-point |
float |
|
AS400Float8 |
Signed eight-byte floating-point |
double |
|
AS400PackedDecimal |
Packed-decimal numeric |
BigDecimal in java.math |
|
AS400UnsignedBin2 |
Unsigned two-byte numeric |
short |
|
AS400UnsignedBin4 |
Unsigned four-byte numeric |
long |
|
AS400ZonedDecimal |
Zoned-decimal numeric |
BigDecimal in java.math |
|
AS400Text |
Character |
String (Unicode) |
|
AS400Array |
Array |
An array of other data types |
|
AS400Structure |
Structure |
A structure of other data types |
PCML for easy calling of programs and service programs
As you have seen, manually coding to the ProgramCall class is tedious. The Toolbox designers have recognized this and added an option that makes it significantly easier. They have invented an XML-based language named PCML, or Program Call Markup Language. It is a simple, tag-based language that can be typed into a source file, where tags are used to define the program to call and the parameter attributes for that call. Having typed this in, you can then simply use the ProgramCallDocument class in the Toolbox to read and parse that PCML file and automatically convert it into the necessary ProgramCall and related objects. You can do this for every call, or do it once and serialize the results for better performance.
Let's look again at the example program CUSTBAL in library CUSTLIB, which takes one input parameter and one output parameter. The input parameter is a 10-digit, unsigned integer value holding the customer ID. The output parameter will be updated to hold the packed-decimal 7.2 customer balance value. Listing A.4 shows what the PCML file CustBal.pcml will look like to describe this program call.
Listing A.4: A PCML File CustBal.pcml for Calling an AS/400 Program
PCML source for calling CUSTLIB/CUSTBAL ->
It is reasonably straightforward. The file starts and ends with the pcml tag, and each program-call description starts and ends with the program tag (you can describe multiple program calls per file). Comments are bracketed between and ->. On the beginning program tag, you identify the name of the program you wish to call, via the name attribute. Unless the program is in the QSYS library, you must also identify the program via a fully qualified IFS-style name on the path attribute.
Between the beginning and ending program tags, you describe the parameters by use of the data tag. One data tag is required per parameter. These tags take name (which will become the ProgramParameter object name), type, length, precision, and usage attributes. The length attribute is the number of bytes for the int data type, and must be two or four. By default, it is assumed to be signed unless you specify a precision of 16 or 32.
For the packed data type, length is the total number of digits, and precision is the number of decimal places. The precision attribute identifies the number of decimal places. The usage attribute is relative to the called program, not the calling program, so if the program updates a parameter, flag that parameter as usage="output". If it only reads the parameter, flag it as usage="input". If it both reads and updates the parameter (or you are not sure), flag it as usage="inputoutput". Input-capable parameters should be supplied a value prior to the call.
Finally, the type attribute indicates the data type of this parameter. The valid types for non-structure parameters are char, int, packed, zoned, float, and byte. There is also an init attribute for initializing parameter values, and a ccsid attribute for identifying the Coded Character Set ID of this character parameter, and a few other rarely used attributes: maxvrm, minvrm, offset, offsetfrom, outputsize, and passby. The JavaDoc help that comes with the Toolbox describes all these parameters.
This example uses the short form to end the data tag, by just putting an ending front-slash character inside the ending greater-than bracket, versus the formal ending tag. This is legal XML syntax whenever a tag has only attributes and no text between the beginning and ending tags.
The Java code to call the program is now much simpler. The usual AS400 object is still necessary, but now you just instantiate the ProgramCallDocument class, passing the AS400 object and the name of the PCML source file without the .pcml extension:
AS400 system400 = new AS400();
ProgramCallDocument pcmlDoc =
 new ProgramCallDocument(system400, "CUSTBAL");
This instantiation finds the PCML source file, parses it, and converts it internally into all the Toolbox objects you saw earlier. Once instantiated, you are ready to prepare and actually call the program. Prior to the call, you must set the input value for each of the input or inputoutput parameters, using the setValue method of the ProgramCallDocument class. Identify a parameter via its tag name attribute, dot-qualified with the tag's name attribute, and pass the actual value for the parameter in the second parameter. Use callProgram to call the program (identifying the program via its program tag name attribute), and finally use getValue to get the value of each of the output parameters (identifying the parameter via its tag name attribute, dot-qualified with the tag's name attribute):
pcmlDoc.setValue("CUSTBAL.custId", new Long(123456) );
boolean pgmRanOK = pcml.callProgram("CUSTBAL");
// Retrieve list of AS/400 messages
AS400Message[] msgs = pcmlDoc.getMessageList("CUSTBAL");
for (int m = 0; m < msgs.length; m++)
 {
 String msgId = msgs[m].getID();
 String msgText = msgs[m].getText();
 System.out.println(" " + msgId + " - " + msgText);
 }
if (pgmRanOK)
 BigDecimal value =
 (BigDecimal)pcml.getValue("CUSTBAL.custBal");
In the ListingA-4 directory on the CD-ROM, you will find an updated version of the CustBal.java class from Listing A.3, which uses PCML instead of ProgramCall. You will also find in the UsingCommonParent sub-directory from there an updated version of the common parent class, renamed to AS400PCMLProgram, and redesigned to use PCML instead of ProgramCall.
This is much simpler than manually writing the tedious code to call ProgramCall directly. This shows how to call a *PGM object with simple non-structure, non-repeating parameters.
This is the simplest scenario, but PCML can also be used to call ILE procedures within *SRVPGM objects versus manually coding to the ServiceProgramCall class directly. To do this, you still use the tag and specify the name of the *SRVPGM on the name="xxx" attribute. However, to identify the procedure within the service program that is to be called, you use the entrypoint="yyy" attribute. The entrypoint attribute is the only difference between calling a program versus an ILE procedure (in any language).
Declaring structures in PCML
In addition to the tag, a tag is required if you are passing structure parameters instead of simple scalar fields. The idea is to name and define the structure first, and then simply refer to this structure definition in the tag. This is done by specifying a type attribute value of "struct" for that tag, and identifying the name of the structure on the struct attribute of the tag. By allowing externally described structures like this, you can easily reuse them in multiple parameters, program calls, and service program calls.
The tag goes at the same nesting level as the tags. It has a required name attribute for giving the structure definition an arbitrary name. Within the beginning and ending tags, you use tags to define the subfields of the structure, exactly as you do for defining non-structure parameters on the tag.
Imagine, in the previous example, you decided to place both the customer ID and the customer balance parameters into a single structure, and use that structure as a parameter. Here is an example of the PCML tag to define that structure:
A tag is simply defined with an arbitrary name attribute value, and the tags previously specified within the tag are placed into it. To update the tag, you now change its tags to have only a single tag identifying the structure parameter. To identify a parameter whose type is a structure, simply set the type attribute to "struct" and name the structure on the struct attribute:
  type="struct" struct="custInfo"
 usage="inputoutput"/>
Notice the usage is set to "inputoutput", since the structure is both read and updated. Of course, it is possible for a single tag to have both structure and non-structure parameters.
When writing the Java code to process a program call or procedure call with a structure parameter, everything is the same except the code to set and get the subfield values. All you have to do is further qualify the subfield name with the name of the structure parameter, as shown here:
pcmlDoc.setValue("CUSTBAL.customerInformation.custId", new Long(123456) );
boolean pgmRanOK = pcml.callProgram("CUSTBAL");
// Retrieve list of AS/400 messages
AS400Message[] msgs = pcmlDoc.getMessageList("CUSTBAL");
for (int m = 0; m < msgs.length; m++)
 {
 String msgId = msgs[m].getID();
 String msgText = msgs[m].getText();
 System.out.println(" " + msgId + " - " + msgText);
 }
if (pgmRanOK)
 BigDecimal value =
 (BigDecimal)pcml.getValue("CUSTBAL.customerInformation.custBal");
Declaring arrays and multiple-occurrence structures in PCML
It's easy to declare arrays and multiple-occurrence structures in PCML. For arrays of non-structure fields, simply specify the size of the array on the count attribute of the tag. For arrays of structure fields, or multiple-occurring data structures, simply specify the number of occurrences on the count attribute of the tag of the tag (versus the tag). Sometimes, you might pass the size in as another parameter instead of hard-coding it. In that case, rather than hard-coding the array size on the count attribute, specify the name of another tag parameter on the count attribute.
To use PCML, you must import com.ibm.as400.data, and monitor for exception PcmlException for all the APIs shown here. Further, you might find that the PCML classes are not on your CLASSPATH. If so, you will have to get the data400.jar and x4j400.jar files and place them on your CLASSPATH. Remember, all the Toolbox .jar files now come as part of the Toolbox open-source product, and are also shipped as part of WebSphere Development Tools for iSeries. You can also read in the Toolbox JavaDoc documentation about how to serialize a parsed PCML file to improve performance.
The DataQueue class
If you are familiar with data queues on OS/400, you know they are an excellent mechanism for inter process-communication (IPC). They are like mailboxes that any program can put mail (messages) into and read mail out of. Readers can access messages in last-in-first-out (LIFO), first-in-first-out (FIFO), or by-key sequence. Readers and writers can communicate via the queue synchronously or asynchronously. Data queues are heavily used on OS/400, which indicate the usefulness of such a mechanism-and there is the huge success of their grown-up, many-platform cousin, IBM's Message Queue Series ("MQ Series"), which we strongly recommend you take a look at.
Data queues, via their Toolbox class, have also become a great mechanism for communicating between a Java program and an RPG program, where that Java program can be running anywhere in the world on any machine that has a JVM. For Java code running on a remote machine or client, it is a nice architecture to use a data queue to get at your data versus going directly against the database from the client. This allows you a level of indirection and the potential benefit of changing either the client code or the server code at any time, without affecting the other. For example, your server code that writes data to the data queue might be an RPG program today, but if you switch it to a Java program tomorrow, all those clients reading the queue will not know the difference. It's that encapsulation idea again-hiding details behind some kind of wall.
To use data queues from Java, use the DataQueue and KeyedDataQueue classes from the Toolbox. The former is for sequential (LIFO or FIFO) access, the latter for reading and writing data by a key. Both classes extend, and hence inherit, much of their behavior (methods) from the BaseDataQueue class.
An example will illustrate a sequential data queue. We will use a typical design pattern for data-queue usage: a client and a server are communicating using two data queues. The first is an input data queue, where the client puts in a request for some type of function. The server program monitors this data queue for a request (by reading, and waiting forever on that read). Once the request is put in by the client, the server reads it, processes it (probably by reading one or more database files), and then puts the result into the second data queue, which the client by now is waiting on. Usually, the output is one or more records of information.
Let's assume the input queue exists in library ALIB and is named INPQ. The output queue is also in MYLIB and is named OUTQ. Typically, these queue names are generated by the client and made to be unique per client, and are passed to the server program via parameters. Also typically, the client creates the queues initially.
As with CommandCall and ProgramCall, you instantiate an instance of DataQueue and pass to it an AS400 object. However, for data queues, you must also pass the name of the queue, as in /QSYS.LIB/ALIB.LIB/INPQ.DTAQ. You again use the toPath method in QSYSObjectPathName to create this IFS-style name.
Let's start with the preliminaries, creating the DataQueue objects, and from them creating the actual AS/400 *DTAQ objects:
AS400 system400 = new AS400();
String inpqName = QSYSObjectPathName.toPath("ALIB","INPQ","DTAQ");
String outqName = QSYSObjectPathName.toPath("ALIB","OUTQ","DTAQ");
DataQueue inpq = new DataQueue(system400,inpqName);
DataQueue outq = new DataQueue(system400,outqName);
inpq.create(2000); // max length
outq.create(2000); // max length
Of course, try/catch blocks are needed, which aren't shown here for simplicity.
Now it is time to communicate. Assume the RPG program running on the AS/400server has already been started, perhaps by using the CommandCall class already discussed. (You have to use the SBMJOB command, since if you call the program directly, the call won't return, as the program will be waiting on the data queue. Alternatively, you could use the ProgramCall class, but do so in a separate thread.)
Let's also assume that the client wants to tell the server to retrieve a customer information record. This requires you to put a one-character field onto the queue, the letter C, which the server program is designed to interpret as "read a customer record." You also have to put a six-digit numeric value indicating the customer ID. The program on the server will then put onto the output queue a record of information including a result code, the customer ID again, the customer name (a 30-character string), the customer phone number (a 15-character string, to be safe), and the customer account balance (a packed-decimal number in the format 7.2). This indicates a need for the record formats described in Table A.8 for input and Table A.9 for the output.
|
Queue Position |
Description |
AS400 Data Type |
Java Data Type |
|---|---|---|---|
|
1-1 |
Request type |
One character |
String |
|
2-5 |
Customer ID |
Four-byte integer |
Integer |
|
Queue Position |
Description |
AS400 Data Type |
Java Data Type |
|---|---|---|---|
|
1-2 |
Return code |
Two-byte integer |
Short |
|
3-6 |
Customer ID |
Four-byte integer |
Integer |
|
7-36 |
Customer name |
30 characters |
|
|
String |
|||
|
37-51 |
Phone number |
15 characters |
String |
To write to a DataQueue object, use the write method, which requires an entire array of bytes. You can't write individual fields, only the entire record. This means you need to use the conversion classes to convert each field to a byte array, and then concatenate all the byte arrays for all the fields together. To read from the queue, use the read method, which returns an object of a class named DataQueueEntry. To get the data out of it, use the getData method, which just gives an entire array of bytes. It is up to you to know how to partition this into fields and use the appropriate conversion classes to convert those fields to data. This is possible, but way too much work! The Toolbox will help.
To work effectively with an entire record of individual fields, you can use a combination of classes from the Toolbox. First, there are field-description classes whose objects wrap objects of the conversion classes you saw for program calls. They allow you to name each field, which will come in handy. There is one field-description class for each of the DDS data types on OS/400, and they all take an instance of the corresponding conversion class, plus a field name of your choosing, in their constructor.
Table A.10 lists all of the field-description classes. Keep in mind for the "Java Type" column of this table, the primitive types shown must be wrapped in an object of their class wrappers, such as Integer for int.
|
OS400 Field Type |
Field-Description Class |
Conversion Class |
Java Type |
|---|---|---|---|
|
FieldDescription: base class |
|||
|
Binary 4 |
BinaryFieldDescription |
AS400Bin2 |
short |
|
Binary 8 |
BinaryFieldDescription |
AS400Bin4 |
int |
|
Character |
CharacterFieldDescription |
AS400Text |
String |
|
Date |
DateFieldDescription |
AS400Text |
String |
|
DBCS graphic |
DBCSGraphicField- Description |
AS400Text |
String |
|
Float 4 |
FloatFieldDescription |
AS400Float4 |
float |
|
Float 8 |
FloatFieldDescription |
AS400Float8 |
double |
|
Hexadecimal |
HexFieldDescription |
AS400ByteArray |
byte[] |
|
Packed-decimal |
PackedDecimalFieldDescription |
AS400PackedDecimal |
BigDecimal |
|
Time |
TimeFieldDescription |
AS400Text |
String |
|
Timestamp |
TimestampFieldDescription |
AS400Text |
String |
|
Zoned-decimal |
ZonedDecimalFieldDescription |
AS400ZonedDecimal |
BigDecimal |
These field-description classes are only remotely interesting by themselves. They become very interesting, however, when you group instances of them together to define an entire record, such as the format of the record you want to put on the input queue, and the format of the record you want to read from the output queue. The Toolbox supplies a class that allows you to do just this, named, appropriately enough, the RecordFormat class. You can create a RecordFormat object and then place a field description object in it (via the addFieldDescription method) for each of the fields in the record layout.
Here is how you do this for the input and output data queues, so that you know what the format for each looks like:
RecordFormat inpqFmt = new RecordFormat();
inpqFmt.addFieldDescription(
 new CharacterFieldDescription(new
AS400Text(1,system400),"request"));
inpqFmt.addFieldDescription(
 new BinaryFieldDescription(new AS400Bin4(), "custID"));

RecordFormat outqFmt = new RecordFormat();
outqFmt.addFieldDescription(
 new BinaryFieldDescription(new AS400Bin2(),"retCode"));
outqFmt.addFieldDescription(
 new BinaryFieldDescription(new AS400Bin4(), "custID"));

outqFmt.addFieldDescription(
 new CharacterFieldDescription(new AS400Text(30,system400),"custName"));
outqFmt.addFieldDescription(
 new CharacterFieldDescription(new AS400Text(15,system400), "custPhone"));
outqFmt.addFieldDescription(
 new PackedDecimalFieldDescription(
 new AS400PackedDecimal(7,2),"custBal"));
This is just like using physical-file DDS to define the fields inside a record format. Note that the AS400Text constructor requires an AS400 object, while the other classes do not. This is for the retrieval of CCSID information, to aid in codepage mapping. Also notice the Toolbox (as of this writing) has no XXFieldDescription class for wrapping unsigned binary numbers like AS400UnsignedBin4. So, you just use the AS400Bin4 and AS400Bin2 classes, which take and return Integer and Short Java objects. This will work fine even though the host program is expecting unsigned data, as long as you don't use really big numbers that would set the sign bit on. The key thing is that the number of bytes is correct between Java and RPG.
Just as you have to compile physical-file DDS so that you can read and write records of actual data, you have to instantiate an instance of something new in the Toolbox-a Record object-to read and write actual data that conforms to the RecordFormat layout. Start by creating a Record object to hold the data you wish to write to the data queue, using the inpqFmt RecordFormat object from above:
Record inpqData = new Record(inpqFmt);
Integer custID = new Integer(123456); // ID of customer to retrieve
inpqData.setField("request", "C"); // Type of request ("C"ustomer)
inpqData.setField("custID", custID); // Set ID of customer to
retrieve
inpq.write(inpqData.getContents()); // Put data record on the queue
The record format object is used in the constructor of the Record object. The setField method is then used on the Record object to put each field's value into the record. The first parameter of setField is the field name of the field in the xxxFieldDescription constructor. Alternatively, you could specify a zero-based number representing the field position in the record format. The second parameter is the object that is the value for that field. Finally, the getContents method is used on the Record object to return a single- byte array containing all the field values, and it is placed on the data queue using the write method of the input DataQueue object.
Now you finally have data on your input queue, which should awaken the host program (not shown) to read the database and put the results into our output queue. The Java client code now needs to read the results from that output data queue. To do this, simply use the read method on the outq DataQueue object, which returns an object of type DataQueue Entry. This class is just a thin wrapper for a byte array, not very interesting by itself. What you really want is to get the data into a Record object that uses the outqFmt RecordFormat class, so that you can easily retrieve individual fields using getField from the Record class. You can do this using the getData method of the DataQueueEntry object, which gives a byte array. This byte array can then be used to create a populated Record object, by passing it into the constructor of the Record class along with the RecordFormat object:
Record outqData = new Record(outqFmt, outq.read(-1).getData());
Short outReturnCode = (Short)outqData.getField("retCode");
Integer outCustID = (Integer)outqData.getField("custID");
String outCustName = (String)outqData.getField("custName");
String outCustPhone = (String)outqData.getField("custPhone");
BigDecimal outCustBalance = (BigDecimal)outqData.getField("custBal");
The first line of code here creates the new Record object by passing the output queue RecordFormat object, created earlier, and the byte array read from the output queue. To get that byte array, read is called to get the DataQueueEntry object, and then getData is called on that to get the actual byte array. Finally, getField is called for each field in the record format, specifying the name you gave each field. Notice the result of getField is cast to the appropriate target type.
What happens if the call to read on the output queue happens before the host program has done its work and put the result on the output queue? Nothing. The program will simply wait until data is put on the queue before returning from the read call. This is because of the -1 passed for the parameter to read. Alternatively, you could pass a positive integer representing the number of seconds to wait.
While we have not shown it for simplicity, many of the methods called in this data queue example throw exceptions, and you will have to place them inside try/catch statements. A full data-queue example is available on the CD-ROM in the file CustReq.java in the ListingA-5. It uses the RPG program CUSTREQ.IRP in the same directory, which you should upload and compile into the CUSTLIB library (using CRTBNDRPG). Listing A.5 shows this RPG program.
Listing A.5: A Simple RPG Program for Processing Client Requests via a Data Queue
D* Prototype for main entry
D CUSTREQ PR EXTPGM('CUSTREQ')
D dqIn 10A
D dqOut 10A
D* Data Structure for input DQ information
D in_data DS
D in_request 1A
D in_custId 10U 0
D* Data Structure for output DQ information
D out_data DS
D out_retCode 5U 0
D out_custId 10U 0
D out_custName 30A
D out_custPhone 15A
D out_custBal 7P 2
D* Size of data-in and data-out data queues
D in_data_size S 5 0 inz(%size(in_data))
D out_data_size S 5 0 inz(%size(out_data))
D* Library containing data queues
D CUSTLIB S 10A inz('CUSTLIB')
D* How long to wait on a data queue read: -1 = forever
D WAIT_TIME S 5 0 inz(-1)
D* Actual main entry
D CUSTREQ PI
D dqIn 10A
D dqOut 10A
C DOW NOT *INLR
C call 'QRCVDTAQ'
C parm dqIn
C parm CUSTLIB
C parm in_data_size
C parm in_data
C parm WAIT_TIME
C IF in_request = 'E'
C EVAL *INLR = *ON
C ELSE
C IF in_request = 'C'
C EVAL out_retCode = 0
C EVAL out_custId = in_custId
C EVAL out_custName= 'Phil Coulthard'
C EVAL out_custPhone='555-111-2222'
C EVAL out_custBal = 76543.21
C call 'QSNDDTAQ' 98
C parm dqOut
C parm CUSTLIB
C parm out_data_size
C parm out_data
C ENDIF
C ENDIF
C ENDDO
To run the Java code that drives this RPG program, run the CustReq Java class. Here is what this class does:
- In the constructor, it prepares the parameter list (the name of the input and output queues) for calling the RPG program. It also prepares the RecordFormat objects for the input and output queues. (Note we extend AS400Program, the class we invented as a common parent for all classes that call programs on the AS/400.)
- The createDataQueues method creates the input and output data queues.
- The callPgm method spawns a thread in which the RPG program is called. The RPG program starts running, waiting and looping on the input queue.
- The requestCustomer method writes the given customer number to the input queue, together with the request code C, indicating we want customer information. It then waits indefinitely on the output queue for the result. When the RPG program has written the customer information to the output queue, the requestCustomer method reads that information and packages it up into a Customer object, a class that stores all the information about a customer. It then returns this to the caller.
- The requestExit method writes request code E to the input queue, which causes the RPG program to set on LR and exit.
- The deleteDataQueues method deletes the input and output queues.
Note that the input queue and output queue names are hard-coded, but you actually need to generate unique names per client and create unique queues per client. We suggest using the client's IP address or the user ID as the root for these generated names. To get the former, use the static method getLocalHost in class InetAddress in package java.net.
These RecordFormat and Record classes are very handy. They can also be used with the ProgramCall class. This is useful when the program you call returns a record of information. They are also used when doing direct record access to the database, as you will see next.
Record level database access
Now that you have seen the basics of the AS/400 Toolbox for Java, we will wrap up this introduction with a look at a way to directly access your DB2/400 data. This is an alterna tive to using JDBC or SQLJ, as presented in Chapter 13.
The Toolbox gives you classes for working with your DB2/400 database files directly, a record at a time, as you are used to in RPG. The classes are AS400File, which is the parent class, the KeyedFile child class for files accessed by key, and the SequentialFile child class for files accessed sequentially. The parent AS400File class offers a lot of functionality for the management of files, such as creating and deleting them, locking them, and managing commitment control on them. We don't cover this functionality here, but the Toolbox documentation does cover it, if you need it. This section just focuses on using the KeyedFile class to read and write an existing keyed file.
The steps to working with data in an existing DB2/400 file are a superset of what you have seen for calling commands and programs and accessing a data queue:
- Create an AS400 object, as usual.
- Create a KeyedFile (or SequentialFile) object, passing the AS400 object as a parameter and identifying the name of the DB2/400 file using IFS style syntax.
- Identify to the Toolbox the layout of the records in the file, by associating a RecordFormat object with the file object.
- Open the file, specifying if it is to be accessed read-only, write-only, or both; the record-blocking factor to use (ignored for read-write access); and the commitment control to use.
- Optionally, use the appropriate methods to position the cursor.
- Use the appropriate read methods to read a record (Record object).
- Use the appropriate methods to add, update, or delete records in the database.
- Close the file object.
Let's look a little closer at these steps. As you can see, the RecordFormat and Record classes play prominent roles. This is not surprising, as DB2/400 record-level access works with records of data, and those records need to be defined field by field. However, the great thing about the record-level access functionality of the Toolbox is that you do not have to define the RecordFormat by hand, unless you really want to. Instead, the Toolbox supplies another class, AS400FileRecordDescription, to create these objects for you, based on the existing database record format itself.
You have two options for creating a RecordFormat object directly from an existing database. You can do it every time, dynamically, as your program runs, or once, statically, at development time, and then reuse the generated class at runtime. In both cases, you first have to instantiate an instance of the AS400FileRecordDescription class, passing in an AS400 object and the IFS version of the file name. Again, you can get the latter using the static method toPath of the QSYSObjectPathName class, but for files, you use the four- parameter version, like this:
AS400 system400 = new AS400("MYSYSTEM");
String fileName = QSYSObjectPathName.
 toPath("MYLIB","MYFILE","MYFILE","MBR");
AS400FileRecordDescription frd = new
AS400FileRecordDescription(system400, fileName);
The third parameter to toPath is the member name of the file to access. You can specify "%FIRST%" to indicate the first member or "%LAST%" to indicate the last member. The fourth parameter is always "MBR", representing the type of object.
The dynamic retrieval of a record format is done by calling the method retrieveRecordFormat, which returns a populated RecordFormat object:
RecordFormat[] myFileFmt = frd.retrieveRecordFormat();
Notice that this method returns an array because of the possibility that the file is a multiple-record-format logical file. In most cases, you will only be interested in the first entry in this array. This is very nice, but if you want to squeeze more performance out of your application, you should do this just once and save the result in a class that extends RecordFormat. The Toolbox allows for this, by using its createRecordFormatSource method on an AS400FileRecordDescription object:
frd.createRecordFormatSource(null, null);
This creates a .java source file in the current directory, which you can subsequently compile via javac and reuse again and again. The file name will be the name of the record format in the database file (you get multiple .java files for multiple-record-format logical files), with the term Format appended. The two parameters the method takes are a target directory to place the resulting java file(s) in, and the name of the package that generates package statements in the generated files. These default to the current directory and no package, respectively, if null is passed.
To use the generated file (after compiling it), simply instantiate an instance of it. For example, if the file above contained a record format named RECORD1, you would use this output (after compiling it with javac):
RecordFormat myFileFmt = new RECORD1Format();
Once you have a RecordFormat object, call the setRecordFormat method on the KeyedFile or SequentialFile object, and then call open on that object.
Let's look at an example that reads a keyed database file on OS/400. Assume the file CUSTOMER exists already and holds customer information data keyed by customer ID. The "on the fly" method is used to create the RecordFormat object here:
AS400 system400 = new AS400("MYSYSTEM");
String fileName = QSYSObjectPathName.toPath("CLIB","CUST","CUST","MBR");
AS400FileRecordDescription frd = new
AS400FileRecordDescription(system400, fileName);
RecordFormat[] custFileFmt = frd.retrieveRecordFormat();
KeyedFile custFile = new KeyedFile(system400, fileName);
custFile.setRecordFormat(custFileFmt[0]);
custFile.open(AS400File.READ_ONLY, 100,
AS400File.COMMIT_LOCK_LEVEL_NONE);
This creates a KeyedFile object, tells the Toolbox what the record format for it is (queried dynamically from the Toolbox), and opens the file. If this is too much work, there is a no-parameter version of setRecordFormat in all XXXFile classes that will call retrieveRecordFormat for you and use the first one. This is the easiest to use if you decide to retrieve it on the fly, but we have had trouble getting it to work with our version of the Toolbox. (We get "Protocol Error Occurred.")
The file is opened using constants defined in the parent class AS400File to specify whether it is to be accessed by READ, READ_WRITE, or WRITE_ONLY, and what the commit level is. The second parameter to open specifies what the blocking factor is, which in this case is set to 100 records. The blocking factor is ignored when the file is opened READ_WRITE.
Now that the file is open, it is time to read from it. This is done by simply calling the read method on the KeyedFile object and specifying the key to use. The key is an Object array, since many files have multiple fields defined for the key. The objects put in the array are instances of Java classes that are compatible with the data type of the key fields in the database (for example, Integer, String, or BigDecimal).
Assume this file is keyed only by the customer ID field, which is a four-byte numeric field. Here is the code to read a particular customer record:
Object[] keys = new Object[1];
keys[0] = new Integer(123456);
Record custData = custFile.read(keys);
The read method returns a Record object (or null, if no record is found). Recall, then, that getting field data from a Record object is simply a matter of calling the getField method on that object. The getField method expects as input either the name of the field, which in this case is the uppercase field name from the file itself, or the zero-based field position number within the record. The following code reads each field from the retrieved record, using the latter method:
if (custData != null)
 {
 Integer outCustID = (Integer)custData.getField(0);
 String outCustName = (String)custData.getField(1);
 String outCustPhone = (String)custData.getField(2);
 BigDecimal outCustBalance = (BigDecimal)custData.getField(3);
 }
Using the field positional number is more efficient, but also less resilient to change if fields are added, removed, or repositioned in the record format. When you are done accessing the file, take care to close using the close method on the file object.
There are alternatives to the read method, which just retrieves the first record that matches the given key (or partial key). These are readAfter and readBefore, which return the first record after or before the record matching the given key. Subsequent reads use other methods, relative to the current cursor position: readNextEqual or readPreviousEqual. These do not take a key array, due to their relative nature.
You might also want to position the cursor without doing that initial read. This is possible via the methods positionCursor, positionCursorAfter, and positionCursorBefore. These all take the key array like read, readNext, and readPrevious, but they don't have the overhead of doing an actual database record retrieval. Finally, the read, readNext, readPrevious, positionCursor, positionCursorAfter, and positionCursorBefore methods all allow an optional second parameter, which is a constant from the KeyedFile class. These constants allow you to specify matching criteria for the key, versus just accepting the default, which is "equal." The self-explanatory constants are KEY_EQ, KEY_GT, KEY_GE, KEY_LT, and KEY_LE.
Suppose you have a keyed file and want to retrieve all the records in it, ordered by key. This common requirement is done by using the KeyedFile class, and the readNext method with no parameter. This returns a populated Record object as long as there is another record, and null when you are at the end of the file. You don't have to specify any key objects in this case, and the database will be read by key, by default.
Of course, your applications don't always just read data. Sometimes, they have to update it as well. This is also possible via the Toolbox. Just be sure to specify AS400File.READ_WRITE or AS400File.WRITE_ONLY on the open method call. Then, you can subsequently use the update or deleteRecord methods to update or delete records identified by the usual array of key objects. The update method also needs a Record object containing the new data to put in the fields. The KEY_XX constants are also allowed on these method calls. Here is an example of updating the previously read custData record:
custData.setField("CUSTNAME", "ABC Company");
custFile.update(keys, custData);
Of course, most of the methods shown here throw exceptions, and so they will have to be wrapped in try/catch statements. A full example of reading the fictitious keyed customer file is in the supplied source TestKeyedRecordAccess.java on the CD-ROM.
In many cases, these record-level-access classes should offer performance gains over the JDBC classes, except for applications that can exploit the expressive power of SQL.
As an example of how to write applications that use the direct-record-access classes described here, we have written a little application that works with a customer database. This application is on the CD-ROM in subdirectory ListingA-6 in AppA, and we invite you to look at it. We don't describe the code here, but we do point out which files are behind which windows. The first file to edit is CUST.PF, in Listing A.6. It is the DDS source for the customer file.
Listing A.6: Physical-File DDS for a Customer Database File
A R CUSTREC TEXT('Customer Info')
A CUSTID 6B 0 TEXT('Unique customer ID')
A CUSTNAME 30
A CUSTPHONE 15
A CUSTBAL 7P 2 EDTCDE(A)
A DFT(0)
A K CUSTID
You should upload this to an AS/400 source member in an AS/400 source file (using File->Save As in CODE/400's editor, for example). Once it is on the AS/400, compile it with CRTPF into library CUSTLIB, say. Now you are ready to populate it with data, and then work with that data. Run the Java class BldCustDB, and you will be presented with the window in Figure A.1.
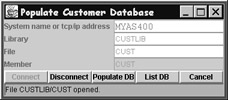
Figure A.1: The BldCustDB Java database exam- ple's main window
Type in the name of your AS/400, and press the Connect button. You are prompted by the Toolbox for your user ID and password, then connected to the AS400. The connect method in the BldCustDB class also creates a KeyedFile object, sets the record format for it, and opens it for read/write. Press the Populate DB button, and the populateDB method uses KeyedFile's write method to write 100 records of randomly generated data into the CUST database. Then, press the List DB button, and you will see the window in Figure A.2.
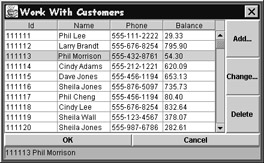
Figure A.2: A window for seeing and working with customer database records
This is a classic "Work With" window for seeing, adding, changing, and deleting records. The class behind this window is DisplayWindowInTable. Its constructor spawns a thread to read all the records from the database into a Vector of Customer objects. This vector, and the code to populate it, is in the class CustomerList (in its populate method). This vector is then passed to the Swing JTable's model class (DisplayWindowModel), which uses it to populate the table. This is done via methods in the DisplayList class, which extends Swing's JTable class and ties that table to our model. (We found it significantly faster to close the KeyedFile object and reopen it for read-only with a blocking factor of 150 records, and then subsequently close and reopen it for read/write.)
If you now press the Add button, you will see the dialog in Figure A.3. This is driven by the CustomerPrompt class. We create a new empty Customer object and pass it to this dialog class, which populates it with user data from the entry fields and returns it. Then, the DisplayWindowInTable class calls the addCustomer method in CustomerList to add that Customer object to both the in-memory Vector and the actual KeyedFile database via its write method.
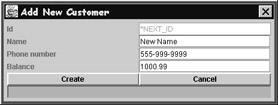
Figure A.3: A window for adding a new customer record to a database
To determine the next unique ID, the getNextUniqueId method in CustomerList positions the cursor to the last record, reads it, and increments its ID value by one. Finally, we call a method in our table model class to refresh the list to display that new entry.
If you press the Change button, you get the dialog window in Figure A.4. This is also driven by the CustomerPrompt class, but in this case, the entry fields are preloaded with the contents of the selected Customer object in the list. We actually pass a copy of the selected Customer object. On return from this dialog, we pass the updated Customer object clone to the updateCustomer method in CustomerList to update the data in the selected Customer object in the in-memory vector and to update the record in the KeyedFile database via KeyedFile's update method.
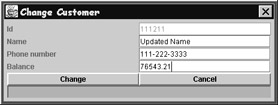
Figure A.4: A window for changing an existing customer record in a database
Finally, the Delete button asks you to confirm your request, and then calls the deleteCustomer method in the CustomerList class, which removes the selected Customer object from the in-memory vector and the KeyedFile database via its deleteRecord method. The confirmation dialog is shown in Figure A.5.
Figure A.5: The confirmation dialog when deleting records
This example shows how to prepare and open a database; read with blocking from a database; write, update, and delete records in a database; and position the cursor in a database. Of course, it also shows how to close the database, as the BldCustDB class does
when it ends. It also shows a typical design pattern for classes you will create for each database you wish to access from Java:
- An XXXKey class containing fields that make up the key for this database.
- An XXX class containing non-key fields in this database, with a reference to an XXXKey object.
- An XXXList class for getting and maintaining an in-memory list of records from the database. This is typically an array or vector of XXX objects, populated by reading the database. It also supplies the methods for inserting, updating, and deleting records in the database and keeping the in-memory list in sync.
This should be enough to get you going quickly with your own database-accessing code.
OTHER AS 400 TOOLBOX FOR JAVA FUNCTIONALITY
In addition to the non-visual and visual classes, the Toolbox comes with a number of utility programs such as JarMaker, which can strip the Toolbox .jar file down to a bare minimum if you don't need all the functionality. All the additional functionality is well documented in the Toolbox documentation, and we direct you to it for more information. You can get to this documentation from CODE/400's editor when editing any .java file, by selecting the Help menu, then Java help, then AS/400 Toolbox for Java. It is also available from the Help pull-down of VisualAge for Java.
We think the AS/400 Toolbox for Java is awesome, and we highly recommend it to you and your team. The fact that it is now an open-source product, meaning you can contribute enhancements to it, is even more reason to use it.
Foreword
- The World Of Java
- The Java Onion
- Javas Language And Syntax
- Structured Operations And Statements
- Data Types And Variables
- Arrays And Vectors
- String Manipulation
- Date And Time Manipulation
- An Object Orientation
- Exceptions
- Threads
- User Interface
- Database Access
- More Java
- Appendix A Using Java on the AS/400
- Appendix B Mixing RPG And Java
- Appendix C Obtaining The Code Samples
EAN: 2147483647
Pages: 191
