| This book is not intended to teach you the details of drawing in Flash 5. Plenty of other books and tutorials on the Web do that very well. If you've never used Flash before, but you're familiar with other graphics programs, you can get up-to-speed very quickly in Flashyou just need to be aware of a few Flash-specific peculiarities . The following sections concentrate on these issues. Tip Need some more help getting started in Flash? There are quite a few good tutorial sites on the Web. Here are a few of our favorites: -
http://www.flashlite.net/ -
http://www.virtual-fx.net/ -
http://www.were-here.com/ -
http://www. flashkit .com/ -
http://www. ultrashock .com/
Simple Shapes A simple shape is anything on the Stage that hasn't been grouped or converted into a symbol. Simple shapes have some behaviors that you might not expect. Shapes on the Stage can either be strokes (lines) or fills. (See Figure 1.11.) The Line and Pencil tools create strokes. The Brush and Paint Bucket tools create fills. The Oval and Rectangle tools can create strokes or fills or both. One important point you need to keep in mind when working in Flash is this: Strokes and fills behave independently of one another. Figure 1.11. The oval on the Stage has both a stroke and a fill. The stroke is the outline, and the fill is the color inside the outline. Strokes and fills behave independently of each other. You can pull them apart by just clicking and dragging on one or the other. 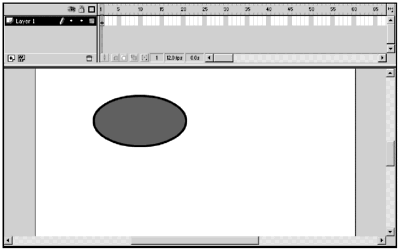 Exercise 1.2 Working with Strokes and Fills When you draw a shape on the Stage that has both a stroke and a fill, you'll discover that you can reposition either the stroke, the fill, or both at the same time. -
Select the Oval tool from the Drawing toolbar. -
Open the Stroke panel by choosing Window > Panels > Stroke (see Figure 1.12) and change the settings to the following: Stroke Style: Solid Stroke Height: 4 Stroke Color: Black (#000000) Figure 1.12. When you're going to use any tool that can have a stroke, it's a good idea to check the settings on the Stroke panel to make sure that the Stroke Style and Stroke Height are what you expect them to be. 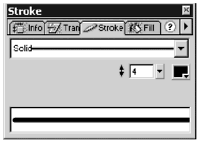 Note You can change colors for the stroke and fill by using the panels or by using the color modifiers on the Drawing toolbar. The panels give you more flexibility because there are additional settings that you can change. You also can use the No Color modifier (box with a slash through it) on the Stroke or Fill panels to draw a shape with fill or stroke only. There's also a No Color modifier in the modifier tray on the Drawing toolbar. -
Switch to the Fill panel. (See Figure 1.13.) If your panels are still in their default setup, the Fill panel is on the same panel set as the Stroke panel. Change the settings to the following: Fill Style: Solid Fill Color: Any color other than black Figure 1.13. The Fill panel. 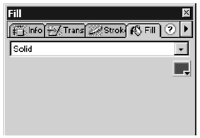 -
With the Oval tool still selected, draw a perfect circle on the Stage by holding down the Shift key while dragging. Note If you want to draw a circle or a square, all you have to do is hold down the Shift key while you drag with the Oval or Rectangle tool. You can use the Shift key with Line tool to force your line to be horizontal, vertical, or at a 45 degree angle. -
Switch to the Arrow (V) tool. Click once in the middle of the circle and drag. You are able to drag the fill, but the stroke remains in place. Strokes and fills behave independently. -
Drag the circle fill and position it so that it overlaps the circle stroke. Click the Stage to deselect the circle fill. -
Click the fill and drag it again. When simple shapes overlap, they dissect one another. (See Figure 1.14.) When you are first getting used to drawing in Flash, this can be a little disconcerting. However, once you're accustomed to this behavior, you can use it to your advantage to create custom shapes. Figure 1.14. When two shapes overlap on the Stage, they dissect each other. You can use this to your advantage to create interesting shapes. 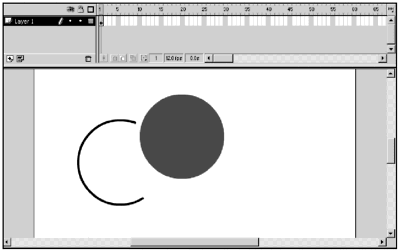 -
Draw another circle on the Stage. Switch to the Arrow (V) tool, and drag a marquee around both the stroke and the fill. -
With both the stroke and fill selected, choose Modify > Group from the Main menu. Now if you click the fill and drag it, the fill and stroke should behave as a single unit. Once a shape is grouped, it can't be dissected by another shape. You also can use the Arrow tool to modify any ungrouped stroke or fill on the Stage. Exercise 1.3 Changing the Shapes of Strokes and Fills Once you draw a shape on the Stage, you can always go back and modify it. That's one of the great things about Flashit helps even the nonartists look good by letting them easily tweak their shapes. -
You can either start with a new movie (File > New) or just delete what is currently on the Stage by double-clicking the Eraser tool. Note Double-clicking the Eraser tool erases everything currently on the Stage. If you do this accidentally , just select Edit > Undo from the Main menu or press Control + Z (PC) or Command + Z (Mac). -
Use the Rectangle tool to draw a rectangle on the Stage. -
Switch to the Arrow tool and move the cursor toward one of the straight edges of the rectangle. As the cursor approaches the straight edge, you should see a Curve modifier appear below and to the right of the cursor. (See Figure 1.15.) Figure 1.15. When the Curve modifier appears below the cursor, you are approaching a line or fill that you can reshape into a curve. 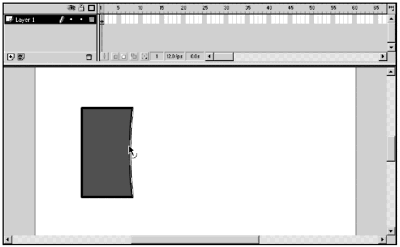 -
Click the line and drag. The line reshapes into a curve. -
Do the same thing again, but this time, move the cursor toward one of the corners until you get an Angle modifier. (See Figure 1.16.) Click and drag again. Figure 1.16. If the Angle modifier appears below the cursor, you are approaching an end or corner point of a line or shape. You can extend or shorten lines and skew shapes. 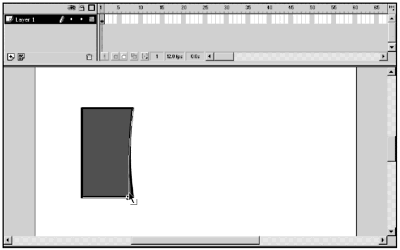 The corner moves and the rectangle skews. In both cases, you'll notice that the fill expands to fill in the new space. -
Move the cursor toward one of the edges again. Add a new end point by holding down the Control key while you click and drag. (See Figure 1.17.) Figure 1.17. Holding the Control key down while you click and drag adds a new corner point to your line or shape. 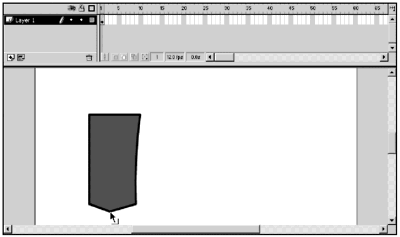 Adding a new end point adds a new corner to your shape. The Pen and Subselection Tools Besides simple shapes, the other key to drawing in Flash is understanding the Pen and Subselection tools. The Pen and Subselection tools are new to Flash 5. Graphic artists who work with other vector graphic software packages such as Macromedia FreeHand or Adobe Illustrator have long lamented the lack of what they consider a true Bezier tool in Flash. They need weep no more. Before anyone has a stroke, yes, Flash has always worked with Bezier curves. In fact, the SWF file format describes curves as Quadratic Bezier curves. A Quadratic Bezier curve has one control handle for each line segment. With such a curve, you have a line with two endpoints (nodes) and a single control handle, and three points describe the entire line segment. (See Figure 1.18.) Figure 1.18. Quadratic Bezier curves have one control handle, and Cubic Bezier curves have two control handles. Flash can work with a representation of a Cubic Bezier curve, but it exports Quadratic Bezier curves to save file size . 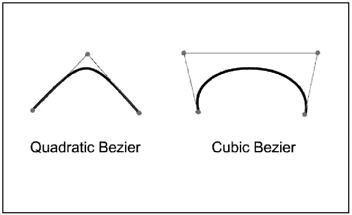 The problem with this type of Bezier curve is that many artists are accustomed to working with Cubic Bezier curves, which have two control handles instead of one. Four points describe a Cubic Bezier curve. Not surprisingly, you have much finer reshaping options when you have two control handles to work with instead of one. Guess which one generates a smaller file size? The three-point curve, of course. The Bezier and Subselection tools create, and enable you to edit, Cubic Bezier curves in Flash. Well, actually Flash creates a Cubic Bezier representation of a Quadratic Bezier curve. What Flash does to keep the published SWF file sizes small is export only the final Quadratic Bezier curves. If you've tried playing around with the Pen tool, you've probably noticed some odd behaviorit seems to randomly and unpredictably add points (nodes) to the line you're editing. It's just one of the unfortunate trade-offs of working in two worlds Quadratic and Cubicat the same time. Fortunately, the additional points won't increase your ultimate file size and it is possible to delete them. Exercise 1.4 Reshaping Lines and Shape Outlines with the Pen Tool You can use the Pen tool to reshape lines and shape outlineseven if you didn't use the Pen tool to draw them originally. -
Start with a new movie or just delete what is currently on the Stage. -
Use the Oval, Rectangle, and Line tools to draw a circle, a rectangle, and a line on the Stage. -
Select the Subselect tool (the white arrow). -
Click each of the shapes to see the endpoints. (See Figure 1.19.) Figure 1.19. Selecting the circle with the Subselect tool shows all of the circle's endpoints. 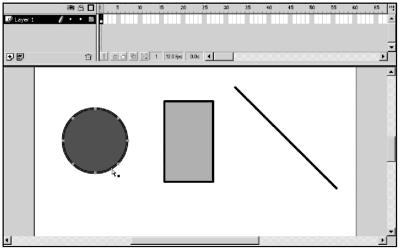 -
To change a line or shape, click an endpoint and drag. Curved lines have Bezier handles you can use to further refine the curve shape. (See Figure 1.20.) Figure 1.20. Endpoints on a curved shape will have Bezier handles. 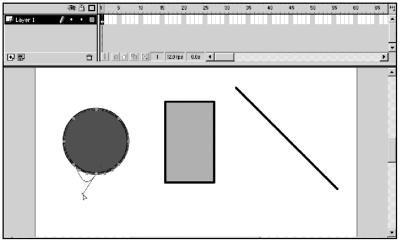 -
To add a new point to a line or curve, select the Pen tool and click a shape or line to select it. Click the line or shape outline again to add a point. -
To remove a point from a line, first use the Pen tool to select the line. Clicking on a corner point then deletes it. Clicking on a curve point converts it to a corner point. Now that you have a handle on how to draw shapes in Flash, it's time to take a look at how you control those shapes using the timeline.  |