Section 46. Applying Effects
#46. Applying EffectsOne feature that defines InDesign as a truly modern page layout tool is its built-in ability to apply raster-based effects and have other objects interact with them. There's no need to enlist Photoshop or a third-party plug-in to apply a drop shadow or feather the edges of an object. You can even apply transparency effects to an object as you would in Photoshop and Illustrator.
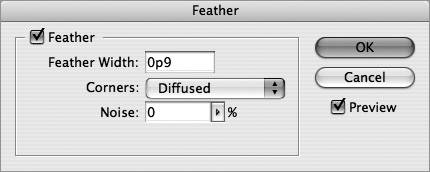
Before applying an effect, it's a good idea to temporarily increase your display preview to high quality (View > Display Performance > High Quality Display) so that you have a truer preview of the effect. To apply a drop shadow to a selected object, choose Object > Drop Shadow (Figure 46a). Select the Drop Shadow and Preview check boxes. You can then adjust the blend mode, opacity, offset, blur, spread, and noise to your liking. Choose a color from your list of swatches or select a different option from the Color menu to use a new color. Figure 46a. The Drop Shadow dialog provides many of the options you're used to seeing in Photoshop.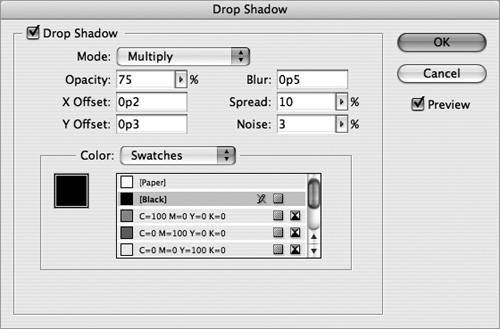 The feather effect softens the edges of an object by fading them to transparent. To feather a selected object, choose Object > Feather (Figure 46b). Select the Feather and Preview check boxes and set feather width. This is the distance over which the feather fades from opaque to transparent. Then choose a corner option and optionally add noise. Figure 46b. The Feather dialog makes it easy to apply a feather effect onto images or other artwork without having to leave InDesign. Here are a few other points to keep in mind when working with effects:
|
EAN: 2147483647
Pages: 143