| Before you edit marked clips into a new sequence in the Timeline, you need to do a little preparation. First, you need to create the new, empty sequence in the Browser, name it, and open it in the Timeline. Then you have to position the playhead to indicate where you want the clip to be placed. And finally, you must make sure the clip will be edited to the correct audio or video track. 1. | In the Browser, click the disclosure triangle to display the contents of the Sequences bin.
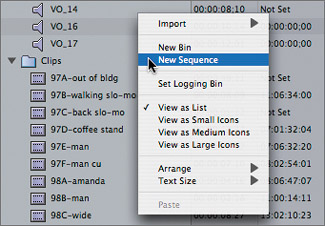
| 2. | Ctrl-click in the empty gray area of the Browser under the Name column. Choose New Sequence from the shortcut menu.

NOTE You can also create a new sequence by choosing File > New > Sequence or by pressing Cmd-N in the Browser. 
In the Browser, a new sequence icon appears with Sequence 2 (or other sequential number) in the name area. This sequence will have the correct default settings for this footage unless you have changed the settings to accommodate your personal projects. You'll learn about project settings in Lesson 8.
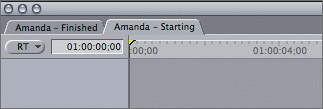
| 3. | In the sequence name area, type Amanda Starting, and press Return.
| 4. | To keep the elements in your Browser organized, drag the new sequence into the Sequences bin.
| 5. | Double-click this sequence to open it in the Timeline.
NOTE You can also select the sequence and press Return to open it. 
The Timeline now contains two sequence tabs identifying the two open sequences. The same two sequence tabs appear in the Canvas as well.
| 6. | From the Clips bin in the Browser, open the 98A-amanda clip in the Viewer. Click Play In To Out to view the previously marked portion of the clip.
| 7. | To prepare to edit this clip, make sure the playhead is parked at the head of the sequence in the Timeline. To do this, click in the ruler area and drag the playhead to the beginning of the sequence, or click in the Timeline and press the Home key.
The playhead position determines the placement of the edit in the sequence, and the clip's marked duration determines how much of the clip is used.
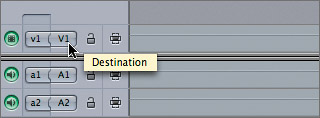
On the far left of the Timeline is the track control area. Each track you use in a sequence is given a different number, such as V1 for the video track, and A1, A2, A3, and A4 for the audio tracks. These are referred to as destination tracks.

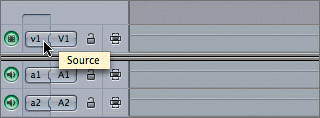
When you open a clip in the Viewer, source controls appear in the Timeline. These represent the video and audio tracks of the clip.

Although the order of the destination tracks is fixed, you can move and connect source controls, or patch them, to any destination. This determines the placement in the Timeline of the audio and video tracks of the source clip.
| 8. | Look at the source controls for the current clip. Open the 97B-walking slo-mo clip, and view the source controls in the Timeline for that clip.
When you open a video-only clip, just a video source control appears in the Timeline.
| 9. | Open the VO_13 clip in the Viewer.
This clip has only one track of audio, so only one audio source control appears.
| 10. | Click the Recent Clips pop-up menu, and choose 98A-amanda to reopen that clip. Before you edit this clip, make sure the v1 source control is connected, or patched, to the V1 destination track, and that a1 and a2 are connected to the A1 and A2 destination tracks. If they are not, drag the source control into place.
|
NOTE If a source control is not connected to a destination track, click either the source or destination control to connect them.
|
