Refining Selections
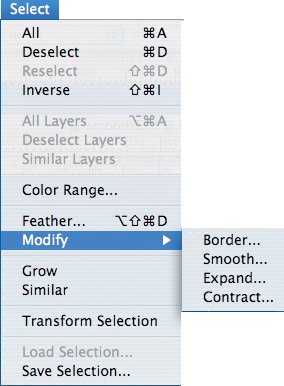
| Most selections are made in multiple passes, adding a bit here, deleting a bit there. Let's take a look at some of the options available under the Select menu for refining selections. When to FeatherFeatheringlike so many tasks in Photoshopcan be accomplished in several different ways. What's crucial is not to apply feathering when you make a selection, but rather after the selection is made. In terms of feathering choices, the Feather menu option is a middleweight, ranking above the Feather option for the Selection tools, but below blurring a maskthe best approach. The Select > Feather command is adequate for many image tasks. Its shortcoming is that the marching ants do not accurately represent how the feather amount will affect the image. Hence you may sometimes see the message "No pixels are more than 50% selected," and no marching ants will appear even though some pixels are partially selected (less than 50%). A better and more visually interactive way to soften edge transitions is to apply a Gaussian Blur to a Quick Mask, alpha channel, or layer mask. Blurring a mask lets you see how far the feathering spreads, and lets you tweak the feather amount by using the Levels or Curves command on the mask. For a description of this technique, see "Choking a Mask" in Chapter 4, "Layer Masks." Figure 1.24. An unfeathered selection (example A). The same selection feathered 40 pixels (example B). The unfeathered selection converted to a mask and a Gaussian blur of 40 pixels applied (example C).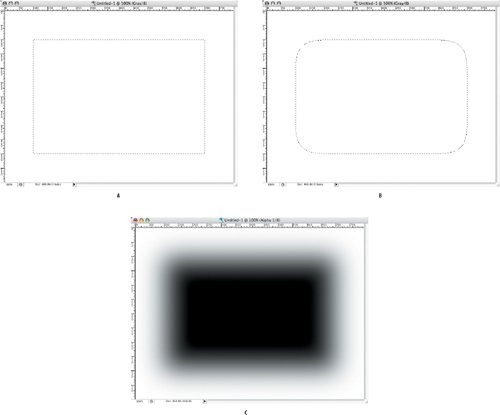 Transforming a SelectionTransform Selection is most useful when working with geometric shapesfor example, when the Rectangular or Elliptical Marquee tool will get you 90% of the way there and you just need to massage the selection shape to get what you're after. You can choose Select > Transform Selection to scale, rotate, skew, move, or distort an active selection. Transform Selection displays handles around your selection border (like its sibling tool, Free Transform, which transforms the contents of a selection). You then pull the handles to tease your selection into shape. To maintain the proportion of your selection, hold down the Shift key; to transform the selection from the center point, hold down the Option/Alt key, and to distort the selection, hold down the Command/Ctrl key. To accept the transformation, press Enter or click the Commit button in the options bar. Figure 1.25. A simple Marquee selection is all that's needed to (almost) select this sign (example A). Using Transform Selection I held Command/Ctrl and pulled the corner handles to distort the selection shape (example B).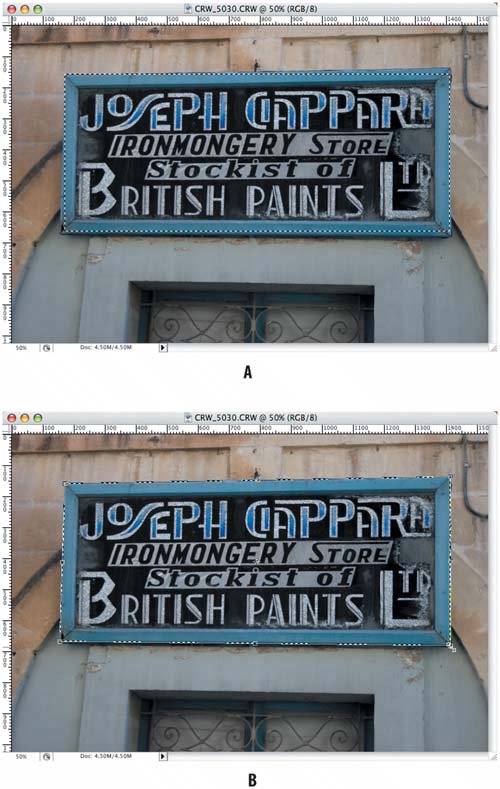 Expanding Color SelectionsBoth the Select > Grow and Similar commands expand a selection to include areas with similar color and by doing such expansions are adjuncts of the Magic Wand tool. Grow includes all adjacent (contiguous) pixels falling within the tolerance range specified in the Magic Wand options, whereas Similar includes all pixels throughout the image (noncontiguous) falling within the tolerance range. Personally, I find it easier to Shift-click with the Magic Wand to add to a selection than to use these options. Smoothing a SelectionThe Smooth command cleans up stray pixels in a color-based selection. Often when using the Magic Wand tool (or Color Range, discussed in the next chapter) certain pixels that aren't within the tolerance range remain unselectedespecially likely if your images are grainy or contain digital noise. Surrounded by swathes of selection these pinholes twinkle like stars in the night sky. A value of 1 to 2 pixels should be sufficientany higher and you're likely to round off your selection edges too much. Smooth is occasionally useful but it doesn't give you anything you can't get, say, with the Lasso tool. If you're expecting too much from Smooth, then your selection isn't good enough to begin with and you should revisit making a more precise initial selection. Figure 1.26. The Modify submenu. Figure 1.27. This image (example A) was scanned from a transparency and is quite grainy. Even after Shift-clicking in the sky several times, numerous unselected pinholes remained. On closer inspection (example B), the problem was worse than I'd thought. Choosing Select > Modify > Smooth with a sample radius of 2 pixels (example C) does the trick.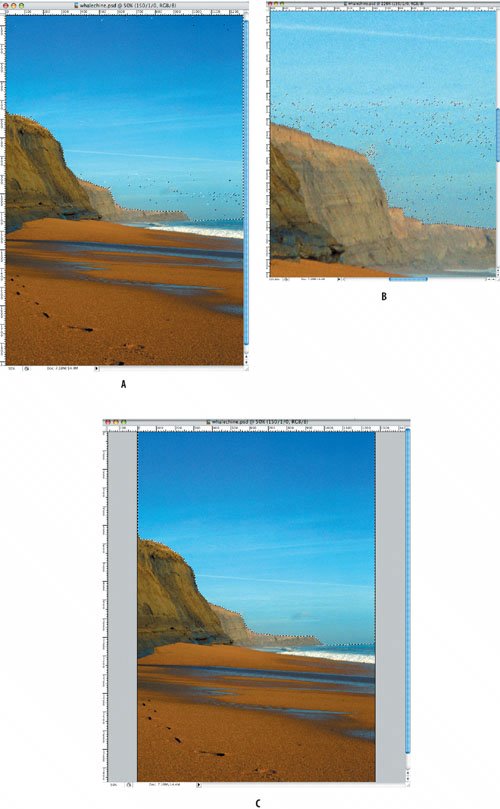 Contracting or Expanding a SelectionThere is almost always a transition between the colors of your selection edge and the background of the image. Sometime these traces of the background color can show up as unwanted color fringe when an image is cut out from its background or composited with another image. One way to eliminate the color fringe is to contract your selection, usually by 1 to 2 pixels. Or, if you are selecting the background, to expand the selection by the same amount. Neither command affects the selection border running along the canvas' edge. Figure 1.28. Here, a selection is made of the flower (example A) and then contracted by 2 pixels (example B). Examples C and D show close-ups of the image composited on a background of contrasting color. In example C, the selection is not contracted and consequently shows a background color fringe. In example D, the selection was first contracted by 2 pixels before being converted to a layer mask. See Chapter 4, "Layer Masks".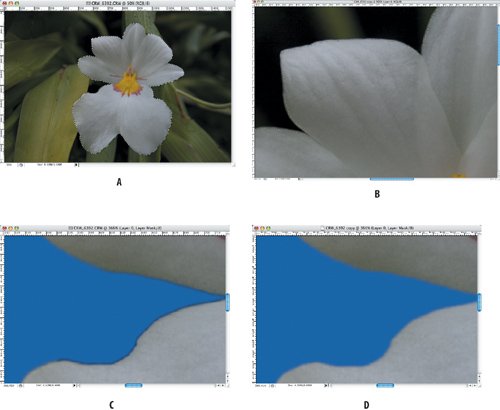 Just as with feathering, while the Expand and Contract menu options work just fine, there's arguably a better way to contract ("choke") or expand ("spread") a selection. See a discussion of that technique in Chapter 4, "Layer Masks". Simulating Anti-aliasing with a BorderYou can use Border to smooth the edges of any selections that may have insufficient anti-aliasing. Specifying a border selects a specified number of pixels on either side of the selection edgemaking it impossible for you to affect the image outside the lines. Let's say you have an image that's been cut from its background and upon closer inspection you realize that you need to feather the selection edge to help it blend in better with its new background. Choose Select > Modify > Border and specify a width for the border (in the example shownan 800-pixel-square imageI used a 4-pixel border) and then add a 1-pixel Gaussian Blur (Filter > Blur > Gaussian Blur) to the border selection. To refine this technique it would be preferable to apply the blurring to a layer mask rather than to the image itself. (See Chapter 4, "Layer Masks," for more information on layer masks.) Figure 1.29. The original selection (example A) shows stair-stepping due to insufficient anti-aliasing (example B). A 4-pixel border is added to the selection (example C). A 1-pixel Gaussian Blur is applied (example D).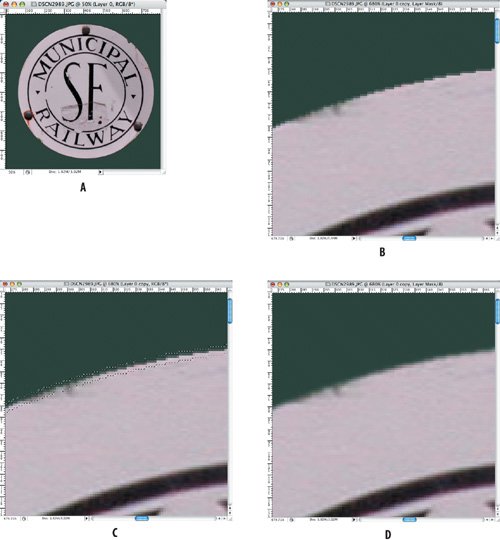 |
EAN: 2147483647
Pages: 93
