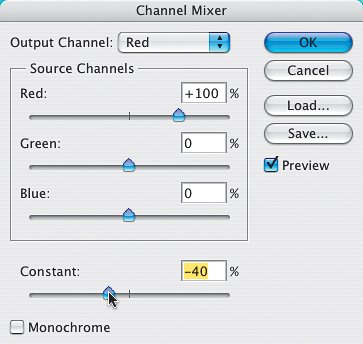
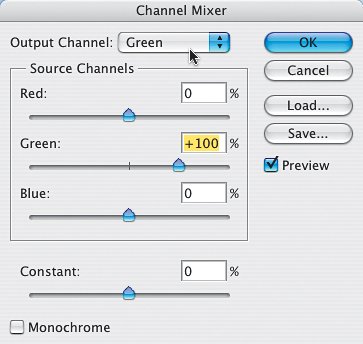
Q&A | Q1: | Okay, just what does the Constant slider (at the bottom of the Channel Mixer dialog) actually do? | | A1: | Believe it or not, it simply darkens or brightens the entire image. Drag it to the left, and the entire image gets darker. Drag it to the right, and it gets lighter. Because I'm trying to create extreme contrast, I often darken the entire image using the Constant slider (by dragging it to the left) so the shadow areas get really dark, then I use the Red, Green, and Blue sliders to brighten things up.  | | Q2: | Do I always have to create a Channel Mixer adjustment layer, or is there another option? | | A2: | It doesn't have to be an adjustment layeryou can apply it directly by going under the Image menu, under Adjustments, and choosing Channel Mixer. Just keep in mind that these changes are applied directly to the image (rather than on an adjustment layer), so they're destructive (meaning you're actually changing the pixels, and after 20 more moves in Photoshop [the number of undos in the History palette], those changes become permanent). | | Q3: | When making my adjustments using Channel Mixer, I've heard that my numbers still have to add up to 100%. Is that true? | | A3: | No. It's a dirty stinking lie. Well, let me clarify. The only reason you'd want to have them add up to 100% is if you're trying to keep the exact same level of brightness in the image. However, we're trying to create more contrast and a more dynamic image, so we're more concerned with the final print, rather than some silly numbers. It's all about the print (unless of course, you're printing a bunch of numbers. Okay, that was pretty lame. Q. Are you going to make lame jokes like that throughout the book? A. Sadly, yes. Hopefully, some will be less lame than others, but you can't count on that). | | Q4: | Is the Channel Mixer just used for making black-and-white conversions? | | A4: | No, but I'd say that it's used primarily for that; however, some people do use it for tweaking colors within the image, or for creating duotone effects, but where it gets most of its use is in black-and-white conversions. | | Q5: | What does the Mask section of the Calculations dialog do? | | A5: | If you already have an Alpha channel mask created, it lets you apply the blending through that mask, so the blending just affects those masked areas (or if you click the Invert checkbox, just the non-masked areas). To use this feature, turn the Mask checkbox on, and then choose your Alpha channel from the pop-up menu. | | Q6: | What does the Output Channel pop-up menu do at the top of the Channel Mixer dialog? | | A6: | It gives you access to each channel. So, if you knew you wanted to reduce the amount of green in your image, you could go right to the Green channel, and by default it would be set at 100%, so to reduce the amount of green, you'd use less than 100%. By the way, you can view these using the same keyboard shortcuts as you would in the Channels palette itself.  | | Q7: | Can you recommend any other sources for more black-and-white conversions using channels? | | A7: | Actually, I've got three: renowned portrait photographer Greg Gorman has got a great step-by-step B&W conversion tutorial, in downloadable PDF format, on his site at www.gormanphotography.com/bw_conversion.pdf. Also, check out the technique from the master of Photoshop black and white, John Paul Caponigro, at www.adobe.com/digitalimag/pdfs/phs8bwconversion.pdf. Lastly, if you get a chance to go to the Photoshop World Conference, check out Vincent Versace's "Advanced Black & White" class. It's pretty scary stuff! |
|