Diamond-Shaped Isometric Grids and Tile Maps
In this example, you're going to create some new tiles, look at a different layout scheme, and use a map to lay out your tiles in exactly the manner you want.
-
You're going to start off by creating some new tiles. Specifically, you're going to create a grass floor tile to use in place of the boring and unrealistic grid floor tile that you were using previously, and you'll create a variant of your blue cube to use as a wall. We're not going to go through the specifics of how to create the tiles in great detail, since we covered the general techniques you'll need in the previous example. If you would rather not create the tiles yourself, just open up diamond_map_start.fla from this chapter's sample files folder, available for download with all the examples in this book from www.friendsofed.com , skip the following early steps, and start at step 10.
-
The first tile you're going to create is the grass tile. You will base all of your tiles on the grid tile you used in the previous example. If you haven't been following in order, you can simply use staggered_sculptures.fla from the downloaded source files and follow these steps (alternatively, this example can be found as diamond_map.fla in the source files).
-
Make a duplicate of the grid tile movie clip symbol and name it grass .
-
Right-click (CMD-click) on the grass movie clip symbol in your Library and choose Linkage... from the context-sensitive menu. In the Linkage Properties dialog box, call its identifier grass .
-
Double-click on the grass movie clip symbol in the Library to open it up for editing.
-
Modify the original grid tile by filling it in with a shade of green ( #009933 ).
-
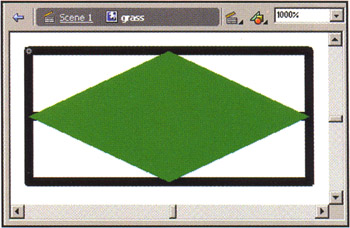
Select the outline of the tile by double-clicking on the gray line, and use the DELETE key to remove it. If you click on the green fill now, you'll see that its dimensions are still 32x15. Flash is weird like that! The reason we deleted the outline instead of keeping it and making it the same green as the fill is because Flash has issues with outlines sometimes, especially when you need them to be placed at exactly the pixel locations you specify ”something that is very important for tile-based graphics. The image at right shows your grass tile with the outline removed. In what is no doubt a miracle of modern mathematics, its dimensions are not affected. Making a cameo appearance is your guide, which can be seen in the background.
For other oddities with outlines, see the post titled "Deeper into the sizing issues" in the Flash Bugs & Workarounds category of onRelease ( www.onrelease.org/index.php?m=200210#12 ).
-
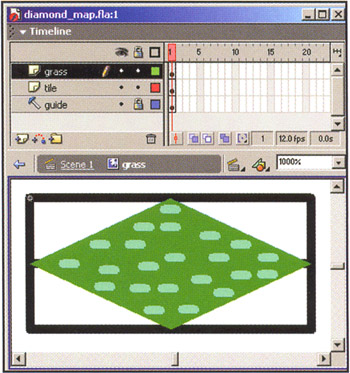
Next , use the Line Tool with your stroke color set to a light shade of green or cyan to create a small horizontal highlight. Click on the line and convert it to a movie clip symbol using F8. Give it the symbol name grass spot . Use Edit > Duplicate with your instance of the grass spot movie clip selected to create about 20 copies of it and sprinkle them around the grass tile. These will be your grass highlights, giving the grass ground tile some texture. If you like, you can place these grass highlight movie clips in their own layer called grass to make it easier to select them en masse.
Here's the final grass tile, showing the tiny highlights that you added. Make sure you keep all highlights within the green area ”you don't want any accidents while you're tiling!
-
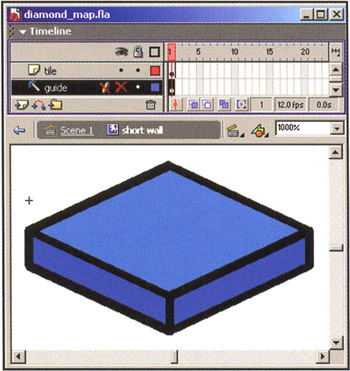
Next, you're going to create a variant (basically a shorter version) of the cube movie clip you made in the last example. In fact, to create it, you can follow steps 3 to 17 in the previous example, with the only difference being that in step 3, you should give it the symbol name short wall , and in step 6, you should move the guide layer up by 4 pixels only, so that its y-coordinate is at -4 (instead of -10 ). That should result in a shorter version of the blue wall tile, as shown. Using the Linkage Properties dialog box, give your new symbol a symbol ID of short wall .
-
Great! With these two new tiles in your arsenal, let's get cracking with a new type of isometric layout. Instead of staggering your tiles as you did in the previous example, you're going to lay them out in a neat diamond shape. Modify the script in frame 1 of the actions layer using the listing below. As usual, we've highlighted the changes and additions for clarity:
// the starting stage x-coordinate for the isometric 3D world WORLD_X = 225; // the starting stage y-coordinate for the isometric 3D world WORLD_Y = 75; // the width of a floor tile in our world TILE_W = 32; // the height of a floor tile in our world TILE_H = 15; // the world map (hey, it's a small world!) map_array = [ [1, 1, 1, 1, 1, 1, 1, 1, 1, 1], [1, 0, 0, 0, 0, 0, 0, 0, 0, 1], [1, 0, 0, 1, 0, 0, 1, 0, 0, 1], [1, 0, 1, 1, 0, 0, 1, 1, 0, 1], [1, 0, 0, 0, 0, 0, 0, 0, 0, 1], [1, 0, 0, 0, 1, 1, 0, 0, 0, 1], [1, 0, 1, 0, 0, 0, 0, 1, 0, 1], [1, 0, 0, 1, 1, 1, 1, 0, 0, 1], [1, 0, 0, 0, 0, 0, 0, 0, 0, 1], [1, 1, 1, 1, 1, 1, 1, 1, 1, 1] ]; // movie clip stacking depth var depth = 1000; for (var gridY = 0; gridY < map.length; gridY++) { for (var gridX = 0; gridX < map[gridY].length; gridX++) { var tileID = (map_array[gridY][gridX]) ? "short wall" : "grass"; _root.attachMovie(tileID, "gridTile"+depth+"_mc", depth++); var stageX = WORLD_X - gridY * 0.5 * TILE_W + gridX * 0.5 * TILE_W; var stageY = WORLD_Y + gridY * 0.5 * TILE_H + gridX * 0.5 * TILE_H; var theTile_mc =_root["gridTile"+depth+"_mc"]; theTile_mc._x = stageX; theTile_mc._y = stageY; } }Looking through the new script, you should notice that the structure of the loops that lay out the tiles has not changed. We have, however, introduced a very important new construct called the map_array . This is a two-dimensional array that shows which tile should be used in which grid position in your isometric world. Look at the array in the listing and mentally replace the 1s and 0s with little graphics tiles.
This is exactly what you're doing in the code. In the inner layout loop, you set tileID equal to the linkage ID of the short wall movie clip if the map contains a 1 for a certain grid/map position. If a map position contains , you set tileID equal to the linkage ID of the grass tile. You do this using the ternary operator that you learned about in the previous example:
var tileID = (map_array[gridY][gridX]) ? "short wall" : "grass";
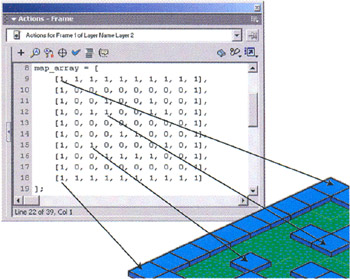
Another major change is that you are now using a new formula to decide the stage coordinates at which to place your isometric tiles:
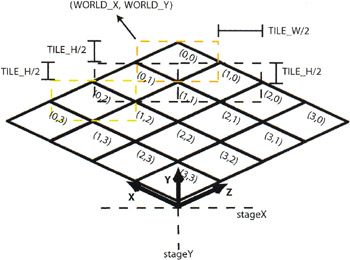
var stageX = WORLD_X - gridY * 0.5 * TILE_W + gridX * 0.5 * TILE_W; var stageY = WORLD_Y + gridY * 0.5 * TILE_H + gridX * 0.5 * TILE_H;
You no longer have a horizontal offset to calculate since you are not staggering the tiles, but you are placing them in a diamond pattern. Look at the diagram below to see how we arrived at those equations for the rotated isometric projection:
-
Can you guess what the output will look like by looking at the map alone? Test out the movie (CTRL/CMD+ENTER to see if you were right!
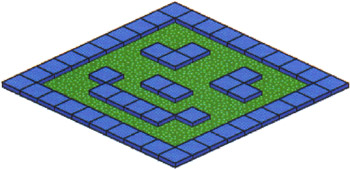
It's an isometric smiley face! Using a tile map allows you to place tiles in exact locations and easily use various types of tiles. Play around with the map array, switching the position of the 1 s and s to create new grass and wall patterns.
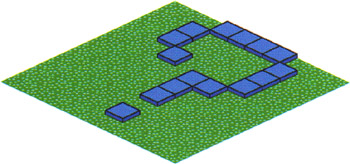
In the next example, you're going to add some more tiles and even create an animated tile. You're going to see how the layout scheme automatically handles z-order , even for animated tiles when they change height.