Creating Background Images
Like you did in Chapter 9, let’s first define our background images before going any further. Dreamweaver’s Properties inspector is where you’ll perform the following:
-
Select each of the images within the Dreamweaver tables and hit your Delete key. This removes them from the Designer Layout. Don’t worry, though; you’ll add them back in a moment.
-
Select the first cell in your table (the one that held your title bar). Now, press the folder next to the Bg field in the Properties inspector. The Select Image Source dialog box displays.
The Bg field is where you define background images.
-
In the Select Image Source dialog box, go to the folder that contains the images for your web page. (Photoshop saved this folder in the same location you saved your web page.)
-
Select the title bar image (it may be Simeon_home_01.gif). If you’re not sure, press the View Menu icon. This is the icon next to the Look in drop-down field. From the View menu, select Thumbnails.
-
Press OK. You’re returned to the Designer Layout. Notice this image displays in your web page. If you look at the Properties inspector, the Bg field displays the Simeon_home_01.gif image. That means this image now is a background image.
Continue working your way around the table cells. Add the appropriate images again as background images using the Properties inspector.
| Tip | You may need to adjust the tables as you add these background images. Sometimes too much of the background image displays and you see tiling. Other times you’ll find that too little of your background image displays, thus cutting off half of your image. |
Slivers and Backgrounds
Remember the gradient background and sliver you created in Chapter 8? Let’s add these now to the San Simeon web page. Perform the following steps:
-
In Dreamweaver, click and delete the center contents area of your web page.
-
Press the folder next to the Bg field in the Properties inspector. The Select Image Source dialog box displays.
The Bg field is where you define background images.
-
In the Select Image Source dialog box, go to the folder that contains the grn-grad.png image you created in Chapter 8.
Note You can find this file in the Chapter 11 folder of the companion files, available at www.wordware.com/files/webdesign.
-
Press OK. You’re returned to the Designer Layout. Notice this image displays in your web page, as shown in Figure 11-28.
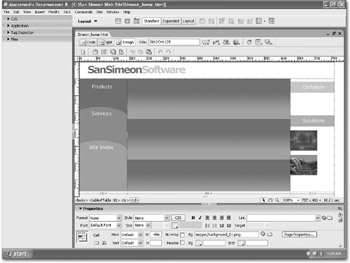
Figure 11-28: Adding a background image to your web page
Drawing a Layout Table Cell
Notice that your background image tiles. Your image’s width blends seamlessly, but the height tiles over and over. Let’s correct that now with the sliver you created in Chapter 8.
-
In the Dreamweaver Insert bar, select the Layout mode. Then select the Layout view (next to the Standard and Expanded modes), as shown in Figure 11-29.

Figure 11-29: Selecting the Layout mode from the Insert bar -
Select the Draw Layout Cell option in the Insert bar.
-
Click and drag your mouse to make a new table cell within the contents area. Cover up the bottom two background images that tile, as shown in Figure 11-30.
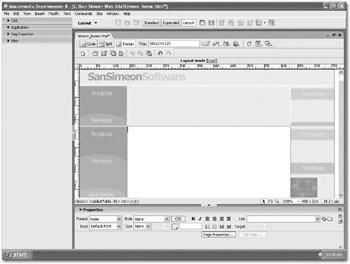
Figure 11-30: Adding a table cell with the Draw Layout Cell option -
Click the [exit] hyperlink at the top of your web page (next to the Layout mode text) to exit the Layout mode. Notice your background images are gone, and the center contents area is now divided into two cells.
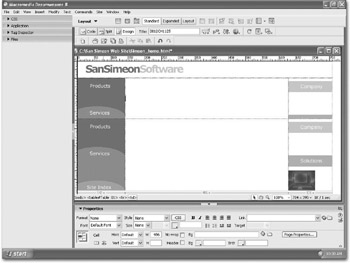
Figure 11-31: Viewing the results of adding cells to your web page
Merging Cells
Unfortunately, you may notice the right and left sides of the screen now tile. This is easy to correct. Let’s merge some table cells on your screen to get rid of some of this tiling.
-
Click and drag your mouse over the two cells on the right side of your web page. These are the cells that contain the colored menu selections.
-
Release your mouse. Then right-click within this selected area. A pop-up menu displays. Select Table ▶Merge Cells from this menu, as shown in Figure 11-32.
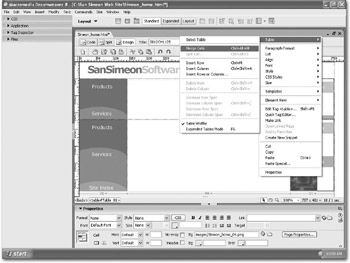
Figure 11-32: Merging table cells
Once you release your mouse, these two cells on the right side merge. You should see only one instance of the color menu selections. These should not tile.
Do the same for the navigation menu on the left side of your web page (merge these two cells). Once you’ve done this, you’re ready to add your background and sliver images.
Adding a Background and Sliver Image
In the top cell, add the grn-grad.png file as a background image. In the bottom cell, add the grn-grad-sliver.png file as a background image. Your screen should look like Figure 11-33.
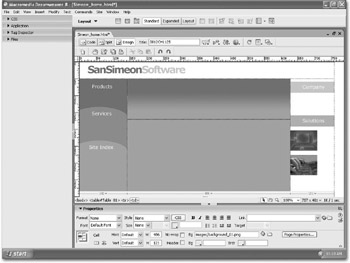
Figure 11-33: Adding background and sliver images
| Note | You can find these files in the Chapter 11 folder of the companion files, available at www.wordware.com/files/webdesign. |
Adding Content
To finish up your web page, add some content and maybe a navigational footer at the bottom of your web page. Then preview your page in a web browser. Try to make your web page look like Figure 11-34.
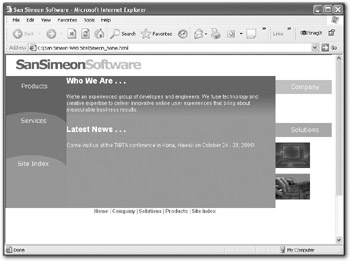
Figure 11-34: Adding content to your web page
EAN: 2147483647
Pages: 108